Introduction
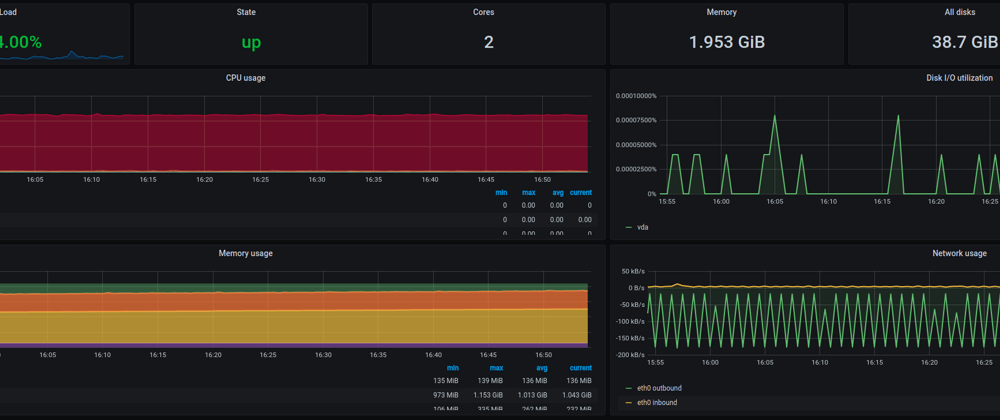
In this article series we will learn how to setup Prometheus and Grafana in your local machine. Then we will configure a Spring Boot application to expose metrics so it can be consumed by Prometheus. At the end we will finally build a cool Grafana dashboard for monitoring the application health.
Tha main goal is to have a local instance of Prometheus+Grafana up and running so you can use it for exploration and future learning.
I will show the setup on a free virtual machine instance on Google Compute Engine, but it should work on any Debian based distro (like Ubuntu).
Concepts
Just a quick explanation of Prometheus and Grafana before we get hands on.
Prometheus
Software that collects metrics in specific formats by polling and persists each result in its internal database, creating a time series data automatically.
Grafana
A separate visualization software that can be used to display Prometheus data.
Google Compute Engine
You can skip this part if you don't want to use Google Cloud, but I recommend it to use if you don't use a Debian based distro.
It's easy to setup and also free you follow the instructions of free tier, also covered in this article.
Signup and create a project
Go to Google Cloud and create an account, a project and setup a billing account. (Don't worry you shouldn't be billed if you delete the virtual machine at the end).
Create a VM instance
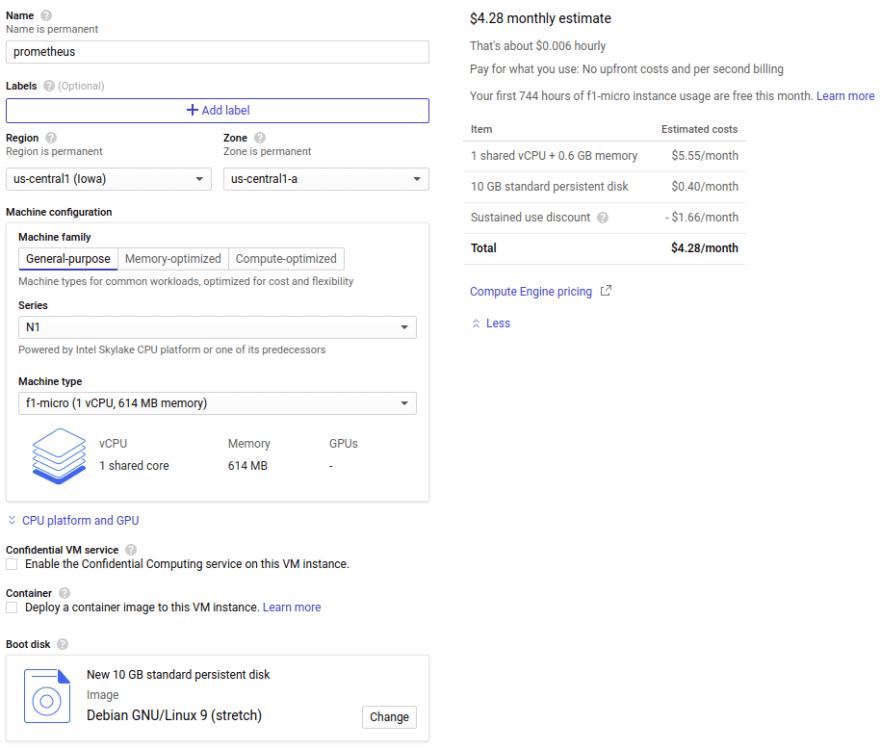
Go to VM Instances and click 'Create'.
Select any Us region excluding us-east4. On 'Machine type', select f1-micro. Note the observation 'Your first 744 hours of f1-micro instance usage are free this month' that should appear on pricing estimation section.
Check the 'Allow HTTP Traffic' so we can access the Prometheus interface from our browser, and click 'Create'.
Wait until your instance is created and access it by clicking the SSH button.
Install
Prerequired packages
sudo apt-get update
sudo apt-get install -y curl
Install Prometheus
Check the Prometheus release page and download the latest amd64. The current version at the time I'm writing this article is the 2.20.1:
curl -LO https://github.com/prometheus/prometheus/releases/download/v2.20.1/prometheus-2.20.1.linux-amd64.tar.gz
Extract the downloaded file and copy the binaries prometheus and promtool to your local binaries directory. Copy also consoles and consoles_libraries to /etc/prometheus folder:
tar -xvzf prometheus-2.20.1.linux-amd64.tar.gz
Enter the new prometheus-2.20.1.linux-amd64 directory:
cd prometheus-2.20.1.linux-amd64
Notice we have two files: the binary prometheus and the configuration file prometheus.yml, that is already configured to scrape metrics of Prometheus application itself.
To start Prometheus using this config file:
./prometheus --config.file=prometheus.yml
Prometheus interface should be accessible on port 9090 on your browser.
To access the VM on GOogle Cloud, you need to liberate the port access on Firewall. The quickest way to do this is editing the default http rule:
Select default-allow-http, then Edit. On Protocols and ports, add the port 9090 separated by comma:
Now you should be able to access the Prometheus interface using your browser, by accessing the external IP of your VM and port 9090:

As a sample query, you can select the prometheus_http_requests_total and then select 'Graph' tab to visualize the number of requests made to Prometheus endpoint by period:

Install Grafana
So far, Prometheus already provides us a simple interface for metrics visualization, but with Grafana we can have a better interface.
To install it on a Debian distro, you just have to follow the instructions on Grafana documentation, but I will summarize the steps here:
Add the apt repository:
sudo apt-get install -y apt-transport-https
sudo apt-get install -y software-properties-common wget
wget -q -O - https://packages.grafana.com/gpg.key | sudo apt-key add -
echo "deb https://packages.grafana.com/oss/deb stable main" | sudo tee -a /etc/apt/sources.list.d/grafana.list
Then install Grafana:
sudo apt-get update
sudo apt-get install -y grafana
And start the process:
sudo systemctl daemon-reload
sudo systemctl start grafana-server
Grafana now should be running on port 3000. You can check it by:
sudo systemctl status grafana-server
It should display a line containing Active: active (running).
If you're on Google Cloud VM, you need to allow access to port 3000 on Firewall, otherwise just access it from your browser. You should see the login page.
Add Grafana data source
The default login and password are admin. After you authenticate, click 'Add your first data source', then select 'Prometheus'.
In my case I had to add the IP and port of the VM, and change to 'Browser' access because the machine wasn't allowing Prometheus to be accessed internally from Grafana Server.
When you click 'Save & Test', Grafana will tell you immediately if the data source is working:

Import Grafana dashboard
One of the cool things about Grafana is that we don't need to
always create a dashboard from scratch, but we can search one in Grafana Dashboards.
In this example I will choose this one.
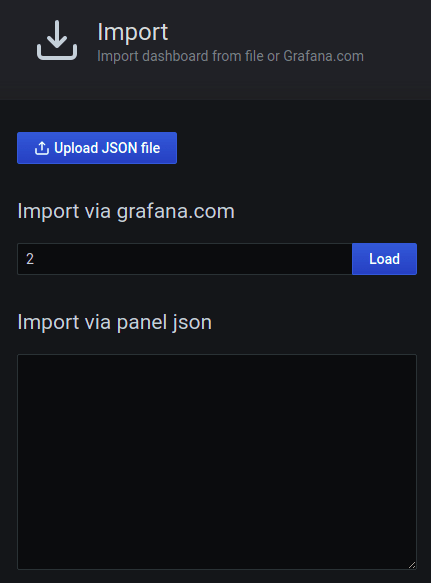
Now click the '+' button on menu and click 'Import'.
Type the Dashboard id (10242) and click the nearest 'Load' Button:

Then select 'Prometheus' as data source and click 'Import'.

Conclusion
After you've finished all your tests on Google Cloud VM, don't forget to stop or delete the VM, otherwise you could be billed.
Hopefully everything should be working as expected, and you can now start exploring Prometheus and Grafana.
In the next article I will explain how to setup a Spring Boot application to export its metrics and then be consumed by Prometheus.
I hope you enjoyed and learned something!


Latest comments (1)
Please where is next article "Spring Boot application setup"?