In my last few blog posts, I’ve been talking about how to get started using Vue.js by giving an introduction to the basic things Vue has to offer. I’ve previously covered the Vue instance, and last week I talked about a few of the Vue directives for handling how things appear on a webpage. I will now talk about the directives that make your Vue app reactive and interactive to a user.
If you know anything about basic, vanilla JavaScript, you should know that the way to make a webpage reactive is by adding event listeners. There are all different kinds of events, including clicking on an HTML element, scrolling through a page, and pushing keys on the keyboard. The v-on directive is Vue’s built in way to listen for events. Here’s an example that also uses the v-if directive, which I covered in my last post:
//  in index.js
new Vue({
  el: '#toggle',
  data: {
    condition: true
  }
})
//  in index.html
<div id="toggle">
  <button v-on:click="condition = !condition">Click Me!</button>
  <p v-if="condition">Click the Button to toggle me in and out</p>
</div>
In the example above, you can see the v-on directive in action. The part after the colon tells Vue what type of event to listen for; in this case, click. If I had instead put mouseover, then it would change every time I moved my cursor over the button. In this example, the v-on directive points to an action to make the condition variable swap between true and false. So with the v-if, the p element will toggle in and out of the page. I can also have v-on point to a function in my instance:
//  in index.js
new Vue({
  el: "#message",
  data: {
    message: "I'm a message!"
  },
  methods: {
    alertMessage: function () {
      alert(this.message)
    }
  }
})
//  in index.html
<div id="message">
  <button v-on:click="alertMessage">Click Me!</button>
</div>
This example will show an alert at the top of the page with whatever the message variable says, like this:
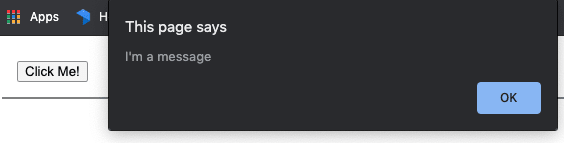
There are also all kinds of modifiers for v-on. Modifiers are “directive postfixes denoted by a dot”. To see a full list of modifiers, you can go to Vue’s documentation on Event Handling. As an example, there is one modifier for v-on called .once that ensures that the event can only be triggered once. So if I add it to the example from earlier:
<div id="counter">
  <button v-on:click.once="alertMessage">Click Me!</button>
</div>
The alert will only pop up the first time you click the button. Clicking the button any time afterwards will do nothing.
Other than v-on, there is one more directive that lets users interact with the data in your Vue instance. That is v-model, and it is arguably the most magic of all of the directives Vue gives you. It is magical because it does a lot of work, handles all of the interaction between an input, textarea, or select element, and a variable to associate them with. For a basic example, assuming we have a message variable with an empty string in our Vue instance:
<div id="model">
  <input v-model="message" placeholder="Type something...">
  <p>You typed: {{ message }}</p>
</div>
Just by adding v-model, this input will always show the current state of the message variable, any changes to the input will change the message variable, and any changes to message will change what appears in the input element.
There are many different ways to use v-model depending on what type of form element you are using and how you want to use the variable. When using the input types of checkbox or radio, whatever you put as the value of the input will be stored in the variable from v-model. Here are some examples:
<!-- The picked variable will change to the string value of
    "Jack" or "Jill" depending on which is selected -->
<input type="radio" id="jack" value="Jack" v-model="picked">
<label for="jack">Jack</label>
<br>
<input type="radio" id="jill" value="Jill" v-model="picked">
<label for="jill">Jill</label>
<p>Picked: {{ picked }}</p>

<!-- The colors variable is an array of checked colors, because
    you can have more than one checkbox selected at a time -->
<input type="checkbox" id="red" value="Red" v-model="colors">
<label for="red">Red</label>
<input type="checkbox" id="yellow" value="Yellow" v-model="colors">
<label for="yellow">Yellow</label>
<input type="checkbox" id="blue" value="Blue" v-model="colors">
<label for="blue">Blue</label>
<p>Checked colors: {{ colors }}</p>

<!-- The selected variable will change to whatever string is
    in the option you select -->
<select v-model="selected">
  <option disabled value="">Please pick one</option>
  <option>Lion</option>
  <option>Tiger</option>
  <option>Bear</option>
</select>
<p>You picked: {{ selected }}</p>
You can see from these examples that v-model can be used in a lot of different ways. But this is just the tip of the iceberg, and you can checkout Vue’s documentation about Form Inputs to find out more.
With this I have finished going over all the main directives that Vue.js gives you. Using these, you can make a webpage interactive and interesting to a user relatively easily because Vue does all the hard work for you, by hooking up your data to elements on the page. So far, I’ve gone over how to do things on a small scale, like having one element on a page react a certain way. But this doesn’t really work well to scale up for large applications. That’s where Vue Components come in. I’ll go over what they are and how to use them another time.

Top comments (0)