
How easy is it to create a chatbot for Google Actions and Google Assistant-powered devices (Google/Nest Hub, Google Home, etc.)? Let’s find out!
Out of the box, Google does not make it as easy as it seems to connect a voice assistant to a custom chatbot. They are trying very hard to make you use Dialogflow (a Google product since they bought api.ai a few years ago), however there are ways to bypass Dialogflow and connect Actions to your preferred custom chatbot backend, in our case the CSML Studio.
1. Creating the chatbot
For this example, let’s create a simple CSML-powered chatbot that guides users through step by step instructions to fix a printer running out of toner. Not the most fun example, but still very useful as this is one of the most common operations you will have to do on any printer!
As usual creating a chatbot is very easy with CSML: simply describe the steps one by one until you are done with the conversation. One thing to keep in mind is that Google Actions have some specific requirements.
Among the main ones are the following:
- No more than two simple text components per step
- No more than 640 characters per text component
- If you want to display an image, there must be a text before and at least one button after
- Same thing with audio files, which will also automatically emit a “FINISHED” event when it is done playing
There are quite a few other rules but these are the main ones that we will be considering today. Here is a link to the documentation so you know what is possible and what are the requirements.
Knowing that, here is the flow we will be using for our Action. It is quite straightforward but of course let me know in the comments if anything is unclear:
start:
  use Button("Yes", accept=["oui", "yes", "y"]) as btny
  use Button("No", accept=["non", "no", "nop", "nope"]) as btnn
  say "Many printer issues come from empty cartridges."
  say Question("Is that your case?", buttons=[btny, btnn])
  hold
  if (event match btnn) goto comments
  say "Let's follow these simple steps to replace your ink cartridge!"
  say "Step 1: Lift up the scanner unit and open the cartridge older."
  say Image("https://cdn.csml.dev/customers/4140eea8-4825-4df6-981d-c1ee239884bc/files/29f64cb9-308b-4ff4-8e7c-ad2dfe20c37b/etape1.jpg")
  say Button("Next")
  hold

  say "Step 2: Remove the yellow tape from the side of the cartridge."
  say Image("https://kb.epson.eu/pf/12/webfiles/Article%20Images/Inkjet%20Printers/yellow_tab.jpg")
  say Button("Next")
  hold

  say "Step 3: Insert the new cartridge into the holder and push it down until it clicks into place."
  say Image("https://kb.epson.eu/pf/12/webfiles/Article%20Images/Inkjet%20Printers/click_in_place.jpg")
  say Button("Next")
  hold

  say "Step 4: Close the lid of the printer."
  say Image("https://kb.epson.eu/pf/12/webfiles/Article%20Images/Inkjet%20Printers/lift_up_lid_old.jpg")
  say Button("Next")
  hold
  goto printerresolved

printerresolved:
  use Button("Yes", accept=["oui", "yes", "y"]) as btny
  use Button("No", accept=["non", "no", "nop", "nope"]) as btnn
  say Question("Did this solve your issue?", buttons=[btny, btnn])
  hold

  if (event match btny) {
    say "Glad I could help!"
    say "Good bye!"
    goto end
  }

  say "I'm sorry I could not help you."
  say "Please open a ticket on Service Now to get additional help!"
  goto end
One more thing to consider is that Google Actions are available on devices with or without a screen. In our scenario we focused on a device with a screen, but remember that some users will not see the images you show them. You might want to provide a different scenario in that case; luckily CSML provides you that information with the _metadata.capabilities.SCREEN_OUTPUT context variable (true or false). You can use it to say different things depending on how your users are using the Action. There are a few other variables available, check them out!
2. Connecting the bot to Actions on Google
Sadly, Google does not make it too easy to connect your action to a custom backend without using Dialogflow — the option to do so is actually quite hidden and not well documented. Most annoyingly, you will need to be able to run a command from your machine, which should not be a problem if you are already familiar with a terminal. Luckily, this is only a one-time setup: once you have done it, you are all set!
- Go to the Google Actions console and create a new project:

- Select Actions SDK as the type of action you want to build.
This is important to not miss, as other options will not let you connect your own conversational backend to your action!
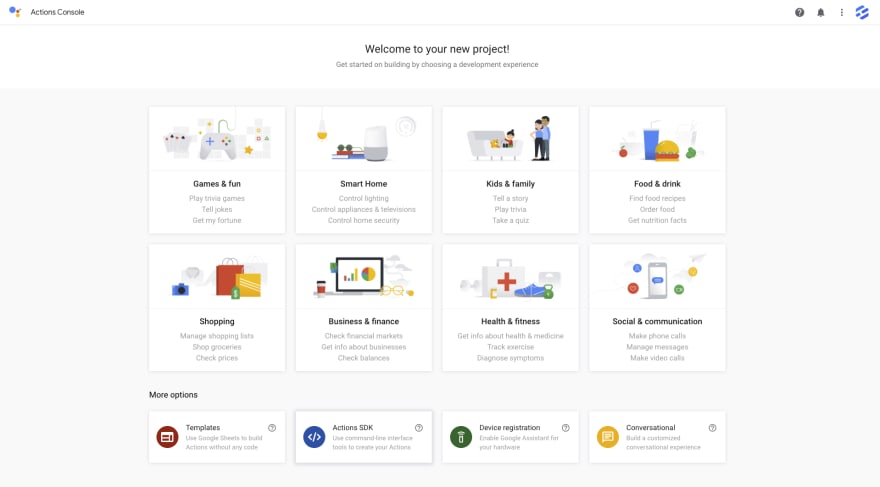
Actions SDK is not very visible, at the bottom of the screen!
- In the next screen, simply copy the project ID from the given command:
gactions update --action package PACKAGE_NAME --project PROJECT_ID
Download and install gactions-cli with the appropriate package for your computer (Mac, Windows, Linux…).
Back to the CSML studio, go to Connectors, then select Create a new Channel, and click on Google Assistant.

- Add a name and description for your channel, then paste the Project ID from step 4. In our case, we were assigned project ID fir-csml by Google, as well as the lowercase 2-letter language code for the actions main language (defaults to en if you leave it empty), then click submit.

After submitting, you will be invited to download a gactions package (in JSON format). Download it, then run the provided command after replacing PACKAGE_NAME with the actual path where you saved the gactions package.
The command may ask you to authentify yourself with Google. Go to the provided URL inside your web browser, complete the authentification, copy the provided code and paste it in your terminal where you entered the command before.

- Finally, back on the Actions on Google console, go to Develop > Invocation and pick an invocation (how people are going to call your action, for example “Super Demo” — beware, Google has quite a strict naming convention, requiring a 2-word name that does not use one of many forbidden terms).
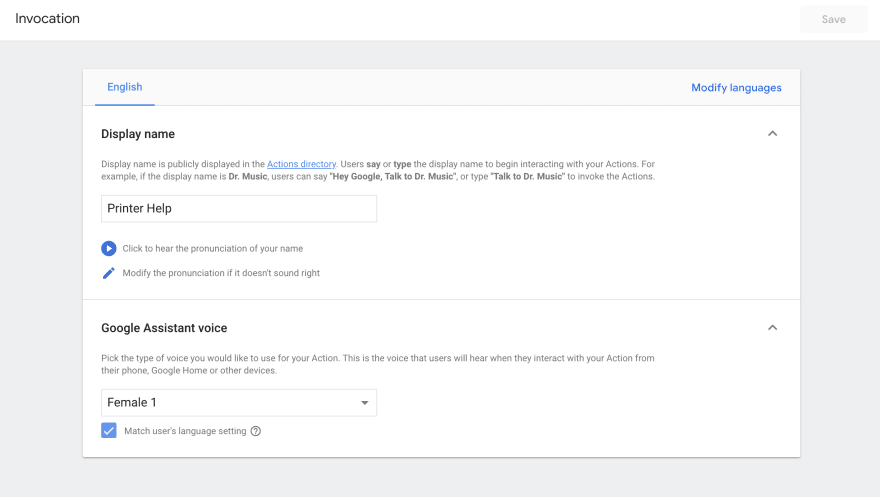
That's it! You are now all set to test and publish your Google Assistant action made with CSML. I hope this guide was helpful to get started, as Google really does not make life easy with their Actions SDK. Let us know what fun or interesting chatbots you decide to build with CSML!

Top comments (0)