
Creating and Consuming a Hasura GraphQL Db with React and Apollo Client
Why GraphQL?!
GraphQL is a way to make specific queries to a single URL endpoint when needed, that returns specific data, rather than multiple calls to various endpoints across an app, as you would in REST.
This example from the documentation shows two seperate queries returning different data.
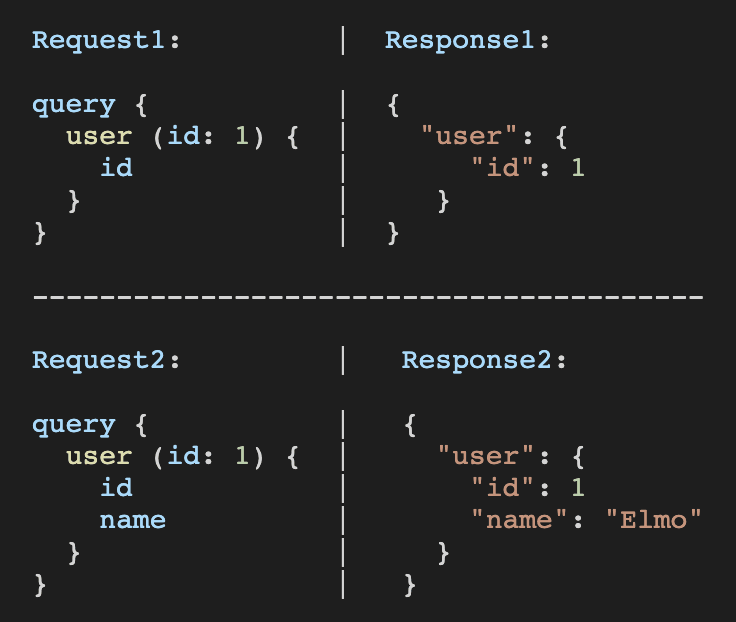
(source Learn Hasura)
What is Hasura?
Hasura is an instant realtime GraphQL API engine.
In just minutes you can have a custom GraphQL API up and running and ready to plug into your app.
If you'd like to see it in action follow this tutorial of my Todo list API.
You can also see my Consuming Hasura GitHub here!
Getting started with Hasura
Head over to https://hasura.io/ and click the 'Get Started In 30 Second' button.
Use GitHub, Google or email to create a new Hasura account.
Verify email address to be redirected to Hasura with this poppup:
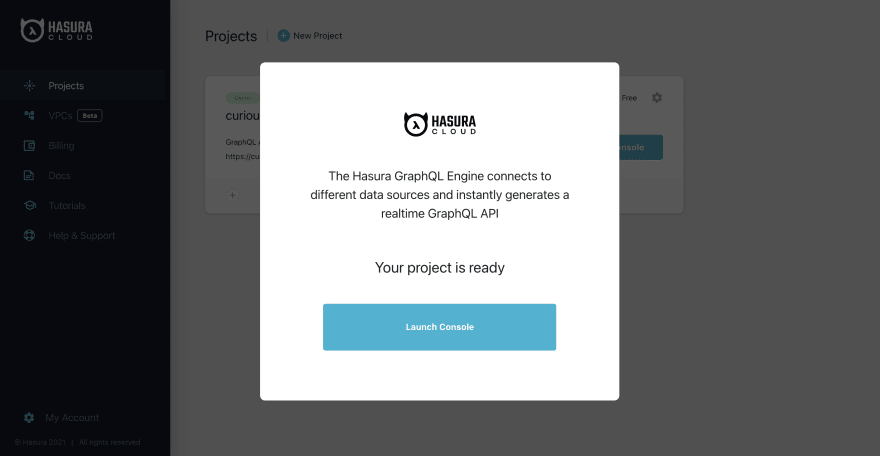
Click 'Launch Connsole' to be redirected again to the GraphiQL dev environment to get started on the API.
Creating the GraphQL API
First connect a database which is easy and free by navigating to the 'DATA' tab:
Then click the 'Create Heroku Database' and below that 'Create Database' button

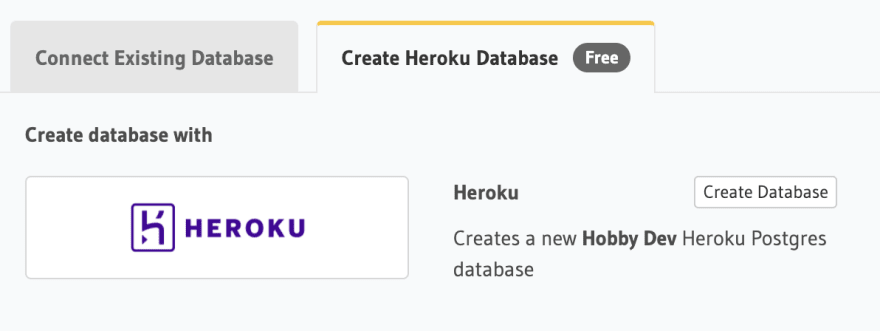
Log in to Heroku via the pop-up and a status bar will appear showing status.
Once finished click 'View Database' button and then the 'Create Table' button at the top of that page.
Name the table 'Todo'
Configure fields and set the Primare Key to id.
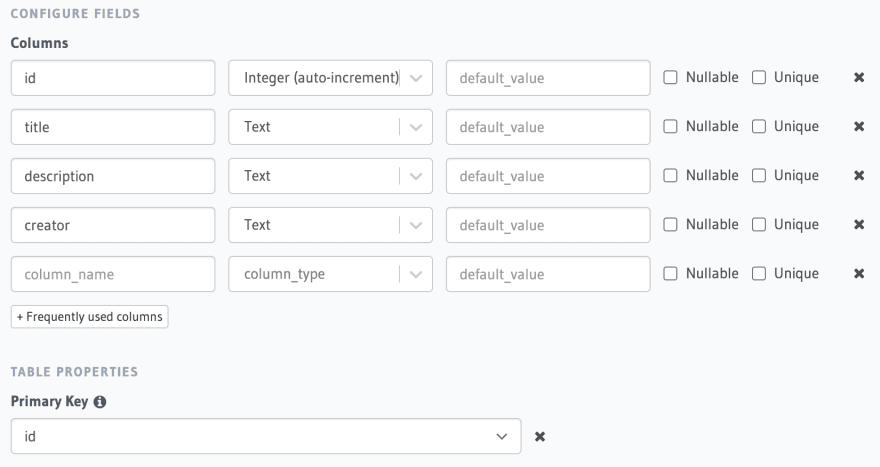
Foreign Keys and Unique Keys can be set up later.
Then click 'Add Table'.
Now you have a new GraphQL API !!!
Next add data to the API by selecting the 'Todo' table in the 'Data Manager' to the left side of the screen then select the 'Insert Row' tab.
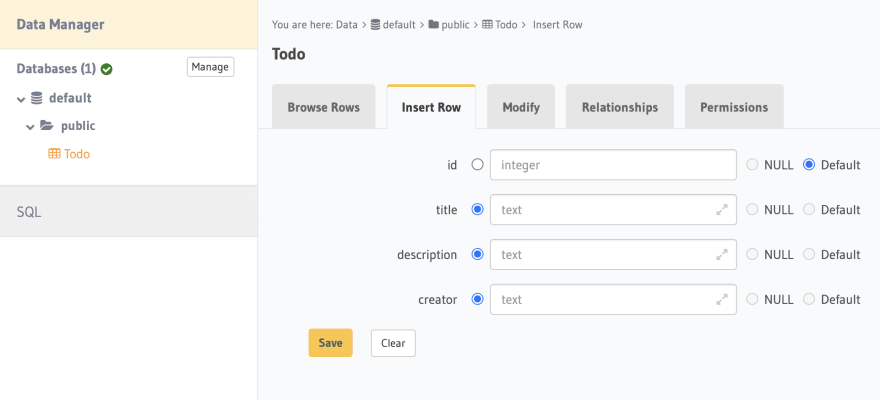
Fill the required fields with data excluding the id as it will be generated automatically.
Press the 'Save' button, then repeat this step but make sure to change the data fields then click 'Insert Again'.
Once there is at least one row inserted, select the API tab at the top of the page to return to the GraphiQL IDE.
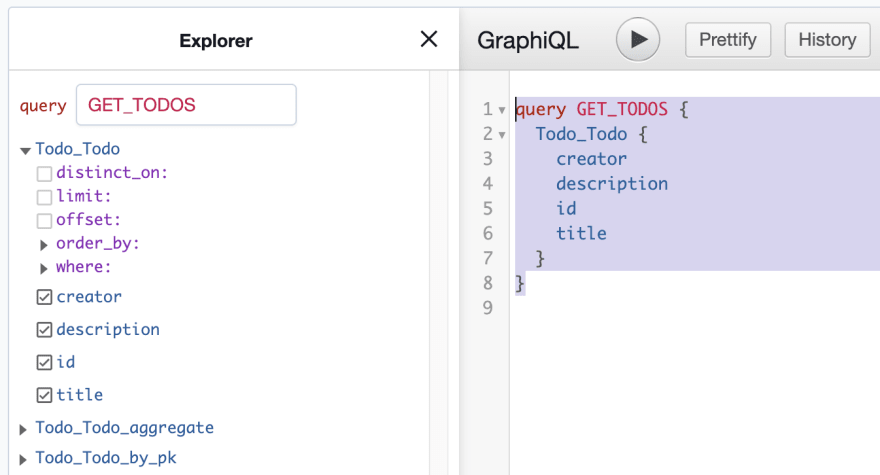
Here you will now see some options in your GraphiQL Explorer.

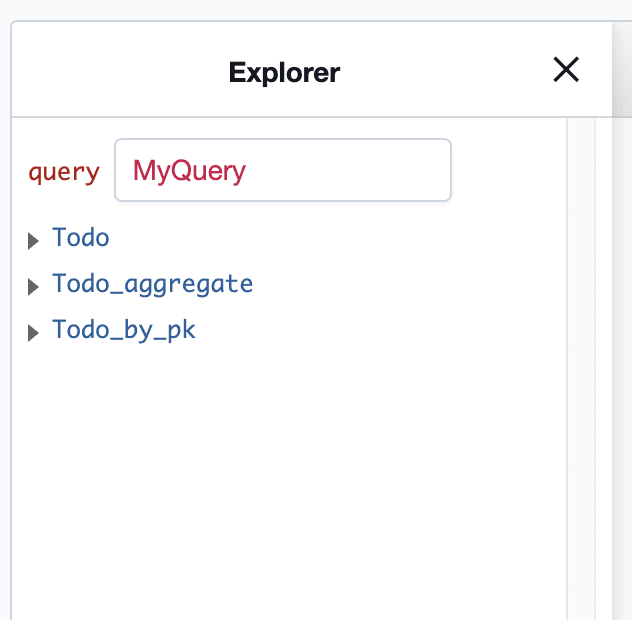
Each of these can be use to make different queries and mutations to your API. Start clicking them to see what they do!
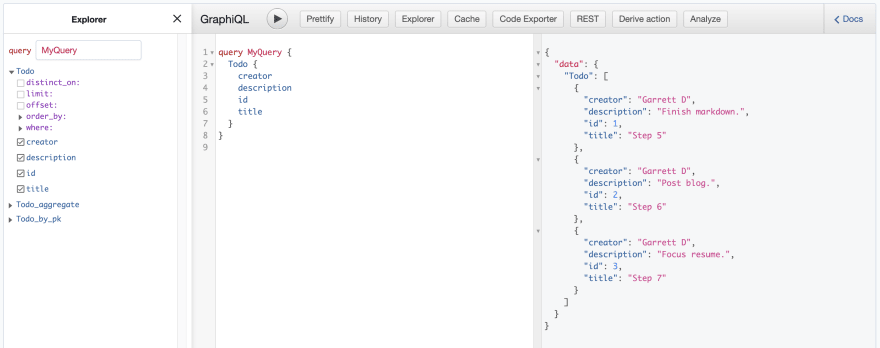
Notice the 'Docs' pop out button in the top right corner. It has documentation created specifically for this table to show how to query and mutate any way you might need.
Keep this dashboard open as it will be needed later !!!
Using React and Apollo Client to consume the API
(Most of this section is directly from Apollo Client Documentation)
Start in terminal by navigating to desktop or a folder of choice, next npx create-react-app project-name, then cd into project-name and npm install @apollo/client graphql. Open the file in code editor of choice.
In index.js initialize ApolloClient by importing:
import {
    ApolloClient,
    InMemoryCache,
    ApolloProvider,
    HttpLink,
    ApolloLink,
} from "@apollo/client";
Next create a .env file in the root of the project.
Return to the Hasura Dashboard where two needed items will be found:
'GraphQL Endpoint' and 'x-hasura-admin-key'.

Open the .env file and create two variables:
REACT_APP_KEY= (paste 'x-hasura-admin-key' here)
REACT_APP_URI= (paste 'GraphQL Endpoint' here)
Make sure to use **NO quotations on key or url.**
If you have been running the dev server you will need to restart it now for these variables to work
Now back in index.js use env variables to connect to the API.
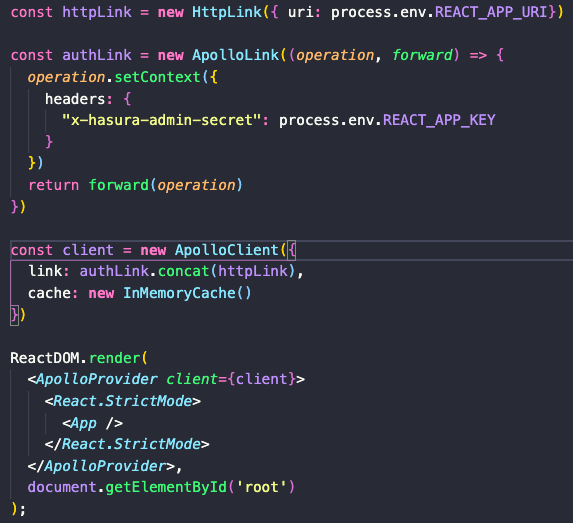
- Set the endpoint in HttpLink using the created env variable.
- Use ApolloLink to pass headers with admin key env variable.
- ApolloClient concatinates these to send the full request to the API.
- ApolloProvider wraps the App to enable access to ApolloClient throughout.
Return to Hasura and copy a database request.
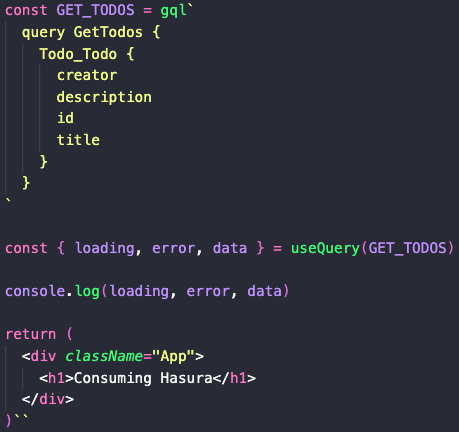
Next, move to App.js and import:
import { useQuery, gql } from '@apollo/client'
- Write a variable holding the Hasura request inside the backticks of a
gqltag. - Set a variable with 'loading, error, data' equal to
useQuery(GET_TODOS).
When your component renders, useQuery returns an object from Apollo Client that contains loading, error, and data properties you can use to render your UI.
console.log 'loading, error, data' to see your data on the front end in devtools.
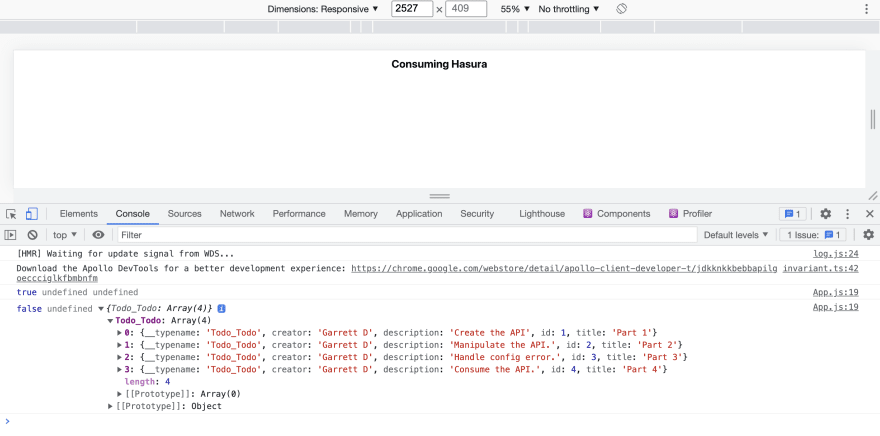
Now use the data to build out the front end !!!


Top comments (0)