
I've been a software engineer for 3 years now, and up until recently, I was very curious as to which frontend Javascript framework I should be using for web development. Having learned React and Vue over the past 1 to 2 years, I know that a lot of people have different opinions on which best to use. (I know what you're thinking... yes, it's an eternal tug-o-war, especially since it's Javascript :P )
There's also been a couple of roadblocks for Angular over the years and a big factor for that is the shift from AngularJS to Angular 2 back in 2016. This was also one of the reasons why I was hesitant to learn it at first.
So... what led me to pursue learning Angular now?
I started gaining interest in Angular when I had to do learn Typescript for Node JS. Having done a lot of Javascript with other frameworks, I was frustrated with how much errors I encountered due to the very lax data typing and structure tendencies of JS. This really cost me a lot of refactoring time, and forced me to go on an error handling spree with my code.
When I decided to learn Typescript, I was amazed by how efficient it was in dealing with data types and applying OOP concepts quite similar to Java, C#, C++ and sometimes Python. This sparked my interest in learning Angular as it was the core/default language being used for the framework. Aside from just Typescript, I also liked the fact that almost everything in Angular is created by the core developers themselves which highly reduces the probability of having future dependency issues as your code ages.
Now that I have had a taste of some of the capabilities of Angular, here's me sharing what I've learned so far...
I have divided this tutorial series into three parts:
Part I. Backend server CRUD using Node JS REST API (Express JS)
- Initializing a Node JS project
- Using express to expose API endpoints
- Applying the body-parser middleware to the express API to accept JSON requests
- Creating CRUD endpoints to handle
- Validating requests using express-validator
- Minimal error handling
- Using cURL to try out the endpoints
Part II. Frontend client CRUD using Angular 10
- Initializing an Angular 10 project
- Creating components and directives
- Using one-way and two-way data binding
- Basic event handling between components and templates / DOM
- Creating services to inject data into a component using dummy data
- Error handling and formatting via pipes
Part III. Integrating the backend server with the frontend client
- Applying the CORS middleware to the express API to accept client requests
- Refactoring angular services to perform CRUD API calls to the backend server
Part I - Backend server CRUD using Node JS REST API (Express JS)
This tutorial assumes that you already have npm installed in your system. If not, here is the link to get you started https://nodejs.org/en/download/
Our blog post will contain CRUD functionalities to keep this app simple. We will be using an array of objects to store our data in order to bypass the process of having to create a database.
We will be creating the following endpoints:
Check if the API is up and running
GET - /
List all posts
GET - /api/posts/
Retrieve a post by its id
GET - /api/posts/:id
Create a post
POST - /api/posts/
Update a post
PUT - /api/posts/:id
Delete a post
DELETE - /api/posts/:id
Let's start-off by creating a folder for our project
mkdir blog-app
mkdir blog-app/server
cd blog-app/server
Initialize a npm project
npm init -y
A package.json file should be generated, and should look like so
{
  "name": "server",
  "version": "1.0.0",
  "description": "",
  "main": "index.js",
  "scripts": {
    "test": "echo \"Error: no test specified\" && exit 1"
  },
  "keywords": [],
  "author": "",
  "license": "ISC"
}
We create the index.js file inside the src folder
mkdir src
touch src/index.js
Now that we have setup the files for the server, we will need to install the following dependencies:
Dependencies:
- express - This will run our REST API server
- body-parser - Allows us to read requests
- lodash - Utility library
- express-validator - Validates incoming requests
npm i --save express body-parser lodash express-validator
I also use nodemon to instantly compile the code when I save, so will add this to the dev dependencies of npm
npm i --save-dev nodemon
If executed properly, your folder structure should look like this.
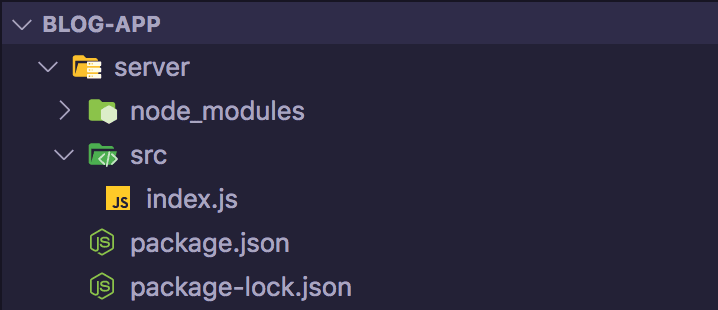
After installing the dependencies, we will need to edit package.json to run our index.js file. Add the following line inside package.json to allow nodemon to run our index.js file.
 "main": "src/index.js",
 "scripts": {
   "start": "nodemon -x node src/index.js",
   "test": "echo \"Error: no test specified\" && exit 1"
 },
Your package.json file should look something like this.
{
  "name": "server",
  "version": "1.0.0",
  "description": "",
  "main": "src/index.js",
  "scripts": {
    "start": "nodemon -x node src/index.js",
    "test": "echo \"Error: no test specified\" && exit 1"
  },
  "keywords": [],
  "author": "",
  "license": "ISC",
  "devDependencies": {
    "nodemon": "^2.0.4"
  },
  "dependencies": {
    "body-parser": "^1.19.0",
    "cors": "^2.8.5",
    "express": "^4.17.1",
    "express-validator": "^6.6.0",
    "lodash": "^4.17.19"
  }
}
At this point, it is finally time to code the API server!
In your index.js, we will first need to initialize express, create a simple get endpoint to see if the server is running properly, and allow express js to listen to port 3000. We will also import lodash for use later on.
// index.js

// Import express
const express = require('express');

// Import lodash
const _ = require('lodash');


// Initialize express
const app = express();

// Endpoint to check if API is working
app.get('/', (req, res) => {
  res.send({
    status: 'online'
  })
});

// Expose endpoints to port 3000
app.listen(3000, () => {
  console.log("Listening to port 3000");
});
Our express app is now ready to receive requests! Run the following command in your terminal to run the server.
npm start
You can now check your API endpoint in your browser at http://localhost:3000/.
The next step is to allow express to accept the our requests in a format it will recognize; in our case, a JSON request. To do that, we will need to import body-parser and apply it as a middleware to be used by the express library as seen below.
// index.js

// Previous imports...

// Import body parser
const bodyParser = require('body-parser');

// Initialize express
const app = express();

// Use the body parser middleware to allow
// express to recognize JSON requests
app.use(bodyParser.json());
Given that we will be doing requests to this server, it is important to validate its format for consistency. Thus, we will need to import express validator. For now, we will only need to extract body and validationResult for our use case.
// index.js

// Previous imports...

// Import express validator
const { body, validationResult } = require('express-validator');
We will also be introducing a bit of error handling to make sure we have consistent error responses all throughout our API.
// Previous middleware
app.use(bodyParser.json());

// Error handler
function createError(message) {
  return {
    errors: [
      {
        message
      }
    ]
  }
};
Now that we have properly setup all the middleware needed to accept and validate our client requests, it is time to create some endpoints.
Our first endpoint will be creating a post that will contain both the title and the content. We will then be validating it using express-validator. After validating the request, we generate a random id using the Math built-in library to create the post.
// index.js

// Error handler
function createError(message) { ... };

// Function to generate ID
function generateId() {
  return '_' + Math.random().toString(36).substr(2, 16);
}

// Post Array
let posts = [];

// Endpoint to check if API is working
app.get('/', (req, res) => {...});

// Endpoint to create post
app.post(
  '/api/posts/',
  // Express validator middleware function to identify which
  // fields to validate
  [
    body('title').isString(),
    body('content').isString()
  ],
  (req, res) => {
  // Retrieve errors from function
  const errors = validationResult(req);

  // If there are errors in validation, return the array of
  // error messages with the status of 422 Unprocessable
  // Entity
  if (!errors.isEmpty()) {
    return res.status(422).json({ errors: errors.array() })
  }

  // Retrieve variables from the request body
  const { title, content } = req.body;

  // Generate a random ID for the post
  const id = generateId();

  const post = {
    id,
    title,
    content
  }

  // Add the post to the list of posts
  posts.push(post);

  // Return the post with 201 status code which will
  // signify the successful creation of the post
  res.status(201).send(post);
});
If you want to see how this works, here's a cURL command that you can run using your command line / terminal
curl --location --request POST 'localhost:3000/api/posts' \
--header 'Content-Type: application/json' \
--data-raw '{
    "title": "First Post",
    "content": "Hey everyone! Just wanted to introduce myself!"
}'
You should be receiving this response afterwards
{
  "id":"_epqv08dtwg8",
  "title":"First Post",
  "content":"Hey everyone! Just wanted to introduce myself!"
}
Moving on to the next endpoint, we will be listing the stored posts. As you may have noticed, I listed the posts in reverse so as to emulate sorting it in order of creation, since I did not include a timestamp or date for the creation of the post.
// index.js

// Endpoint to create post
app.post('/api/posts/', (req, res) => { ... });

// Endpoint to list all the posts
app.get('/api/posts/', (req, res) => {

  // Return the list of posts in reverse with the
  // status code 200 to signify successful retrieval

  res.send(posts.reverse());
})
To retrieve a specific post, we will need its id. I will be using a path parameter instead of the request body for this one.
// index.js

// Endpoint to list all the posts
app.get('/api/posts/', (req, res) => {...});

// Endpoint to retrieve a post by its id
app.get('/api/posts/:id', (req, res) => {
  // Store id in variable from the path parameter
  const id = req.params.id;

  // Match the post using lodash's find function id and return
  // its contents
  const post = _.find(posts, (post) => post.id === id);

  // Handle error and return 400 Bad Request if post is not
  // found
  if(!post) {
     return res.status(400).send(
      createError('Post not found')
    )
  }

  // Return the post with the status code 200
  // to signify successful retrieval
  res.send(post);
})
Our next task is to update an existing post. We will be using both the request body and the path parameters for this endpoint, so we will need to add validation for this endpoint as well. The request body will contain the title and the content, while the path parameter will contain our id.
// index.js

// Endpoint to retrieve a post by its id
app.get('/api/posts/:id', (req, res) => { .. });

// Endpoint update post by its id
app.put(
  '/api/posts/:id',
  // Express validator middleware function to identify which
  // fields to validate
  [
    body('title').isString(),
    body('content').isString()
  ],
  (req, res) => {

  // Retrieve errors from function
  const errors = validationResult(req);

  // If there are errors in validation, return the array of
  // error messages with the status of 422 Unprocessable
  // Entity
  if (!errors.isEmpty()) {
    return res.status(422).json({ errors: errors.array() })
  }

  // Store id in variable from the path parameter
  const id = req.params.id;

  // Retrieve variables from the request body
  const { title, content } = req.body;

  const updatedPost = {
    id,
    title,
    content
  }

  // Retrieve the index of the post using its id
  const index = _.findIndex(posts, (post) => post.id === updatedPost.id);


  // Handle error and return 400 Bad Request if index is -1
  // meaning the post is not found
  if(index === -1) {
    return res.status(400).send(
      createError('Post not found')
    )
  }

  // Replace the stored post with the updated one
  posts[index] = updatedPost;

  // Return the post with the status code 200
  // to signify successful update
  res.send(updatedPost);
});
Our final task for this API will be deleting a post using its id. Once again, we will use the path parameter that contains our id.
// index.js

// Endpoint to update post by its id
app.put('/api/posts/:id', (req, res) => { ... });

// Endpoint to delete post by its id
app.delete('/api/posts/:id', (req, res) => {
  // Store id in variable from the path parameter
  const id = req.params.id;

  // Retrieve the index of the post using its id
  const index = _.findIndex(posts, (post) => post.id === id);

  // Handle error and return 400 Bad Request if index is -1
  // meaning the post is not found
  if(index === -1) {
     return res.status(400).send(
      createError('Post not found')
    )
  }

  // Remove the post from the list of posts
  posts = posts.splice(index, 1);

  // Return the post with the status code 200
  // to signify successful deletion
  res.send({
    'message': `Post with id ${id} has been successfully deleted`
  })
})

// Expose endpoints to port 3000
app.listen(3000, () => { ... });
We have now completed all the tasks required for our CRUD API. We will need to do just one final thing before moving on to the frontend client: making sure we handle errors for routes that don't exist. But to do that, we have to indicate that every other route that is not indicated in the server will return an error of 404 not found.
// index.js

// Endpoint to delete post by its id
app.delete('/api/posts/:id', (req, res) => { ... });

// Return an error if route does not exist in our server
app.all('*', (req, res) => {
  return res.status(404).send(
     createError('Not found')
  )
})


// Expose endpoints to port 3000
app.listen(3000, () => { ... });
and that's it! We're officially done! Here's what your code should look like by the end of this tutorial.
// index.js

// Import express
const express = require('express');

// Import lodash
const _ = require('lodash');

// Import body parser
const bodyParser = require('body-parser');

// Import express validator
const { body, validationResult } = require('express-validator');

// Initialize express
const app = express();

// Use the body parser middleware to allow
// express to recognize JSON requests
app.use(bodyParser.json());

// Error handler
function createError(message) {
  return {
    errors: [
      {
        message
      }
    ]
  }
};

// Function to generate ID
function generateId() {
  return '_' + Math.random().toString(36).substr(2, 16);
}

// Post Array
let posts = [];

// Endpoint to check if API is working
app.get('/', (req, res) => {
  res.send({
    status: 'online'
  })
});

// Endpoint to create post
app.post(
  '/api/posts/',
  // Express validator middleware function to identify which
  // fields to validate
  [
    body('title').isString(),
    body('content').isString()
  ],
  (req, res) => {
  // Retrieve errors from function
  const errors = validationResult(req);

  // If there are errors in validation, return the array of
  // error messages with the status of 422 Unprocessable
  // Entity
  if (!errors.isEmpty()) {
    return res.status(422).json({ errors: errors.array() })
  }

  // Retrieve variables from the request body
  const { title, content } = req.body;

  // Generate a random ID for the post
  const id = generateId();

  const post = {
    id,
    title,
    content
  }

  // Add the post to the list of posts
  posts.push(post);

  // Return the post with 201 status code which will
  // signify the successful creation of the post
  res.status(201).send(post);
});

// Endpoint to list all the posts
app.get('/api/posts/', (req, res) => {

  // Return the list of posts in reverse with the
  // status code 200 to signify successful retrieval

  res.send(posts.reverse());
})

// Endpoint to retrieve a post by its id
app.get('/api/posts/:id', (req, res) => {
  // Store id in variable from the path parameter
  const id = req.params.id;

  // Match the post using lodash's find function id and return
  // its contents
  const post = _.find(posts, (post) => post.id === id);

  // Handle error and return 400 Bad Request if post is not
  // found
  if(!post) {
     return res.status(400).send(
      createError('Post not found')
    )
  }

  // Return the post with the status code 200
  // to signify successful retrieval
  res.send(post);
})

// Endpoint update post by its id
app.put(
  '/api/posts/:id',
  // Express validator middleware function to identify which
  // fields to validate
  [
    body('title').isString(),
    body('content').isString()
  ],
  (req, res) => {

  // Retrieve errors from function
  const errors = validationResult(req);

  // If there are errors in validation, return the array of
  // error messages with the status of 422 Unprocessable
  // Entity
  if (!errors.isEmpty()) {
    return res.status(422).json({ errors: errors.array() })
  }

  // Store id in variable from the path parameter
  const id = req.params.id;

  // Retrieve variables from the request body
  const { title, content } = req.body;

  const updatedPost = {
    id,
    title,
    content
  }

  // Retrieve the index of the post using its id
  const index = _.findIndex(posts, (post) => post.id === updatedPost.id);


  // Handle error and return 400 Bad Request if index is -1
  // meaning the post is not found
  if(index === -1) {
    return res.status(400).send(
      createError('Post not found')
    )
  }

  // Replace the stored post with the updated one
  posts[index] = updatedPost;

  // Return the post with the status code 200
  // to signify successful update
  res.send(updatedPost);
});

// Endpoint to delete post by its id
app.delete('/api/posts/:id', (req, res) => {
  // Store id in variable from the path parameter
  const id = req.params.id;

  // Retrieve the index of the post using its id
  const index = _.findIndex(posts, (post) => post.id === id);

  // Handle error and return 400 Bad Request if index is -1
  // meaning the post is not found
  if(index === -1) {
     return res.status(400).send(
      createError('Post not found')
    )
  }

  // Remove the post from the list of posts
  posts = posts.splice(index, 1);

  // Return the post with the status code 200
  // to signify successful deletion
  res.send({
    'message': `Post with id ${id} has been successfully deleted`
  })
})

// Return an error if route does not exist in our server
app.all('*', (req, res) => {
  return res.status(404).send(
     createError('Not found')
  )
})

// Expose endpoints to port 3000
app.listen(3000, () => {
  console.log("Listening to port 3000");
});
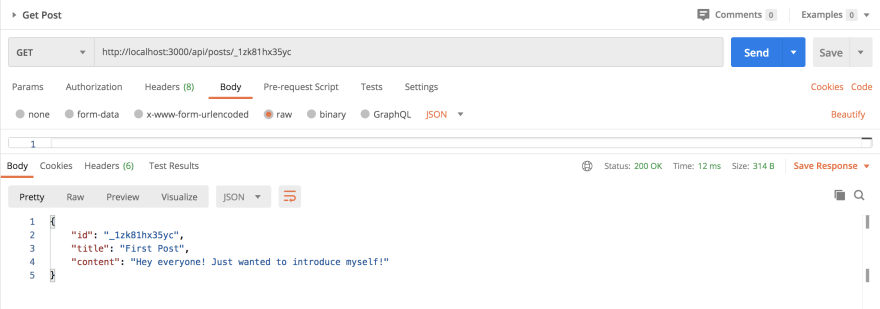
Here are some screenshots of me using Postman to test out the endpoints.
If you don't have Postman check it out at this link https://www.postman.com/downloads/
Check if the API is up and running
GET - /

Create a post
POST - /api/posts/

List all posts
GET - /api/posts/

Retrieve a post by its id
GET - /api/posts/:id
Update a post
PUT - /api/posts/:id

Delete a post
DELETE - /api/posts/:id

Return not found error if route does not exist

Summarizing this tutorial, I basically demonstrated how to create REST API endpoints that will serve as the backend server to our Angular frontend client.
We were able to do the following steps below, and now we are ready to move on to the next part of this series.
- Initializing a Node JS project
- Using express to expose API endpoints
- Applying the body-parser middleware to the express API to accept JSON requests
- Creating CRUD endpoints to handle
- Validating requests using express-validator
- Minimal error handling
- Using cURL to try out the endpoints
Stay in tune for the next part of this series where I will share how I developed the frontend client for the blog application using Angular 10!
Til' next time guys and gals :)

Top comments (1)
Please post parts 2 and 3