
Mailing is an important component of any blog, as active interaction with readers increases the audience and brings more traffic. Now various services help web users send newsletters to their customers. But if your site is powered by WordPress, there is no need to pay separately for a third-party service. This platform offers many plugins that will help you regularly interact with your audience. And MailChimp is one of them.
This mailing service with a funny monkey character was launched in 2001 as a side project designed to create email lists. But very soon, it has turned into a powerful marketing platform, leaving many alternative services far behind.
This online instrument is designed to create newsletters, launch email marketing campaigns, and evaluate their effectiveness. MailChimp is attractive to blog owners as it offers many efficient promotion features. Keep reading to learn how to install this plugin.
Create a Signup Form on Your Website
Step 1: Install "MailChimp for WordPress" plugin
First, to send blog posts by MailChimp, you need to install the plugin on WordPress by going to Dashboard > Plugins > Add News. WordPress has a ready list of available plugins, and it is enough to find and select MailChimp. Note, that all plugins should be activated after you install them.

Step 2: Create an Account on MailChimp
Then, you should start your work by creating a personal account on MailChimp here, submitting such details like email and name.

Registration in the service
After confirming your account via email, you will be rerouted to the page with the Let's Get Started field.
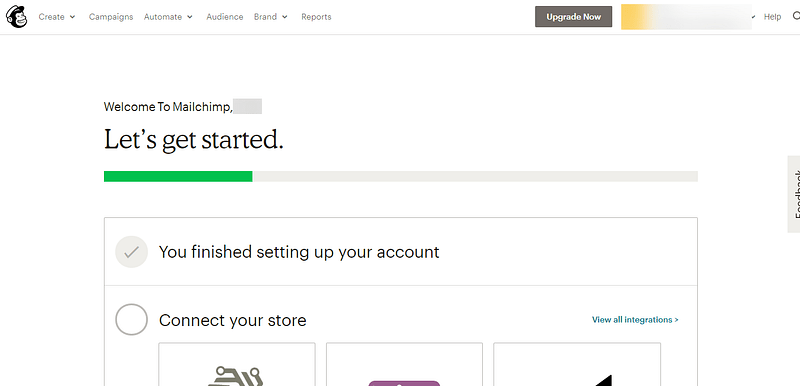
You will need to enter the following data:
- Your name
- The size of your campaign
- Address and contact information
Although these are fairly simple things, you should not ignore them. To ensure your site works in accordance with international anti-spam rules, recheck that you have entered the valid and correct information.
Step 3: Integrate MailChimp Account with "MailChimp for WordPress" Plugin
The next task is to set up an interaction between MailChimp and WordPress. Here you will require an API key. It is easy to obtain it through your MailChimp account settings in just a few steps:
- Click on your account name. You will see it in the top-right menu bar.
- Then click on Account in the drop-down menu list.
- Continue by clicking on Extras in the menu.
- And after it, click in API keys.
- If you haven't had any API keys, click Create a key as the image below.
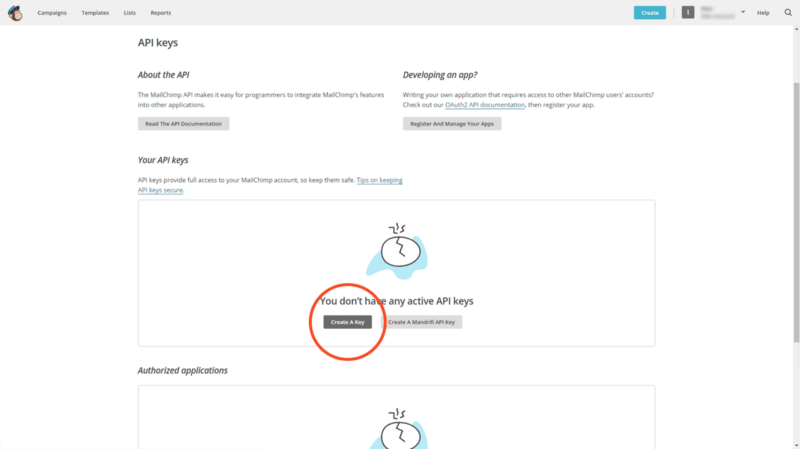
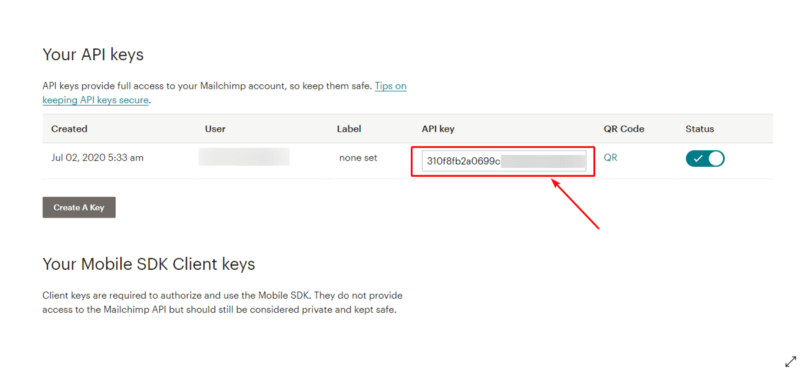
Obtain API key
After that, you'll have an API key.
Then, go to your WordPress Dashboard and find the Settings part of the MailChimp plugin, copy the key, and add it here. Don't forget to click Save Changes.
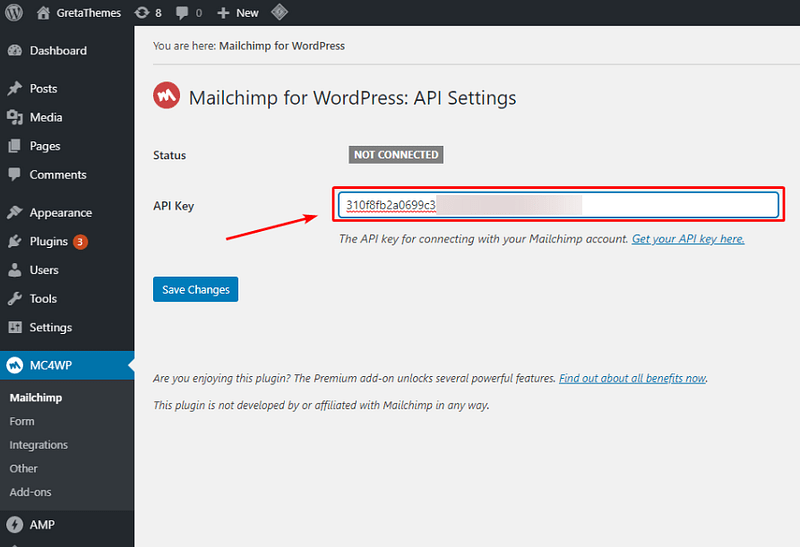
After you add the API key, the connection between MailChimp and WordPress is established.
Remember to always protect your API keys with a strong password. Keep all the keys confidential, this way you will protect your information from being stolen.
Step 4: Create a Sign-up Form
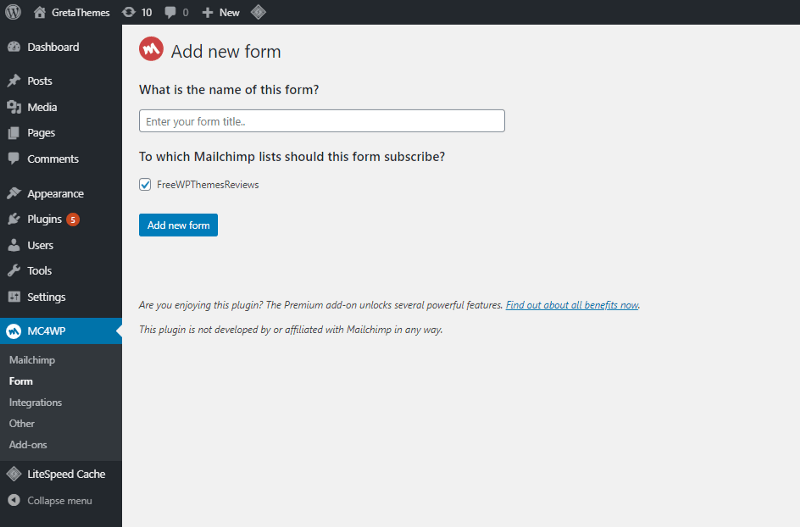
You can create a signup form using MailChimp plugin in your Admin Dashboard by going to MC4WP > Forms. In this screen, enter your form title and choose the MailChimp lists, and then click Add new form.
Next, in the Field tab, select the fields and forms you want to include in the form (1) and you can see the form preview in (2).

A lot of additional settings can be found in the Messages and the Settings tab. These settings are easy to deal with so you just need to read the instructions carefully for each tab.
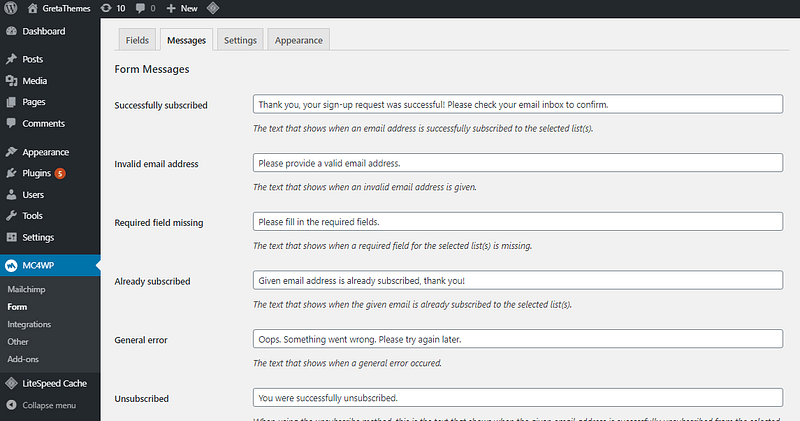
Message tab
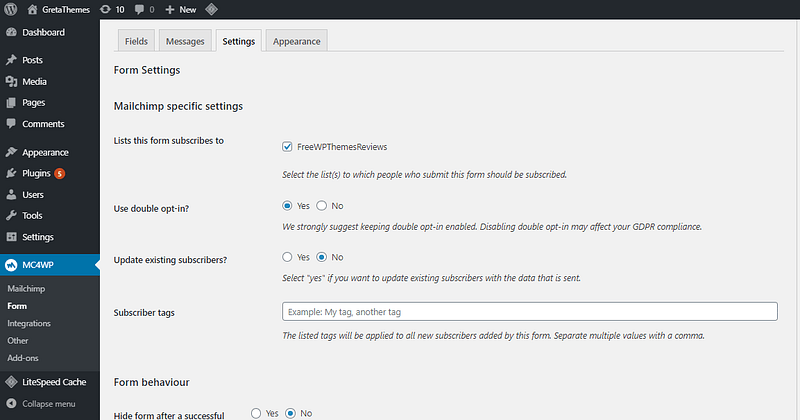
Settings tab
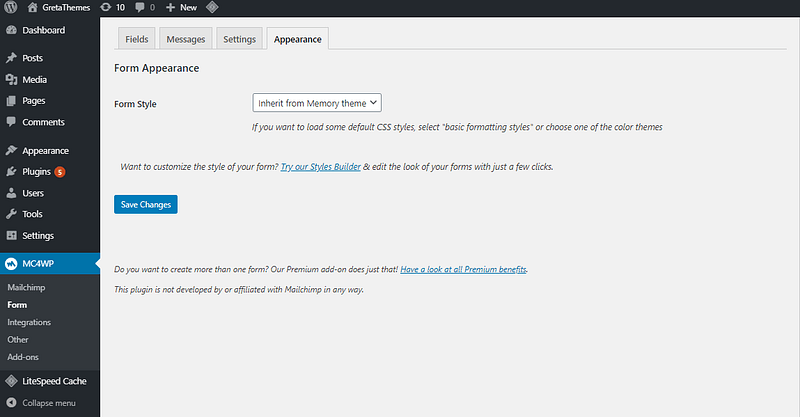
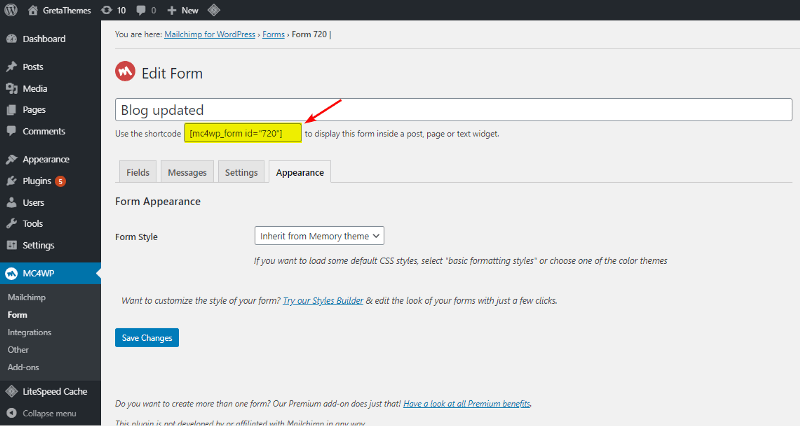
The Appearance tab will decide how your form looks like. Remember to hit the Save Changes button after completing all steps.
Now, all you need to do is inserting the shortcode of the created form to the post/page you want.
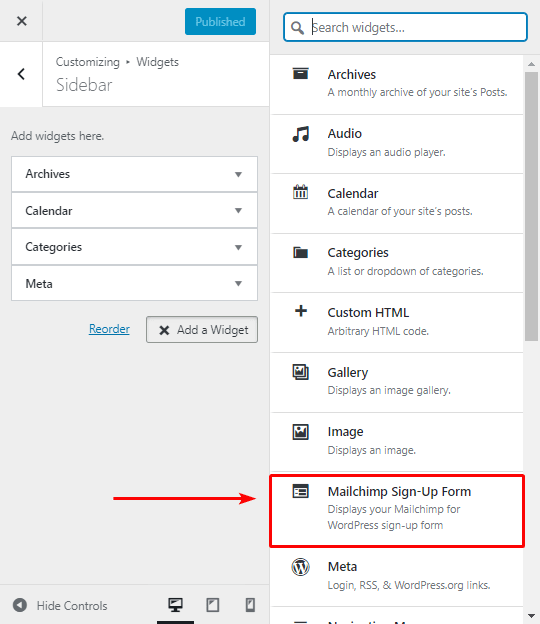
Moreover, MailChimp provides you with a special widget to let you display form easily just by adding this widget to the wanted area.
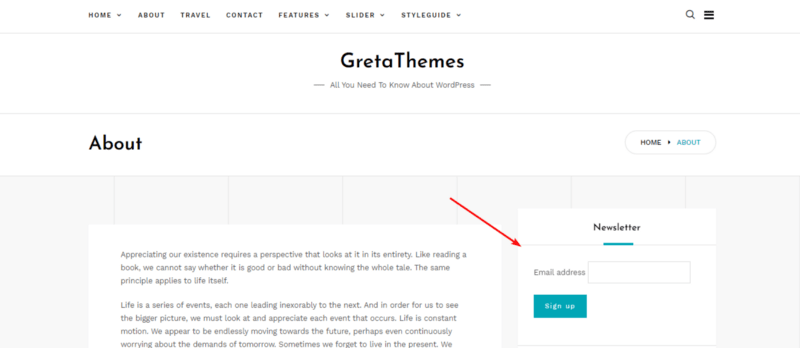
This is the result of my form:
Send a Blog Post to Subscribers
After you finish step 1, it's time to set up automatic regular updates to the mailboxes of your subscribers. All emails to your readers can be sent manually. But it may not be a good idea when it comes to a regularly updated blog, as it takes a lot of time. Therefore, in MailChimp, you can set up an automatic campaign that without your participation will notify all your subscribers about new articles on your blog. This is called an RSS feed. Follow these steps to set up it:
Step 1: Create a New Campaign
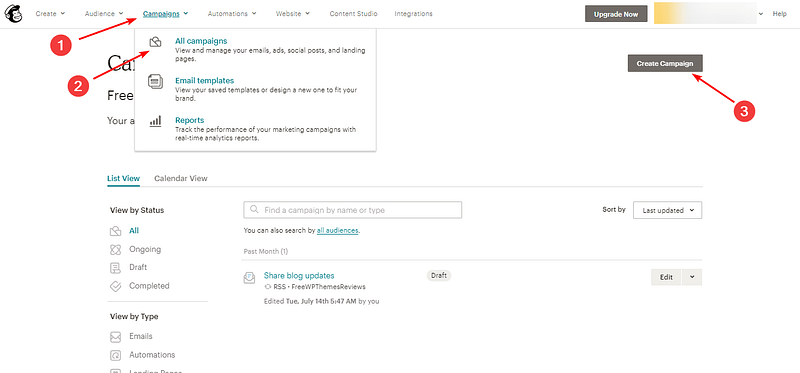
After logging in to MailChimp, Campaigns > All Campaign at the top of the page, and then select Create campaign.
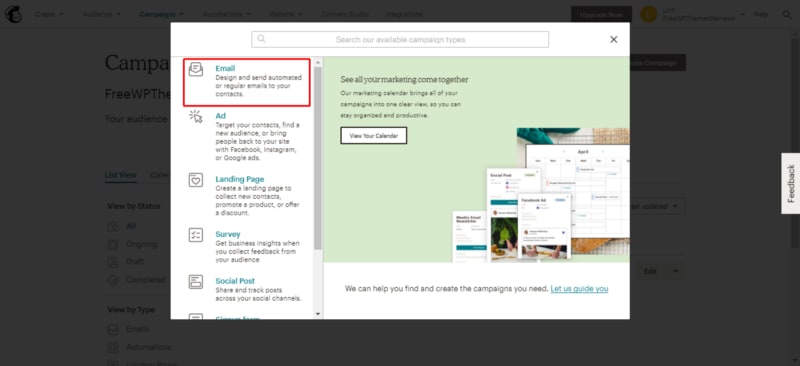
This is the next interface you will see. Because MailChimp changes the interface quite often so it may be dissimilar when you use it. You are offered different types of campaigns, but we are creating email campaigns, so click Email.
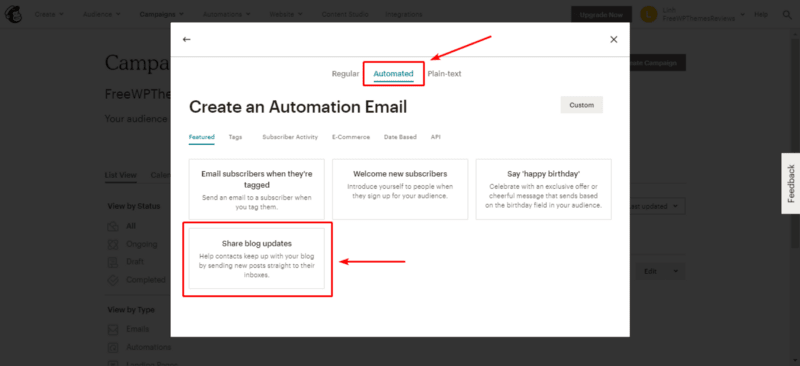
Choose Automate to send email automatically and click the Share blog updates box.
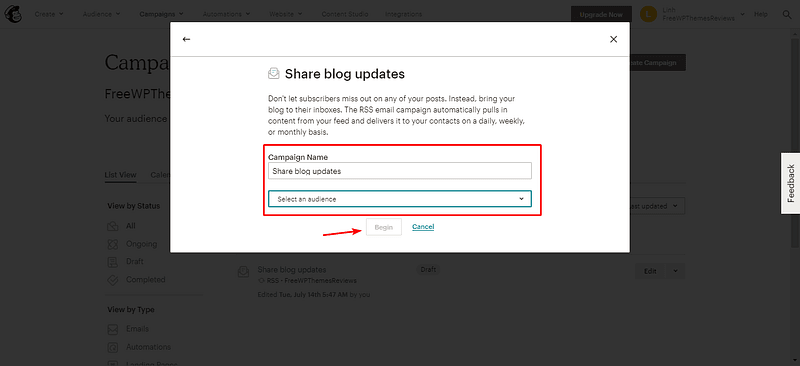
In the next step, you just need to fill in the campaign name and select the audience. When finishing, hit the Begin button.
Step 2: Set Up Automatic RSS Feeds in MailChimp
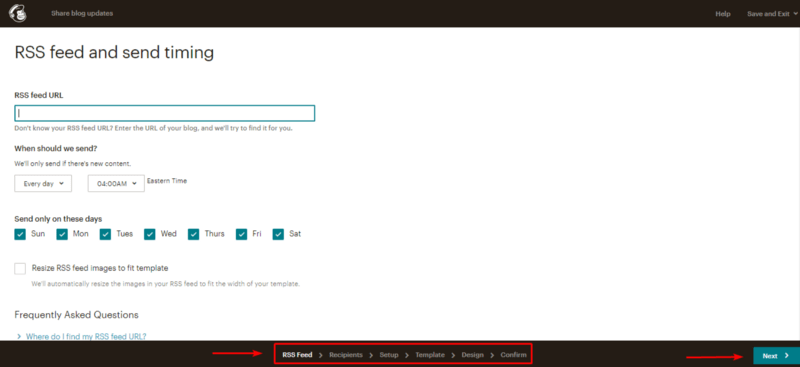
When you've done with the previous step, you will see this page where you set up automatic RSS feed other things.
MailChimp prepared guidance with all the possible options, even how to get your RSS feed URL, so you can easily follow. After finishing each step, click Next to move to the next step that you see in the footer. Specifically, these steps require you to:
- RSS Feed tab: Customize the campaign by adding RSS feed URL, time, and frequency of mailing.
- Recipients: Add recipients;
- Setup: Give a name to your newsletter.
- Template: Select a template from the Themes.
- Design: Design your template after choosing one in the previous tab.
- Confirm: Check your campaign and confirm to send.
The Confirm tab reviews your work carefully. If it finds something wrong with your campaign, you need to resolve it until you see this notice. Choose Start RSS to begin the campaign.

If you're sure to continue, click Start Campaign. And you've all done!

Final Thoughts
MailChimp is one of the most powerful tools for interaction with subscribers and newsletters management, and it is suitable for both simple WordPress users and experienced web developers. This mailing service is a great way to expand the list of email addresses on your WordPress blog. Together with useful content, it will help you build an extensive audience and promote your blog. Note that a free version allows you to have not more than 2,000 subscribers and send a maximum of 12,000 letters per month. And when you reach the allowed limits, you can always switch to a paid version.
--- --- ---
The publication at GretaThemes.

Top comments (0)