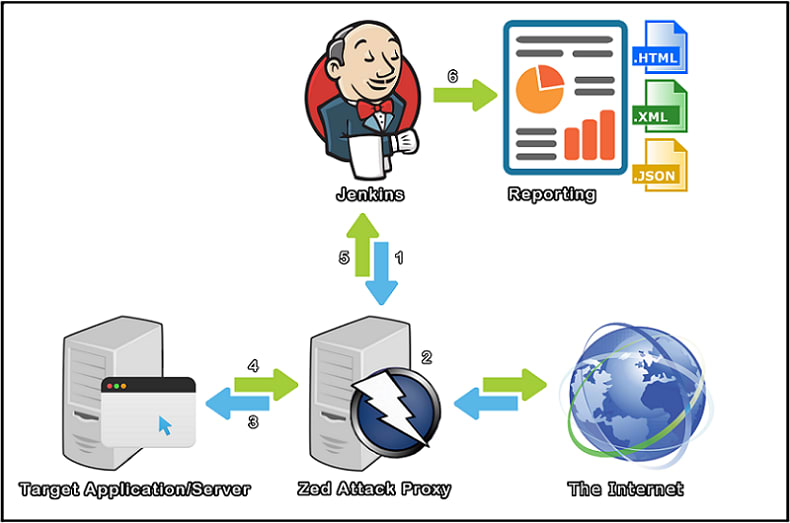
OWASP ZAP is a very popular tool used to find vulnerabilities in your codebase and in your instance/server setup.

What it basically does is crawl through your website and then scan for vulnerabilities on all the URLs it found during the crawl.
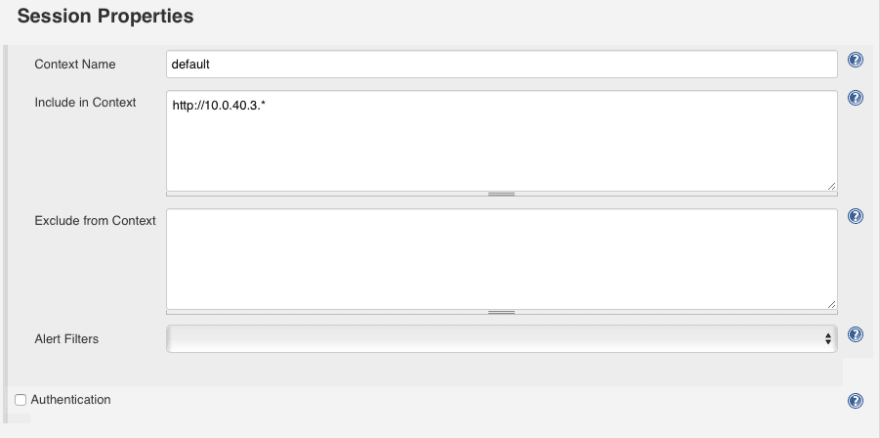
A session is an instance of a test. Inside a session you can have multiple contexts.
Contexts help ZAP only scan the URLs you want.
For example if you include directly bootstrap in your pages with:
<link rel="stylesheet" href="https://maxcdn.bootstrapcdn.com/bootstrap/3.3.7/css/bootstrap.min.css">
ZAP will inevitably find this URL. And since you most certainly don’t want ZAP to scan https://maxcdn.bootstrapcdn.com for vulnerabilities, you exclude it of the context.
So you include or exclude URLs from the context based on what you want it to scan.
Before following this guide, you should probably play the OWASP ZAP client on your computer to understand the basic concepts.
Brace yourself it’s going to be a long journey to setup the OWASP ZAP Jenkins plugin!
Download and install OWASP ZAP on your Jenkins instance
Go to https://github.com/zaproxy/zaproxy/wiki/Downloads and download the version of the client for your platform.
Unzip it and move the folder to /usr/local/bin for example.
Then set the environment variable ZAPROXY_HOME to the path of your ZAP proxy installation folder:
vim /etc/environment
and paste the following content:
ZAPROXY\_HOME=/usr/local/bin/ZAP\_2.x.x/
Install the OWASP ZAP plugin
To install the official OWASP ZAP plugin on your Jenkins instance go toManage Jenkins -> Manage Plugins -> Available (it is a tab) -> look for OWASP ZAP.

Install it.
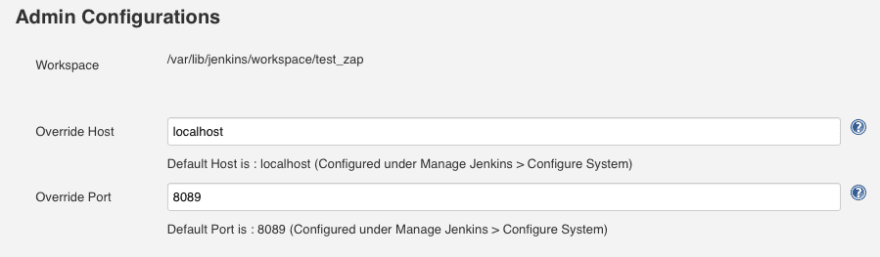
Configure the plugin by going to Manage Jenkins -> Configure System and filling out the following fields.

Create a new Jenkins job
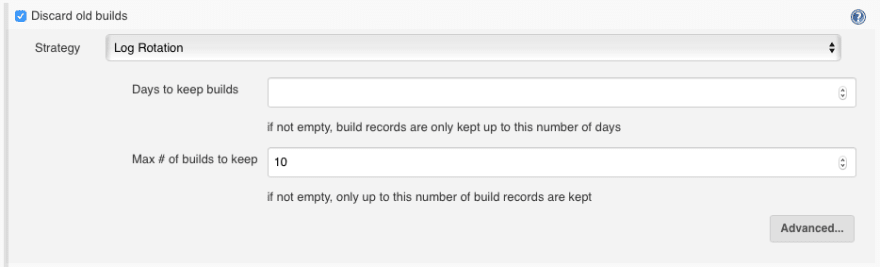
Create a new freestyle project and fill in the following fields:
- Discard old builds
- Build Trigger (optional)

- Add the Execute ZAP build step
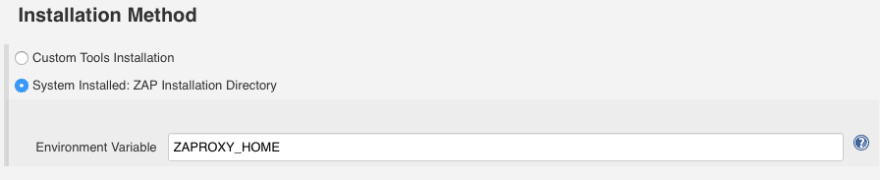
Inside the Execute ZAP build step:

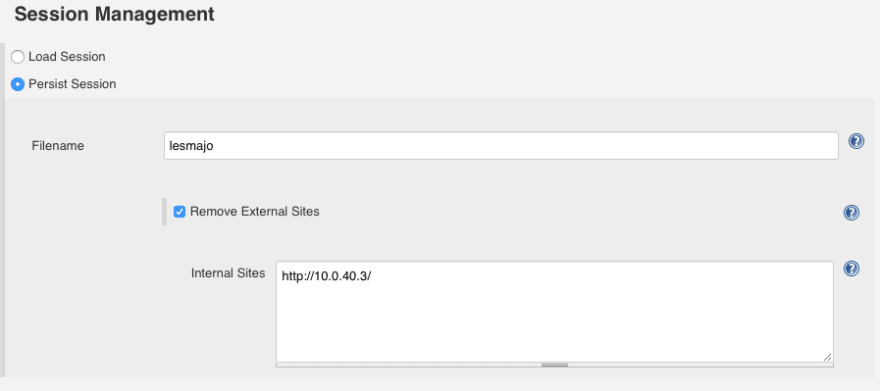
Finally go back to the Session Management section which requires more explanation than the other ones:
If you tick the checkbox Persist Session ZAP will create a new session for you. It is the easiest option to setup but also the least thorough.
You see if your web application has a login page, ZAP won’t know the credentials to use in order to gain access to the private zone of your web app. So ZAP will only attack the public part of your website and miss a good portion of it.
To help ZAP know the credentials, what you would have to do is use the GUI client on your computer to generate a ZAP session in which you assign a valid session cookie for example. You would then export and upload the session you created to your new Jenkins Job folder and then tick the Load Session checkbox and select your session in the select list.
- Add a Publish HTML reports post-build step
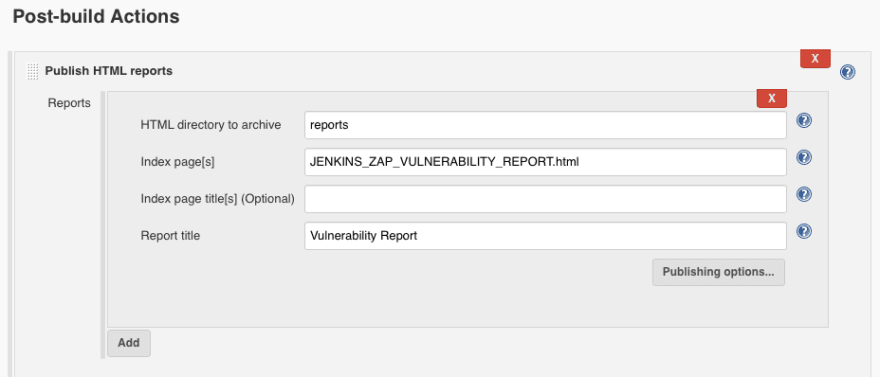
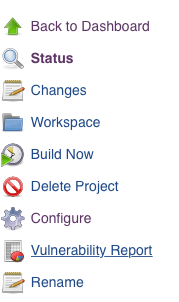
And that’s it! Either manually build the job or wait for your cron schedule to execute it and you should see the HTML report of ZAP tests in your Jenkins job dashboard.
Let me know if I missed anything!

Oldest comments (9)
Hey Grégoire,
Take a look at Probely (probely.com) and gives us your feedback.
Thanks,
Filipe
Hello Filipe,
Seems nice! But in my case I can have the same functionalities for free with Jenkins.
Hi Grégoire, not really sure if I understood your comment. Probely has a plugin that can be used within Jenkins to perform dynamic application security testing.
And Gregoire said he can do the same thing, but with owasp zap instead, since it's free. so why pay for probely?
@selaru , not really trying to argue here, just wanted to understand his comment.
If you ignore the cost for a human resource to operate it, then yes, Zap is free. Zap is better suitable for a pentester, to help him/her doing the pentest. Probely is more suitable for point&shoot and wait for the results. Two different scenarios.
Thanks a lot for this interesting article!
I have tried to configure Zap in jenkins by following the same steps, but i have a error that i could not fix!
It is :
[ZAP Jenkins Plugin] PLUGIN VALIDATION (PLG), VARIABLE VALIDATION AND ENVIRONMENT INJECTOR EXPANSION (EXP)
ERROR: java.lang.IllegalArgumentException: ZAP INSTALLATION DIRECTORY IS MISSING, PROVIDED [ null ]
Are you sure the installation directory variable is set on your system?
Could you do echo $NAME_OF_YOUR_INSTALLATION_DIR_VAR and see if it is correctly set?
Hi, thank you for your answer.
Yes, i added the variable (ZAP Installation Directory) in the PATH (system variable) and still have the same probleme.
However, i fixed it by setting the environment variable in the jenkins configuration (name & value under manage jenkins-> Global setting) and it works finally!
Thanks for this article. It really helps me