For years Heroku has been the choice platform for developers looking to host their web applications. With just a new pushed commit, the Heroku Platform handles everything from deployment and scaling to integrating with ecosystem partners.
In larger teams and those with complex projects, it’s not enough to just deploy on each new commit. A new, more methodical workflow is needed to ensure developers have the latest version of a codebase and only the latest stable version is available to users. Fortunately, the rise of Continuous Integration / Continuous Delivery (CI/CD) answers this need.
Continuous Integration is part of the Heroku Flow and is tightly linked with Heroku Pipelines and Review Apps. In this post, we’ll introduce you to these concepts and tools in the context of working in a team.
Heroku Teams is our environment for team collaboration. For this post, what’s important is that developers can access apps owned by their team, and there are three permission levels - Admin, Member and Collaborator. Your Members and Collaborators have the same permissions - but Collaborators are meant to be people who are only working in your team temporarily. Members are usually developers and Admins are often technical team leads.
Gitting Good
It wouldn’t be right to cover the Heroku Flow without first taking a whirlwind tour of the way many teams use Git and GitHub to manage their codebases.
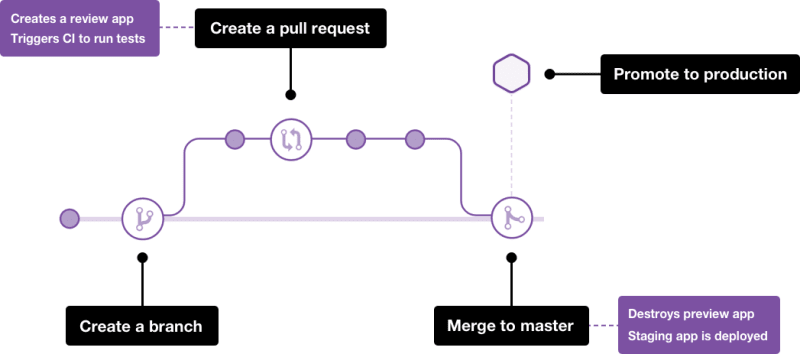
While using Git, we create snapshots (commits) of their code. At any point we can take t, e latest commit and create a parallel version of it (a branch) to build new features without impacting the stable (master) branch.
Once we’re happy with their code and want to incorporate it back into master, they create a ‘pull request’ where code is reviewed and then ‘merged’. The master branch now has the changes incorporated.
During a pull request there are often several steps - some are automated and see whether pre-defined test conditions pass - and others may involve manual quality assurance.
Unlike some other providers, Heroku Pipelines make this a breeze to set up and use with little-to-no setup time to get started and sensible user permissions out of the box.
Setting up a Pipeline
Each deployed application on Heroku is called an app, and a Pipeline is a collection of apps relating to a single codebase. Apps will exist in one of multiple stages in a Continuous Delivery workflow - review, staging and production (live).
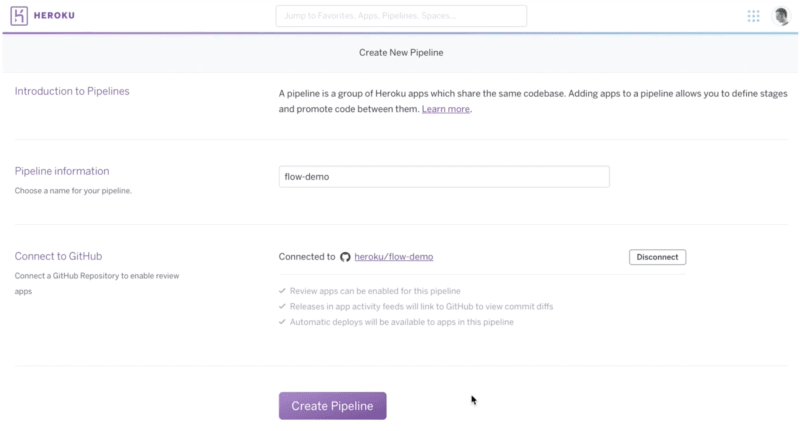
You can set up a Pipeline by clicking ‘Create New Pipeline’ (who’d have thought?) and connecting it to a GitHub repository.
At its most basic you’ve just set up a working Pipeline. But there are several more features just a few clicks away that turn your new Heroku Pipeline into an incredibly powerful review tool:
- From the menu in the staging column turn on automatic deploys when new commits are available in the master branch.
- In the review apps column enable review apps.
- From the tests tab in your Pipeline you should enable Heroku CI if you have automated tests for your project.
With everything set up, let’s run through how you can now use your souped-up Pipeline to its fullest.
Let’s get our work reviewed
Let’s assume you’ve created a branch and are working on a new feature of your application. You’re ready to get feedback and hopefully push your code to production. The first step will always be to create a pull request on GitHub.
Previously, you or a team member might have simply merged the work into the master branch blind, or had to download that PR’s worth of work and get it running in order to review it.
Now, with the Heroku Flow, and the enabled settings in our Pipeline, two things will happen:
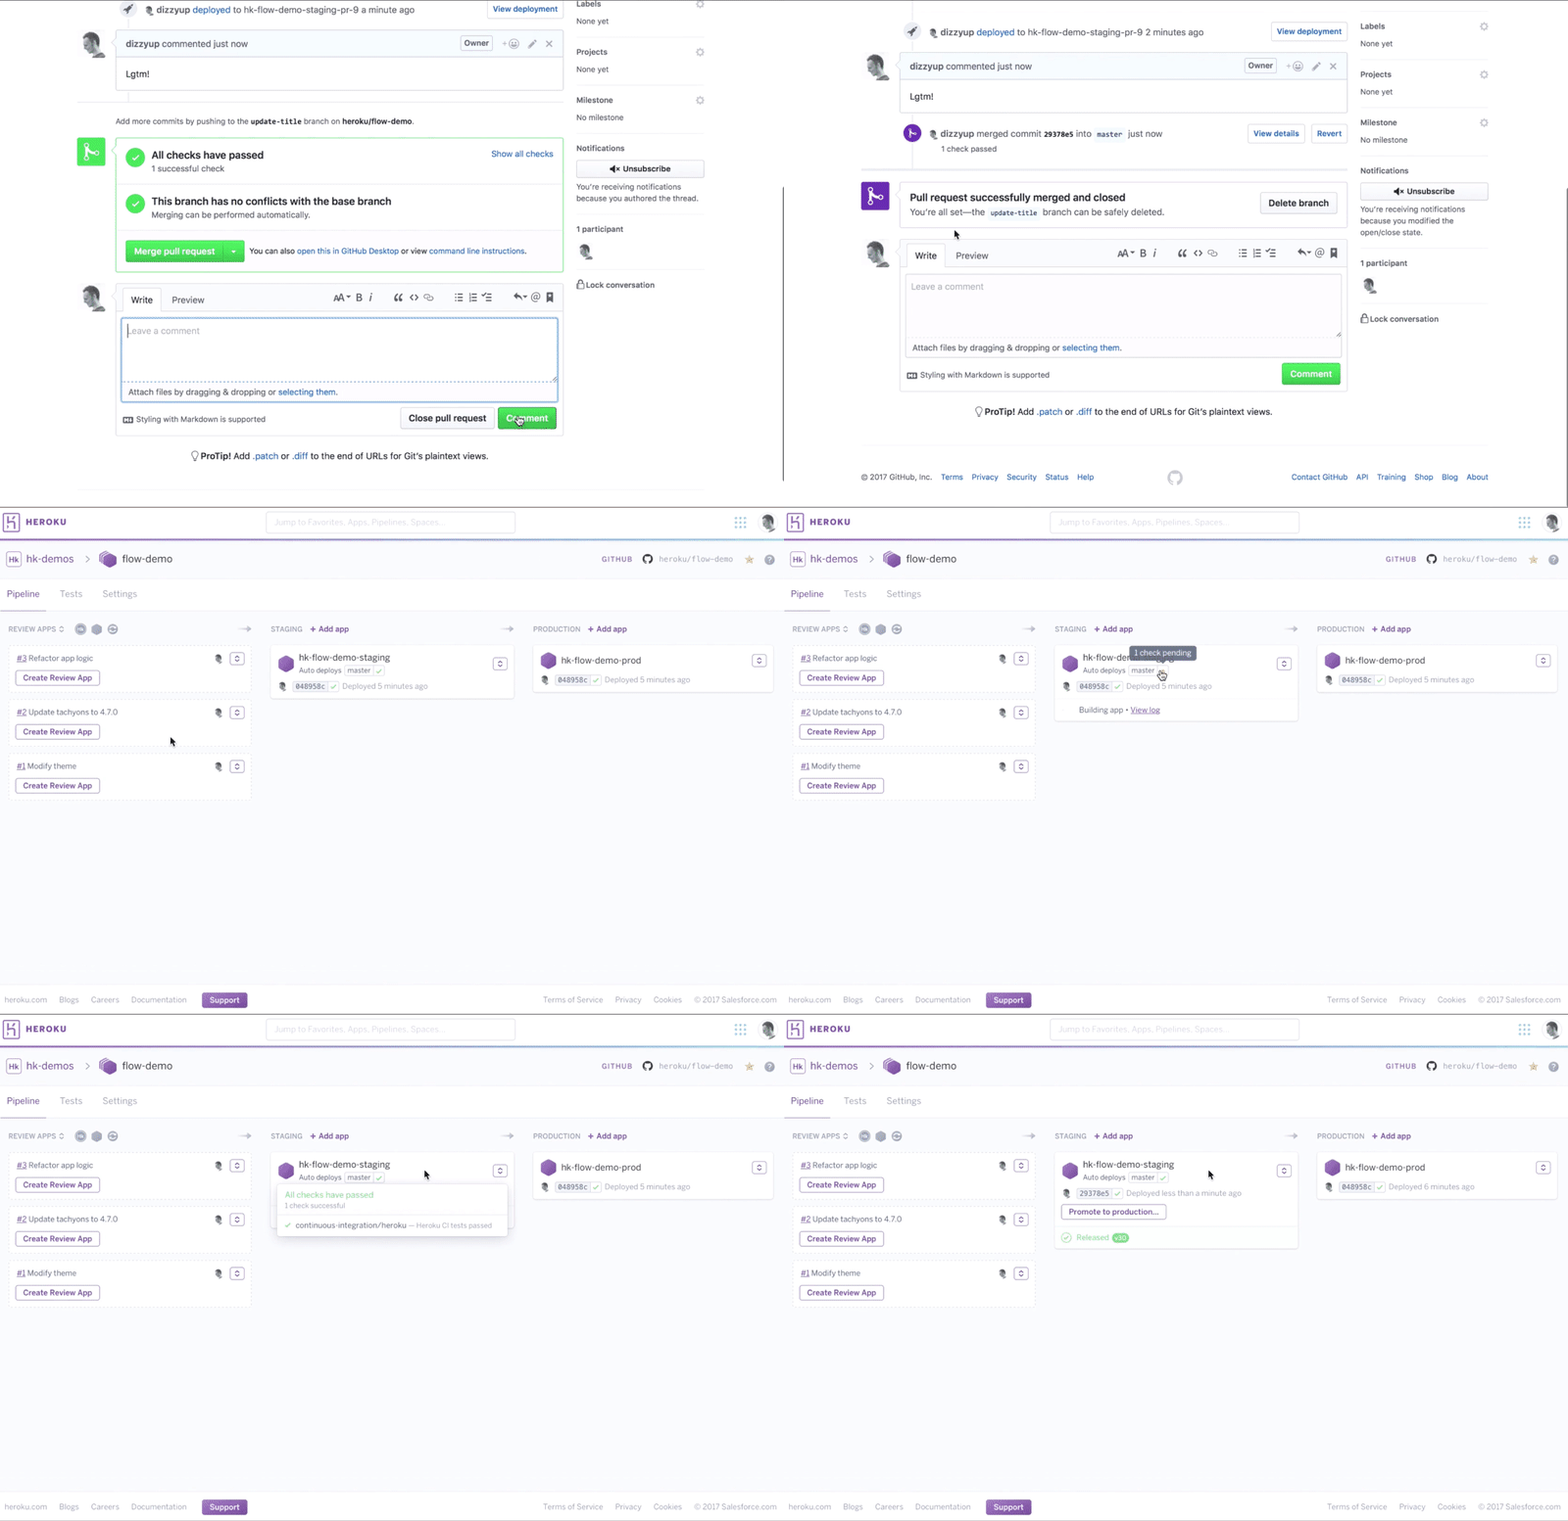
- Heroku will automatically detect the project’s language and spin up a new, temporary, review app. The review app has a URL you can share with your team and will be re-deployed every time there is a new commit in the PR, so you can be confident it’s the version that will be merged.
- Heroku CI will then run automated tests and provide a summary of whether they have passed.
As this Pipeline is part of Heroku Teams you can request a review from another member who will have access to both the test requests and the review app. All from five minutes of setup. Magic.
When the PR is merged the review app is automatically destroyed as it’s no longer needed. As the repository now has a new commit in master as a result of the merge, the Heroku app is also moved to the staging phase.
Isn’t it live yet?
You might be itching to get your app live to production, but the app is moved to staging and not to production. While this may immediately feel like an extra step if you’ve not used a staging environment before, there are some benefits to having one.
Firstly, this is a great chance for some final quality assurance - seeing how your application works and spotting any unexpected behavior before your users do.
Unlike the step between review and staging, the step between staging and production also allows for what we call ‘release phase tasks’. These are scripts that can perform operations as your site is deployed and often includes things like minifying assets, uploading content to content delivery networks or invalidating caches.
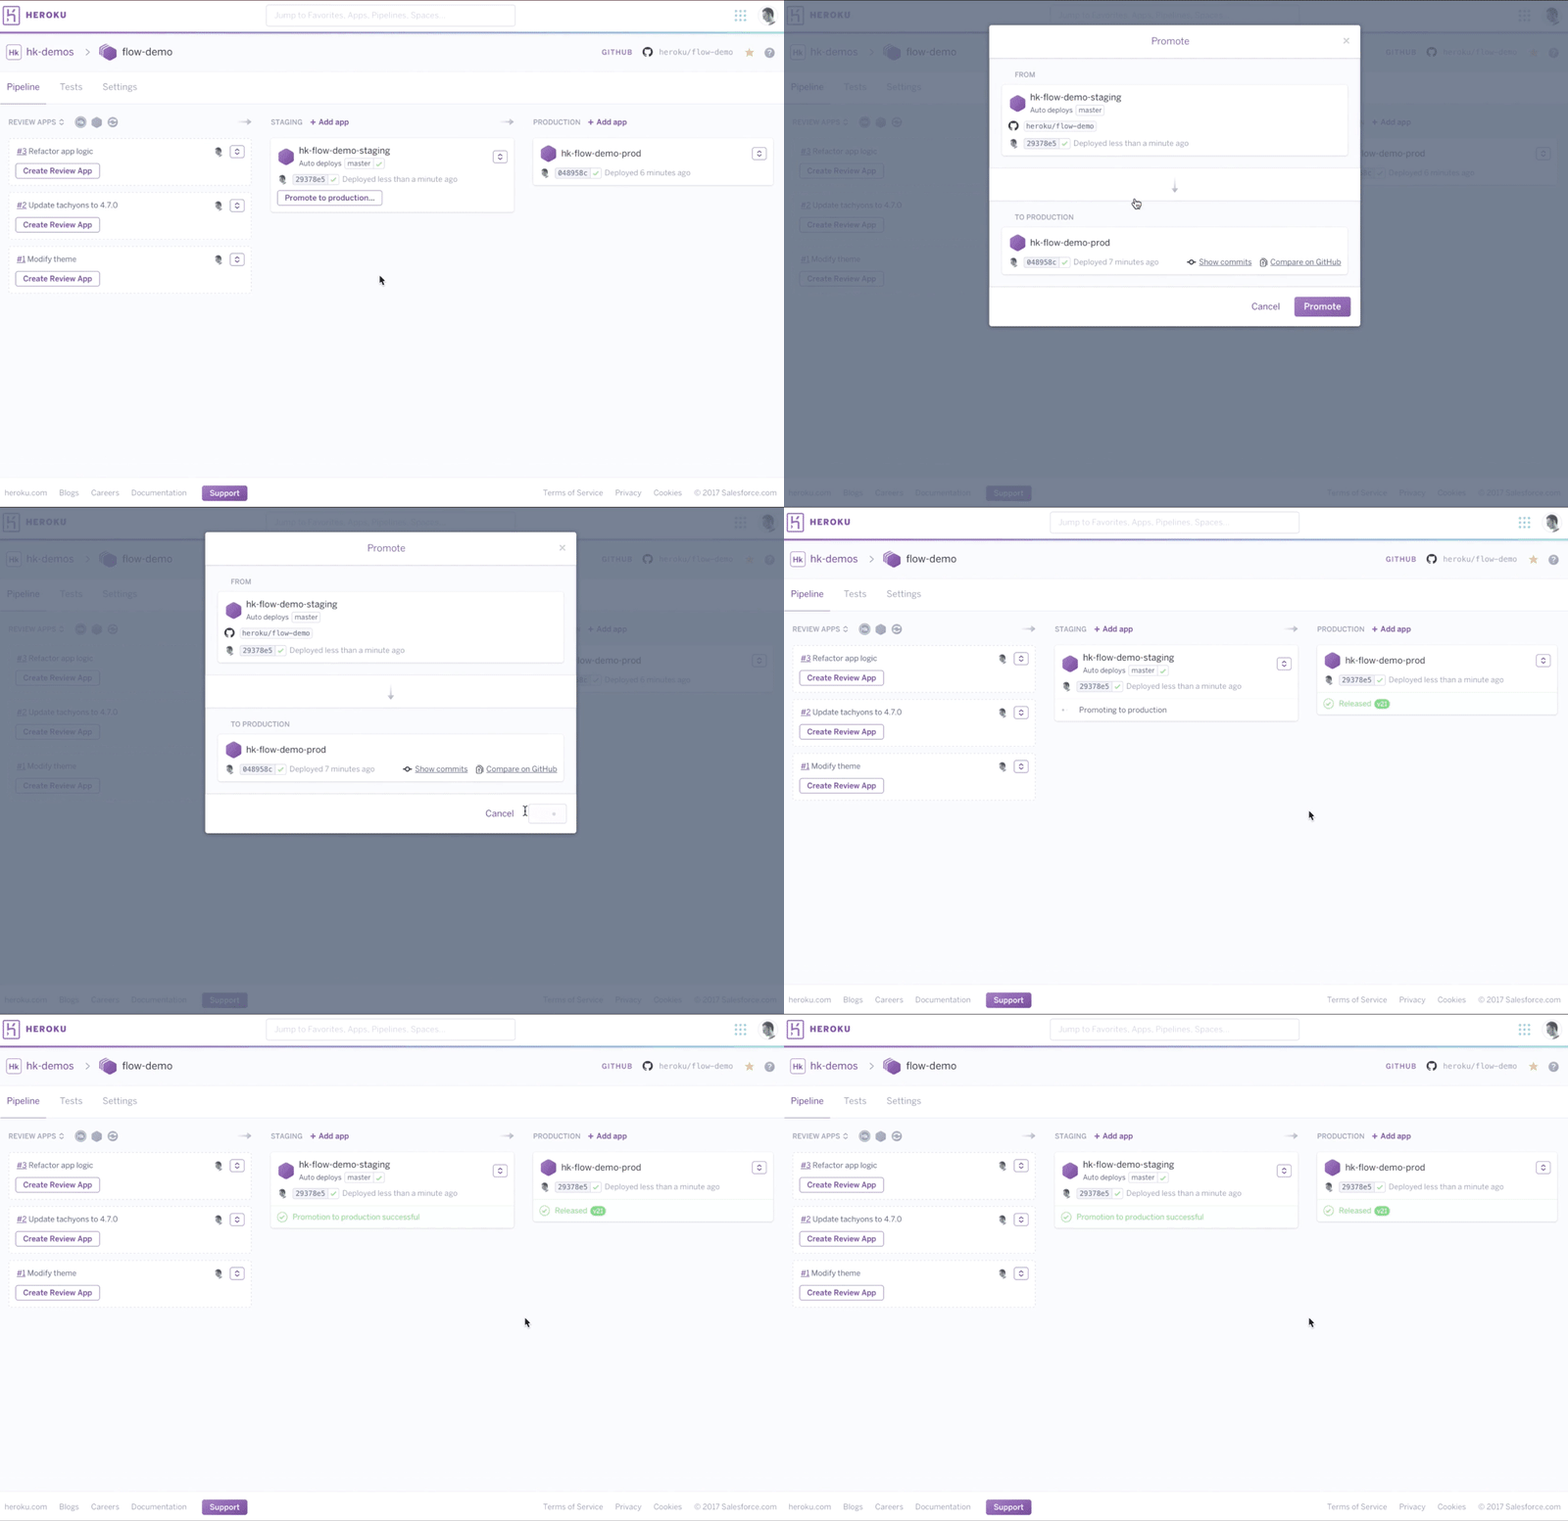
When you’re ready, you can ‘Promote’ the staging application to production, which will then be made available to your users with no downtime. Your production environment will then mirror your staging environment until you merge new PRs into master.
What just happened?
Without the need to configure roles or read lengthy documentation we’ve taken an existing application and created a CI/CD workflow. When new PRs are created we automatically have a testing URL for reviewers and a summary of our automated tests.
By default the static permissions in Heroku Teams only Admins can promote apps to production, but you might consider fine-tuning the permissions if you have Heroku Enterprise.
We hope that you feel ready to set up your first Heroku Pipeline. Once you’ve set up a couple, you might consider learning about how to get the most from Heroku CI.


Top comments (0)