
Introduction
Getting started with Selenium WebDriver for automated testing can be a powerful addition to your development toolkit. In this guide, we'll walk through the process of setting up Selenium WebDriver with Java, managing dependencies with Maven, integrating ChromeDriver using WebDriverManager, and configuring it in IntelliJ.
Prerequisites
Before we begin, ensure you have the following installed on your machine:
Step 1: Create a Java Project in IntelliJ
Open IntelliJ IDEA and select "Create New Project."

Enter project information:
Enter the group ID and artifact ID of your project. Then select a location for your project.
Select project type:
Choose one of our build tools, such as Maven or Gradle. Maven is commonly used. For now, let's choose Maven.

Select JDK: Click Download, then select Oracle open JDK and click Download.

We do not select Add sample code and Create git repository here.
Click "Create"
Step 2: Configure Maven Dependencies
- Open the pom.xml file in your project.

- Add the following after < properties>< /properties> : dependencies for Selenium WebDriver, JUnit, and WebDriverManager: Please modify the version number to match the latest version.
<dependencies>
    <dependency>
        <groupId>org.seleniumhq.selenium</groupId>
        <artifactId>selenium-java</artifactId>
        <version>4.17.0</version>
    </dependency>
    <dependency>
        <groupId>io.github.bonigarcia</groupId>
        <artifactId>webdrivermanager</artifactId>
        <version>5.6.3</version>
    </dependency>
    <dependency>
        <groupId>org.junit.jupiter</groupId>
        <artifactId>junit-jupiter-api</artifactId>
        <version>5.10.1</version>
        <scope>test</scope>
    </dependency>
    <dependency>
        <groupId>org.junit.jupiter</groupId>
        <artifactId>junit-jupiter-engine</artifactId>
        <version>5.10.1</version>
        <scope>test</scope>
    </dependency>
</dependencies>
- IntelliJ should automatically resolve and download the dependencies.
About WebDriverManager (io.github.bonigarcia)
WebDriverManager automates the download and setup of ChromeDriver, eliminating the need for manual handling. This streamlines the process, making it convenient and hassle-free for Selenium WebDriver test setups.
To learn more about WebDriverManager, visit the official GitHub repository.
About JUnit
JUnit is a widely used testing framework for Java that simplifies the process of writing and running unit tests. It provides annotations and assertions to define test cases, making it an essential tool for ensuring the reliability and correctness of Java applications.
To explore the features and capabilities of JUnit, refer to the official JUnit user guide.
- Add additional dependencies for logging
<dependencies>
    <!-- Other dependencies -->
    <dependency>
        <groupId>ch.qos.logback</groupId>
        <artifactId>logback-classic</artifactId>
        <version>1.4.14</version>
        <scope>test</scope>
    </dependency>
</dependencies>
About ch.qos.logback:logback-classic
logback-classic enhances your test logs, providing valuable information about the test execution flow, errors, and other relevant details. When using WebDriverManager, having detailed logs can be beneficial for troubleshooting any issues related to web driver setup and configuration.
Without the logging feature, you may encounter warnings in the console window when running tests.
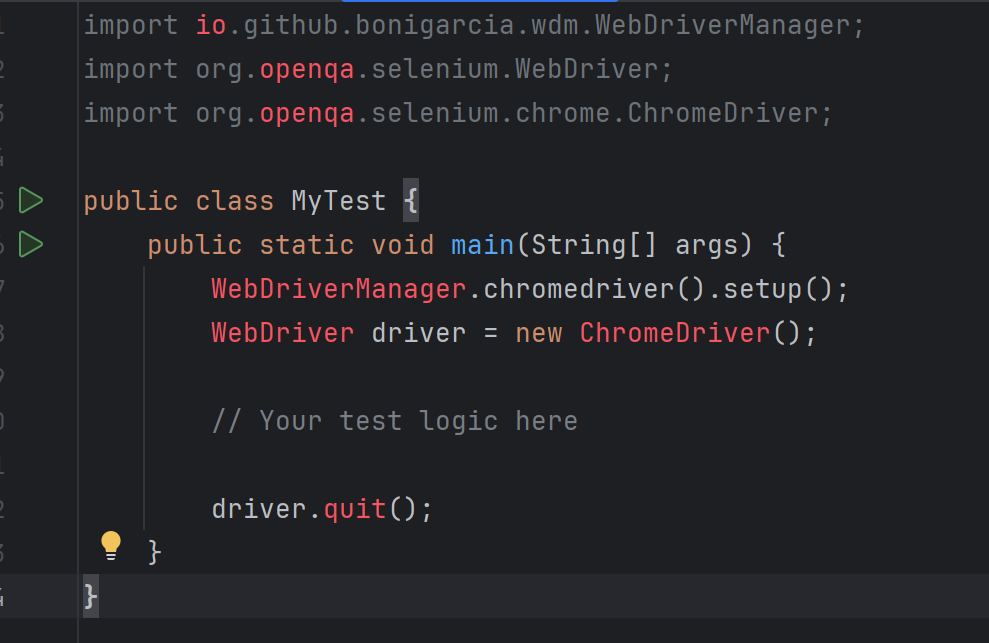
Step 3: Create a java file to write your test files.
- Create a Java class called 'MyTest' in the src/test/java folder.


- Set Up Selenium WebDriver with WebDriverManager In your test class, use WebDriverManager: ```java
import io.github.bonigarcia.wdm.WebDriverManager;
import org.openqa.selenium.WebDriver;
import org.openqa.selenium.chrome.ChromeDriver;
public class MyTest {
public static void main(String[] args) {
WebDriverManager.chromedriver().setup();
WebDriver driver = new ChromeDriver();
    // Your test logic here

    driver.quit();
}
}
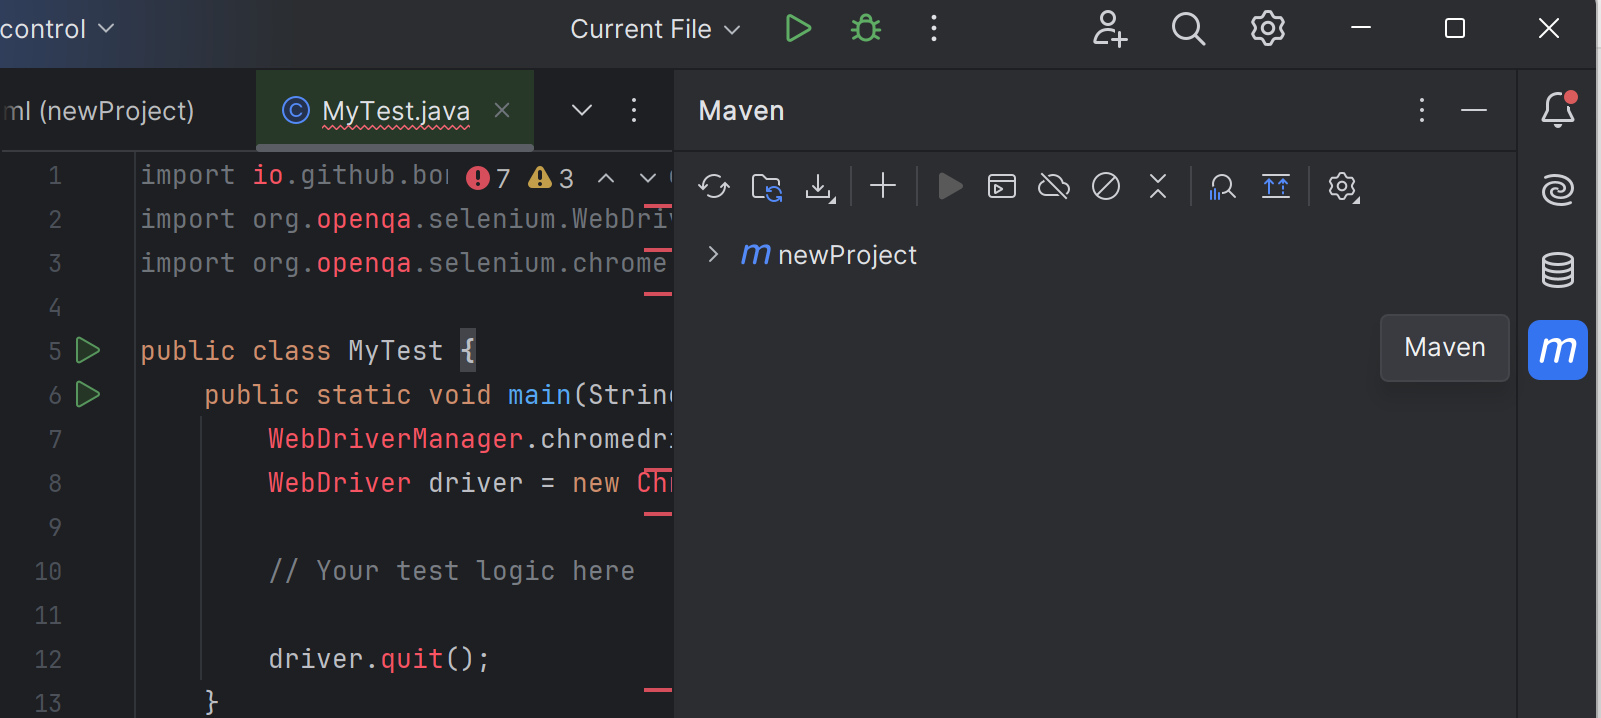
### Step 4: Import Dependencies and Reload Project
You can see that the information you entered is in red. Something wasn't working properly. Now let's download the dependencies and add them to our project.
- **Open the Maven tab in IntelliJ IDEA:**
Find the Maven tab in the right sidebar of IntelliJ IDEA, or click the "Maven" tab at the bottom.
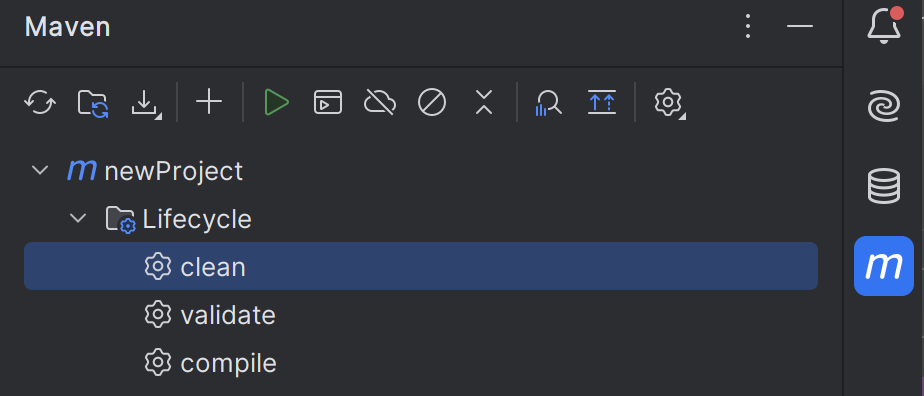
- **Dependency updates:**
In the "Lifecycle" section, run clean, then run install to get the dependencies.
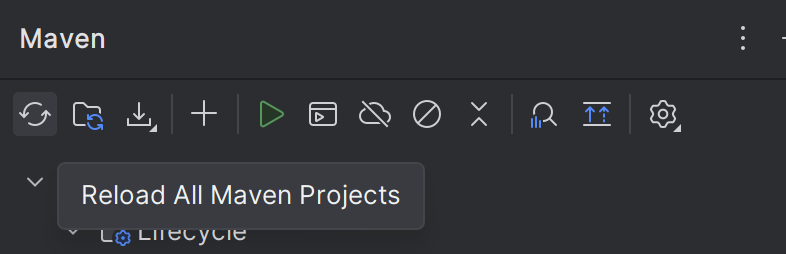
- **Reload project: **
In the Maven tab, click the "Reload Project" icon (↻) to reload the project.
### Step 5: Running tests through Chrome Driver
Chrome must be installed before running the test.
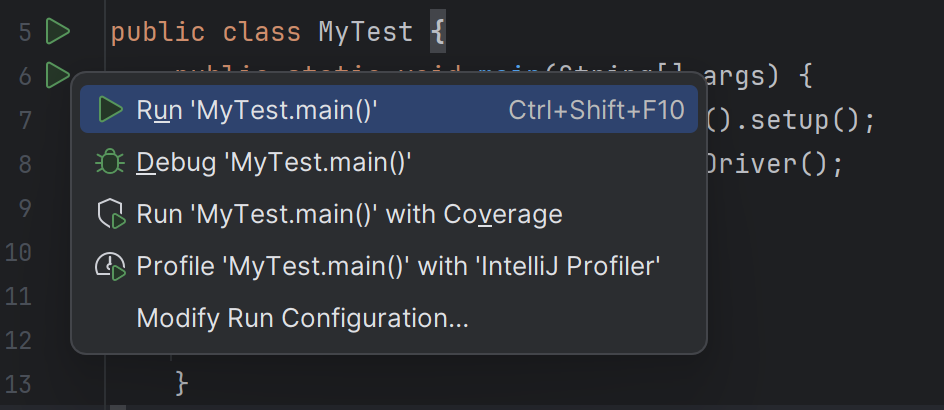
Right-click or click the arrow on the left bar to execute 'Run.MyTest.main()'.
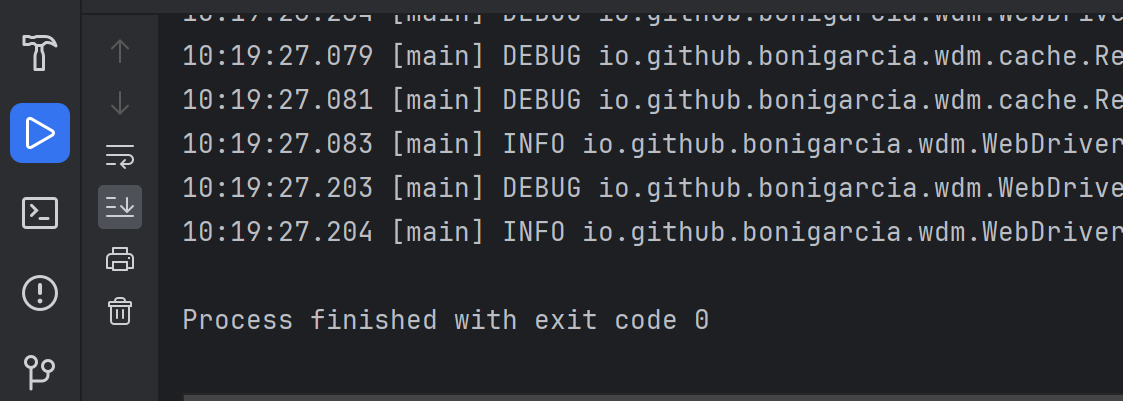
If the Chrome page opens and closes, and you see the following in the console, it's running fine.
Process finished with exit code 0
### Step 6 : Write Your First Test
Write a simple test using Selenium WebDriver methods. For example:
```java
import io.github.bonigarcia.wdm.WebDriverManager;
import org.openqa.selenium.By;
import org.openqa.selenium.WebDriver;
import org.openqa.selenium.WebElement;
import org.openqa.selenium.chrome.ChromeDriver;
import org.junit.jupiter.api.Test;
import java.time.Duration;
public class MyTest {
@Test
public void testGoogleSearch() {
WebDriverManager.chromedriver().setup();
WebDriver driver = new ChromeDriver();
driver.get("https://www.selenium.dev/selenium/web/web-form.html");
driver.getTitle();
driver.manage().timeouts().implicitlyWait(Duration.ofMillis(500));
WebElement textBox = driver.findElement(By.name("my-text"));
WebElement submitButton = driver.findElement(By.cssSelector("button"));
textBox.sendKeys("Selenium");
submitButton.click();
WebElement message = driver.findElement(By.id("message"));
message.getText();
// driver.quit();
}
}
If you see the following screen and a message appears, it is successful.

Conclusion
You've successfully set up Selenium WebDriver with Java, Maven, and ChromeDriver using WebDriverManager in IntelliJ. This approach simplifies the management of WebDriver binaries, ensuring compatibility with your test environment.
Feel free to explore more advanced features of Selenium and customize your testing framework based on your project requirements.
Happy testing!
This modification integrates WebDriverManager for automatic management of the ChromeDriver version, making your test setup more convenient and maintainable.

Top comments (0)