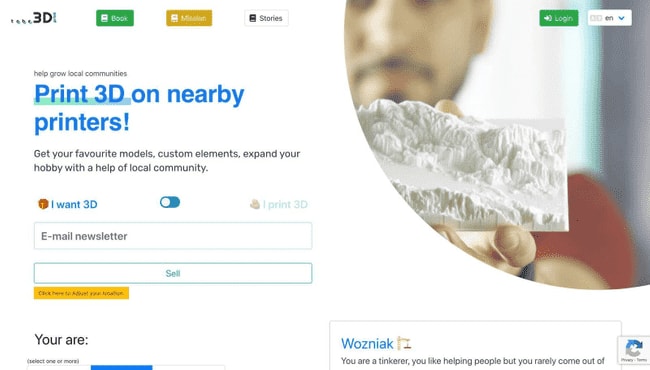
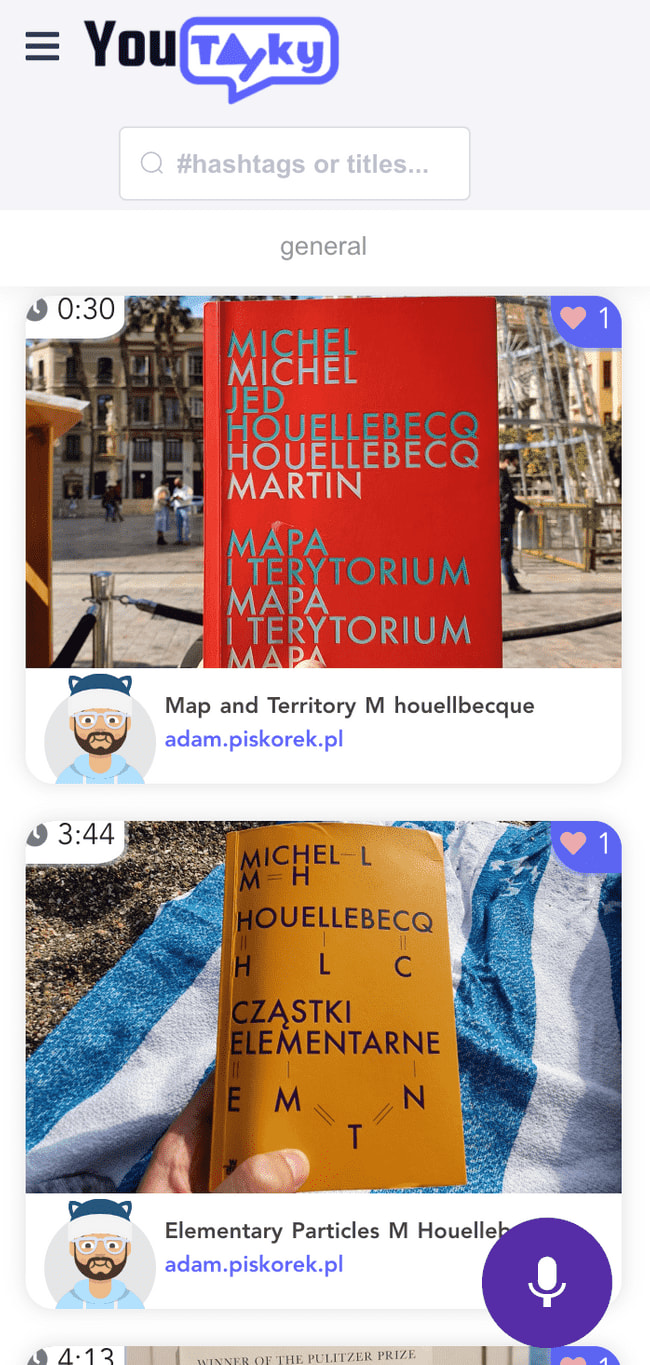
Fastforwarding many days ahead:
- I have build 3D printing project with VueJS:
- I have build a music player with social network using Nuxt (VueJS SSR):
I really enjoyed the experience. This is how to begun:
My VueJS adventure diary
Many people talk about it. It’s getting popular. It’s VERY popular in start up community. My question is: why don’t I know how to use it? I decided to change it and learn it.
Day 1
Plan : I got the VueJS in Action book, looks a bit old but I really like those ‘In Action’ editions. I had one for Flutter and one for ReactJS. That’s why I decided to start with this book.
I have downloaded a Creative Tim FREE Template, I think that the best way to learn is to start tinkering as soon as possible. I installed the template and had a look to adjust my mind to new syntax, organization of code within files and feneral structure.
Result : I went through 3 chapters on the book. It starts with explanations of MVC, Reactive paradigms and other things that are well known for someone with previous knowledge of other frameworks. THat’s why I moved so fast to actual code.
What I have noticed immediately are similarities to Angular. For example filters are nothing else but Pipes well known in Angular or Django templates.
v-model
The vmodel directive creates a two way data binding between form or text area inputs and the template. This assures data in our application model will always be in sync with our UI.
v-bind:class="{ active: isActive }"
// Can be written just with
// :class="{ active: isActive }"
Binding connects the DOM element’s properties with data present in the script part.
<button v-on:click="counter += 1">Add 1</button>
//Can be written just with
<button @:click="counter += 1">Add 1</button>
Simple event handling.
v-show
v-if
v-else
Both techniques—vshow and vif/velse—have advantages and disadvantages, for a user and for us as developers. As we know, the vshow directive hides or shows an element using CSS, while the vif/velse directive removes the content from the DOM. With that said, understanding when to use one or the other depends mostly on what we’re trying to achieve, so perhaps the best way to compare them is to think about a few use cases for each.
Day 2
Plan : I am planning to read next chapter. Book is designed to learn VueJS in a month but thanks to knowledge of other frameworks I am more familiar with the concepts and moving swiftly. I will try to make Traversy VueJS crash course. It’s good to apply knowledge as soon as possible. I also hope that I will learn a bit more about the <script><script/> structure since I am a bit confused by filters, models, data. Not sure if it’s syntax or just the Author’s way of writing things. That’s why it’s good to learn from multiple sources.
Result :
Trying to document my progress by explaining in real time what I’m reading about. The chapter 4 is about Forms and binding input from them through vmodel directive. Again - directives in Angular and similar syntax. The vmodel directive creates a twoway data binding between form or text area inputs and the template. This assures data in our application model will always be in sync with our UI. React and Angular use one-way data binding. What does it mean? Basically means that the data is not updated in the View or Model (depends if we change it in the model or view).
Difference between v-model and v-bind ?
v-model is used mostly when working with forms and inputs.
v-bind is used to bind to HTML attributes.
Again, similarity to Angular.
I’ve watched Brad’s tutorial and learned about emitting events. Probably there is a less mesys way of communicating between components but for the sake of the simplicity and the tutorial he didn’t use it. Overall, good sum up of what I’ve read so far in the book.
Day 3
Plan : Today I will read the Chapter 5 and I will start playing around with the Creative Tim VueJS Template. I am thinking about some project to Implement. The best way to learn is to do and the best way to do thing is to do interesting things. I think that some geolocation for 3D Printers would be a fun idea. I will start with that when I’m firm about my knowledge, maybe after 8 chapters?
Result : When playing with the template I needed to check directly some stuff so I went to Official Docs which are Amazing by the way. I learned some new directives like:
v-html
That is a security measurement prventing XSS attacks.
JS Expressions work perfectly inside the mustaches:
{{ message.split('').reverse().join('') }}

<div v-bind:id="'list-' + id"></div>
Very interesting : Directives like v-bind or event handlers like v-on: can take dynamic arguments. It means that every time that someName changes here:
<a v-bind:[__someName__]="url"> ... </a>
// or here
<a v-on:[__someName__]="doSomething"> ... </a>
The binder or event will change. It will be e.g. on:click or on:focus depends on someName of course.
Day 3 - 7
I needed to make something real so I’ve found an open-source product made by NGO called Hikaya-io. In order to do that I used a tech & startup jobs finder called Angel.co. They are were not paying but happened to have VueJS & Django stack which is perfect for me. Apparently they have just started on a project that is about connecting backend with frontend so their first step was to make a base of reusable components with Storybook. I’ve heard about it before but not much, so it looked like a great opportunity. I made some components, pull-requests and learned a lot as a VueJS beginner.
Day 8 - 9
I am still following with Hikaya and contributing open-source but in order to make my knowledge double-useful I’ve started a FrontEnd board on my Podcaster project ( you can read more on why you should join it here ). Starting your own project with Vue that is useful, connected with your own backend API and has big potential is a huge boost for learning.
The goal is to make the Podcaster functionalities for content management available on FrontEnd for users via this beautiful Dashboard template adjusted to my needs. In order to make all front-end happen I need to implement a few tasks:
- Create Storybook with reusable components.
- Connect to Django so it will host Vue builds.
- Connect this Dashboard as a core.
- Implement landing page
- Implement sub-pages with content for users.
- Add new, custom components to Storybook.
- Create a simple Bootstrao template for podcasts ( that’s gonna be FREE of course).
This is a loot of work, but a few days into Vue and I already have a vali plan. This will not require from me sitting in front of dull books or courses - instead - I will be using them in order to solve infinite amount of problems that arrive during those tasks. Let’s go!
Day 10
I started on implementing first bootstrap components and making them reusable. I think I need to plan some design work in order to prepare a list of components I need to make the simpliest template. I will spend some time on this but won’t count it here as learning Vue.
I’ve learned that Storybook can have it’s own, hardcoded data for the components so that we can test them always against the same input even if we make constant changes on production code.
Day 11
Finally! I have successfully made first Full-Stack integration. I did it on blog list page on Podcaster. It looks like that:
Apart of that I learned how to run Dashboard and main page simultaneously thanks to routing settings and scopes in components. Short sum up of what I’ve learned today by coding and rading the book. It’s day free from work so I was coding all day.
📖 I’ve learned:
- props Should not be modified within a component (one way data flow)
- File components are better for bigger apps ( I was using them since day 1, I find it easier to understand than the official VueJS doc examples with scripts.)
- Slots allow showing elements by passing them inbeteen the component tags. Without slots anything you put between tags dissappears.
That’s it 🥇 I’m going to have a rest.
Day 15 let´s say
I’ve spent some time for rethinking my current priorities that´s why the continuous flow of learning daily broke. I must have spent a few days on searching and trying out different Templates for my new project. I did spent quite a long time for that and came with a conclusion that I will not be buying any template. I need something custom so I decided to do it from scratch.
I´ve found a library that is called Buefy which combines VueJS and Bulma CSS framework. It is J U S T A M A Z I N G ✨. It´s important to notice that it does not have any 3rd party libraries like Bootstrap has Popper and JQuery.
I must say, previously I´ve used ElementUI, Bootstrap 3 and 4 but they are not comparable with this one. Maybe Material Design could be compared but I definately like more the the colorful beauty and gaming-like UX in comparsion to Material UI.
I will definately use this and will stick with only Buefy for my next project to make it more popular within the community.
Day 16
My next project requires async search inputs ( just like suggestions google gives you when you type ). Fortunately Buefy has just something like it.
This is just a scetch but done 100% with Buefy. Next step is to make reusable components (form, input, header, navbar etc). To make the Customer Support floating widget on the bottom I´ve used vuejs-beautiful-chat package.
Judging my poor CSS skills I´m quite proud of what I did. The thing is to make it responsive now… 🤦
Next step is to implement the async input / searching and validations for the form.
Did you make any mistakes when using VUEJS or you’ve seen one here? Tell me about your insights. Leave a comment with YOUR opinion.


Top comments (0)