
In this tutorial, we'll build a chat app that sends a copy of a chat transcript in an email using SendGrid. Imagine being able to automatically inform your sales team when one of their clients has chatted with your support team. This app sends a transcript of that chat directly to the salesperson's email address using Stream Chat and SendGrid.
This post will guide you through the Git Repository Here. Let's get started!
What is Stream Chat?
Build real-time chat in less time. Rapidly ship in-app messaging with our >highly reliable chat infrastructure. Drive in-app conversion, engagement, and >retention with the Stream Chat messaging platform API & SDKs.
Requirements:
- node.js
- React
- A (free) Stream Trial Account
- A (free) SendGrid Trial Account
- Some elementary understanding of React Hooks and Express will also be helpful.
Read this tutorial if you want to...
- Learn how to use React useEffect() to collect a chat transcript
- Send a chat transcript in an email using Stream and SendGrid
- Set up a frontend/backend Stream Chat app
These topics will be covered using Express JS and React, but the methodologies can be ported to most languages and frameworks.
What's not covered
This tutorial focuses on the collection and transmission of a chat transcript. The GitHub repo for this project includes a fully functional registration form and frontend for Stream Chat, but not every aspect will be covered in depth. For more info on the React registration form and initiating a Stream Chat Client, check out this post.
Account Configuration
Stream Setup
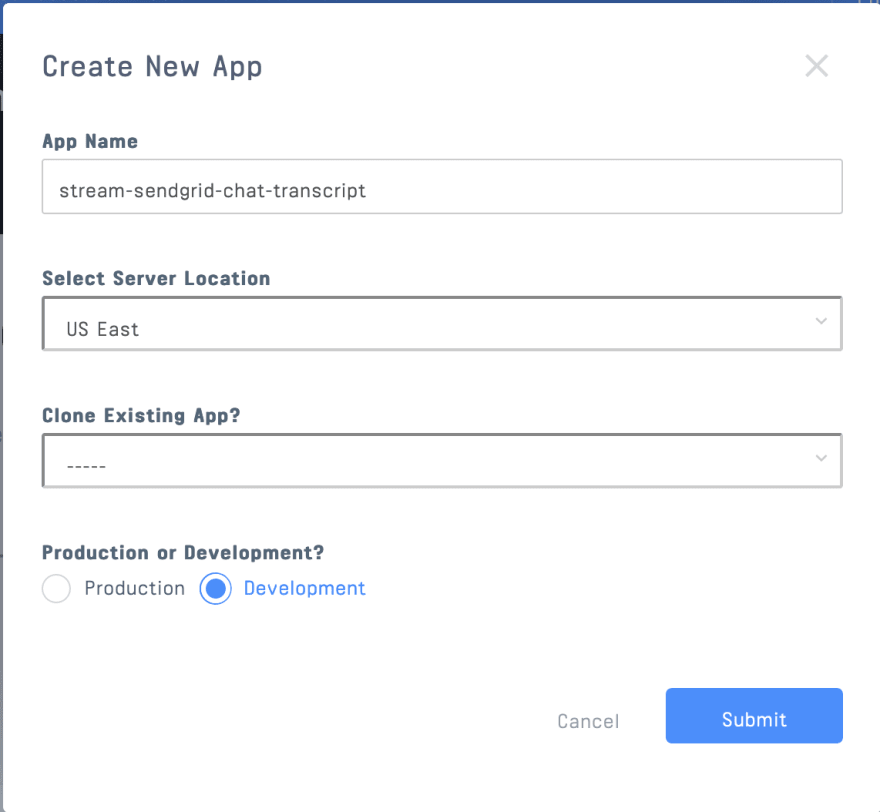
Once you've got your free Stream Trial account set up, you'll want to create a new app on your Stream dashboard. Be sure to choose the 'Development' mode.
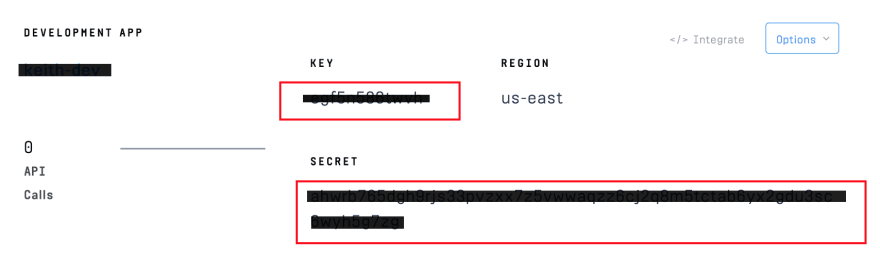
Copy the API key and Secret generated, we'll add them to a .env file in a moment.
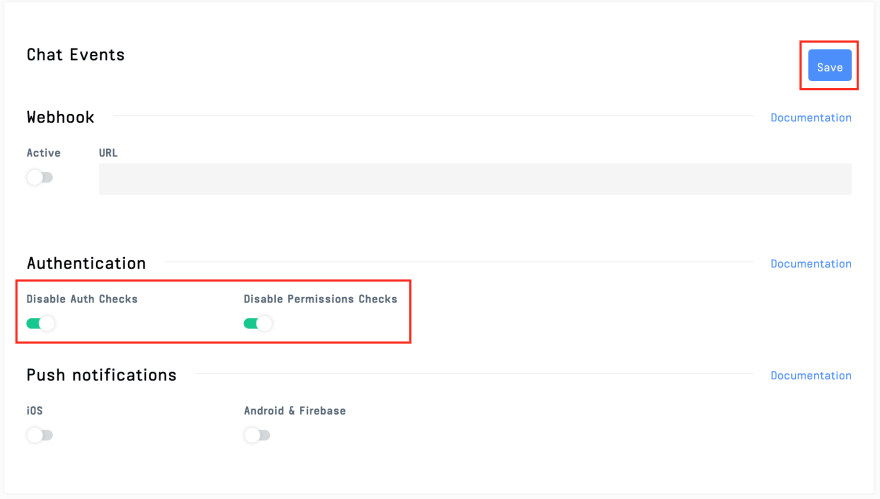
By default, Stream offers Auth Checks and Permissions Checks on its apps. These are good features for production apps, but we'll keep this app simple by disabling these. In your Stream dashboard, select your app. Click the 'CHAT' navbar dropdown and select 'Overview'
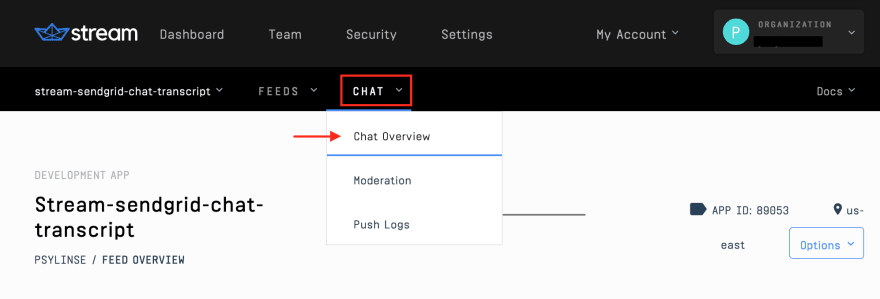
Scroll down and activate the 'Disable Auth Checks' and 'Disable Permissions Checks' toggles.
SendGrid Setup
From your SendGrid setup guide, you need to verify an email address or domain to send from. We'll just use a personal email address for this app, but be sure not to use a proper domain address in production. Enter the sender details then verify your account with the email sent to the address registered.

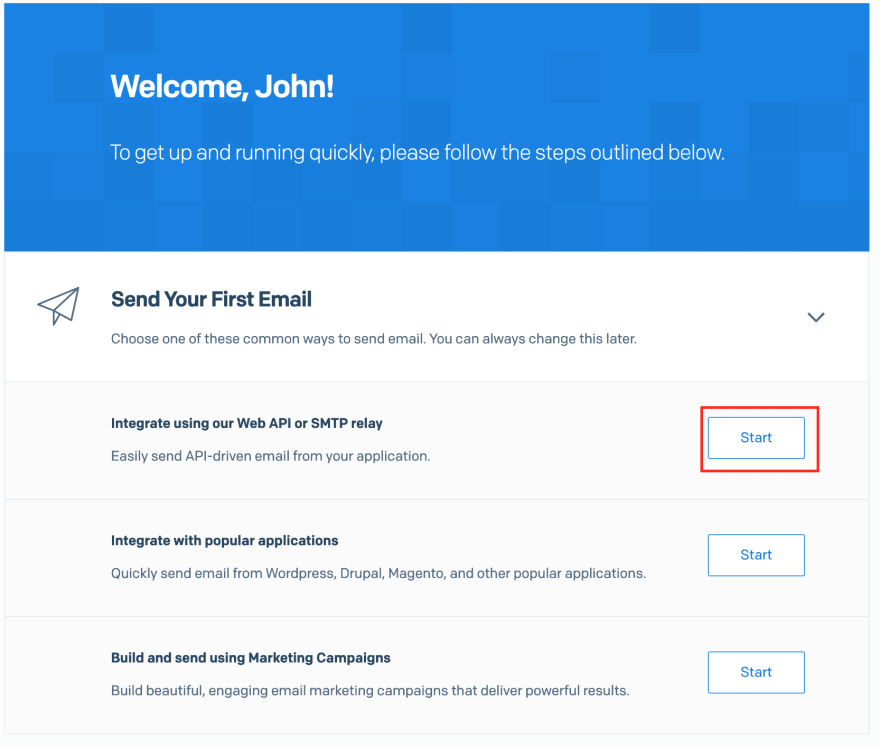
Back in the SendGrid setup guide, select 'Integrate Using Our Web API or SMTP relay,' then select 'Web API'.

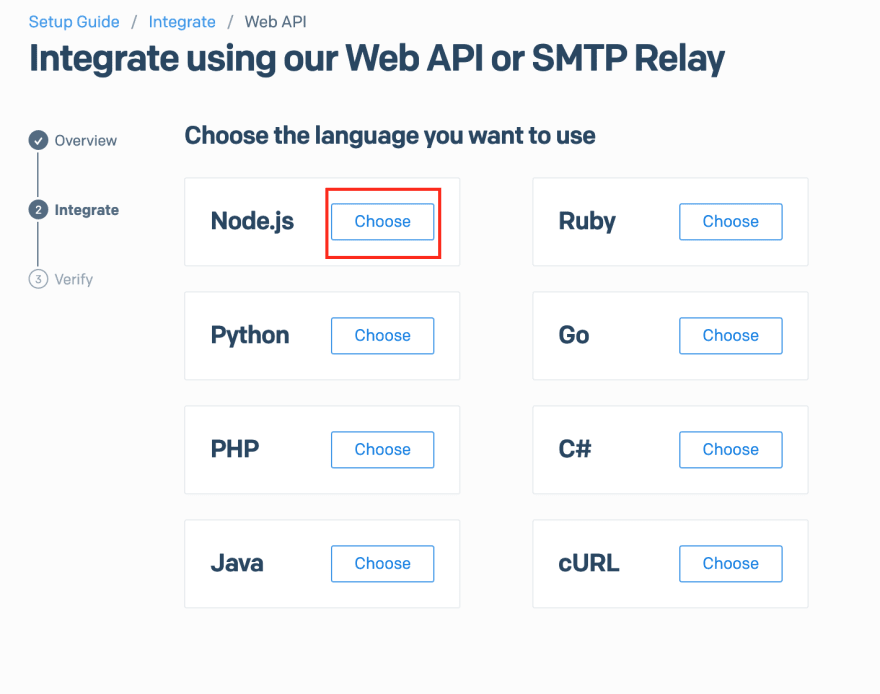
Choose node.js as the integration language.
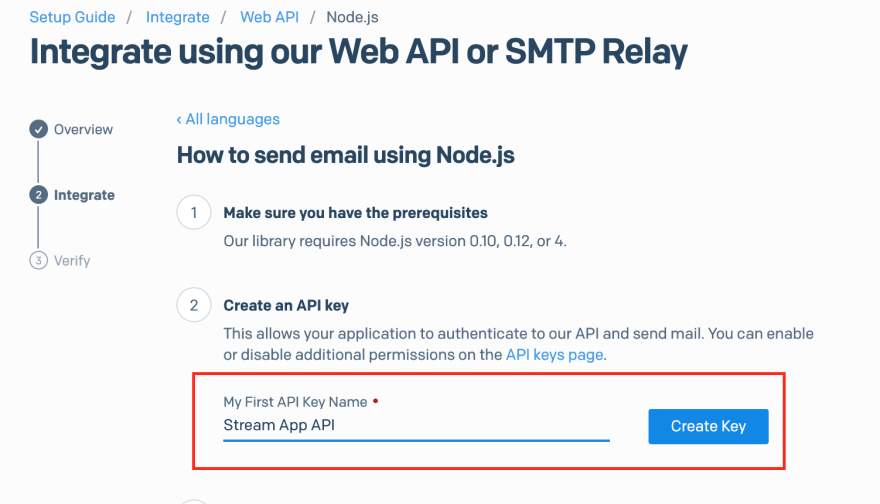
Create a name for your app, generate an API Key, and copy the key for the backend .env file.
App Configuration
.env Setup
If you're using the git repo, there is a file in the backend folder titled .env.example. Input your API keys and secret here, then rename the file to .env.
//backend/.env
NODE_ENV=development
PORT=8080

STREAM_API_KEY= your Stream API key here
STREAM_API_SECRET= your Stream API secret here
SENDGRID_API_KEY= your SendGrid API key here
SendGrid Configuration
Just a few steps are needed to integrate SendGrid in the backend.
-
Install the following package:
npm install --save @sendgrid/mail -
In the
index.jsfile, require the SendGrid package:
const sgMail = require('@sendgrid/mail'); -
In
//backend/routes.index.js, change thetoandfromemail addresses. Thefromaddress must be the email address you registered and verified as a sender with SendGrid:
<!-- https://gist.github.com/isaidspaghetti/774ccdb8bfaff4642c926e3dc4fe26b1 -->
  //backend/routes.index.js
    const msg = {
      to: 'recipient@example.com',
      from: 'yourSendGridVerifiedEmail@example.com',
      subject: 'Stream Chat: Your client started a Support Chat Session',
      html: `Hello, \n Your client, ${firstName} ${lastName} started a chat with the support team chat widget on ${createdAt}. \n
      Here is the transcript of the chat: \n ${transcript} END OF TRANSCRIPT \n You can reach your client at ${email}. \n This message was sent to you from Stream Chat`,
    };
Initial Run
The app is split into a frontend folder created using stream-chat-react and a backend folder created using npm express-generator.
To start the app on your machine run npm install and npm run start on both frontend and backend folders. Once running, navigate to http://localhost:3000 to see the frontend. Now, we can dive into how this app works.
Registration
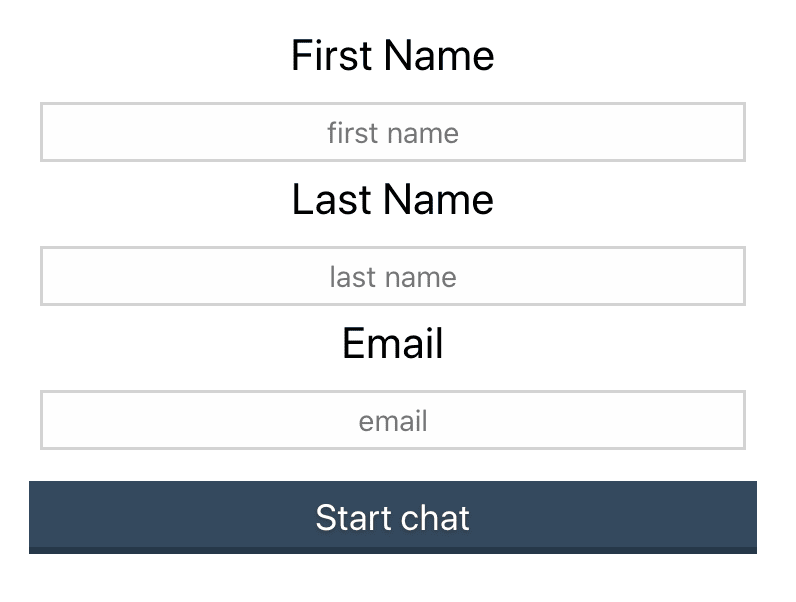
When a user visits http://localhost:3000, they input their credentials which are sent to the backend /customer-login route.
The first half of the register function sends the form data. The second half receives data from the backend to initialize the chat app and join the correct channel. Again, for more depth on this portion, check out this post.
//frontend/src/App.js:14
const register = async (e) => {
  try {
    e.preventDefault();

    const response = await fetch('http://localhost:8080/customer-login', {
      method: 'POST',
      headers: {
        'Accept': 'application/json',
        'Content-Type': 'application/json',
      },
      body: JSON.stringify({
        firstName,
        lastName,
        email,
      }),
    });

    const { customerId, customerToken, channelId, streamApiKey } = await response.json();
    const chatClient = new StreamChat(streamApiKey);

    await chatClient.setUser(
      {
        id: customerId,
        name: firstName,
      },
      customerToken,
    );

    const channel = chatClient.channel('messaging', channelId);

    setChatClient(chatClient);
    setChannel(channel);

  } catch (e) {
    console.error(e);
  }
};
The customer-login endpoint, found in the backend API, cleans the user input, sets up our Stream Chat client, creates a new Stream Chat channel, and sends the information required to join that channel, back to our frontend.
//backend/routes/index.js:27
router.post('/customer-login', async (req, res) => {
  try {
    const firstName = req.body.firstName.replace(/\s/g, '_');
    const lastName = req.body.lastName.replace(/\s/g, '_');

    const client = new StreamChat(streamApiKey, streamApiSecret);

    [customer, admin] = createUsers(firstName, lastName);

    await client.upsertUsers([
      customer,
      admin
    ]);

    const channel = client.channel('messaging', uuidv4(), {
      members: [customer.id, admin.id],
    });

    const customerToken = client.createToken(customer.id);

    res.status(200).json({
      customerId: customer.id,
      customerToken,
      channelId: channel.id,
      streamApiKey,
    });

  } catch (err) {
    console.error(err);
    res.status(500).json({ error: err.message });
  }
});
The createUsers() method in the snippet above simply creates the customer and admin objects to be registered with our channel. We used a unique identifier with uuidv4 as the second argument to client.channel(), this is will be the channel id. If a channel id is not included as a parameter, Stream will create one based on the chat participant names. By using a UUID we can be sure that no two 'John Smiths' will end up in the same chat.
//backend/routes/index.js:11
function createUsers(firstName, lastName) {
  const customer = {
    id: `${firstName}-${lastName}`.toLowerCase(),
    name: firstName,
    role: 'user',
  };

  const admin = {
    id: 'admin-id',
    name: 'Support Admin',
    role: 'admin'
  };

  return [customer, admin];
}
To keep things simple, this app will focus on the customer experience of our chat app. The channel creation above assumes a generic Support Admin will join the other end of the chat.
Chat Window
Once the user has registered, the chatClient and channel get configured, the following boolean on line 52 allows for the CustomerChat component to be loaded:
//frontend/src/App.js:52
 if (chatClient && channel) {
    return (
      <CustomerChat
        channel={channel}
        chatClient={chatClient}
        firstName={firstName}
        lastName={lastName}
        email={email}
      />);
  }
The necessary props are sent to the CustomerChat component, which returns the following jsx:
//frontend/src/CustomerChat.js:39
return (
        <div className="App">
            <Chat client={chatClient} theme={'messaging light'}>
                <Channel channel={channel}>
                    <Window>
                        <ChannelHeader />
                        <MessageList />
                        <MessageInput />
                    </Window>
                    <Thread />
                </Channel>
            </Chat>
        </div>
    );
}
This is all that's required for Stream to set up an elegant and customizable chat window. Check out Stream's free UX kits to add some polish.
Sending a Chat Transcript to the Backend
Rather than prompting users to send a chat transcript with a button, this app will automatically POST the transcript to the backend when the user closes their browser window or tab. This is achieved using the useEffect() React Hook. Here's how...
//frontend/src/CustomerChat.js:6
useEffect(() => {
    const handleUnload = (event) => {
        event.preventDefault();
        fetch('http://localhost:8080/email-transcript', {
            method: 'POST',
            headers: {
                'Accept': 'application/json',
                'Content-Type': 'application/json'
            },
            body: JSON.stringify({
                messages: channel.state.messages,
                firstName: firstName,
                lastName: lastName,
                email: email,
                createdAt: channel.data.config.created_at
            })
        });
        event.returnValue = '';
    };

    window.addEventListener('beforeunload', handleUnload);

    return () => {
        window.removeEventListener('beforeunload', handleUnload);
    };
}, [channel, firstName, lastName, email]
);
The useEffect() above initiates an event listener to listen for beforeunload (user closing the browser window), and will run the handleUnload function when the event is eventually triggered.
handleUnload initiates a POST to the backend. All the data needed for a transcript is conveniently bundled in the Stream channel object. This object contains loads of useful information, including all messages sent in the channel.
The Intricacies of useEffect()
We limited the triggering of
useEffect()by including a second argument array:[channel, firstName, lastName, email].useEffect()will only be triggered if one of the elements in that array has had its state changed.The
removeEventListener()function is an optional cleanup function. React will perform this function when the component unmounts, ensuring there's only one event listener.Note that the
event.returnValue = '';is a requirement for Chrome'sbeforeunloadevent listener to work properly.
One of the caveats of using this method is the on-close popup.
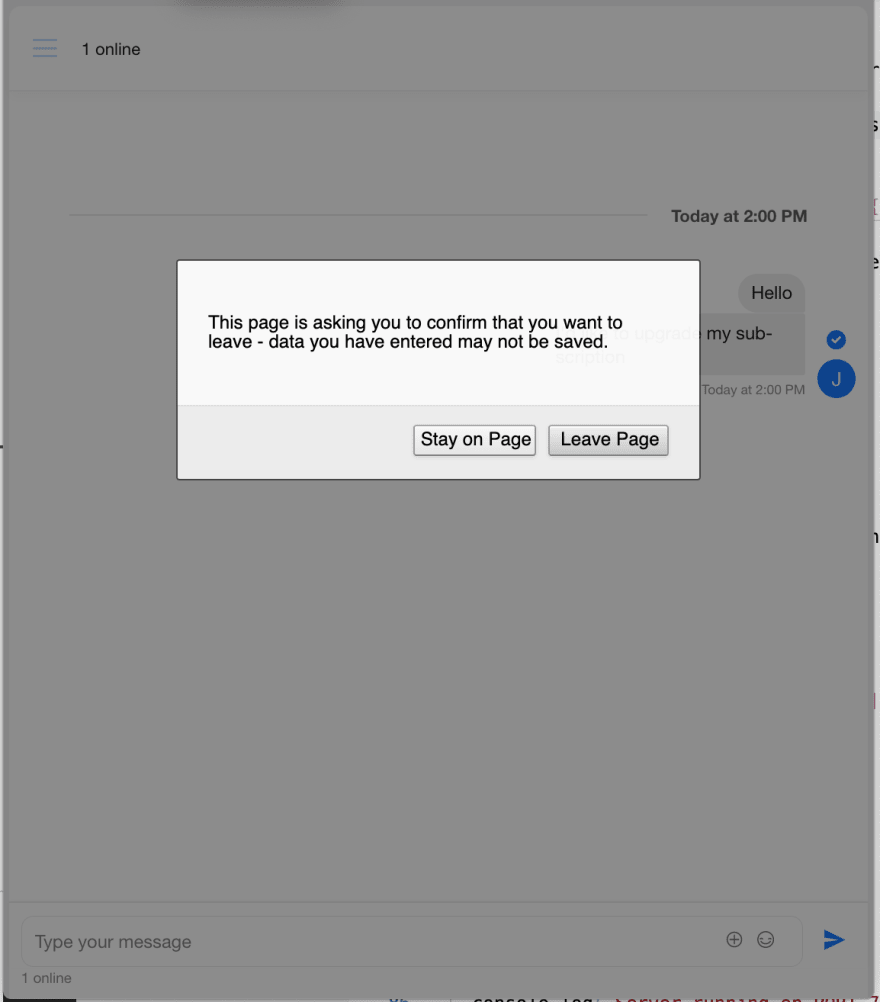
If a user is in an hour-long support chat, this is a helpful feature; if you're looking for something different in your production, WebSockets provide a different experience but are outside the scope of this post.
Receive the Frontend Transcript
The following snippet handles the chat transcript from the frontend:
//backend/routes/index.js:59
router.post('/email-transcript', async (req, res) => {
  const messages = req.body.messages;
  const { firstName, lastName, email, createdAt } = req.body;

  let transcript = messages.map((message) => {
    return (`<li>FROM: ${message.user.id}</li>\n<li>MESSAGE: ${message.text}</li>\n`);
  });

  sgMail.setApiKey(sendgridApiKey);

  const msg = {
    to: 'recipient@example.com',
    from: 'sendgridVerifiedEmail@example.com',
    subject: 'Stream Chat: Your client started a Support Chat Session',
    html: `Hello, \n Your client, ${firstName} ${lastName} started a chat with the support team chat widget on ${createdAt}. \n
    Here is the transcript of the chat: \n ${transcript} END OF TRANSCRIPT \n You can reach your client at ${email}. \n This message was sent to you from Stream Chat`,
  };

  try {
    sgMail.send(msg);
    res.status(200).end;
  }
  catch{ (err) => console.log(err.response.body); }

});
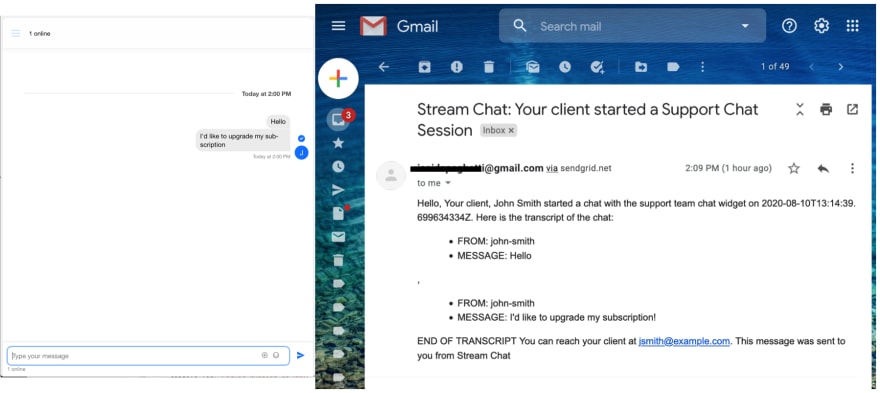
Let's dissect this a bit. First, the req.body is destructured to extract the information we need for our transcript. Next, a transcript is assembled in a simple html string by mapping() over each message. The result will look like this:

The message object provided by Stream contains a plethora of data. The Stream Documentation shows all the options you could include in your email transcripts.
Next, we send SendGrid our API Key sgMail.setApiKey(sendgridApiKey) and build the msg object. Just use any email address you can check in the to field for now. The from field must match the email address you registered and verified with SendGrid as a sender. Again, feel free to customize the subject and html fields as desired.
Finally, we use sgMail.send(email) in a try catch block. This is done because errors can otherwise be swallowed in the response from SendGrid. In a couple of seconds, you will receive the email in your inbox! Voila!
Closing thoughts
Congrats, you're now able to email your chat transcripts! With just a touch of React knowledge, Stream and SendGrid API do the heavy lifting for us. Parouse some of the other posts on the Stream Blog to see more of its functionality!

Top comments (0)