This week I started working on my first React Native project, and I found the set up to be very simple. Here's how I got my project set up on Windows.
Node JS
First you need to have node installed in order to run npm commands. that you'll need to download your environment files. It needs to be the LTS version and higher than 12. You can download this at the Node website.
https://nodejs.org/en/download/
Expo
After getting Node installed you'll need to run an npm command to download the Expo dependency. You can do this by running
npm install -g expo-cli
This will install the Expo dependency globally allowing you to now run expo commands in your terminal.
Create a new project
After downloading expo you should be able to run this command to create a new expo project
expo init ProjectName
After running this command, there is a potential error you could get which says that expo isn't recognized as an environment variable.
To fix this you have to set your path system variables and add this route %USERPROFILE%\AppData\Roaming\npm.
This tutorial has instructions on how to do that here for different windows versions.
Running your project
When you run npm start you should get something like this in your terminal.
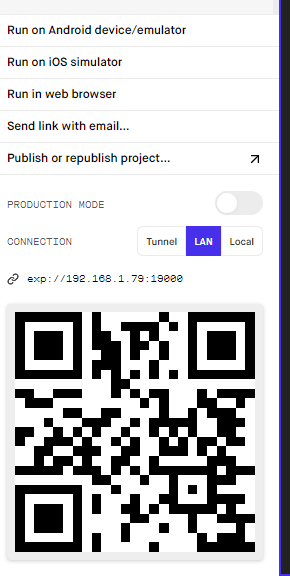
You can now access the developer tools page which allows you to run react native through a number of different mediums. Here are the options they give you.
If you want to test your code through the client, just select the client option and you should get a pop up browser.
If you want to test your code you'll need to download the Expo app on your Android or iOS device, and use your camera to scan the QR code provided on the bottom right. You can switch the type of connection, and for my own case, the only one that worked for me was tunnel. After scanning the code your phone should give you a push notification to open your project in the Expo app.
Welcome to React Native!


Top comments (0)