The holidays are coming and between dinners with the entire family and shopping for last-minute gifts, there will be less and less time for keeping your eye on those precious Lambdas, especially with all that delicious eggnog laying around.
So what are you to do? Easy. Set up alerts.
Sure you can use Cloudwatch to set up alerts and it will probably do the job, at least for the most part but if you are to really enjoy the holidays you need to know beyond a doubt that your app is not only running but running at peak performance.
This is where Dashbird comes in. It will give you the peace of mind of knowing your precious applications are running smoothly the entire time and the best part, you can start using it right now, for free!
Here’s how you set it up.
1. The signup
This is obvious but I feel like I should go through this step in order to make this little guide as complete as possible. To begin with, you should jump over on the registration page and fill your information.
The next step is probably the most complicated step of this entire thing and it’s where you deploy Dashbird’s client-side code to your AWS account.
It sounds more complicated than it actually is and the import process should be around 2 minutes but in some rare cases, it may take more time to discover resources.
2. Understanding how Dashbird alerts work
I want to take a second to explain how our alerting system works. The first thing you do is you set up a policy for the type of alert you want. After you’ve created a new policy there are certain criteria that you select that will trigger the alert when those parameters are met.
You can configure your alerts based on these parameters:
- Type of request (invocations in general, cold starts, errors, etc)
- Metric (cost, duration, memory usage, etc)
- Inequality operator (above or below a certain threshold)
- A given number to compare against the metric monitored
- Aggregation factor (sum, average, minimum, maximum)
- Time-period to look for the comparison (last minute, 5 or 10 minutes, for example)
- Target Lambdas (to which functions this policy should apply - can be all your Lambdas)
3. Set up your first Alert
You add a new Policy from the right side of the screen with the “+ ADD” button. Select either a function or a project depending on what your target is and then you go through the parameters and you are done.
When selecting the target, keep in mind that you can target a project rather than Lambdas. This is especially helpful when having multiple microservices. With Dashbird’s Projects, you can bundle multiple functions, effectively allowing you to track a subset of your infrastructure like a microservice, for example.
4. Selecting the alerting channel
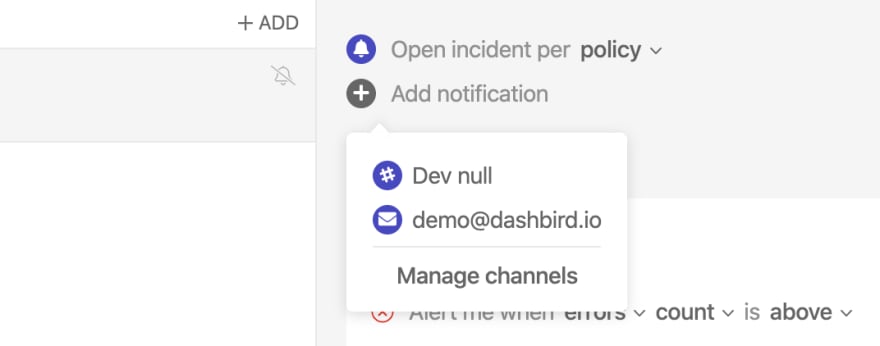
As of today, Dashbird Alerts can be received via two channels: Slack and email. You can pick the one that works for you from the top section of the Policy screen.
I've made this little video that will guide you through the entire process.
5. Enjoy the holiday
That’s it. Now you’ll get notified whenever something goes sideways or if you’ve set up your alerts correctly when something is about to go wrong.


Oldest comments (0)