
How to Design an Intersecting Decor Using 3D CAD Software
Intersecting decor pieces add a modern and artistic touch to interior design, often featuring overlapping geometric or organic shapes. Designing such a piece in SelfCAD involves combining multiple 3D forms, adjusting their alignment, and ensuring smooth intersections for a visually appealing result. Using SelfCAD’s powerful modeling tools like union and transformation, you can create a unique decor piece that balances aesthetics with structural integrity.
This article will guide you through the step-by-step process of designing an intersecting decor in SelfCAD. From selecting base shapes to refining their intersections and applying finishing touches, each step will be covered in detail. By the end, you will have a stylish 3D model that can be used for digital rendering, 3D printing, or interior decoration.
To access the interactive tutorial to this article, check out; https://www.selfcad.com/tutorials/y38146d553v9574n5j6s364t1m282m5m6f3y
Once you’ve launched the editor;
From the 3D Shapes Category on the Toolbar choose Icosahedron; Set Segment to 1, Rotation x to -21
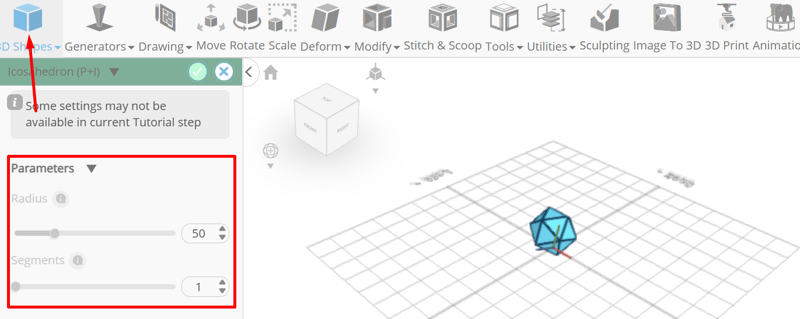
Click to finalize Icosahedron
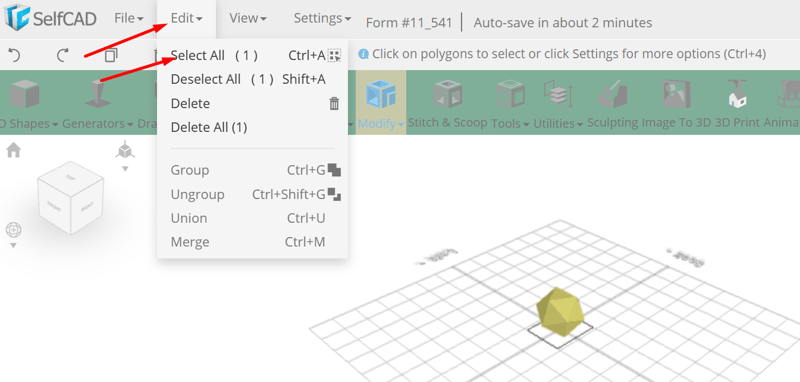
Click to activate Polygon selection; From the Edit Menu on the Top Toolbar choose Select All
From the Modify Category on the Toolbar choose Inset. Set Inset Amount to 3
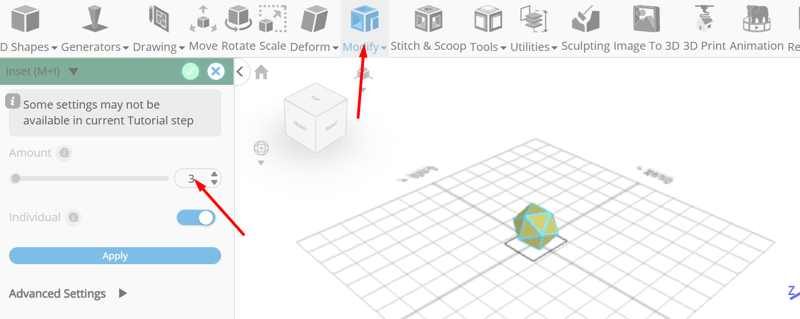
Click to finalize Inset
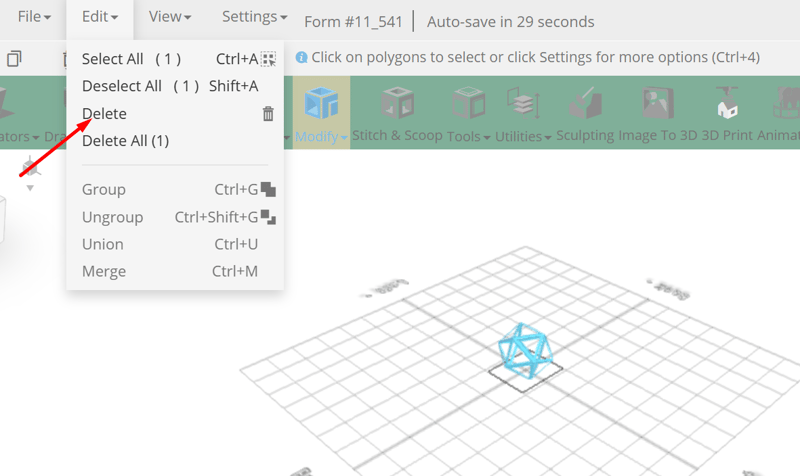
Click Delete button to delete selected object
From the Modify Category on the Toolbar choose Add Thickness; Set Thickness to 1
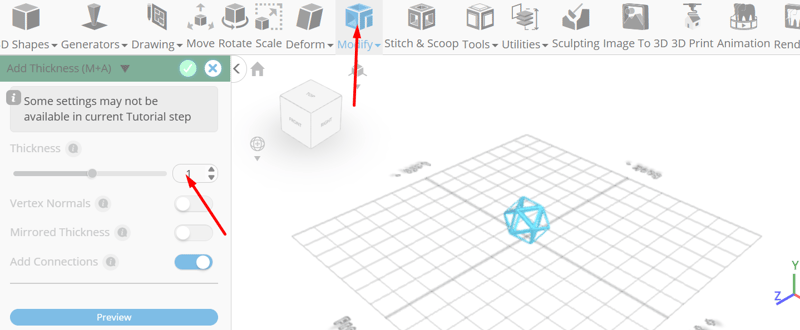
Click to finalize Add Thickness
From the Tools category on the Toolbar choose Copy offsets; Set Operation to scale, x to -30, y to -30, z to -30, amount of copies to 2
Click Copy button to create copies
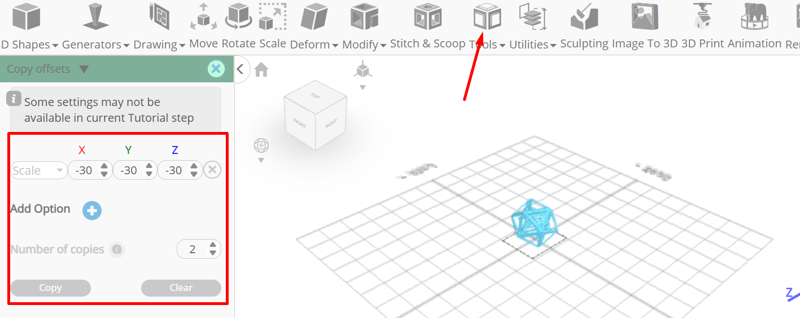
Click ‘x’ to close copy offsets panel
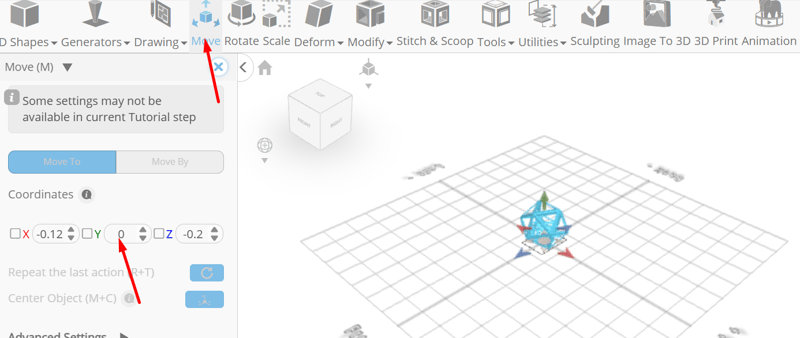
Click on mesh 4 to deselect it
Click Move on the Toolbar. Set y to 0
Click on mesh 4(1) to deselect it
Set y to 0
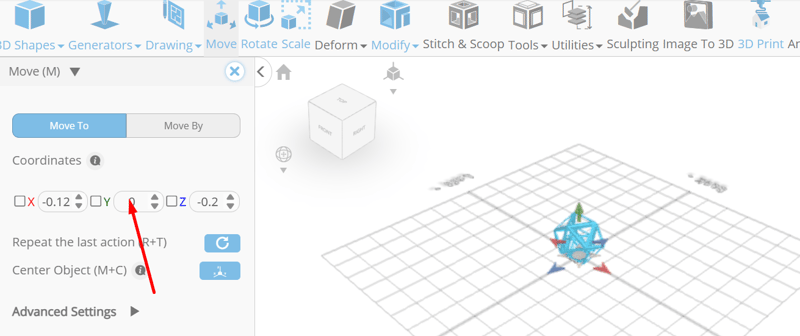
Click ‘x’ to close Transformation panel
As you continue honing your design skills, remember that SelfCAD offers a wealth of resources to support your learning journey. To deepen your understanding and explore more advanced features, consider checking out the interactive tutorials (https://www.selfcad.com/tutorials) available on the SelfCAD website. The tutorials page provides a treasure trove of guides, tips, and tricks that cater to designers of all levels.
More structured learning experience can also be accessed at the SelfCAD Academy (https://www.selfcad.com/academy/curriculum/), https://www.youtube.com/@3dmodeling101, and 3D Modeling 101 series (https://www.youtube.com/playlist?list=PL74nFNT8yS9DcE1UlUUdiR1wFGv9DDfTB). This comprehensive resource offers in-depth courses taught by industry experts, allowing you to master the intricacies of SelfCAD at your own pace.

Top comments (0)