Some things to take into account before reading this article. This tutorial is meant for beginners just learning Rails, although you may need to know a little about associations, schema, and other computer science related terms.
In this post, I will cover the following topics:
-Setting up associations
-Using rails generators
-Setting up controller actions
-Writing a form
Let’s get started!
The first thing I did was write a simple generator task in the terminal. With just the following code, a new folder was created!
rails new flower-shop
You can read more about the rails new terminal command here.
The next thing to do would be to set up some tables and associations. As this was just practice, I set up my tables with just the minimal amount of information needed to get the app working.
Before I started building the schema, or even using the generator to create the folder, I sat down and thought about my associations for a while. I recommend everyone take a few moments to sketch out or imagine what their domain models may look like before creating an application like this. It’s great practice for thinking about how your models may interact with one another, and determines the functionality you’ll build in later. A wonderful resource, if you haven’t used it by this point, is Ruby on Rails Association Basics
As this was an exercise in has many through relationships, I mapped out a simple sketch for the domains, replicated by the models below.
From there, I was free to migrate and seed my database. Now that the models were associated the way I wanted, I could start building the controllers and routes in order to view the website. One of the reasons I used the rails resource generator was because it will generate routes in the config > routes file, enabling access to many different routes. Now, this isn’t always something you want to do, but because this was just something I used to practice website creation, I did want to have access to all the possible routes created by resource.
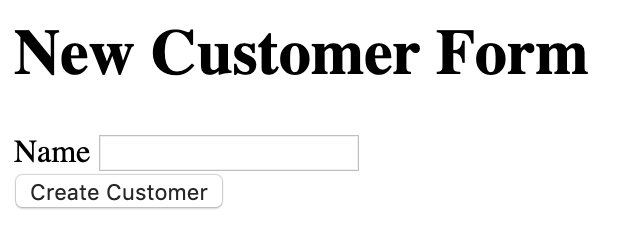
After that, I set up controller action. I started with the customer controller, since one cannot have an order without a customer. I knew, in order to create a new customer, I would need the customer to fill out some sort of sign up form. Since I was only just learning about form creation, the form I created used only the most basic parameters.
The first step to creating a form is setting up the controller action that allows us to do so. In a private method, customer_params has been set up with a name attribute. When a user navigates to the customers/new page, they will be greeted with a form asking for their name. But do I really want to allow my customer to enter a blank name?
That’s where the .valid? comes in. In my Customer class, rails will validate that the customer’s name is present on the form. There are many types of validations that you can write in, but this method seemed to fit my needs.
After that, I created a form using form_for in the views > new.html.erb file. The thing to remember about form_for is that it is a method, so it will require an <%end%> at the bottom of it, which I sometimes forget to add!
Another thing I had trouble with was the redirect_to @customer route. How can it be both a variable and a route? Well, that's where the Rails magic happens. Rails knows that I want to route to that newly created customer's show page, so it will use that customer's id to get me there. Cool, isn't it?
From there, it’s a matter of basically copying and modifying the existing code in the other controllers and classes to write new forms, but this is, at its most basic, how the website will function.
Thanks for reading!


Top comments (0)