For those who don’t know, MAL is short for My Anime List, a website that helps one keep track of the anime the watched or the manga they read. Although it’s very useful, I wanted something a bit more colorful and image oriented, so I set out to practice javascript and create my own MAL look-a-alike website! Keep in mind, I had only had traditional Javascript a week prior, so it is very basic, but gets the job done!
Overview of article:
Creating DOM elements
Using helper functions
Make a fetch requests
Creating buttons
First of all, I knew I wanted to practice working with an API for this project. The API is a simple json file that lives in my project. To access that file, I simply declare a variable at the top that represents the URL I would be using. Now, declaring global variables like this is not something you normally want to do, especially with a larger application. However, because I knew this would be a small project, and because I wanted an easy way to reference my url, I stuck it at the top of my program.

Another concept I wanted to practice was to create a new card div whenever a user submitted new data. I did this with the function makeCard. The makeCard function is the largest in the JS file. It contains all the elements necessary to create a card div, including information stored in the json file.
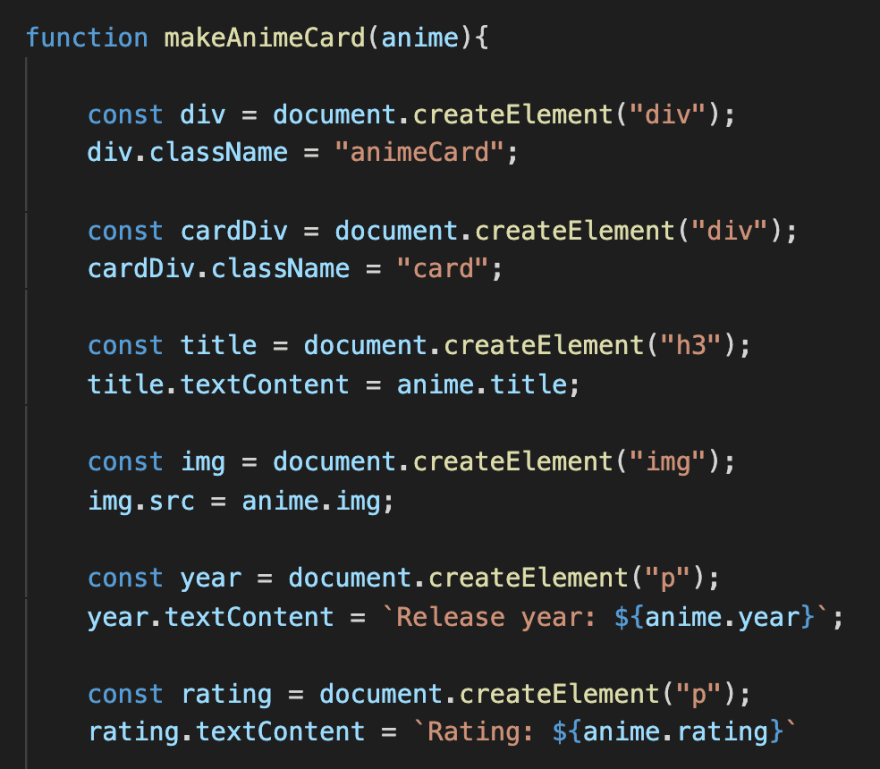
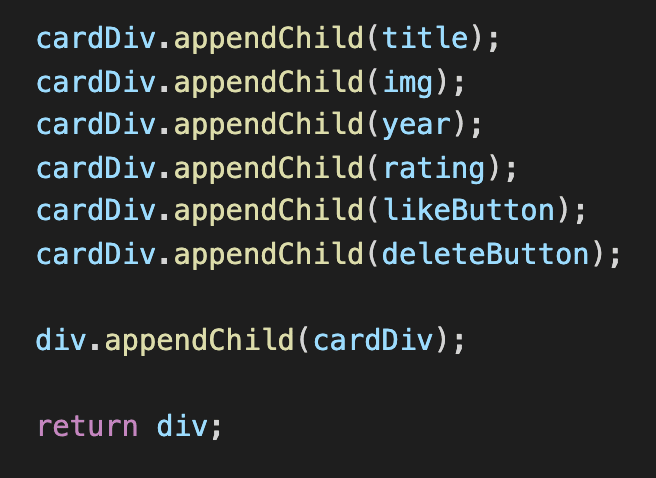
As you can see, the makeCard function is long, but not overly complicated. There was A LOT of repetition involved in creating these DOM element. Finally, at the bottom of the function, I appended the newly created elements to the cardDiv.
Underneath my makeCard function, I have my create function. Here, I use the form data to create new variables. All of these different variables constitute a new anime card. Also, it’s important to think about the creation of a new anime card as an event: the user fills out a form, presses a button, and a new card is created. That new card data is saved to the json data using a post request.

The post function is a standard POST fetch. Once that data is returned in a form Javascript can read, it is sent to another helper method, the add function.
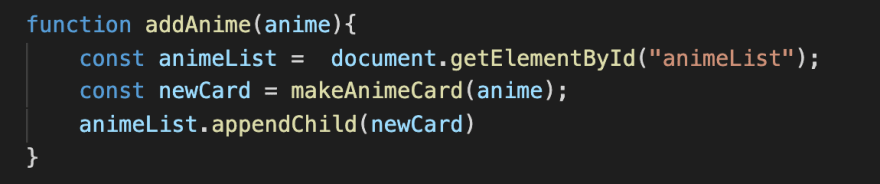
The add function uses the makeCard function to set up information for that card and append it to the div!

Finally, the get function uses another fetch to display that information to the page. The show function takes that data (stored in an array) and also uses the add function to display data. If this is a bit hard to wrap your head around, don’t worry! Just think of the get being responsible for displaying the data on the page and post being responsible for sending the data to the json file. They both go through add in order to display the new and old data.

I also added a couple of buttons to give the site more functionality. In hindsight, I should have created an edit button rather than a like button, but perhaps that can be another project of mine!

Top comments (0)