
At COVIS we have been using GitLab, Sentry and Angular for a while now. Until recently, it was not very straightforward to build the necessary source map files for an Angular application and make them available to Sentry. Without the source map files, the stack trace of the exception is not very useful.
In this post we will see how to:
- Integrate Sentry with GitLab
- Setup GitLab CI pipelines that deploys an Angular app to GitLab pages
- Extend our pipeline to build source maps files and upload them to Sentry
Note : This is my first post so be gentle and I am looking forward to your feedback 😊. We will be using the SaaS version of Sentry for this post. You will have to create accounts both on GitLab and Sentry (free tiers will do just fine).
Introduction
It is hard to image writing an application these days without git. GitLab is a full DevOps tool that can serve as source code repository, continuous integration and continuous delivery tool. GitLab became very popular last year with the #movetogitlabthing (btw I love GitHub too).
Sentry is a tool that can help after our applications are on production. It provides a rich set of features for collecting, identifying and understanding what may have gone wrong.
But Angular application are written in TypeScript and our source code gets compiled, minified, uglified and now it is so much harder to understand our logged exception stack traces and figure out what when wrong!
In this post we will see how we can create a build process that enables us to see our original TypeScript source code logged in the exception stack trace in Sentry.
Integrate Sentry with GitLab
We will start by creating a new GitLab group and repository. Then we will create our Sentry project and enable the integration between our Sentry project and our GitLab repository.
On GitLab, from the top menu, click Groups , and click the green button New group. We will name our group “angular-sentry-demo”
Once the group is created, click the green button New Project. We will name our project “demo-ng-app”

Now let’s create a new Sentry project. Navigate to https://sentry.io/signup and create an Account if you do not have one already. Once you have your account click on the “Create project” button. We will name our project “demo-gitlab-ng” and select the Angular SDK:


Once your project is ready, the quick-start sample code will be presented to you showing your project’s DSN. The DSN is the most important thing as it tells the SDK where to send events. You can always find your project’s DSN in the “Client Keys” section of your “Project Settings” in Sentry. We will use the DSN later on when we configure the SDK.
Great! Now let’s perform the integration with GitLab. Please follow the steps 1–9 from the Sentry manual here:
👍 We have successfully integrated GitLab and Sentry! Now let’s move on to create our sample Angular application.
Setup GitLab CI pipelines that deploys an Angular app to GitLab pages
We will now create a new Angular app and install the Sentry SDK. This will allow us to capture exceptions from our application, but on the generated code. On the final section we will change that.
Create new Angular app
We will create our application using the ng new command of the Angular CLI:
ng new demo-ng-app
cd demo-ng-app
Then we will add our generated application to our GitLab repository:
git remote add origin git@gitlab.com:angular-sentry-demo/demo-ng-app.git
git push -u origin master
Add Sentry SDK to Angular
Let’s install the Sentry SDK on our newly created application. We will follow the instructions
npm i -S [@sentry/browser](http://twitter.com/sentry/browser)
Now we will configure the SDK as documented on the Sentry documentation here:
Note : Sentry documentation is smart enough to provide you the snippet with your own DSN.
That’s it! Now any unhandled exceptions will be sent to Sentry! But how did this happen? The snippet above implements Angular’s ErrorHandler class, that provides a hook for centralized exception handling. In the handleError method, the exception is send to Sentry using the captureException() method, before we rethrow it. If you want more info on these please check the following two links:
It is now time to send out first exception to Sentry. We will implement a simple button that raise an exception:
Now if we click the button, we will see the following exception stack trace logged under our Sentry project:

Although we do get a lot of useful insights here, we do not see our source code. Let’s see if we can do better.
Build Source Map Files
As you may know, Angular CLI uses webpack under the hoods for several tasks of our application build process, including building our TypeScript code. Webpack is able to generate the source map files which will allow us to reference the original TypeScript code with the generated JavaScript. But configuring webpack is not an easy task and the Angular team wants to keep this abstracted from the developers. The ng eject command of the Angular CLI would reveal us the underlying webpack configuration and allow us to configure the source map file generation, but now there is a better way!
Recently, thanks to @ AlanAgius4 contribution 👏, we have better control over the source map files generation using Angular CLI angular.json file. The purpose of this file is to provide workspace-wide and project-specific configuration defaults for build and development tools. You can read more about it here:
We want to configure our angular.json file so that it generates the hidden source map files. They are called hidden, because the generated output files do not have references to them as opposed to the regular ones. This allows us to put them on Sentry without the need to host them on our web server. If you want to get deeper into source map files you can start here:
So let’s configure our angular.json file to generate the hidden source map files during the production build:
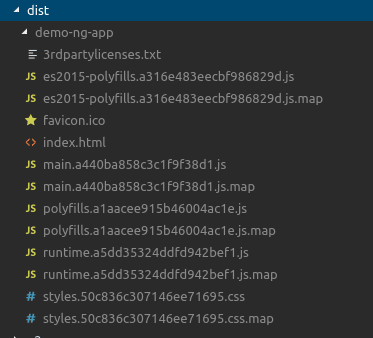
Now when we build our application with ng build --prod, the source map files will be available under dist folder:
Release Management
Sentry provides an abstraction called Releases which allow us to attach source artifacts to. The release API allows us to store source files (and source maps) within Sentry. In order to configure the release management, we need to do two things:
- Configure the SDK with the release property during initialization e.g.:
Sentry.init({
 release: "my-project-name@2.3.12"
})
- Use the release API to create the release, upload our artifacts and finalize it. We will see how to do this in the next section.
Since we are aiming to build a continuous integration pipeline, that builds our application with every commit on GitLab, we want to name our releases with something unique. The commit SHA is a good candidate for our release name. In order to do that, we need to be able to provide it as environmental variable. So we will start with adding a variable into our environment.ts and environment.prod.ts files:
During our CI build process, we will replace the VERSION string with our Commit SHA, using the sed utility. To be honest, I wish there was a better way to pass environment variables at build time. This a highly requested feature:
Hopefully, this will be better in the future. For now, sed tool will do the work.
Create Gitlab CI
Thanks for being patient enough so far, and here is where everything falls into place. At the root of our angular application create our “ .gitlab-ci.yml ” file:
In this file, we define three jobs as part of our CI pipeline:
- Stage build : Build our angular app, but first replace the VERSION variable (as we explained in the previous section)
- Stage sentry : Create our new release using the commit SHA and upload source map files. The $CI_COMMIT_SHA variable is pre-defined by GitLab.
- Stage deploy : Upload dist folder to GitLab pages, but remove the source maps files.
The final configuration we need to do is to set the $SENTRY_BASE_TOKEN , $SENTRY_BASE_ORGANIZATION and $SENTRY_BASE_PROJECT variables. Let’s configure those into our GitLab group:

To get the Sentry Auth Token navigate here:
Create a token with at least project:read, org:read and project:releases scopes.
That’s it!
We are done! Now on every commit, GitLab will run our CI pipeline:

Testing time! We will go to our published application and cause our fake exception. To find out the GitLab Pages URL, go to your repository under Settings > Pages:

Important Note: The very first time it might take several minutes before your pages gets publicly available. Be patient!
We can now create click our button that cause the exception and let’s check what is logged on Sentry:

🎉🎉🎉 There it is! The TypeScript code of your Angular app in the exception stack of Sentry! Let’s view them again, side by side for comparison.

Bonus
Since we are doing the release management in Sentry and we are associating the commits with our releases; Sentry is able to show the “suspect” commits for our exception:

Conclusion
When an exception occurs on production systems, having as much information as possible is imperative. Even more if we are talking about our source code. In this post we saw we can have our TypeScript source code from our Angular application available in the exception stack trace. Furthermore, we did it as part of our continuous integration pipeline. The process described here can be extended if you also use TypeScript with NodeJS.
The code for the Angular application can be found here: https://gitlab.com/angular-sentry-demo/demo-ng-app
I hope you found it useful! 😃
Special thanks to Pavlos Panagiotidis for introducing me to these technologies and Aristeidis Bampakos and Stefanos Lignos for the reviews! 👍

Top comments (0)