
If you are working on a project that has an OpenAPI spec, then you can generate your Angular Code and even generate a simulator for development and test purposes. This reduces time and complexity of integrating with a OpenAPI gateway tremendously. Let me show you how I use OpenAPI to boost up my productivity!
Here is a brief introduction if you’re not familiar with OpenAPI in general:
The OpenAPI Specification (OAS) defines a standard, language-agnostic interface to RESTful APIs which allows both humans and computers to discover and understand the capabilities of the service without access to source code, documentation, or through network traffic inspection. When properly defined, a consumer can understand and interact with the remote service with a minimal amount of implementation logic.
Or maybe you know Swagger, so what’s the difference? Check it out here: Differences between Swagger and OpenAPI.
OpenAPI Generator
So your backend colleague gave you the endpoint of their api so you can start integrating your web application with some real data. So what will be your next step? You’re quite a Typescript enthousiast and want to make sure that your web application has some type safety, so you start typing out some TS interfaces that we can use. Okay, check ✅. Next step? Maybe add some abstraction and reusability to your stack? So you create an Angular Service that uses the HttpClient and so wraps the actual endpoint. Sounds good and eventually this will be a good approach. But it feels a bit repetitive to do this for every project again. Besides that, I think you can spend your time better on building actual features for your application, right?
So what if we could automate these steps to safe some precious time 🧐? In a few steps we can generate Angular specific code based on our OpenAPI spec. Let’s get started 👨💻!
Create Angular app
First install the Angular CLI if you dont have this installed already:
npm install -g @angular/cli
Start with a new angular app and choose the default options:
ng new angular-openapi-demo
cd angular-openapi-demo
Start the application to verify everything went well:
ng serve
Create an OpenAPI yaml file
A well defined api comes with some documentation. An api built with OpenAPI comes with a yaml, or JSON, spec that describes the actual api. We can build this spec by creating a yaml file in our application. In order to have a real working api, we will use the well known JSON Placeholder public test api.
Add a file openapi.yaml to the root of your application and add the following content:
You can also download the file from the demo repo
openapi: 3.0.0
info:
  title: JSON Placeholder OpenAPI
  description: Example spec of the well known JSON Placeholder website
  version: 0.1.9
servers:
  - url: https://jsonplaceholder.typicode.com
paths:
  /posts:
    get:
      summary: Returns a list of Posts.
      description: Optional extended description in CommonMark or HTML.
      operationId: GetPosts
      responses:
        '200':
          description: A JSON array of Posts
          content:
            application/json:
              schema:
                type: array
                items:
                  $ref: '#/components/schemas/Post'
components:
  schemas:
    Post:
      required:
        - id
        - userId
        - title
        - body
      type: object
      properties:
        id:
          type: number
          description: record id
          example: 1
        userId:
          type: string
          description: unique user identifier
          example: 2
        title:
          type: string
          description: title of this Post
          example: sunt aut facere repellat provident occaecati excepturi optio reprehenderit
        body:
          type: string
          description: description of this post
          example: quia et suscipit\nsuscipit recusandae consequuntur expedita et cum\nreprehenderit molestiae ut ut quas totam\nnostrum rerum est autem sunt rem eveniet architecto
I think that this kind of documenting is quite self explanatory, but let’s discuss a couple of things:
-
Post: this is a way of defining a model. We can use this model by using the $ref keyword. -
servers: here we define one or more base url’s for our spec. -
example: give a hint about what value to expect. Later on I will explain you why this is handy when creating a simulator.
Tip! Make working with OpenApi spec easier in VSCode by installing the Swagger Viewer extension
Generate Angular Services
We’re going to generate our Angular code with the CLI of openapi-generator. We can install this via NPM as devDependency:
npm i @openapitools/openapi-generator-cli -D
This packages has a lot of generators available, we’re going to use the typescript-angular one.
Add a npm script to your package.json file for more convenient usage:
{
  "scripts": {
    // other scripts
    "generate:api": "openapi-generator-cli generate -i ./openapi.yaml -g typescript-angular -o src/app/core/api/v1"
  }
}
We use the default configuration over here. But you can customize this based on your needs.
One example could be the option removeOperationIdPrefix to prevent redundant method names. Take for example the following operationId in your spec:
operationId: Posts_GetPosts
The generator will use the operationId to determine the Angular Service name and the method name. If we use the default configuration, our class will look like this:
// this looks redundant
export class PostsService {
  public postsGetPosts() {}
}

// and when you invoke it, it is redundant and looks weird...
const postsService = new PostsService();
postsService.postsGetPosts();
Using the arguments -p=removeOperationIdPrefix=true will remove the Posts_ part of the operationId: Posts_GetPosts
// this looks redundant
export class PostsService {
  public getPosts() {}
}
That already looks better to me! As I said, there’re plenty configuration options. And you probably will be using some of them from time to time depending on the spec you receive.
Next step is to actually generate our code with our custom NPM script:
npm run generate:api
We now have the following directory structure because we told the generator to output (-o) to the src/app/core/api/v1 directory:

Use generated NgModule and services
The most important parts of the generated code are the following files:
-
posts.services.ts: the actual Angular service. -
post.ts: a TS interface that matches thePostmodel of our OpenAPI spec. -
api.module.ts: a NgModule that can be imported to your AppModule. -
README.md: README file with usage instructions.
Add this ApiModule to your AppModule. This will use the ‘default’ server endpoint that is available in your openapi.yaml. You can see that in the generated posts.service.ts:
@Injectable({
  providedIn: 'root',
})
export class PostsService {
  protected basePath = 'https://jsonplaceholder.typicode.com';
  // ...
}
// without configuring providers
import { ApiModule } from '';
import { HttpClientModule } from '@angular/common/http';

@NgModule({
  imports: [
    ApiModule,
    // make sure to import the HttpClientModule in the AppModule only,
    // see https://github.com/angular/angular/issues/20575
    HttpClientModule,
  ],
  declarations: [AppComponent],
  providers: [],
  bootstrap: [AppComponent],
})
export class AppModule {}
If you want to override or provide a different endpoint, you can do this by passing in a factory function in the forRoot method of the ApiModule:
import { NgModule } from '@angular/core';
import { AppComponent } from './app.component';
import {
  ApiModule,
  Configuration,
  ConfigurationParameters,
} from './core/api/v1';

export function apiConfigFactory(): Configuration {
  const params: ConfigurationParameters = {
    basePath: 'https://staging.jsonplaceholder.typicode.com',
  };
  return new Configuration(params);
}

@NgModule({
  imports: [ApiModule.forRoot(apiConfigFactory)],
  declarations: [AppComponent],
  providers: [],
  bootstrap: [AppComponent],
})
export class AppModule {}
And we can go one step further by moving the basePath to the Angular environment files:
// environment.ts
export const environment = {
  production: false,
  basePath: 'https://dev.jsonplaceholder.typicode.com',
};
// environment.prod.ts
export const environment = {
  production: true,
  basePath: 'https://jsonplaceholder.typicode.com',
};
So now we can import the environment.basePath variable to configure our ApiModule.
There are even more variables in the Configuration object that can be set, see Configuration.ts on the demo repo.
import { NgModule } from '@angular/core';
import { environment } from '../environments/environment';
import { AppComponent } from './app.component';
import {
  ApiModule,
  Configuration,
  ConfigurationParameters,
} from './core/api/v1';

export function apiConfigFactory(): Configuration {
  const params: ConfigurationParameters = {
    basePath: environment.basePath,
  };
  return new Configuration(params);
}

@NgModule({
  imports: [ApiModule.forRoot(apiConfigFactory)],
  declarations: [AppComponent],
  providers: [],
  bootstrap: [AppComponent],
})
export class AppModule {}
Usage example
We can now start using our generated services in our application! Change your app.component.ts to this:
import { Component } from '@angular/core';
import { PostsService } from './core/api/v1';

@Component({
  selector: 'app-root',
  templateUrl: './app.component.html',
  styleUrls: ['./app.component.css'],
})
export class AppComponent {
  // Create a `cold` observable - we will be subscribing to this observable in the template
  posts$ = this.postService.getPosts();

  // Inject the generated Angular service as a dependency of this class
  constructor(private postService: PostsService) {}
}
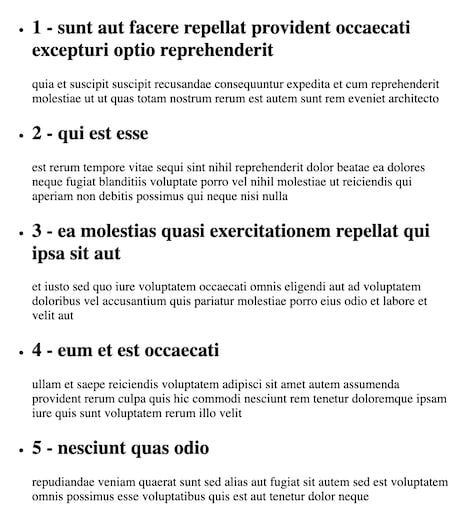
And in your app.component.html we can use the posts$ variable by subscribing to it with the async pipe:
<ul>
  <li *ngFor="let post of posts$ | async as list">
    <h2> - </h2>
    <p></p>
  </li>
</ul>
Your browser should now show you a list of Posts from JsonPlaceholder:
🎉 Done! That was all we needed to do to generate ourselves some Angular services and spare us some time.
Next steps
In this example I’m generating and putting my code in my project’s repository. That’s fine for most of my projects because we’re using monorepo’s and also using client specific api’s. Another approach could be to publish your generated code as a NPM package that can be installed by others. These steps are also described by the OpenAPI generator itself in the README. So it depends on your needs which approach fits better.
Simulator
Now that we've generated our Angular services, let’s have a look how wo can utilize the OpenAPI spec even better in our front-end application stack! What we’re going to use for this is a great package called: OpenAPI backend from Viljami Kuosmanen.
As Viljami describes it in one sentence:
OpenAPI Backend is a Framework-agnostic middleware tool for building beautiful APIs with OpenAPI Specification.
OpenAPI backend has a couple of useful features, but the feature that we’re going to use is the auto-mocking responses behavior.
Setting up simulator project
The simulator project will be a independent project but within your current directory structure and so it will also be part of your git repo. So actually we’re going to create a monorepo: a single repository that contains all our code. I’m an advocate when it comes down to monorepos. If you want to learn more about useful tooling around monorepos, then you certainly should check out the following tools:
I’m not going to use any of these tools for the sake of this tutorial.
Let’s get started by creating a directory where our simulator will live and go to the directory:
mkdir simulator
cd simulator
Initialize a new npm project to generate a package.json file:
npm init -y # -y will answer the questions with yes
Install the required dependencies:
npm i openapi-backend # the actual dependency we need :-)
npm i --save-dev typescript # we will be using Typescript, so transpilation needs to be done
npm i express # To serve our simulated endpoints
npm i --save-dev @types/express # typescript types for express
npm i cors
npm i --save-dev @types/cors
As you see we’re using Typescript. We need a tsconfig.json file, you can initialize this with the following command:
npx tsc --init
We used the locally installed typescript compiler by running it via npx. It will run the
tscbin from your localnode_modulesbecause we installed it as ourdevDependency:
Open the generated tsconfig.json file and configure the output directory. Your file should look like this:
{
  "compilerOptions": {
    "target": "es5",
    "module": "commonjs",
    "outDir": "./dist", /* Redirect output structure to the directory. */
    "strict": true, /* Enable all strict type-checking options. */
    "esModuleInterop": true, /* Enables emit interoperability between CommonJS and ES Modules via creation of namespace objects for all imports. Implies 'allowSyntheticDefaultImports'. */
    "skipLibCheck": true, /* Skip type checking of declaration files. */
    "forceConsistentCasingInFileNames": true /* Disallow inconsistently-cased references to the same file. */
   }
}
We’re almost there. Update the npm scripts in your package.json so we can build and run our simulator. Your package.json should now look like this:
{
  "name": "simulator",
  "version": "1.0.0",
  "description": "",
  "main": "index.js",
  "scripts": {
    "start": "tsc && node dist/index.js"
  },
  "keywords": [],
  "author": "",
  "license": "ISC",
  "dependencies": {
    "cors": "^2.8.5",
    "express": "^4.17.1",
    "openapi-backend": "^3.9.1"
  },
  "devDependencies": {
    "@types/cors": "^2.8.10",
    "@types/express": "^4.17.11",
    "typescript": "^4.2.3"
  }
}
And the last thing we need to do is to actually create a simulator instance with the openapi-backend package. Do this by adding a file called index.ts to your simulator directory and add this content to it:
import cors from 'cors';
import express from 'express';
import OpenAPIBackend, { Request } from 'openapi-backend';

// Create api with your definition file or object. This points to the openapi yaml spec
const api = new OpenAPIBackend({ definition: '../openapi.yaml' });

// Register your framework specific request handlers here
api.register({
  notFound: (c, req, res) => res.status(404).json({ err: 'not found' }),
  notImplemented: (c, req, res) => {
    const { status, mock } = c.api.mockResponseForOperation(
      c.operation.operationId ?? ''
    );
    return res.status(status).json(mock);
  },
});

// Initialize the backend
api.init();

// Initialize the express server that will serve the api backend
const port = 9000;
const app = express();
app.use(express.json());
// Allow cors on all origins - its okay to do this for our simulator
app.use(cors());
app.use((req, res) => api.handleRequest(req as Request, req, res));
app.listen(port, () =>
  console.info(`api listening at http://localhost:${port}`)
);
Registering the notImplemented handler that we will be using to mock the response is the most important part of this configuration. As the documentation states: The notImplemented handler gets called by .handleRequest() if no other Operation Handler has been registered for the matched operation. The mockResponseForOperation method will then mock a response based on the available example data.
Running the simulator
Now run npm start in your simulator directory and open your browser on http://localhost:9000/posts to see some Posts🚀! The response should look like this:
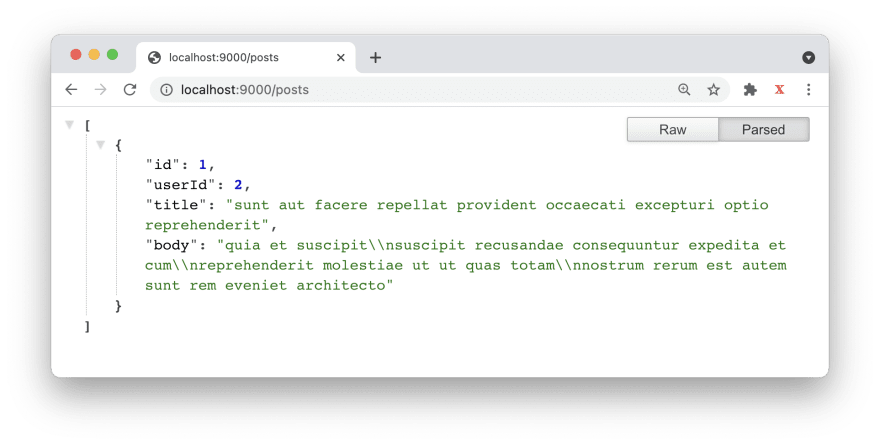
So where is this data actually coming from? Do you remember the example keyword that I mentioned earlier? That’s how we can return some useful response data to our requests. Here you can check out the official documentation about this example keyword.
Using the simulator in our Angular app
Now that we’ve our simulator project configured and running, we can use it in our Angular app. Open the environment.ts file located at: src/environments/environment.ts and change the basePath property to our local running simulator. You file should look like this:
export const environment = {
  production: false,
  basePath: 'http://localhost:9000',
};
This is the default environment file that Angular will use when you run the project with
npm startorng servewithout any configuration parameters. You could add a specific environment configuration. Check out the official docs to learn more: https://angular.io/guide/build#configure-environment-specific-defaults
If you still have your Angular app running, then you should now see a single Post record being displayed in your browser. Otherwise restart your Angular app by running npm start in the root of your application. Our Angular application is now running against a local simulator!
Enhancing DX (Developer Experience)
Angular applications already utilizing the npm start command to eventually run ng serve. We need to make some adjustmenst in order to start our Angular application and simultanously start our simulator. I really appreciate it, and actually expect it, when I only have to run two commands to start the project: npm i && npm start. Why? Nobody wants to have some superfluous starter doc that you need to read, handle mentally and do all kinds of set up tasks. To give your project a first good impression it should be ready to use within seconds! I’m not saying you should not have a README.md file, the opposite! The README file could describe other helpful information that your reader should know (e.g. different configurations).
So what’s the problem with the repo that we created along this tutorial? As a developer you now need to:
- Run the Angular app via
npm startin the root of your application - And start the simulator via
npm startin the subdirectorysimulator.
In practice this requires the developer to open two terminal windows/tabs and run the commands. Not a great Developer Experience if you ask me. We can do better!
So let’s assume that we want to always run against the simulator in the default configuration, so when running the npm start command. We need to be able to start two tasks in parallel. And maybe you’re already quite familiar with npm, but there’s a package for that called: npm-run-all.
Install it as a devDependency in the root of our project:
npm install npm-run-all --save-dev
Now open the package.json of our root project and alter the scripts section it like this by adding two scripts and changing the start script:
"start": "npm-run-all --parallel start:app start:simulator",
"start:app": "ng serve",
"start:simulator": "npm --prefix simulator start",
I guess the scripts do explain themselves, but here’s a brief description:
-
startwill now use thenpm-run-allpackage to run two other npm scripts. The--parallelflag will run them in parallel. -
start:appwill start the Angular application -
start:simulatorwill start the simulator. Because its located in a subdirectory, we need to pass the--prefixargument to npm to point it to thesimulatordirectory.
Running the npm start command from the root should now start our Angular app + starting the local simulator! Do not forget to update your README.md file with a sidenote about this behavior.
Custom handlers
As you might have noticed is that our simulator only returns a single record on an endpoint that could return multiple records. This is fine for some situations, but sometimes you’re developing a new feature that incorporates a list of items, or Posts in our context. Returning a single Post will not help you very much if you want to see how your list is working when multiple items are in it. Think about applying staggered animations on lists, filling the available space etc. In this situation the example data is not sufficient for our use-case. What we can do is providing specific handlers for our Openapi operations. A simple example for our Posts api is this:
api.register('GetPosts', function (c, req, res) {
  return res.status(200).json([
    {
      id: 1,
      userId: 1,
      title: 'a',
      body: 'a',
    },
    {
      id: 2,
      userId: 2,
      title: 'b',
      body: 'b',
    },
  ]);
});
You should add this to your simulator/index.ts file before app.init().
This way we created our very own response for the endpoint that is described in our api spec file! Great for developing and testing purposes if you ask me!
Check the docs for more info:https://github.com/anttiviljami/openapi-backend/blob/master/DOCS.md#registeroperationid-handler
When you are going to provide or ‘override’ multiple endpoints, make sure that you keep your simulator code maintainable: so splitting up custom handlers in separate files and keeping your index.ts file clean.
Conclusion
The OpenAPI spec is already very helpful to describe your api’s. I showed you how I utilize this spec to generate code in our Angular application and generate a simulator that we can use for development purposes. What I did not describe is how I use this same simulator to act as a api for my integration tests that I run with Cypress. Another great use-case for your OpenAPI spec!
So, what else could you do with it? Let me know!

Top comments (0)