
Deploying your Server side Swift application using ARM-based server with Ubuntu in Oracle Cloud
The point, when you want to access your API server not only from localhost, comes very fast. When your application is in development phase, it is very difficult to commit yourself to any paid services, that's why I will show a way how to host your API server for free.
We will deploy our previously created parkAPI on Oracle Cloud Infrastructure (OCI). It offers you an "Always Free" Tier, you can find many tutorials on the web, how to register and start with it.
Although for the first sight it looks complicated, stay with me, you will see it is easy.
Step 1 - Create an ARM-based virtual machine with Ubuntu
Before creating the VM we need to configure the network.
Step 1.1 - Create a compartment
To easily separate the different workloads and setup user access properly, it is recommended to create a separate compartment.
- Go to "Identity & Security", then from "Identity", choose "Compartments".
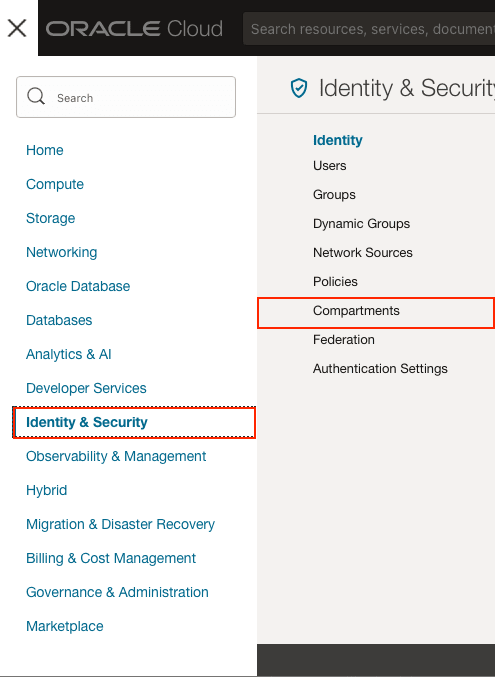
- "Create Compartment" and fill "Name" and "Description".

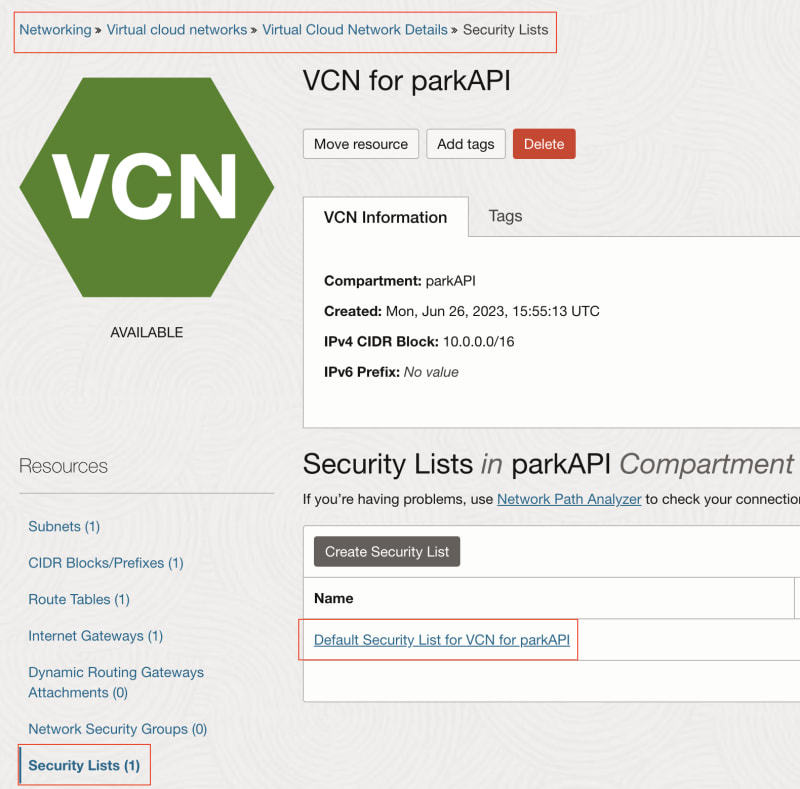
Step 1.2 - Create Virtual Cloud Network (VCN)
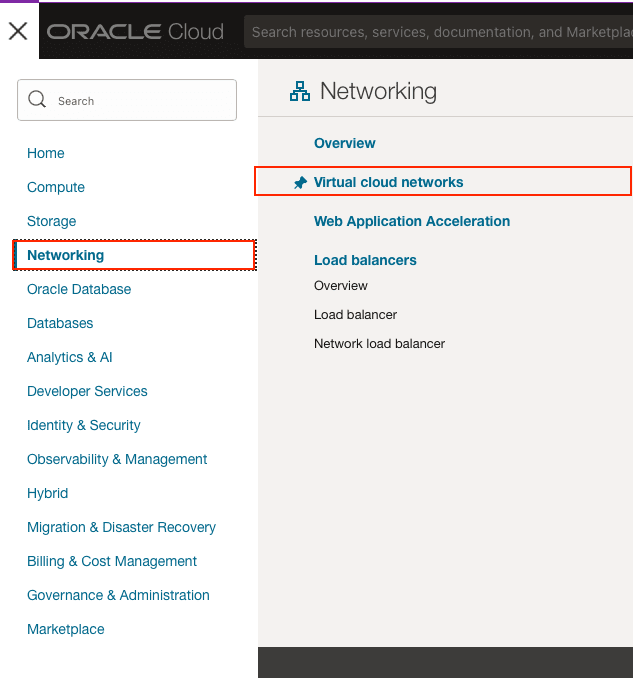
- Go to "Networking", then "Virtual cloud networks"
- Set "Compartment" to "parkAPI"
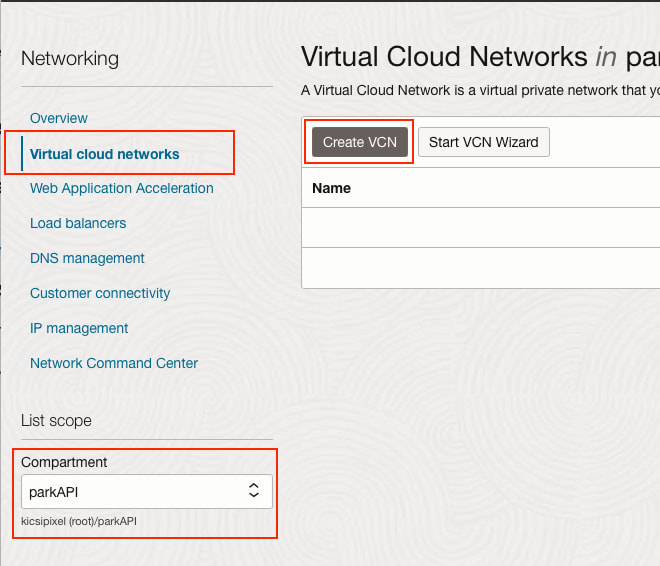
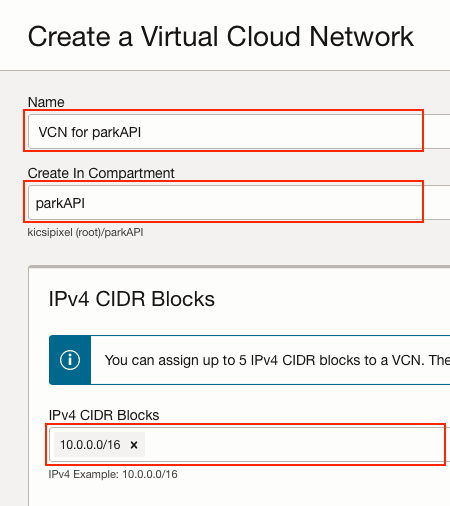
- "Create VCN" and fill "Name" and "PIv4 CIDR Blocks"
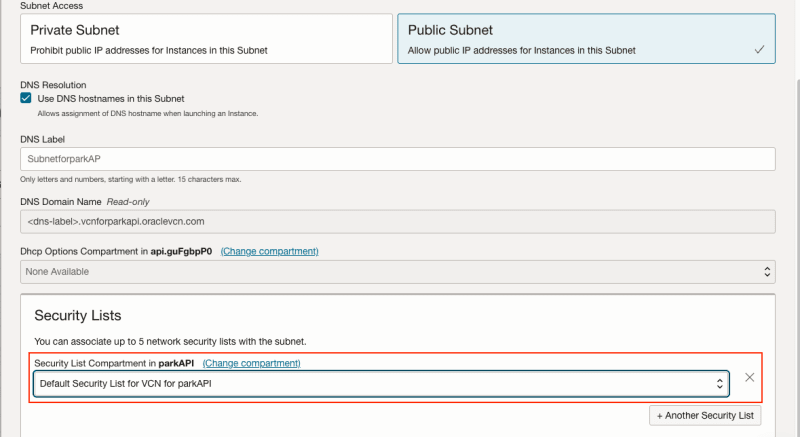
Step 1.3 - Create Subnets
- Choose "Subnets" then "Create Subnet"

- Fill "Name", "Create in Compartment", "IPv4 CIDR Block", choose "Public Subnet"

- Add "Default Security List for VCN for parkAPI"
Step 1.4 - Create Internet Gateway (IG)
- Choose "Internet Gateways", then "Create Internet Gateway"

- Fill "Name" and "Create in Compartment"

Step 1.5 - Create Route rules
- Choose "Route Tables" and click on "Default Route Table for VCN for parkAPI"
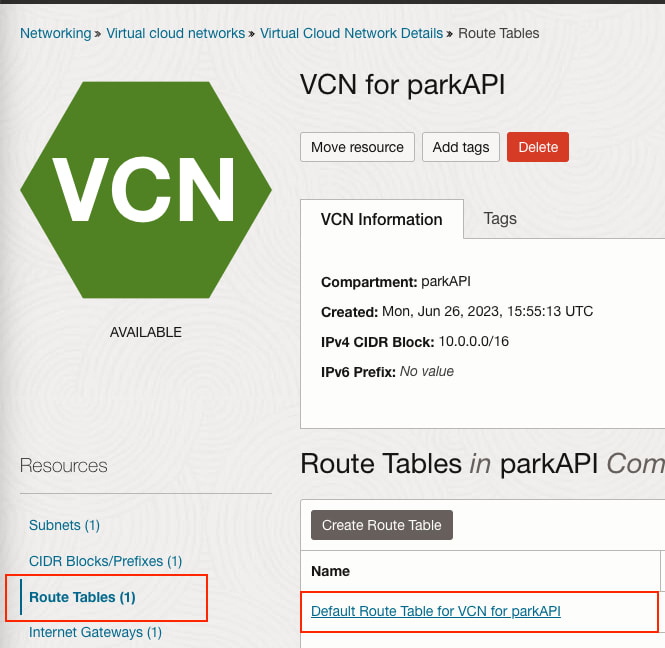
- Click "Add Route Rules"

- Set Internet Gateway

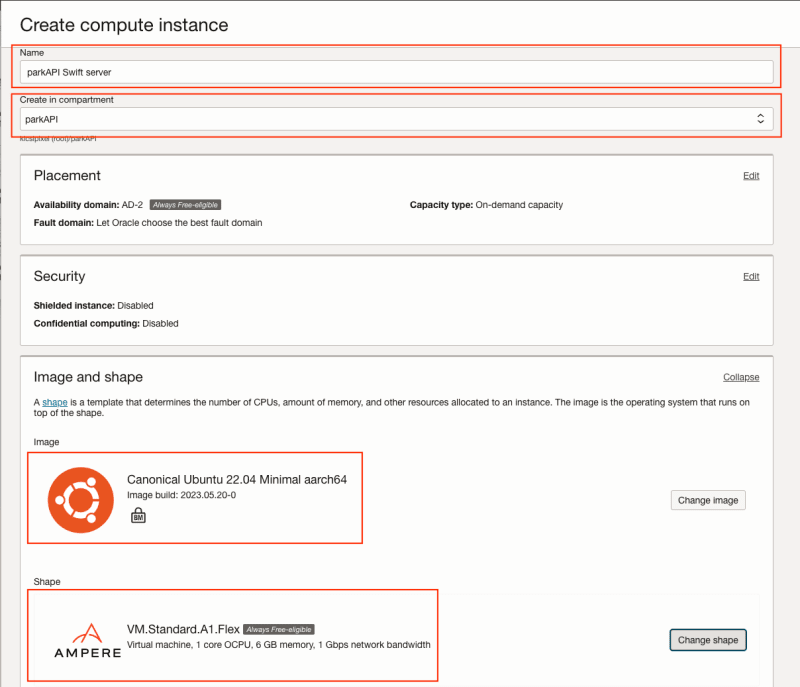
Step 1.6 - Create VM server
- "Compute" and "Instances"

- Set "Compartment" to "parkAPI" then "Create Instance"

- Fill "Name", change "Image" to "Canonical Ubuntu 22.04 Minimal aarch64" and the "Shape" will automatically change to Ampere.
- Assign the newly created VCN at "Networking" section

- At "Add SSH keys" you either "Generate a key pair for me" or "Paste public keys", but you must have to set SSH key for administration purposes.

- "Create"
Step 1.7 - Test our newly created server
Step 1.7.1 - Enable ping
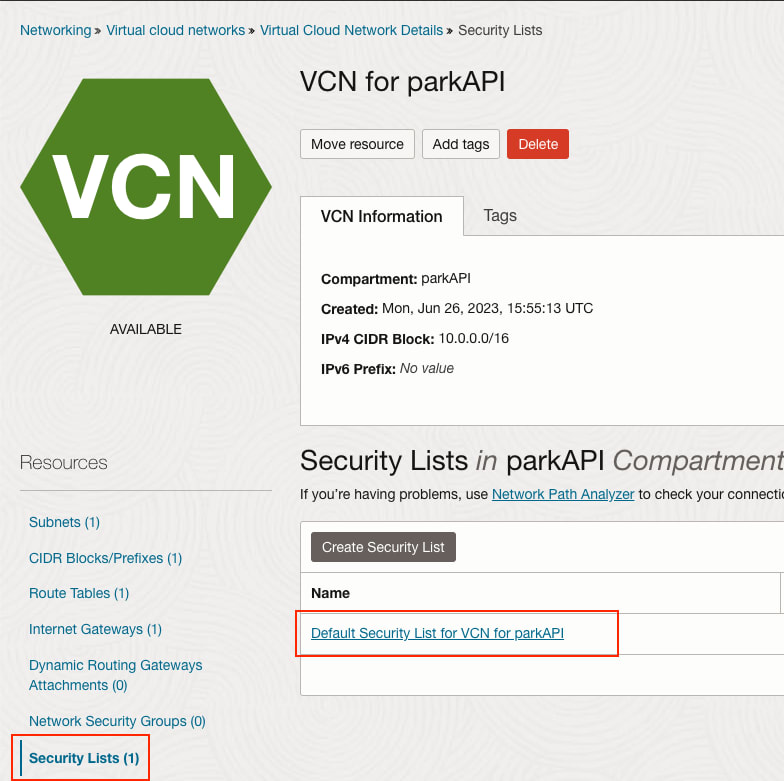
By default OCI doesn't allow ping traffic, you need to allow it.
- Go to "Security Lists" then click on "Default Security List for VCN for parkAPI"
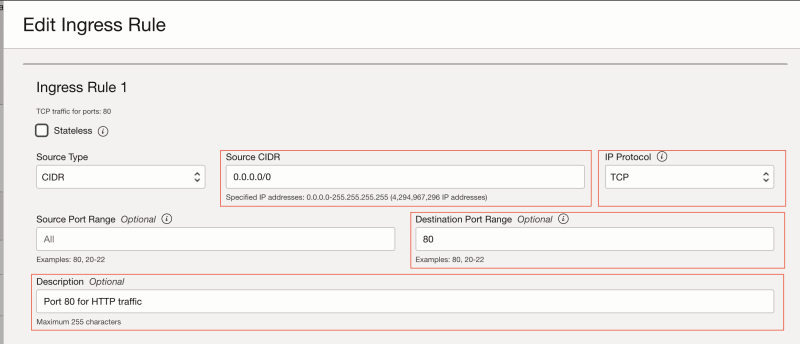
Click on "Add Ingress Rules"

Fill "Source CIDR| "IP Protocol" and "Type"

- Go to "Instances" and set "Compartment" to "parkAPI" and you will see your public IP

- Now you can try:
$ ping 144.24.166.181 -c 5
Step 1.7.2 - Use ssh to login
$ ssh -i oci ubuntu@144.24.166.181`
where oci is your private SSH key.
Step 2. - Install Swift
- Install developer tools
$ sudo apt install clang libpython2.7 libpython2.7-dev
- Download the Swift release for
aarch64platform
$ wget https://download.swift.org/swift-5.8.1-release/ubuntu2204-aarch64/swift-5.8.1-RELEASE/swift-5.8.1-RELEASE-ubuntu22.04-aarch64.tar.gz
- Unpack it
$ tar xzf swift-5.8.1-RELEASE-ubuntu22.04-aarch64.tar.gz
- Move the unpacked Swift folder under
/usr
$ sudo mv swift-5.8.1-RELEASE-ubuntu22.04-aarch64 /usr/share/swift
- Add it to your
PATH
$ echo "export PATH=/usr/share/swift/usr/bin:$PATH" >> ~/.bashrc
- Reload your
SHELLwith the updatedPATH
$ source ~/.bashrc
- Test your Swift version
$ swift -v
Step 3 - Install git
$ sudo apt install git
Step 4 - Install and configure NGINX
- Install NGINX server
$ sudo apt install nginx
- Start the service
$ sudo systemctl start nginx.service
- Add a rule at the top of the INPUT and OUTPUT chain to ACCEPT connexions to port 80. Try again after adding these rules:
$ sudo iptables -I INPUT -p tcp --dport 80 -m conntrack --ctstate NEW,ESTABLISHED -j ACCEPT

$ sudo iptables -I OUTPUT -p tcp --sport 80 -m conntrack --ctstate ESTABLISHED -j ACCEPT
- Before you can check your web server, you need to open the port: 80 on OCI side as well.
Under the Networking / Virtual cloud networks / Virtual Cloud / Network Details / Security Lists click on "Default Security List for VCN for parkAPI".
"Add Ingress Rules" and fill it.
Now, you will see your web server running.
Step 5 - Clone and run our API server
- Clone our Hummingbird app from Github:
$ git clone https://github.com/kicsipixel/parkAPI
- Run your app
$ swift run parkAPI
- To be able to reach your API server you need to configure NGINX to serve as reverse proxy and connect localhost:8080 to www: 80.
Step 5 - NGINX as reverse proxy
- Remove the default NGINX config
$ sudo unlink /etc/nginx/sites-enabled/default
- Create your own
parkAPI.conffile under/etc/nginx/sites-available/
server {
    listen 80;
    listen [::]:80;

    server_name 144.24.166.181 www.144.24.166.181;

    location / {
        proxy_pass http://127.0.0.1:8080;
        proxy_http_version 1.1;
        proxy_set_header Upgrade $http_upgrade;
        proxy_set_header Connection 'upgrade';
        proxy_set_header Host $host;
        proxy_cache_bypass $http_upgrade;
    }
}
- Create a symlink to
sites-enabled
$ sudo ln -s /etc/nginx/sites-available/parkAPI.conf /etc/nginx/sites-enabled/parkAPI.conf
- Restart the server
$ sudo systemctl reload nginx
- Test your server in the browser.

Congratulations, your Hummingbird server is running in the cloud.

Top comments (0)