
In a series of articles, I have shown how I created a new website for the condominium association where I live using Gatsby and with Auth0 user authentication. Read part 1 here: How I built our condos's new web pages with Gatsby and Chakra UI
In my previous article I showed how I built a user admin dashboard with Gatsby Functions, and I configured everything at Auth0 so that I could use role-based access control and Auth0s Management API to display a list of everyone who is registered as a user on the condominium's website, gartnerihagen-askim.no.
The functionality for displaying all users, including what roles they have (user, editor or admin) is finished. Now we need to build the functionality for creating, updating or deleting users.
Create new users
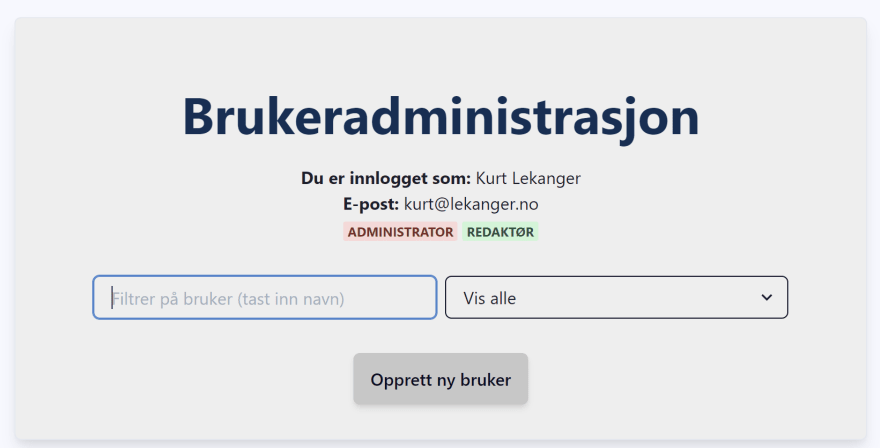
When the user clicks the Create New User button ("Opprett ny bruker" in the screenshot below), I use Gatsby's navigate helper function to send the user to /user-admin/create-user.
The route /user-admin/ and everything below is configured as a client only route in the plugin gatsby-plugin-create-client-paths in the file gatsby-config.js, so that no static pages are created when building the Gatsby site. Under /src/pages I have created the file user-admin.tsx which contains the necessary code to route users to the pages for creating users, updating users, or go to the main page for user administration. The <Privateroute> component in the code snippet below uses a higher order component in auth0-react called withAutenthicationRequired to check if a user is logged in or not.
// src/pages/user-admin.tsx

import * as React from 'react';
import { useAuth0 } from '@auth0/auth0-react';
import { Router } from '@reach/router';
import PrivateRoute from '../utils/privateRoute';
import NotLoggedIn from '../components/notLoggedIn';
import LoadingSpinner from '../components/loading-spinner';
import UserAdminPage from '../components/private-components/user-admin/userAdminPage';
import CreateUserPage from '../components/private-components/user-admin/createUserPage';
import UpdateUserPage from '../components/private-components/user-admin/updateUserPage';

function UserAdmin() {
  const { isLoading, isAuthenticated, error } = useAuth0();

  if (isLoading) {
    return <LoadingSpinner />;
  }

  if (error) {
    return <div>Det har oppstått en feil... {error.message}</div>;
  }

  if (!isAuthenticated) {
    return (
      <NotLoggedIn
        title='Logg inn for brukeradministrasjon'
        description='Du må logge inn for å administrere brukerkontoer for Boligsameiet Gartnerihagen.
      Du vil da kunne legge til, slette eller endre brukere, samt gi brukere admin-tilgang.
      Ta kontakt med styret.'
        redirectUser='/user-admin'
      />
    );
  }

  return (
    <Router>
      <PrivateRoute path='/user-admin/create-user' component={CreateUserPage} />
      <PrivateRoute path='/user-admin/update-user' component={UpdateUserPage} />
      <PrivateRoute path='/user-admin' component={UserAdminPage} />
    </Router>
  );
}

export default UserAdmin;
If the user is logged in, we render the component createUserPage.tsx and the user will see this on the screen ("Create a new user"):

With Chakra UI it is easy to make a form that looks nice. React's useState hook is used for storing the state of the form. All data that is entered into the form is stored in the variable formData, as an object with key/value pairs for email, name, and so on:
const [formData, setFormData] = useState({
    email: '',
    name: '',
    password: '',
    repeatPassword: '',
    roles: [],
});
When someone changes the information in one of the fields of the form, I use setFormData to update the state of the form so that formData at all times contains the correct information. For example, this is how I update the surname ("fornavn") and last name ("etternavn") fields:
  <FormControl id='name' isRequired>
    <FormLabel>Fornavn og etternavn</FormLabel>
    <Input
      value={formData.name}
      placeholder='Fornavn Etternavn'
      onChange={(e) =>
        setFormData((prevState) => {
          return {
            ...prevState,
            name: e.target.value,
          };
        })
      }
    />
  </FormControl>
FormControl in the code snippet above comes from Chakra UI and gives a little extra control when using forms, you can read more about it here.
If the user changes the contents of the field (onChange), we use the spread operator to fill in all existing data in formData with ...formData, and then we change formData.name to whatever the field contains.
When the user presses the Create button, we call the handleSubmit function. In this function we start by validating the information entered in the fields. I check if both password fields are identical, and that the password entered contains both numbers and uppercase and lowercase letters, and that the password is at least 8 characters long:
const handleSubmit = async (event) => {
    event.preventDefault();

    if (formData.password !== formData.repeatPassword) {
      toast({
        title: 'Passordene er ikke like',
        description:
          'Pass på at du har skrevet passordet helt likt i de to feltene.',
        status: 'error',
        duration: 3000,
        isClosable: true,
      });
      return;
    }

    if (!formData.password.match(/((?=.*\d)(?=.*[a-z])(?=.*[A-Z]).{8,})/)) {
      toast({
        title: 'Ikke sterkt nok passord',
        description:
          'Passordet må inneholde både tall og store og små bokstaver, og være minst 8 tegn langt.',
        status: 'warning',
        duration: 3000,
        isClosable: true,
      });
      return;
    }

// ...the rest of the handleSubmit function
If the passwords are not identical, or not strong enough, I use the Toast component in Chakra UI to display a warning that pops up on the screen for a few seconds, before disappearing again.
The new user form also have checkboxes for which roles the new user will have. I store whether or not the checkboxes are checked in the variables isAdminChecked and isEditorChecked. Then I can do the following in the handleSubmit function to update the roles array in formData with all the roles we want the new user to have:
formData.roles = ['user'];
if (isAdminChecked) {
  formData.roles.push('admin');
}
if (isEditorChecked) {
  formData.roles.push('editor');
}
All users should have the role "user", so we only have to check for admin and editor. We add the role "user" to all newly created users.
Contact our serverless function to create the user
We have now updated our formData variable so that it contains a Javascript object with all necessary data about the user we want to create. Example of what formData can look like when we press the "Create" button:
{
    email: 'ola@nordmann.no',
    name: 'Ola Nordmann',
    password: 'InnmariBraPassord123',
    repeatPassword: 'InnmariBraPassord123',
    roles: ['user', 'admin'],
}
Now we can make a request to our create-user API that we have made with Gatsby Functions. All t Functions are located in /src/api/. Here's how it's done on the client (we are still in our handleSubmit function in the createUserPage component at the client:
try {
      const accessToken = await getAccessTokenSilently(opts);
      const api = await fetch(`/api/admin-users/create-user`, {
        method: 'POST',
        headers: {
          'Content-Type': 'application/json',
          Authorization: `Bearer ${accessToken}`,
        },

        body: JSON.stringify(formData),
      });

      if (api?.status !== 200) {
        throw new Error(`${api.statusText} (${api.status})`);
      }

      const isJson = api.headers
        .get('content-type')
        ?.includes('application/json');

      const data = isJson && (await api.json());

      if (!data) {
        throw new Error('no_data');
      }

      if (data.error) {
        const { error_description } = JSON.parse(data?.error_description);
        throw new Error(`${data.error} : ${JSON.stringify(error_description)}`);
      }

      // Store the API response (e.g. the user data for the newly created user)
      setResponse(data?.body?.user);

      setShowLoadingButton(false);
    } catch (error) {
      if (
        error.message.includes(
          'Consent required' || 'Forbidden (403)' || 'access_denied'
        )
      ) {
        getToken();
      }

      if (error.message === 'Conflict (409)') {
        toast({
          title: 'Brukeren eksistererer allerede',
          description:
            'Hver bruker må ha en unik epost-adresse og et unikt navn.',
          status: 'error',
          duration: 3000,
          isClosable: true,
        });
      } else {
        toast({
          title: 'Noe gikk galt',
          description: `${error.message}`,
          status: 'error',
          duration: 3000,
          isClosable: true,
        });
      }
      setResponse(null);
      setShowLoadingButton(false);
    }
Let's start at the top: First we fetch the user's access token from Auth0 with getAccessTokenSilently(opts). opts are configured like this:
const opts = {
    audience: 'https://useradmin.gartnerihagen-askim.no',
    scope: 'create:users read:roles create:role_members',
  };
Scope are which permissions the user should have to be able to create another user, and the user should also request permissions for updating the roles of the newly created user. For more information, have a look at Auth0's documentation on how to call a protected API with an access token here.
We have now received an access token that we can include in the authorization header when calling our create-user API. In addition to the token, we also include our formData - data about the user we want to create - in body, like this:
const api = await fetch(`/api/admin-users/create-user`, {
    method: 'POST',
    headers: {
      'Content-Type': 'application/json',
      Authorization: `Bearer ${accessToken}`,
    },

    body: JSON.stringify(formData),
});
Our Gatsby Function for creating users
Our serverless function create-user will now receive a POST request where the access token is in the authorization header and info about the user to be created is in the body.
Before we call Auth0's Management API to create the user, it's a good idea to do some checking. I use the @serverless-jwt/jwt-verifier library to read the access token received from the client, and then I use jwt.verifyAccessToken to check that it is a valid token. I also retrieve all the permissions (scopes) from the access token, and check that the user has the permissions needed for creating a user. I only check for the scope create:users. If the user can create users, the user should also be able to read roles and assign roles to users - we don't need to verify that.
Here is the first part of our serverless function:
// src/api/admin-users/create-user.ts

import { GatsbyFunctionRequest, GatsbyFunctionResponse } from 'gatsby';
const ManagementClient = require('auth0').ManagementClient;
const {
  JwtVerifier,
  JwtVerifierError,
  getTokenFromHeader,
} = require('@serverless-jwt/jwt-verifier');

const ALLOWED_ROLES = ['user', 'admin', 'editor'];

const jwt = new JwtVerifier({
  issuer: `https://${process.env.GATSBY_AUTH0_DOMAIN}/`,
  audience: `https://${process.env.AUTH0_USERADMIN_AUDIENCE}`,
});

export default async function handler(
  req: GatsbyFunctionRequest,
  res: GatsbyFunctionResponse
) {
  let claims, permissions;
  const token = getTokenFromHeader(req.headers.authorization);
  const userRoles = req.body.roles;

  if (req.method !== `POST`) {
    return res.status(405).json({
      error: 'method not allowed',
      error_description: 'You should do a POST request to access this',
    });
  }

  userRoles.forEach((role) => {
    if (!ALLOWED_ROLES.includes(role)) {
      return res.status(403).json({
        error: 'invalid user role',
        error_description: 'Serveren mottok en ugyldig brukerrolle',
      });
    }
  });

  // Verify access token
  try {
    claims = await jwt.verifyAccessToken(token);
    permissions = claims.permissions || [];
  } catch (err) {
    if (err instanceof JwtVerifierError) {
      return res.status(403).json({
        error: `Something went wrong. ${err.code}`,
        error_description: `${err.message}`,
      });
    }
  }

  // check if user should have access at all
  if (!claims || !claims.scope) {
    return res.status(403).json({
      error: 'access denied',
      error_description: 'You do not have access to this',
    });
  }

  // Check the permissions
  if (!permissions.includes('create:users')) {
    return res.status(403).json({
      error: 'no create access',
      status_code: res.statusCode,
      error_description:
        'Du må ha admin-tilgang for å opprette brukere. Ta kontakt med styret.',
      body: {
        data: [],
      },
    });
  }

// ...create-user.ts continous
If the user passes all checks, we're ready to create the new user. Vi create a new Auth0 ManagementClient:
const auth0 = new ManagementClient({
  domain: `${process.env.GATSBY_AUTH0_DOMAIN}`,
  clientId: `${process.env.AUTH0_BACKEND_CLIENT_ID}`,
  clientSecret: `${process.env.AUTH0_BACKEND_CLIENT_SECRET}`,
  scope: 'create:users read:roles create:role_members',
});
Then we create a new constant, userData that holds an object with data about the user - which we get from req.body. connection in the code snippet below is the name of the Auth0 database where we store all the users:
const userData = {
  connection: 'Username-Password-Authentication',
  email: req.body.email,
  name: req.body.name,
  password: req.body.password,
  verify_email: false,
  email_verified: false,
};
Now we can create the user with the createUser method from the Auth0 Management API SDK (we're putting everything inside a try/catch block to get error handling):
const newUser = await auth0.createUser(userData);
Unless something goes wrong, Auth0 has now created the user for us and added it to the Username-Password-Authentication database on their servers. However, we're not quite finished yet. We need to give the new user the roles we selected when filling out the add user form on the client. For that, we need a couple of other methods from the Auth0 Management API: getRoles to fetch all roles defined at Auth0, and assignRolesToUser to assign the roles to our new user:
const allRoles = await auth0.getRoles();
let rolesToAdd = [];
allRoles.forEach((role) => {
  if (userRoles.includes(role.name)) {
    rolesToAdd.push(role.id);
  }
});
await auth0.assignRolestoUser(
  {
    id: newUser.user_id,
  },
  {
    roles: rolesToAdd,
  }
);
In the code snippet above, we first fetch all roles with getRoles and store this in the constant allRoles. Then we create a new, empty array called rolesToAdd that eventually will contain all the roles we want to assign to the user. We then use forEach to iterate over all the roles we have defined at Auth0 and check if the role excists in userRoles (which we fetch from req.body.roles in the start of our code). If the role excists, we add the role to the rolesToAdd array. Note that we have to use the ID and not the name of the role, as this is what's required by the assignRolesToUser method.
When the rolesToAdd array has all the role IDs the user should have, we call assignRolesToUser with the ID of the new user (which we got when we called createUser) and the array with all the roles we want to assign to the user).
If everything have worked out as expected, we return the new user and the roles back to the client - just to confirm that the user has been created:
res.status(200).json({
    body: {
      status_code: 200,
      status_description: 'Ny bruker er opprettet',
      user: { ...newUser, roles: userRoles },
    },
  });
Confirm that the user has been created
When the client (ie the <CreateUserPage> component) receives the response from the API, I first check that the HTTP status code is 200, which indicates that everything is OK. I do this inside a try/catch block, to be able to use throw new Error() and handle the error in the catch block (I use the Toast component in Chakra UI to display a sensible error message).
If all went well, I receive data about the new user from the API, and I use the useState hook in React to store data about the user in the response variable, like so: setResponse(data?.Body?.User)
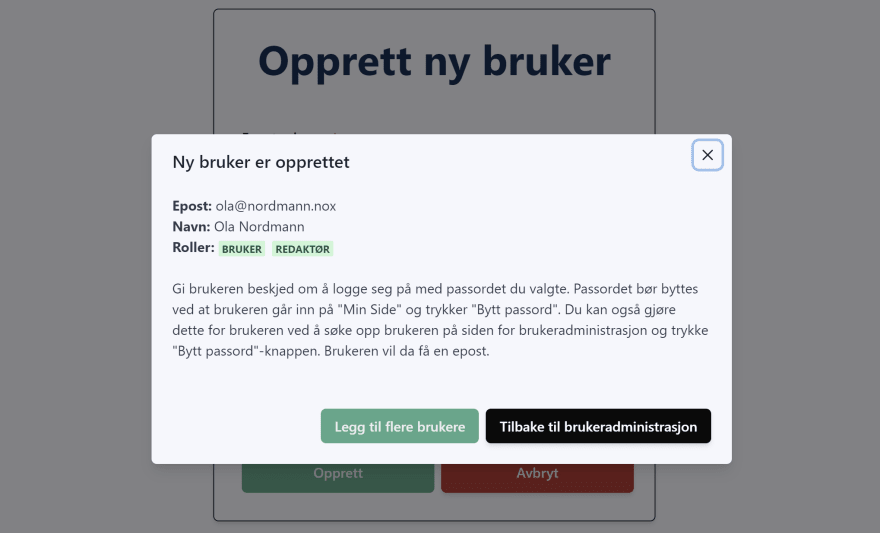
Finally, I use a modal component in Chakra UI to display a confirmation that the user has been created, with the user information we just received from the API:
Updating a user
Updating users is not very different. When we click the Create User button on one of the users in the user admin dashboard, we navigate to the route /user-admin/update-user with Gatsby's navigate helper function. We also send data about the user we want to change, by passing in an options object to the navigate function, with a state prop inside. This is from the component in userAdminPage.tsx:
onClick={() =>
    navigate('/user-admin/update-user', {
      state: userToShow,
    })
}
If the user is authenticated, the component UpdateUserPage is rendered - this is controlled by Reach Router which is built into Gatsby. We get access to the user data via props.location.state like this: const userToModify = props?.location?.state.
Then I use the useState hook in React to store the current state of the user information for the user I'm updating in an object (userDataForm):
const [userDataForm, setUserDataForm] = useState({
    created_at: '',
    last_login: '',
    email: '',
    name: '',
    picture: '',
    roles: [],
    user_id: '',
  });
The first time the component is rendered, I set userDataForm to the user data we just received via props.location.state:
useEffect(() => {
  setUserDataForm({
    ...userToModify,
    roles: [...userToModify.roles],
  });
}, []);
I won't go into all the details about everything I do on the client to update the user information, it's basically just pre-filling a form with info about the user we are going to edit, and then in case of changes to any of the fields in the form use setUserDataForm to update state (much like we did in the new user creation form). This is the screen you get when you press Change user:

The source code of the component UpdateUserPage is on my Github, together with the rest of the source code.
Call the serverless function to update the user
I created a handleSubmit function which runs when we press the "Update" button in the form. handleSubmit first fetches the access token of the logged in user, and I specify that the user needs the permissions update:users, read:roles and create:role_members. Then we make a PATCH request to our serverless Gatsby Function update-user, and pass along the access token in the authentication header and the updated data about the user (userDataForm) in body:
// src/components/private-components/user-admin/updateUserPage.tsx

const opts = {
  audience: 'https://useradmin.gartnerihagen-askim.no',
  scope: 'update:users read:roles create:role_members',
};

try {
      const accessToken = await getAccessTokenSilently(opts);
      const api = await fetch(`/api/admin-users/update-user`, {
        method: 'PATCH',
        headers: {
          'Content-Type': 'application/json',
          Authorization: `Bearer ${accessToken}`,
        },

        body: JSON.stringify(userDataForm),
      });

// ...the rest of the code
How the update user serverless function works
In the Gatsby function update-user located in our API directory, we do much of the same as we did when we were creating a user. We verify the access token and check that the client calling the API has the necessary permissions. Then we use the Auth0s Management API SDK to create a new ManagementClient which we call auth0, and then we can call auth0.updateUser() to update the user. updateUser() requires the ID of the user you want to update, along with the updated user data:
// src/api/admin-users/update-user.ts

const updatedUser = await auth0.updateUser(
  { id: req.body.user_id },
  userData
);
We also need to add and/or remove roles from the user. I create an empty array I call rolesToRemove and another I call rolesToAdd. Then I loop over all the roles defined in Auth0, and see if the roles exist or not in the user data, and use auth0.assignRolesToUser and auth0.removeRolesFromUser, respectively, to add or remove roles. Finally, the API returns info about the updated user and which roles have been removed or added. If something goes wrong (for example, if the Auth0s Management API complains about something), this is intercepted by the catch block - which returns information about the error to the client. If this happens, I use the Toast component in Chakra UI to give a hopefully meaningful error message to the user.
Here is the rest of the backend code that updates the user and the roles of the user:
// src/api/admin-users/update-user.ts

  const auth0 = new ManagementClient({
    domain: `${process.env.GATSBY_AUTH0_DOMAIN}`,
    clientId: `${process.env.AUTH0_BACKEND_CLIENT_ID}`,
    clientSecret: `${process.env.AUTH0_BACKEND_CLIENT_SECRET}`,
    scope: 'update:users read:roles create:role_members',
  });

  const userData = {
    connection: 'Username-Password-Authentication',
    email: req.body.email,
    name: req.body.name,
  };

  try {
    const updatedUser = await auth0.updateUser(
      { id: req.body.user_id },
      userData
    );
    const allRoles = await auth0.getRoles();

    let rolesToRemove = [];
    allRoles.forEach((role) => {
      if (!userRoles.includes(role.name)) {
        rolesToRemove.push(role.id);
      }
    });

    let rolesToAdd = [];
    allRoles.forEach((role) => {
      if (userRoles.includes(role.name)) {
        rolesToAdd.push(role.id);
      }
    });

    if (rolesToAdd.length > 0) {
      await auth0.assignRolestoUser(
        {
          id: req.body.user_id,
        },
        {
          roles: rolesToAdd,
        }
      );
    }

    if (rolesToRemove.length > 0) {
      await auth0.removeRolesFromUser(
        {
          id: req.body.user_id,
        },
        {
          roles: rolesToRemove,
        }
      );
    }

    res.status(200).json({
      body: {
        status_code: 200,
        status_description: 'Bruker er oppdatert',
        user: updatedUser,
        roles_removed: rolesToRemove,
        roles_added: rolesToAdd,
      },
    });
  } catch (error) {
    res.status(error.statusCode).json({
      error: error.name,
      status_code: error.statusCode || 500,
      error_description: error.message,
    });
  }
Deleting users
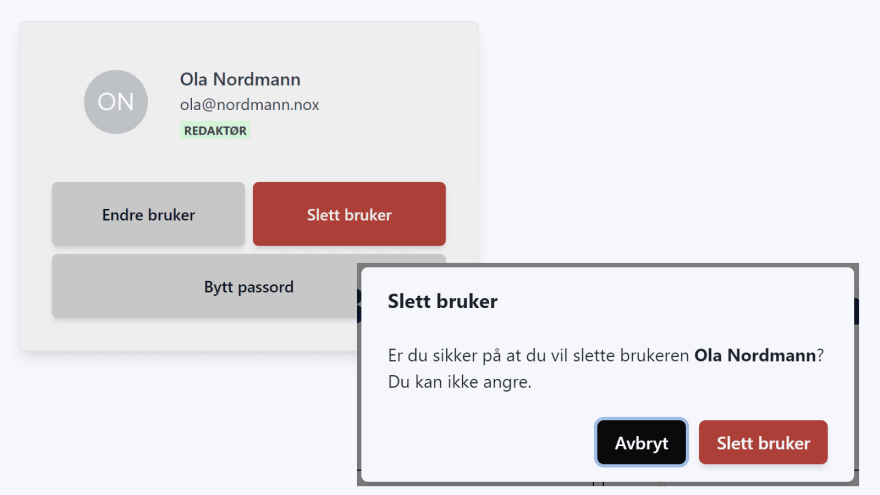
Deleting a user is done in a similar way. If someone clicks the Delete User button on the client, I store the user ID and the name of the user in a constant, userToDelete, and show a warning with the AlertDialog component in Chakra UI.
If you confirm that you are sure you want to delete the user, I call my function handleDeleteUser which in turn fetches the access token of the logged-in user and asks Auth0 for the delete:user permission. I then do a DELETE request to our serverless function delete-user with the access token in the authorization header and the userToDelete constant in the body of the request:
const handleDeleteUser = async () => {
    const opts = {
      audience: 'https://useradmin.gartnerihagen-askim.no',
      scope: 'delete:users',
    };

    try {
      if (!userToDelete.id.includes('auth0')) {
        throw new Error('User ID is not valid');
      }

      const accessToken = await getAccessTokenSilently(opts);
      const api = await fetch(`/api/admin-users/delete-user`, {
        method: 'DELETE',
        headers: {
          'Content-Type': 'application/json',
          Authorization: `Bearer ${accessToken}`,
        },

        body: JSON.stringify({ idToDelete: userToDelete.id }),
      });

// ... the rest of the code
Our API (serverless function) for deleting users then checks the validity of the access token, and of course that the user has the permissions to delete other users. We also check that the user ID in req.body.idToDelete is valid. If it is, then we create a new Auth0 ManagementClient which we call auth0, and call auth0.deleteUser() like this:
// src/api/admin-users/delete-user.ts

.
.
.

const auth0 = new ManagementClient({
    domain: `${process.env.GATSBY_AUTH0_DOMAIN}`,
    clientId: `${process.env.AUTH0_BACKEND_CLIENT_ID}`,
    clientSecret: `${process.env.AUTH0_BACKEND_CLIENT_SECRET}`,
    scope: 'delete:users',
  });

  try {
    const idToDelete = req.body.idToDelete;

    if (!idToDelete || !idToDelete.includes('auth0')) {
      const error = {
        name: 'bad user id',
        statusCode: 400,
        message: 'Manglende bruker-id eller feil format',
      };
      throw error;
    }

    await auth0.deleteUser({ id: idToDelete });

    res.status(200).json({
      body: {
        status_code: 200,
        status_description: 'Bruker er slettet',
      },
    });
  } catch (error) {
    res.status(error.statusCode || 500).json({
      error: error.name,
      status_code: error.statusCode || 500,
      error_description: error.message,
    });
  }
If everything is successful, we return HTTP status code 200 to the client and use Chakra UIs Toast component to show an alert that the user has been deleted.
Some final thoughts
Pooh! This was a lot of work, but after some late evenings and weekends with coding I was able to finish our condominiums web page, with user administration and most of the features we need.
I have not gone into detail on all the nooks and crannies of how everything is built, but instead I encourage you to take a look at the complete source code on my Github.
When I started the job of creating the web site, I thought that this should be done fairly quickly - but if there is one thing I have learned from the project, it is that a web site like this is never finished. There is always something that can be improved.
I will probably spend some refactoring and improving the code to make things a little tidier, and then the plan is also to create a serverless function that automatically notifies registered users when new content is published. Here I will set up a webhook at Contentful that calls a Gatsby Function that uses Sendgrid's node solution to send an email with a link to the new content. Or perhaps I just use Nodemailer.
If you have any feedback or thoughts on the project, or suggestions for things that can be improved, feel free to comment. I'm not a professional developer and has done all this in my spare time, mostly weekends and evenings. So I'm thankful for all constructive inputs on things that could be improved.
You can find all the source code at https://github.com/klekanger/gartnerihagen
This YouTube video shows what the user interface and web pages look like live:
This is a translation, the original article in Norwegian is here: Brukeradmin-dashbord med Gatsby Functions: Oppdatere, opprette eller slette brukere

Top comments (0)