
Django is an awesome framework and sometimes we don't like to write the CSS files separately so in that scenario we can use an CSS framework packed with classes like flex, pt-4, text-center and rotate-90 that can be composed to build any design, directly in your markup. Yes you are right it's Tailwind CSS.
Using Tailwind CSS can significantly reduce the number of static files in your project.
In order to use Tailwind CSS with Django you have to follow the steps given below :
- initialize a django project.
- initialize npm and install tailwindcss.
- make static directory.
- create templates.
- add views and urls.
- Start the Tailwind CLI build process.
- Start the development server.
- More...
Initialization of django project
In the beginning we will open the terminal and make a django project using command django-admin startproject myproject after this we will cd into our project, In this case command will be cd myproject.
Create an app inside your project by executing python manage.py startapp myapp.
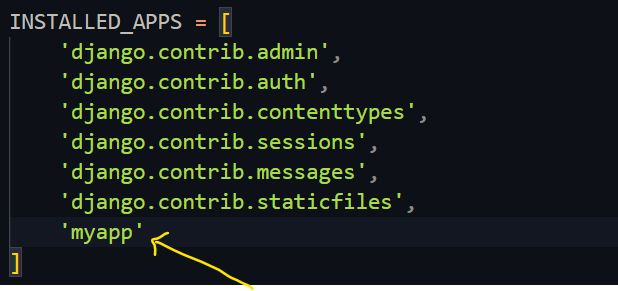
Include the app inside INSTALLED_APPS in settings.py file.
Installing Tailwind CSS
To use Tailwind CSS we need to install two npm packages tailwindcss and @tailwindcss/cli and for that we have to initialize this project with npm using the command npm init -y this command will create package.json for us.
Now install the packages using command given below.
npm install tailwindcss @tailwindcss/cli
Make static a directory
In order to save static files create an empty folder named static in root directory and use following settings in your settings.py.
STATIC_URL = 'static/'
STATICFILES_DIRS = [BASE_DIR / "static"]
STATIC_ROOT = BASE_DIR / "staticfiles"
inside this static folder create another folder called src and inside src create a file named input.css.
the input.css file should have the following code.
@import "tailwindcss";
Make templates
To organize our HTML we will create a empty directory called templates in root folder and add it in our settings.py like this 👇🏻

Now we will create a html file called index.html which will contain following code.
{% load static %}
<!DOCTYPE html>
<html lang="en">
<head>
    <meta charset="UTF-8">
    <meta name="viewport" content="width=device-width, initial-scale=1.0">
    <title>Django + Tailwind CSS v4</title>
</head>
<body>
    <div class="container mx-auto bg-gray-100 py-10">
        <h1 class="text-4xl font-bold text-center text-green-700 ml-30">Django + Tailwind CSS v4</h>
    </div>
</body>
</html>
Define views and add urls
your views.py should look like this.
from django.shortcuts import render

def index(request):
    return render(request, 'index.html')
your urls.py should look like this.
from django.contrib import admin
from django.urls import path
from myapp.views import index

urlpatterns = [
    path('admin/', admin.site.urls),
    path('', index, name='index'),
]
Start the Tailwind CLI build process
Open a terminal window and start the tailwind cli build process by executing command npx @tailwindcss/cli -i ./static/src/input.css -o ./static/src/output.css --watch this generate an file named output.css in the src directory which is specified earlier.
⚠️ make sure you do not close the above window during your development process so that tailwind cli can compile the tailwindcss code everytime we write.
now add that output.css into your index.html by adding following line in head <link rel="stylesheet" href="{% static '/src/output.css' %}">. your index.html should look like this 👇🏻
{% load static %}
<!DOCTYPE html>
<html lang="en">
<head>
    <meta charset="UTF-8">
    <meta name="viewport" content="width=device-width, initial-scale=1.0">
    <title>Django + Tailwind CSS v4</title>
    <link rel="stylesheet" href="{% static '/src/output.css' %}">
</head>
<body>
    <div class="container mx-auto bg-gray-100 py-10">
        <h1 class="text-4xl font-bold text-center text-green-700 ml-30">Django + Tailwind CSS v4</h>
    </div>
</body>
</html>
Now start the development server
Now you can start the development server by python manage.py runserver and you will be able to see following output.

More...
moreover you can refer official tailwindcss v4 documentation for more details like how to add dark mode and custom classes etc.
Thank You for reading the full blog.

Top comments (0)