How to set up a mechanical keyboard with super light-touch switches.
My journey to set up the easiest touch and shortest travel possible on a keyboard led me to a Planck-EZ keyboard with switches with modified springs, but it won’t stop there.
This article is aimed primarily at people with unusual keyboarding needs, such as those dealing with RSI (repetitive stress injury ). There is a difficult learning curve to using super light touch switches, during which time you will likely see a lot of extra home row characters sprinkled throughout your documents, as you rest your hands on the keyboard and unintentionally actuate the keys. j
Background
My life as a keyboard-using person temporarily ended for a few years, starting in early 2016, when the cumulative effects of RSI caused typing to be too painful, and my arms too achy to comfortably carry out some basic household tasks, or even continue playing much guitar.
In order to continue working in my field as a software engineer, I then became a voice coder, using VoiceCode (extinct) and then Talon, and got good enough with the software to be able to work professionally, largely hands free.
Eventually due to my professional role switching to teaching and mentoring, my needs for keyboarding increased. I had healed quite a bit from my injuries, but knew that full time keyboarding would likely lead me down the same path of eventual physical injury.
Daydreaming about the possibility of being able to use a keyboard again, my research was inspired by the way I’ve always set up my guitars, with the lowest “action” (string height off of the neck) possible, leading to the least finger strain.
That search led me to a slack posting by a member of the Talon community who mentioned they had made a super light-touch keyboard by cutting the springs in their Cherry MX reds to bring the actuation force down.
My research that I’ve documented in this post included buying a small wire cutter and trying some experiments with spring cutting, but I found it lacking in precision, enough to want to try something else. It turns out that there are now precision springs with a huge variety of actuation forces easily available online. You can view a list at https://www.spritdesigns.com/mx
Another piece of the puzzle was researching key switches that would work well with reduced spring forces. I found a variety of low-actuation distance “speed” switches that triggered a key press around 1.1mm. For comparison, a normal Cherry MX red actuates around 2mm. If you have a ruler with millimeters on it and actually look at the difference here, it would seem to be ridiculously negligible. I thought the same. But… here is an important distinction that made a big difference in terms of my personal need. Not only did I want keys that actuated by basically breathing on them, I also wanted to lower the amount of total travel that was possible during a keypress, so that even if I had the hand strength to type relatively hard on a particular day, the design of the key would limit the amount of finger movement I was doing.
After using a bunch of super-light modified Gateron Clear switches, I found that their greater overall travel of 4.0mm was irritating my RSI. The Kailh Speed Silvers have an overall travel of 3.5mm which by itself is a ridiculously small difference, but I further lower the key travel with 2 stacked O-rings on the key cap (details below). Over hundreds or thousands of key presses over the day, these modifications make a big difference for my RSI.
The final piece of the puzzle was locating a keyboard that would allow me to experiment with different key/spring combinations. I landed on the Planck-EZ which seemed too good to be true. It’s a Planck keyboard with the ability to hot-swap your key switches. I ordered one with a set of Kailh Speed Silver switches installed. I also bought some different switches to experiment with: Kailh copper switches, and some Gateron clears.
The Kailh copper switches were immediately out for me. The tactile bump was totally counter to my goal of lightest touch. They were irritating to my RSI, and with the lighter springs I was using, didn’t fully rebound after pressing. They helped me realize that I should only focus my further research efforts on linear switches.
The Kailh Speed Silver switches have an actuation point around 1.1mm. They were the switches that I ordered with the board, and I swapped the springs with 35g Spirit MX springs. They actuate at 25g. The 30g Spirit MX springs I also bought were not springy enough to fully ‘reset’ the Kailh Speed Silver. If I were to lube the switch, it might be sufficient, but I have not tried that yet.
You can follow this link to my layout on the Ergodox EZ Configurator site.
Here is how I have arranged the modified switches on my Planck-ez
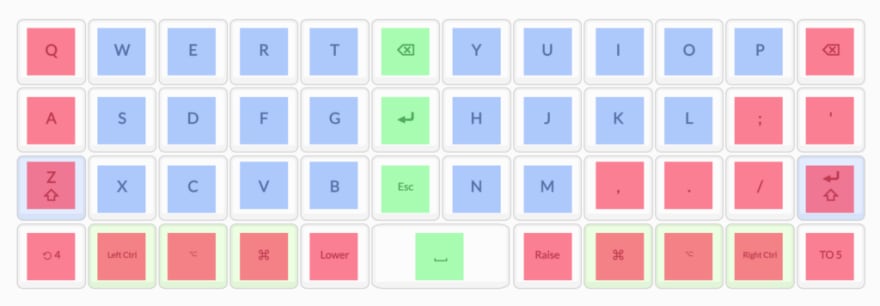
Here is the key for the colors above:

Gateron clear springs are sold with 35g springs installed. However, that is the actuation force, which means that the finger force curve goes up from there. The Spirit MX compatible spring that I swapped into the Gateron Clears are sold as 30g, but they have a 20g actuation force. The 30g Spirit springs were insufficient to reset the Kailh Speed Silvers, but work very well for the Gateron Clears, making them incredibly light to actuate.
The modified Gateron Clears, with their slightly longer actuation point serve as a very useful “guard row” against accidental key presses that come from just moving your hands anywhere near the board. You may not be aware of how much pressure you put on your keys while you are subconsciously locating the right key to press. When you remove virtually all resistance from the keys with the modified springs, and lower the actuation point (on the letter keys) to 1.1mm with a Speed series switch, you will learn just how sloppy most of us are when it comes to locating keys.
Swapping Springs
- The Gateron Clears are easy to open up with an MX Switch Top Removal Tool.
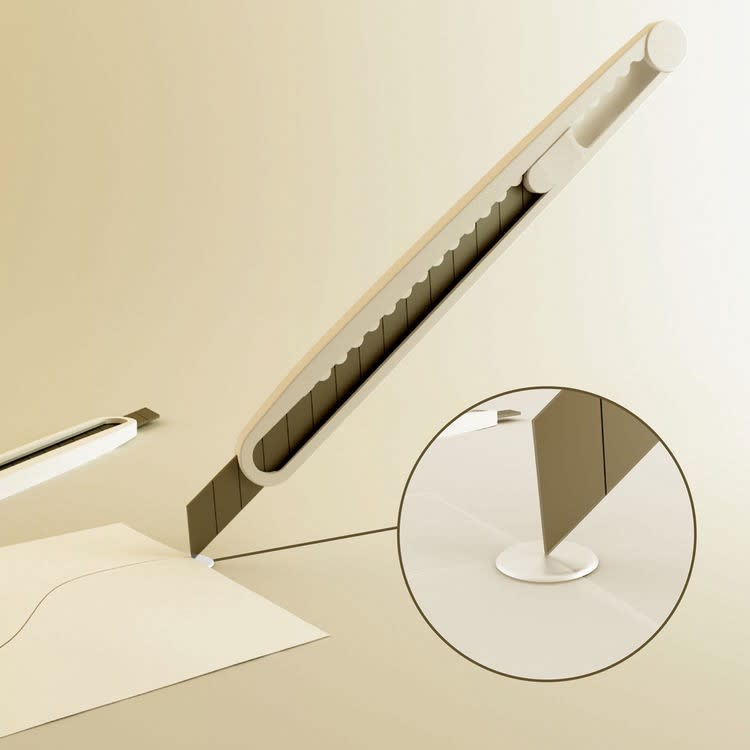
- The Kailh switches require some semi-dangerous knife work to open up. Here is a good set of photos showing the process. Instead of a large blade, I use a thin box cutter blade similar to the one shown below. Either way, you are at a good risk of blood letting.
O-rings
I was able to further reduce the total key travel distance an estimated 1 or 2 mm with O rings. They also make the keyboard much quieter. They also raise the height of the keys off the board by a couple millimeters. I bought a set. They sit on top of each other nicely. I put the large ring on first, push it down with an unscrewed ball point pen body, and then put the small one on top. I make sure not to push down too hard on the key caps when attaching them to the stem. Yes, this means that they keycaps fall off occasionally if I carelessly drag something across the edge of a key when moving things on my desk.
The modified Gateron Clears with O-rings actuate much closer to the end of their total key travel than the modified Kailh Speed Silvers. I can actuate the Speed Silver with a super light touch and sometimes not even bottom out. The Gaterons are almost bottomed out (with O-rings) when they actuate.
Here are the sizes of O-rings that I am using:
- Large: OD 9 x 2.5mm
- Small: OD 8 x 1.5mm

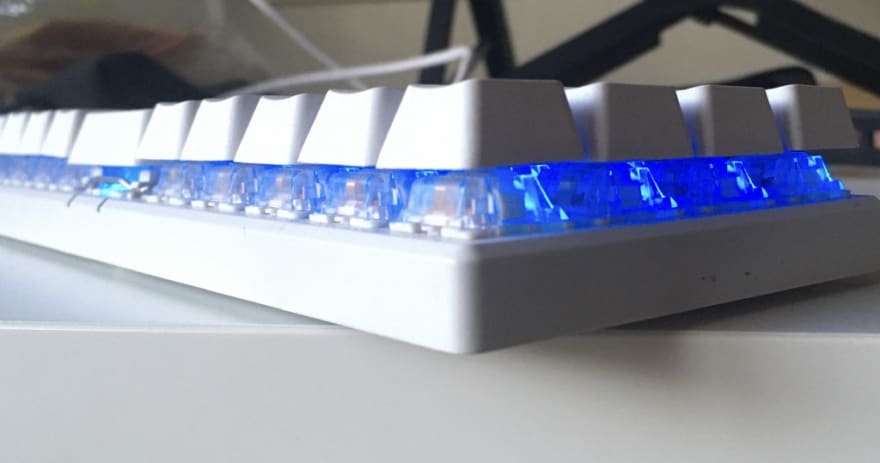
You can even see in the following photo, on the spacebar, which only has 1 large O-ring, that it sits lower than the other keys, which all have 2 O-rings. The O-rings significantly affect key height, overall travel, and sound. I tried removing them recently and found I’ve really gotten used to the feel. I found the travel and noise irritating. Many mechanical keyboard fans love the noise and feel of their keys, without O-rings. I probably would as well, but due to RSI, my goals unfortunately have to focus on ergonomic purpose over aesthetics.
This is the type of box knife I use to open the Kailh Speed Silver switches.
Here is my board with all the keycaps removed and placed on the table above the board and exposed switches. Red sharpie dots were added to the modified switches to be able to identify the ones with the swapped springs.

My weirdo layout was inspired by my TypeMatrix 2030, as an attempt to make more space for my wrists. It’s still not enough for me.

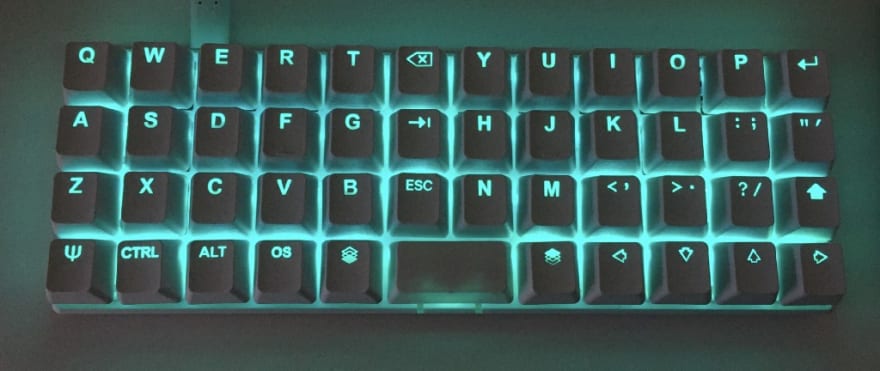
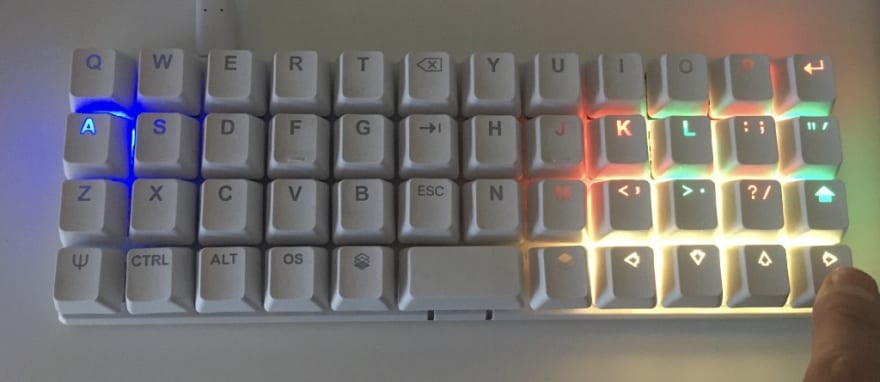
The following photos show the customized LED settings that correspond to the various programmable “modes”.


Where I plan to go from here
So it turns out through researching for this post, you can go even lighter. Check out the gboards link below in Further Reading. They’re using low profile Kailh Choc switches with 12g (!!) switches.
I don’t think I’m ready yet to move further down the rabbit hole to even less keys than I’ve gotten skilled with using on the Planck. The Planck-EZ is an incredible keyboard, and has been my gateway into the world of mechanical keyboards. My persistent problem with it is that, similar to any non-split keyboard, my hands are stuck too close together, which is causing wrist pain for me. Even with my weirdo layout that puts an extra row of keys between the left and right hand keys, the keys feel too close together. I also compared the Planck-EZ to my mac laptop keyboard, and the Planck-EZ offers more width than the laptop keyboard. It basically seems that any solid keyboard is going to bother my RSI.
So, next, I want to purchase an ErgoDox-EZ, which is a split keyboard that will allow me to space the right and left halves as far apart as I need to to remove the wrist bend that is bothering me so much. And, it will of course allow me to make the same switch mods that I was so easily able to add to the Planck-EZ. My plans for setting up the ErgoDox-EZ are to minimize use of the thumb clusters. I imagine this will change, but I initially only plan to use the most easily accessible thumb buttons for a space bar, and continue to use the ErgoDox as if it is a Planck. The beauty of learning to type and code efficiently with the Planck is that I’ve found it really great to be able to use the programmability of the firmware to “move the keys to my fingers rather than the other way around”. I will initially try to keep using my super compact layout that I’ve mastered with the Planck, but with the ergonomic benefit of the ErgoDox split keyboard. I’ll likely purchase the tent kit as well to experiment with different tilting angles to see if I can provide even greater ease to my fingers.
You can check out my ErgoDox-EZ layout here. At the present moment, I’ve programmed it without even having the board, so I’m sure it will change a lot after actually having the board.
Further Reading
- Full list of Spirit Designs MX compatible springs https://www.spritdesigns.com/mx
- Next-level super light touch chorded keyboards (check out the blog) https://www.gboards.ca/
- A story about choosing an ErgoDox-EZ https://fangpenlin.com/posts/2019/09/18/ninja-speed-vim-like-debugging-with-ergonomic-keyboard-and-trackpad/
- A detailed story about not choosing an ErgoDox-EZ and going with a Gergo instead (great links within) https://curiosityoverflow.xyz/posts/ergonomic-superiority/
Acknowledgements and disclaimer
I’m grateful to the hundreds of keyboard enthusiasts that have shared their knowledge on online forums, and the manufacturers that created the parts that went together to make my board. Also, this is description of how to make the lightest touch and shortest travel keyboard that works for my personal needs. The world of mechanical keyboards is very wide, and there may be ways to go beyond what I’ve found in terms of shorter travel, or lighter keys. One method is to use a “chorded” keyboard. And finally, nothing in this article should be taken as medical advice. If you have, or think you have RSI, please seek professional medical help. It’s a serious condition that can take a frustrating amount of time and resources to figure out how to manage and / or heal.

Top comments (0)