
I’ve always heard that contributing to open source looks really good for developers, but I never really understood why it’s so important. After immersing myself in the tech world, I’ve come to learn that if we were to keep all our beautiful developments to ourselves, then we’d be stifling the growth & advancement of the industry as a whole.
What is open source?
Wait a minute… I’m not quite sure that I know exactly what open source is… But that’s why the internet is so great! One search lead me to https://opensource.com/, which has a great article with a nice, short explanation.
“Open source software is software with source code that anyone can inspect, modify, and enhance.”
DRY - Don’t Repeat Yourself
When we embarked on our journeys to become more experienced developers, we learned what it means to write clean, reusable code. open source is to the dev community as DRY code is to the individual developer. Without it, as a whole, we’d each be wasting time trying to come up with methods that someone else has already created, and implemented in some of their designs.
Help Me Help You
Open source isn’t just great for us, open source is great for you, too!! Let me write you a story. Bare with me, here.
 on [Unsplash](https://unsplash.com/search/photos/dog?utm_source=unsplash&utm_medium=referral&utm_content=creditCopyText)](https://res.cloudinary.com/practicaldev/image/fetch/s--Rk43WHuU--/c_limit%2Cf_auto%2Cfl_progressive%2Cq_auto%2Cw_880/https://cdn-images-1.medium.com/max/6048/1%2AjJnMFu_IUjPz7LwTTjNg7Q.jpeg) Photo by Charles 🇵🇭 on Unsplash
Photo by Charles 🇵🇭 on Unsplash
This is Max. You’ve created an application that tells you when Max is sad. It’s super great! However, you’re not sure how to transform this app so that you can make Max happy. Kim👩🏽💻 loves your app! She forks that repository and adds a feature that lists all the reasons why Max is unhappy, then makes a pull request. After you review and merge her changes, you are able to implement a feature that takes all the reasons why Max is unhappy, and generate a list of things that will make Max happy! You’ve done it! You, a rockstar, was able to get help from another rockstar who saw your public repository. Tim 👨🏻💻 is then able to add a feature so that he can make his kitten, pearl😸, happy. Now that this application works for dogs and cats, your friend Jim🙋🏿♂️ can make sure that his cat Mr. Motto🦁 is happy, too!
How can I contribute to Open Source?
Golly gee Willikers, that’s a great question! To some, just the idea of touching someone else’s code can be a bit daunting. I, too, fall into that category, since I’m quite new to this myself. But that’s great! We can walk through the process together.
First, lets find an open source repository…
danthareja/contribute-to-open-source
*Learn the GitHub workflow by contributing code in a fun simulation project - danthareja/contribute-to-open-source*github.com
Great! Dan made this repository specifically to help us get familiar with the open source workflow. We can check out the Readme, and see what the project’s about.

Perfect! Now, let’s take a look at that issue — Issues give us a good understanding of the problem that needs to be fixed.

In this case, the issue tells us that some sections in our codebase may not be as DRY (Don’t Repeat Yourself) as they could be. We’ll fix that soon enough!
We’re also provided with some cool tips to be considerate and efficient open source contributors.
Time to see what’s in the contributing guidelines. Each environment is different, and it’s important that we know what rules to follow before we dive into the codebase. The contributing guidelines (normally found in a CONTRIBUTING.md file) tell us how we can be the most efficient while trying to make a contribution. We can read through ’em right here, and we can walk through the whole process, together.
Let’s begin
Now that we’ve read the contributing guidelines, we can get this project on our local machine.
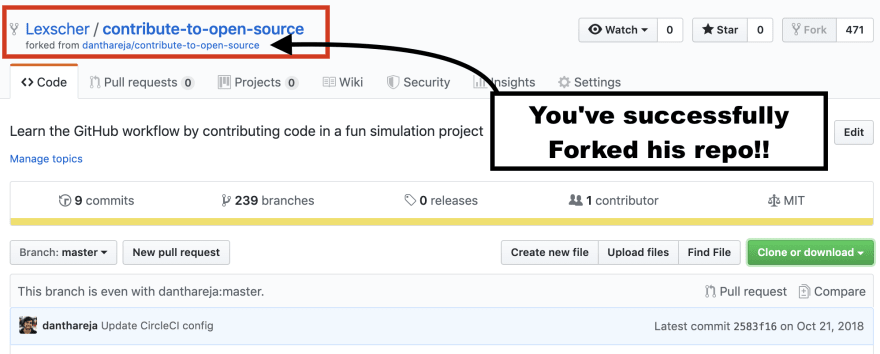
Step 1. Fork the repository from Dan’s GitHub

This can be done by clicking the “fork” button at the top of the page.
Then you should be redirected to your fork of his repository. It would look a little something like this:
Hit the “Clone or download”, and you’ll be presented with a few options to get this project on your local machine. To keep things simple, we’ll make sure that we’re using SSH.
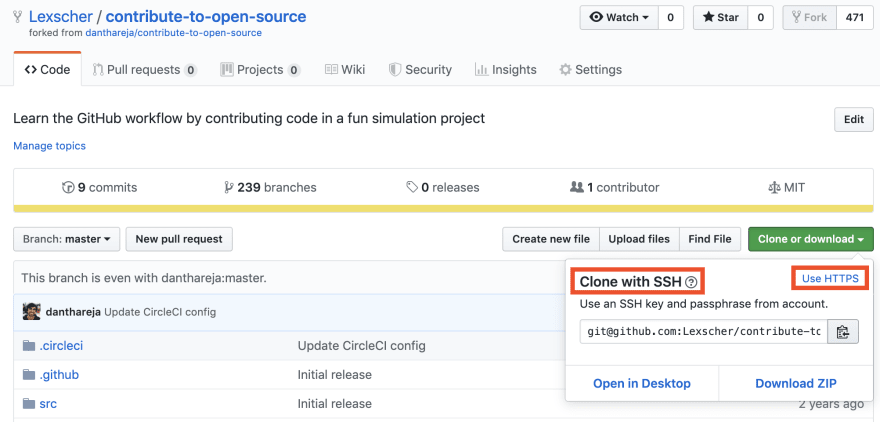 Make sure it says “Clone with SSH” at the top.
Then we’ll copy that link. In our terminal, we’ll type git clone , then cd into the repository.

If your terminal doesn’t tell you what branch you’re on, you can always type git branch and it will tell you what branch you’re on! Let’s make a new branch. Normally, we’d name a branch after a specific feature we’re trying to implement or fix. Since we’re cleaning up some repetitive code, I think cleanup is an appropriate name, however, feel free to use whatever you see fit!
Now it’s time to install the project dependencies by typing the command npm install. Dan also suggests that we check the code’s style against the style guide with npm run lint.

Let’s go to line 4 in ./src/calculator.test.js and change describe.skip to describe.only.

Then we’re ready to start running tests with npm test.

So far so great!
Here’s the result of our test! We’ve got no passing tests, but that’ll change, soon!
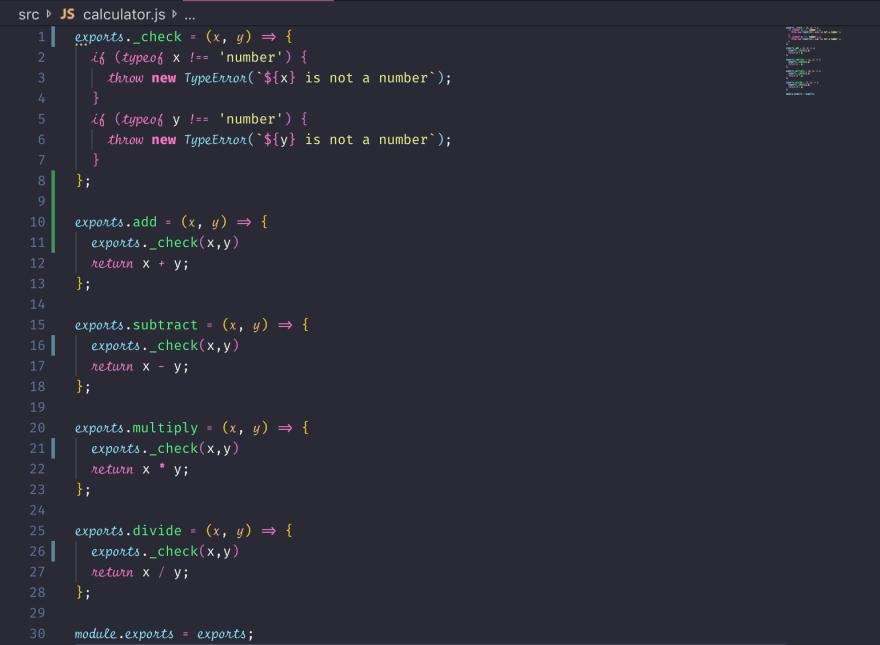
The errors tell us that our _check method should throw a TypeError, and our other methods should call the _check method.
This will make more sense once we’ve seen the code.

Ah… So each of our operational methods are checking if the arguments being passed are numbers before operating on them. But they’re all doing this in the same exact way. Let’s not repeat ourselves!
That looks a tad cleaner.

Now, let’s revisit line 4 in ./src/calculator.test.js and change describe.only to describe.
Now let’s run npm test.
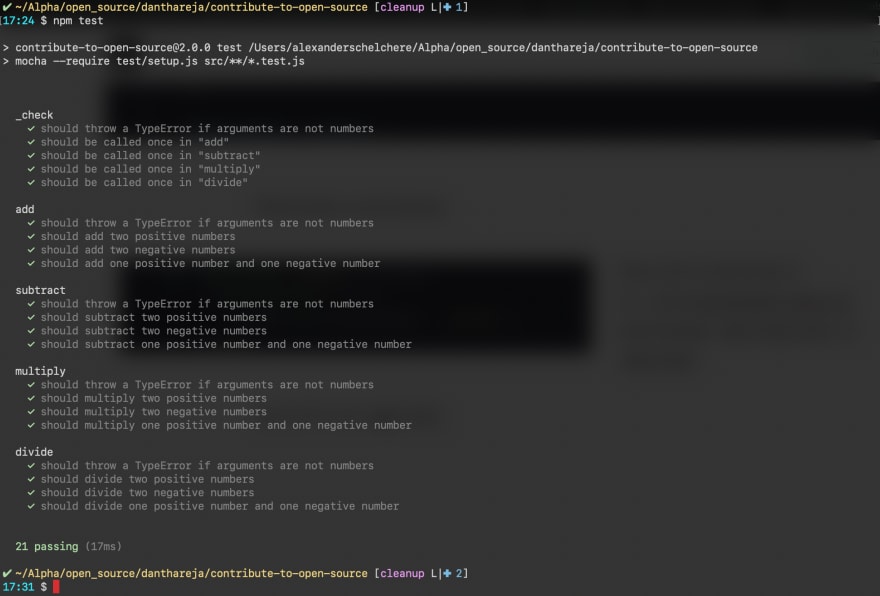 Success!
All our tests are passing, awesome!! Now that we’ve implemented our fix, and we used Dan’s tests to make sure we didn’t break any of the code, we should commit our changes and push our cleanup branch to GitHub.
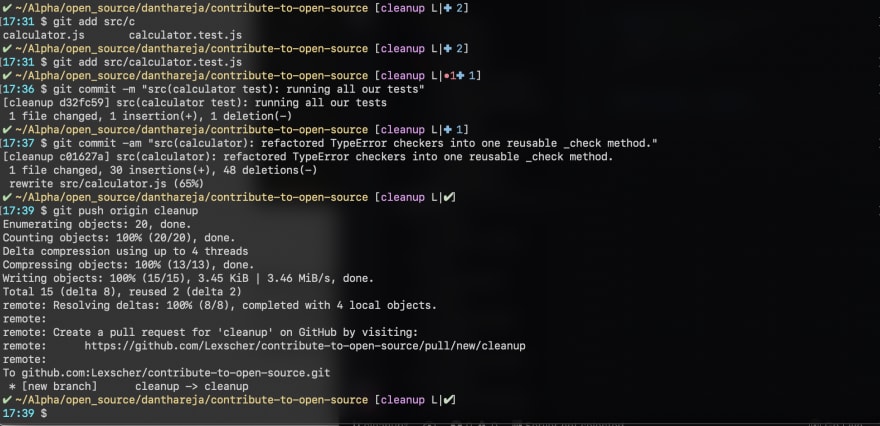
Now let’s go to our forked repository on GitHub, and make a pull request.

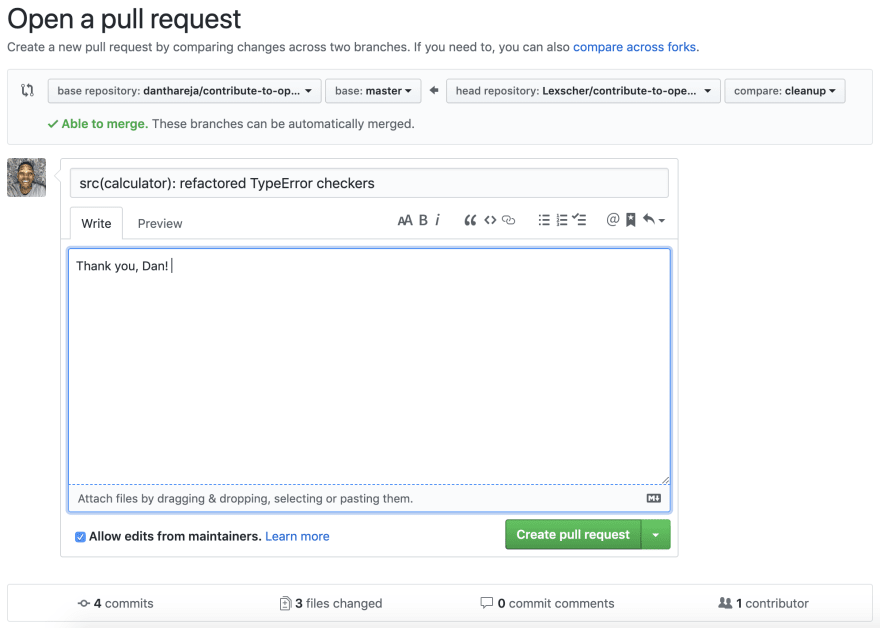
After you’ve written your message (which would usually be a bit more descriptive than mine), hit the green Create pull request button.
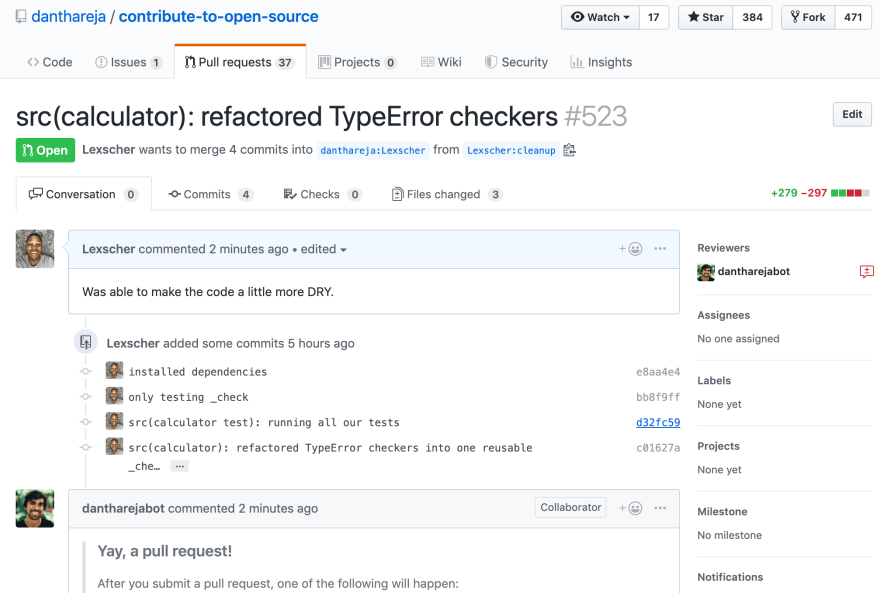
We did it! Dan also explains the process quite well. Your code will be reviewed, then a few things could happen:
You might not get a response.
Your pull request might get rejected.
You may be asked to make a few more changes to your code.
Your pull request will be accepted & merged!
Special thanks to Dan Thareja!
Header photo creds to Josh Gordon on Unsplash
I hope you’ve got a better understanding of open source now, I know I sure do! Try to look for more open source projects you can contribute to, it’ll help you build a stronger foundation. You can also find some open source tools you can incorporate in your projects.
I love feedback and constructive criticism, so feel free to leave a comment. If you’d like to see what I’ll do next, follow me here, or on GitHub.

Latest comments (0)