
The whole Nette and its standalone sub-components are PHP 8 ready; thus, the project is alive and is actively developed and maintained. There are many ambitious projects built on Nette Framework that have already spread out behind the Czech borders, to name some: Rohlík, Zásilkovna, or CDN77.
These three examples are only a needle in a haystack of companies who had to overcome all the challenges and struggles that the inevitable internationalization process comes with. Can we do it any easier? We believe so; that's why we created Localazy.
Localazy features a pro-active review process, highly accurate translation memory supported by community-shared translations, machine translations and professional translation services, and a simple, very intuitive UI. Thanks to that, managing translation strings, even with open-source projects where anybody can contribute (with varying quality), is a piece of cake 🍰.
This article will walk you through all the steps necessary to create a Nette application, integrate one of the Nette Community's internationalization packages, and use Localazy to localize the application.
Most importantly, to not diverge from the main topic, I'll focus on core concepts of internationalization using the
Contributte/Translationplugin for Nette and how Localazy can help; not Nette Framework itself nor visual styling concepts.
💨 TL;DR
- set up and run a Nette project example
- install and set up a localization plugin called
contributte/translation - prepare templates for translations using the NEON file format
- implement an easy language switcher
- sign up for Localazy
- install Localazy CLI
- create the
localazy.jsonfile in the project root and fill in the configuration, with modified upload needs - upload extracted language files by running
localazy upload - in Localazy, add any language(s), translate, review...
- update your project of new locales with
localazy download - create a new presenter including phrases in ICU Plurals notation
- update
localazy.jsonconfiguration to fit our modified download needs, including a transformation - upload, translate and download plural strings
- Voilà 🎉
🕹️ Set up a new Nette project
Let's create a new Nette 3.1 web project, following steps from the quick start. Make sure you have composer installed on your machine. If not, use these guidelines to set it up. Then, open a terminal, navigate to any desired location and run the following command:
composer create-project nette/web-project nette-i18n-example
You can name the project whatever you like, here I used nette-i18n-example. It's also important to ensure that your PHP environment is at least in a 7.2 version, it is a compatibility requirement when using Nette 3.1.
Next, let's try if everything worked out well and we can run the project sample. Navigate into the www folder (in the terminal window or using your IDE terminal). Run the in-built PHP CLI web server in the folder, using:
php -S localhost:2222
This will start localhost server, serving from www folder on port 2222 (you can choose any allowed and free port number you like). Open your browser and go to http://locahost:2222. If you followed all the previous steps correctly, you should see the screen below:
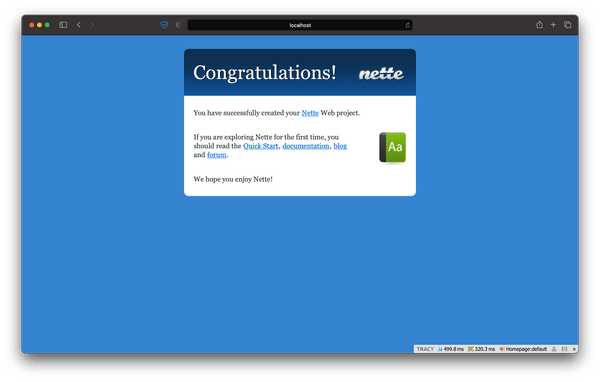
Great, we've just set up a new sample project!
🎌 Set up the localization plugin
Now, we will install and set up a localization plugin that will handle locale switching and read string resources from our translations files. There's a couple of localization plugins for Nette.
You can find a list of these plugins on Componette #localization. One of them, Kdyby/Translation, which integrates Symfony/Translation into Nette Framework, is widely used, although unfortunately not being developed anymore (at the time of writing this post, the latest known release was in September 2019).
That's the reason why we will use Contributte/Translation. Even though Contributte/Translation has fewer stars ⭐ on Github, the project is more than five years younger (the first stable release was in March 2019), and the number of installations is almost 650k lower compared to the previously mentioned one (at the time of writing this post), I can recommend using the plugin. Why?
- it's developed and maintained
- works with the same localization library as Kdyby/Translation (plugin is a wrapper of Symfony/Translation); thus, the implementation is very similar
- Contributte/Translation creator is really helpful in answering questions and resolving issues quickly (credits to Aleš Wita and Milan F3l1x Šulc for helping)
So in the next step, install the plugin:
composer require contributte/translation
Now, we have to set the plugin up. Open a configuration file named common.neon and register the plugin using the extensions block like this:
...
extensions:
    translation: Contributte\Translation\DI\TranslationExtension
Open the local.neon file and insert the following configuration:
translation:
    locales:
        whitelist: [en, cs, sk, pl] # supported locales
        default: en # default locale
        # fallback: [en] # fallback locale
    dirs: # directories containing locale files
        - %appDir%/lang/homepage
        - %appDir%/lang/common
    returnOriginalMessage: false
    localeResolvers:
        - Contributte\Translation\LocalesResolvers\Router
The purpose of keys is described in the code snippet comments above. I've commented the fallback key out because I would like to see the untranslated keys during the development phase.
As we would definitely like to keep the order in our locale files, we will keep those files in subdirectories. If returnOriginalMessage is set to true, it returns a message (string) in default language if we choose one of the whitelisted (whitelist) languages and our message is not translated, in other case it returns a string resource key name.
A part called localeResolvers instructs the extension on how to resolve current locale and the order in which it will do so. There are four available resolvers.
localeResolvers:
    # Locale passed as URL parameter
    - Contributte\Translation\LocalesResolvers\Router
    # Locale passed as HTTP header
    - Contributte\Translation\LocalesResolvers\Header
    # Locale passed as URL query
    - Contributte\Translation\LocalesResolvers\Parameter
    # Locale passed in a session
    - Contributte\Translation\LocalesResolvers\Session
This order would give the Router resolvers the highest priority, following Header, Parameter and Session in descending order. In our example, we will be using only Router locale resolver (as you may have noticed).
Use whatever locale resolver fits your needs, it's completely up to you, although some of the following steps will differ a bit.
One more note: By default the
Router,Parameter, andSessionresolvers expect the name of the parameter/key to belocale.
In the next step, we have to update our RouterFactory class. We need the Nette router to take the locale parameter so the app can recognize what the current locale is.
<?php

declare(strict_types=1);

namespace App\Router;

use Nette;
use Nette\Application\Routers\RouteList;
use Nette\Routing\Route;


final class RouterFactory
{
    use Nette\StaticClass;

    public static function createRouter(): RouteList
    {
        $router = new RouteList;
        $router->addRoute('<locale>/<presenter>/<action>[/<id>]', [
            'presenter' => 'Homepage',
            'action' => 'default',
            'id' => null,
            'locale' => [
                Route::FILTER_TABLE => [
                    'cs' => 'cs',
                    'sk' => 'sk',
                    'pl' => 'pl',
                    'en' => 'en'
                ]
            ]
        ]);
        return $router;
    }
}
This router setup matches our localhost URLs like http://localhost:2222/en/ or http://localhost:2222/cs/plurals/test (as we will see in the latter steps of this tutorial). By adding a Route::FILTER_TABLE-keyed array we can force the translation plugin to map the locale name in a route to an internal locale name (might be useful in certain situations).
We do not want to use this functionality, therefore we will keep the locale shortcuts the same (or we could also completely omit this block as I just wanted to demonstrate the option).
Great job! We've just set the Contributte/Translation plugin up!
📃 Prepare templates for translations
In this step, we will externalize the strings by extracting all the string resources into files that will serve as locale files. Remember when we configured our directories that will contain locale files?
Just a reminder, it's %appDir%/lang/homepage and %appDir%/lang/common. Create these directories in a project folder tree.

Now, open the Homepage default template. It's in app/Presenters/templates/Homepage folder. The content of this file will look a lot alike this:
{* This is the welcome page, you can delete it *}
{block content}
<div id="banner">
    <h1 n:block=title>Congratulations!</h1>
</div>
<div id="content">
    <h2>
        You have successfully created your
        <a href="https://nette.org">Nette</a> Web project.
    </h2>
    <p>
        <img src="..." alt="">
        If you are exploring Nette for the first time, you should read
        the <a href="https://doc.nette.org/quickstart">Quick Start</a>,
        <a href="https://doc.nette.org">documentation</a>,
        <a href="https://blog.nette.org">blog</a> and
        <a href="https://forum.nette.org">forum</a>.
    </p>
    <h2>We hope you enjoy Nette!</h2>
</div>
<style>
    ...
</style>
As I've already mentioned, our goal is to take all the strings and put them into separate files. As English is our source language, create a file called locale.en.neon in the previously created app/lang/homepage folder (if Spanish was a source language, for instance, we would create locale.es.neon file).
Copy strings one by one into the locale file and assign them a key. Then, replace strings in the template with the key wrapped in a underscore tag notation ({_locale_key}). After finishing this step, both should look similar to the snippets below.
congratulations: "Congratulations!"
we_hope_you_enjoy_nette: "We hope you enjoy Nette!"
docs_links_paragraph: "If you are exploring Nette for the first time, you should read the <a href='https://doc.nette.org/quickstart'>Quick Start</a>, <a href='https://doc.nette.org'>documentation</a>, <a href='https://blog.nette.org'>blog</a> and <a href='https://forum.nette.org'>forum</a>."
web_project_successfully_created: "You have successfully created your %project% Web project."
{* This is the welcome page, you can delete it *}

{block content}
<div id="banner">
    <h1 n:block=title>{_locale.congratulations}</h1>
</div>

<div id="content">
    <h2>
        {_locale.web_project_successfully_created, [
            'project' => '<a href="https://nette.org">Nette</a>',
        ]|noescape}
    </h2>

    <p>
        <img src="..." alt="">
        {_locale.docs_links_paragraph|noescape}
    </p>

    <h2>{_locale.we_hope_you_enjoy_nette}</h2>
</div>

<style>
    ...
</style>
Let's take a further look at both snippets as there's a couple of important things related to localization we've just used that don't necessarily have to be clear. In the string resource key-named web_project_successfully_created of the NEON file, we've used a variable placeholder notation.
In NEON files, placeholders are recognizable with starting and ending % signs, containing a placeholder name in between, in our case it is a %project%.
In the template file, we passed a variable called project containing a value into the extracted string mentioned before. All of this is done using an array as a second argument of the underscore tag notation. This is how this pairing works using latte templating engine and NEON. We've also used the noescape filter, which disables automatic escaping so the HTML tags are actually rendered and not printed as a text.
Do not ever use the
noescapefilter for any untrusted user's input, as it can potentionally lead to XSS attack vulnerabilities.
Good job! Now, let's see how the project looks in the browser. Refresh the page - oops! What has just happened? We can see an exception thrown with No route for HTTP request information.

It makes sense though, this is a completely legit behavior. We've changed our RouterFactory to match URLs containing the locale identifier. Update the URL to localhost:2222/en.

Why don't we see our strings loaded from the locale.en.neon file? Why are we seeing only the keys? Let's check what is really happening here. Nette includes a debugging tool called Tracy.
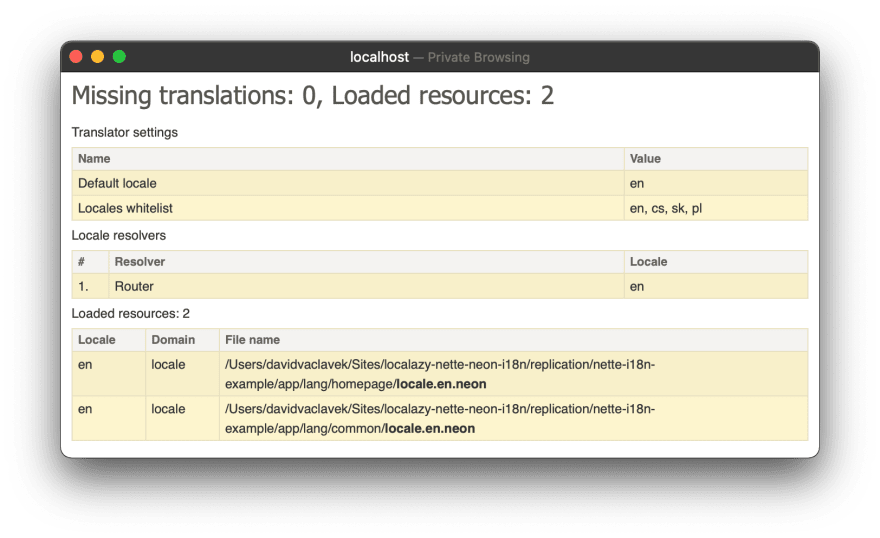
If we take a look at the expanded Tracy Bar (a section containing Contributte/Translation settings), we can see that we're missing four translations and have loaded no resources files at all. In-built Nette caching mechanisms are the reason. To resolve this problem, delete temp/cache directory located in the project and reload the page in the browser.
As I used Nette over the years, I've experienced the "caching problem" many times during the development, not only when translating. Deleting cached files helped in the vast majority of problem occurrences.

Great! We can see that string resources are correctly loaded from the locale file. Using Tracy Bar, we can also notice that there's one loaded resource file and that we're using Router as our locale resolver. There's also a translator setting. From this point onwards, if anything goes wrong, you can always check this bar for any cues that might lead to resolving a problem.
🧭 Implement an easy language switcher
It would be great to have an option to change the locale of our web application another way than just re-typing the URL parameter manually every time. We will create a simple language switcher. You can then style it using your custom CSS.
Go to @layout.latte template file. This file serves as a layout file and defines an HTML skeleton document. Update the content:
...
<body>
    <div n:foreach="$flashes as $flash" n:class="flash, $flash->type">
        {$flash->message}
    </div>

    <ul>
        <li>
            <a n:href="this locale:en">
                English ({_locale.english})
            </a>
        </li>
        <li>
            <a n:href="this locale:cs">
                Česky ({_locale.czech})
            </a>
        </li>
        <li>
            <a n:href="this locale:sk">
                Slovensky ({_locale.slovakian})
            </a>
        </li>
        <li>
            <a n:href="this locale:pl">
                Polski ({_locale.polish})
            </a>
        </li>
    </ul>

    {include content}
    ...
Notice how the links are being built. We use the n:href helper to create a link, pointing to this (same URL we're currently at), passing a locale URL parameter (we defined in the RouterFactory in one of the earlier steps), set to a value describing the desired locale.
You probably already know what to do now - we have to define resources keys in NEON file. As layout serves as a common part of the application, we've already proactively created the common directory, where we will address all of the common string resources. Create a locale.en.neon file in that directory with the following content:
english: English
czech: Czech
slovak: Slovak
polish: Polish
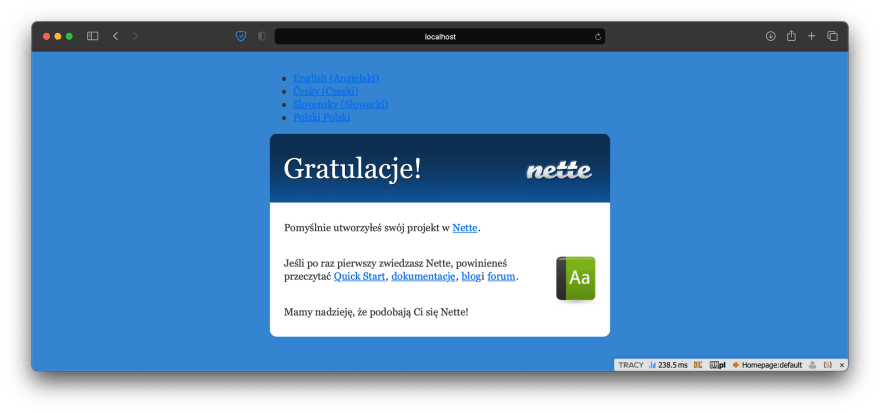
Apply our recently described cache deleting process and reload the page.

Great! We can click on links a couple of times to confirm that language switching works - take a look at Translator Tracy Bar changes.

Now that the language switching is implemented, it's time to add translations using Localazy!
🚩 Integration with Localazy
This is the part where we can start benefiting from features that Localazy offers. In any project, we certainly do not want to manually handle things that can be automated. The manual approach is error-prone, tedious, and takes a long time. And localization is undoubtedly one of the things that you can automate.
Go to the Localazy signup page or login (if you have already joined our community). Then, create a new app. We can leave it as public so other contributors can freely help with translating our app.
Select English as the source language (generally, of course, you can use any other). Also, enable the Use community translations (ShareTM) option to get some strings translated automatically by Localazy.

The app is created. As you can see on the integration screen, Localazy supports a plethora of integrations and file formats! Scroll down and choose NEON.

Now, we see the integration instructions screen. If you haven't used Localazy before, you need to install a CLI tool on your machine to be able to interact with Localazy in an automated way.
npm install -g @localazy/cli
Then, create a configuration file named localazy.json in the root folder of your project. Also, paste writeKey and readKey from step 2 of the integration guide page.
{
    "writeKey": "<your-write-key>",
    "readKey": "<your-read-key>",
    "upload": {
        "type": "neon",
        "files": [
            {
                "pattern": "app/lang/**/locale.en.neon",
                "lang": "inherited",
                "path": "${path}"
            }
        ]
    },
    "download": {
        "files": "${path}/locale.${lang}.neon"
    }
}
You may have noticed, that in the snippet above I just haven't blindly copied a sample that's provided on the integration page. Why? Because we have our locale files in a different directories.
More details on all available options of upload section are available in documentation.
Now, it's finally time to upload our source language strings to Localazy. Navigate the terminal to the project root folder and run the following command:
localazy upload -s
Great! We’ve just simulated (-s stands for simulate) the upload without actually uploading anything. It is a good practice to test out the configuration to make sure that nothing unexpected occurs. In case of any warnings/errors, CLI would output a log describing a problem to help you determine the problem and fix it faster. Let's upload language strings for real!
localazy upload
Files were successfully transferred. In the Localazy app, hit the NEXT STEP button to proceed. Our app is ready! According to the instructions, refresh your browser window. Click on the MANAGE SOURCE button. List of uploaded source strings should be displayed.

Go back, click ADD LANGUAGES tab and add the languages we've defined in our Nette web application. It was Czech, Slovak, and Polish.

You may see most of the strings translated, just waiting for your review. The automated matching with ShareTM improves all the time, and it's likely that thanks to this article (but not only), you would have all the strings automatically translated. That's one of the many powers of Localazy.
**
Some parts of this article might not be accurate. This article mentions the ShareTM feature, which we've updated later. Learn more about the Localazy ShareTM improvements in this article.


Review suggestions and translate our strings. Localazy automatically shows you possible versions and suggestions. Also, the Amazon Machine Translation Engine result is at your disposal to help you with translations for free.

Good job. All strings are translated and translations approved. Now, we have to download them back to the web project.
localazy download
Note that we can also simulate a download first by typing
localazy download -s
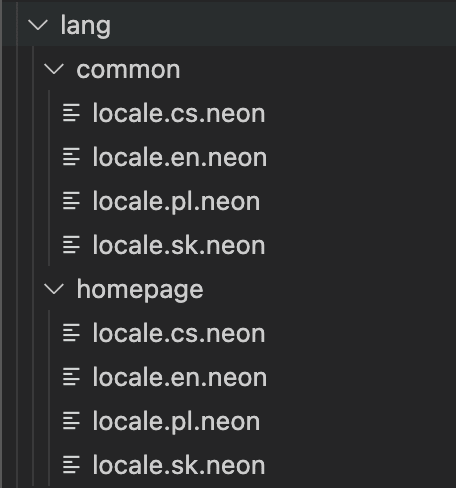
Everything went well. When you look into the project file tree, you should see that we have six new files containing translations we've just made in Localazy. Now, delete the cache again and reload the page. Voilà!

Check our well-known screens to confirm everything was loaded correctly. It works like a charm!
⚠️ There's one more thing - plurals and selects
Processing plurals is one of the most complex things when localizing applications. Imagine handling all of the possible variants of plurals for each of the world's languages - that can really be a challenge.
Fortunately, Localazy knows them all and makes translating completely intuitive. You can read more on that topic in How to translate plurals.
First, let's create a new presenter in the app/Presenters folder - name it, for example, PluralsPresenter. We've already demonstrated how to use translations in templates, this time, we'll use translator directly in a presenter.
<?php

declare(strict_types=1);

namespace App\Presenters;

use Nette;

final class PluralsPresenter extends Nette\Application\UI\Presenter
{
    /** @var Nette\Localization\ITranslator @inject */
    public $translator;

    public function renderDefault() {
        $data = [];
        $this->sendJson($data);
    }
}
Now, when we navigate to localhost:2222/en/plurals in the browser, we see just empty square brackets [] printed out. In the presenter code example, we've also injected a ITranslator dependency.
More on dependency injection usage in Nette can be found in DI: Getting Dependencies.
Because Contributte/Translation plugin is based on Symfony's translation rules, we must define ICU messages using this approach. To use the ICU Message Format, the file containing message has to be suffixed with +intl-icu. Knowing this convention, create a file app/lang/plurals/locale+intl-icu.en.neon with the following content:
num_of_apples: "{apples, plural, one {There is one apple...} other {There are # apples!}}"
users: "We have {count, plural, one {one user named {user_name}} other {# users named {user_name}}}."
baby_gender: "{gender, select, girl {It's a girl!} boy {It's a boy!} other {It's something else!}}"
organizer_gender: "{organizer_gender, select, female {{organizer_name} has invited you for her party!} male {{organizer_name} has invited you for his party!} other {{organizer_name} have invited you for their party!}}"
We've defined two plurals respecting the English plural types (defining one, other). On top of that, to show you that Localazy handles it all, there are two more ICU select notations named baby_gender and organizer_gender. Let's try to send the strings as a JSON response. Modify our presenter:
...
public function renderDefault() {
        $t = $this->translator;
        $data = [
            'num_of_apples_0' =>  $t->translate(
                'locale.num_of_apples', ['apples' => 0]
            ),
            'num_of_apples_1' =>  $t->translate(
                'locale.num_of_apples', ['apples' => 1]
            ),
            'num_of_apples_3' =>  $t->translate(
                'locale.num_of_apples', ['apples' => 3]
            ),
            'num_of_apples_9' =>  $t->translate(
                'locale.num_of_apples', ['apples' => 9]
            ),

            'users_0' =>  $t->translate('locale.users', [
                'count' => 0,
                'user_name' => 'Joe',
            ]),
            'users_5' =>  $t->translate('locale.users', [
                'count' => 5,
                'user_name' => 'Joe',
            ]),

            'baby_gender_girl' =>  $t->translate(
                'locale.baby_gender', ['gender' => 'girl']
            ),
            'baby_gender_boy' =>  $t->translate(
                'locale.baby_gender', ['gender' => 'boy']
            ),
            'baby_gender_other' =>  $t->translate(
                'locale.baby_gender', ['gender' => 'other']
            ),

            'organizer_female' =>  $t->translate(
                'locale.organizer_gender', [
                'organizer_gender' => 'female',
                'organizer_name' => 'Miley'
            ]),
            'organizer_male' =>  $t->translate(
                'locale.organizer_gender', [
                'organizer_gender' => 'male',
                'organizer_name' => 'Kyle'
            ]),
            'organizer_other' =>  $t->translate(
                'locale.organizer_gender', [
                'organizer_gender' => 'other',
                'organizer_name' => 'Daniel'
            ]),
        ];
    $this->sendJson($data);
}
...
Also, keep in mind that we have to register the app/lang/plurals directory in local.neon configuration file:
dirs: # directories containing locale files
    - %appDir%/lang/homepage
    - %appDir%/lang/common
    - %appDir%/lang/plurals
Refresh the browser (don't possibly forget to delete the cache). If you reproduced all of my steps, you should see a JSON response similar to mine.

Let's dig into modifying our setup now. We need to tweak it a bit to make everything work correctly. Open localazy.json config file. We need to update both the upload and download sections:
...
"upload": {
        "type": "neon",
        "files": [
            {
                "pattern": "app/lang/**/locale.en.neon",
                "lang": "inherited",
                "path": "${path}"
            },
            {
                "pattern": "app/lang/**/locale+intl-icu.en.neon",
                "lang": "inherited",
                "path": "${path}"
            }
        ],
        "features": [
            "plural_icu"
        ]
    },
    "download": {
        "files": "${path}/${fileNameWithoutExtension}.${lang}.neon"
    },
    "transformations": [
        {
            "name": "fileNameWithoutExtension",
            "source": "${file}",
            "operations": [
                "substringBefore: ."
            ]
        }
    ]
We now provide not only locale.${lang}.neon files, but also locale+intl-icu.${lang}.neon source files. That's why we had to add this pattern into the upload.files section to tell Localazy to process these files as well. But our download section also needs to be changed.
We have to map a correct file name while downloading translations to the form that Nette translation plugin requires. That's why there's a transformation written in the config file. Use substringBefore to obtain the file name without the extension as a variable, so we can use it to help us build the correct file name.
There's a thread on the Localazy Discuss forum that helped me resolve this problem. You can discuss and help each other with app localization. You can also report bugs, add new features ideas and more...
Localazy CLI consists of lots of optional features. In this example, we are using the ICU Message Format to parse plurals. To tell Localazy that we actually want to parse ICU plurals, we have to provide this in upload.features section. Each of the supported file format can have it's own specific features, in our case everything is described in the NEON format documentation.
We are ready to upload the ICU messages into Localazy. Use localazy upload again to transfer new changes. When we switch to Localazy user interface now, we see that the language completion status has changed and that there are more strings ready to be translated.
Little cutaway: One thing that can also be really helpful and where Localazy rules is the File management. You can click on the File management button to see what we have uploaded. If you click on the file name, you can see the phrases contained in the file. You can also perform various actions on files and file content.


Now, get back to translations and translate our plurals. We can see that Localazy translation screen is adapted to plurals for the current language being translated.

Practically, that means, that forms one and other from English were automatically mapped into Slovak one, few and other plural forms. It just feels so natural translating plurals using Localazy!
Localazy also recognizes various formats of placeholders, that can sometimes be quite hard to recognize for a non-technical person or someone without a decent experience with localization. Thanks to Localazy, you will never lose a piece of information that you need to keep in the same format.

Finish translating all languages and then type localazy download again to transfer newly translated phrases into our application. We can see three new files, containing our ICU translations. Now, after deleting the cache and trying locales by changing the URL in the browser, the translated JSON response is being returned.

✔️ Closing words
This article demonstrated how to use Localazy, Nette framework, and Contributte/Translation plugin to localize a web application. Localazy is a powerful tool that makes translating various applications (not only Nette!) faster, easier, error-proof, and more fun.
Now, you can download the repository with this example project to explore it or start localizing apps on your own!
Feel free to join us at discuss.localazy.com. Share ideas with other developers, discuss feedback and new concepts, and comment on new features of Localazy as we add them.

Top comments (0)