
Written by Rishi Purwar✏️
Have you ever used recursive components in React? I have. My first experience with them gave me an entirely new perspective on working on frontend projects. So, I thought it would be a good idea to write an article about a real-world example using recursive components in React to help folks become more familiar with working with them.
In this article, we will explore the details of recursive components in React and their usage in a real-world application. We will look at an example of a recursive and non-recursive component in React and evaluate their modularity, readability, and maintainability. After that, we’ll build a real-world recursive component, a nested file explorer similar to VS Code.
Jump ahead:
- What are recursive components in React?
- How is recursion different from loops in React?
- Why and when to use recursive components in React
- Building a nested file explorer using standard React components
- Using recursive components in React to build a nested file explorer
What are recursive components in React?
Recursion is calling a function repeatedly within itself until a base condition is met (base case). Each time the recursive function calls itself, it takes a new argument. For example, the factorial function below works by repeatedly calling itself with a different argument until a base condition is met:
function factorial(num) {
    if (num <= 1) { // base condition
        return 1;
    }
    return num * factorial(num - 1); // function calling itself with new input value.
}
console.log(factorial(6)); // 720
Now that we’ve laid down the foundation for understanding recursive components, let’s look at them in React. As you may know, React components are functions. When a React component repeatedly renders inside itself with different props until a base condition is met, it’s called a recursive component.
A recursive component is unique because it can call itself and helps render deeply nested data. These components are not limited to simply rendering parent data on the UI; they also render the parents’ children’s data until the depth limit is reached. In these components, children can be set by passing props.
Let’s look at a simple example of a recursive component in React:
import React from "react";

const RecursiveComponent = ({children}) => {
  return (
    <div>
      {children.length > 0 && <RecursiveComponent children={children} />}
    </div>
  );
};

export default RecursiveComponent;
If you’re curious about the real-world applications of this concept, you can see them in action as nested comment systems in Reddit and file explorers similar to VS Code.
Now that you have a fundamental understanding of recursive components, we’ll explore their uses and build a real-world example.
How is recursion different from loops in React?
You may be wondering about the critical differences between loops and recursion. In this section, we’ll take a look at those differences. In contrast to loops, recursion includes calling a function that calls itself, whereas loops require continuously calling the same code until a specific condition is met.
With loops, we must first define our control variable before we can use it in any of the iterations of the loop. For instance, when we create for loop to loop through an array, we have to declare a counter variable, let i=0, to keep track of the number of iterations. This allows us to use the counter variable when we loop through our array. Otherwise, we won’t be able to use it when we need to, and we’ll need to increment or decrement these control variables to avoid infinite loops.
On the other hand, we do not have to declare any variables to carry out recursive operations when using recursion. This is because recursive operations do not depend on variables and only need a base condition to stop calling a function.
- Returnability: With loops, we cannot return anything. However, when we use recursion, we can return a value from a function
- Readability and modularity: The code becomes more readable and modular with recursion. However, using loops makes code longer
Why and when to use recursive components in React
In React, components are the primary building blocks for building user interfaces. They are awesome because they help us think about our app holistically and build it from smaller code chunks that are easier to reason.
You may think, “why would we ever want to make recursive components?” The main reasons for using recursive components in React are that they make code DRY, more readable, and modular.
With that out of the way, let’s focus on understanding when to use recursive components in React. The most common situation is when we have data nested several levels deep.
Suppose we have an array of objects, and each object has a children key corresponding to another array of objects. Each object part of that array has a children key corresponding to another array of objects. Likewise, these objects can similarly contain more children's arrays.
An example of such data looks like this:
export const data = [
  {
    isFolder: true,
    name: "public",
    children: [
      {
        isFolder: false,
        name: "index.html",
      },
    ],
  },
  {
    isFolder: true,
    name: "src",
    children: [
      {
        isFolder: true,
        name: "components",
        children: [
          {
            isFolder: true,
            name: "home",
            children: [
              {
                isFolder: false,
                name: "Home.js",
              },
            ],
          },
        ],
      },
      {
        isFolder: false,
        name: "App.js",
      },
    ],
  },
];
As you can see, the above data has lots of nested children’s arrays. These nested items can go deeper, but I kept it to only four levels deep to explain things clearly.
Using loops in this situation isn’t a good choice because it requires writing a lot of nested loops to loop through each level of data. This makes your code larger and harder to read. In addition, if we are unsure of how deep our data goes, it’s challenging to loop through all the nested data using a loop. So, in this case, it’s better to use recursion.
Building a nested file explorer using standard React components
In this section, we will build a nested file explorer app using standard React components. In the next section of this tutorial, we will build the same React app by using recursive components.
First, create a new React app and a data folder in the src folder. Then, create data.js inside the data and copy and paste the data from the "Why and when to use recursive components in React" section into the later.
Now, replace the code of your App.js file with the code below:
import React from "react";
import { data } from "./data/data";

const NonRecursiveComponent = ({ data }) => {
  return <div>Non Recursive Component</div>;
};

const App = () => {
  return (
    <div style={{ margin: "8px" }}>
      <NonRecursiveComponent data={data} />
    </div>
  );
};
export default App;
We created a NonRecursiveComponent in the above code and rendered it inside the App component. Then, we passed the data prop from the App to the NonRecursiveComponent.
Now, let’s start working on rendering the data on the UI. In the NonRecursiveComponent, replace the existing code with the following:
const NonRecursiveComponent = ({ data }) => {
  return (
    <div>
      {data.map((parent) => {
        return (
          <div key={parent.name}>
            <span>{parent.name}</span>
          </div>
        );
      })}
    </div>
  );
};
The above code will render all the parent (first level) data and display this on the UI: 
Now, let’s render the children by using the map method inside the second return statement. Your code should look like this:
const NonRecursiveComponent = ({ data }) => {
  return (
    <div>
      {data.map((parent) => {
        return (
          <div key={parent.name}>
            <span>{parent.name}</span>
            {parent.children.map((child) => { // rendering children of the parent
              return (
                <div key={child.name} style={{ paddingLeft: "20px" }}>
                  <span>{child.name}</span>
                </div>
              );
            })}
          </div>
        );
      })}
    </div>
  );
};
From there, you should see all the children of the parent on the UI: 
Let’s render the grandchildren. So, to do that, we need to do the same thing we did for children. Your code should look something like this:
const NonRecursiveComponent = ({ data }) => {
  return (
    <div>
      {data.map((parent) => { // rendering parent data
        return (
          <div key={parent.name}>
            <span>{parent.name}</span>
            {parent.children.map((child) => { // rendering children of the parent
              return (
                <div key={child.name} style={{ paddingLeft: "20px" }}>
                  <span>{child.name}</span>
                  {child.children && // rendering grandchildren of the parent
                    child.children.map((grandChild) => {
                      return (
                        <div key={grandChild.name} style={{ paddingLeft: "20px" }}>
                          <span>{grandChild.name}</span>
                        </div>
                      );
                    })}
                </div>
              );
            })}
          </div>
        );
      })}
    </div>
  );
};
You should see something like this on the UI:  Now, the last thing we need to do is render
 great-grandchildren on the UI. We need to do the same thing we did for rendering children and grandchildren. After doing this, your code should look like this:
const NonRecursiveComponent = ({ data }) => {
  return (
    <div>
      {data.map((parent) => { // rendering parent data
        return (
          <div key={parent.name}>
            <span>{parent.name}</span>
            {parent.children.map((child) => { // rendering children of the parent
              return (
                <div key={child.name} style={{ paddingLeft: "20px" }}>
                  <span>{child.name}</span>
                  {child.children && // rendering grandchildren of the parent
                    child.children.map((grandChild) => {
                      return (
                        <div
                          key={grandChild.name}
                          style={{ paddingLeft: "20px" }}
                        >
                          <span>{grandChild.name}</span>
                          {grandChild.children && // rendering great-grandchildren
                            grandChild.children.map((greatGrandChild) => {
                              return (
                                <div
                                  key={greatGrandChild.name}
                                  style={{ paddingLeft: "20px" }}
                                >
                                  <span>{greatGrandChild.name}</span>
                                </div>
                              );
                            })}
                        </div>
                      );
                    })}
                </div>
              );
            })}
          </div>
        );
      })}
    </div>
  );
};
Your UI should look like this: 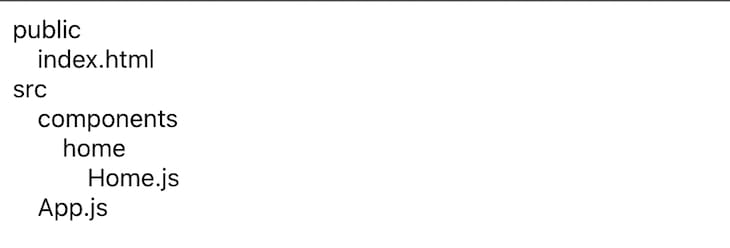
So far, we’ve built a basic nested file explorer component using regular React components. However, as you can see, the NonRecursiveComponent code appears to be repeating itself for each nested level of data. As the nesting level of our data goes up, this code gets longer, making it more difficult to understand and maintain.
So, how do we solve this problem? In the next section, we’ll look at how recursive components in React can help.
Using recursive components in React to build a nested file explorer
In this section, we’ll build the same nested file explorer using recursive components and implement a show/hide functionality for the nested files and folders.
Let’s start by creating a new RecursiveComponent in the App.js file. Then, swap out the NonRecursiveComponent rendered in the App with the RecursiveComponent. Your code should look like this:
const RecursiveComponent = ({ data }) => {
  return (
    <div style={{ paddingLeft: "20px" }}>
      Recursive Component
    </div>
  );
};

const App = () => {
  return (
    <div style={{ margin: "8px" }}>
      <RecursiveComponent data={data} />
    </div>
  );
};
Now, let’s render all the parent data on the UI:
const RecursiveComponent = ({ data }) => {
  return (
    <div style={{ paddingLeft: "20px" }}>
      {data.map((parent) => {
        return (
          <div key={parent.name}>
            <span>{parent.name}</span>
          </div>
        );
      })}
    </div>
  );
};
Next, let’s use recursion to render all the nested files and folder data. To do that, we need to do two things: first, render the RecursiveComponent from inside itself with a different data prop. Second, we need a base condition to stop rendering the RecursiveComponent.
In our case, the base condition will be when the length of the children is zero or when they don’t exist, at which point we won’t call the RecursiveComponent.
Your code should look like this:
const RecursiveComponent = ({ data }) => {
  return (
    <div style={{ paddingLeft: "20px" }}>
      {data.map((parent) => {
        return (
          <div key={parent.name}>
            <span>{parent.name}</span>
            {/* Base Condition and Rendering recursive component from inside itself */}
            <div>
              {parent.children && <RecursiveComponent data={parent.children} />}
            </div>
          </div>
        );
      })}
    </div>
  );
};
Your UI should look like this: 
😮 Surprise! With a few lines of code, we achieved the same output. This is the magic of recursion in React.
Now, let’s implement show/hide to the nested files and folders. We need to make some changes to our code before we can start doing that. First, we need to use the button tag for the folder’s name and the span tag for the file’s name conditionally using the isFolder key in our data. We’ll do this because we’ll only add the onClick event to the folders and not to the files to show or hide all the files and folders inside a particular folder.
Your updated code should look like this:
const RecursiveComponent = ({ data }) => {
  return (
    <div style={{ paddingLeft: "20px" }}>
      {data.map((parent) => {
        return (
          <div key={parent.name}>
            {/* rendering folders */}
            {parent.isFolder && <button>{parent.name}</button>}
            {/* rendering files */}
            {!parent.isFolder && <span>{parent.name}</span>}
            <div>
              {parent.children && <RecursiveComponent data={parent.children} />}
            </div>
          </div>
        );
      })}
    </div>
  );
};
Now, let’s implement show/hide by creating a state using the useState Hook inside the RecursiveComponent like this:
import { useState } from "react";

const RecursiveComponent = ({ data }) => {
  const [showNested, setShowNested] = useState({});
  // ...
  // rest of the code
  // ...
};
This showNested state variable will store all the opened folders like this:
{
  public: true, // if the folder is opened, set it equal to true
  src: false // if the folder is not opened, set it equal to false
}
Now, create a function to handle show/hide:
const RecursiveComponent = ({ data }) => {
  const [showNested, setShowNested] = useState({});

  // handle show/hide functionality
  const toggleNested = (name) => {
    setShowNested({ ...showNested, [name]: !showNested[name] });
  };
  // ...
  // rest of the code
  // ...
};
The toggleNested function accepts the folder’s name as an argument and then updates the value of that folder in showNested using the setShowNested function. This changes it from false to true or vice versa.
Now, let’s add an onClick event to the button to invoke toggleNested. Then, pass the name of the folder as an argument when a user clicks any of the folders, as shown below:
const RecursiveComponent = ({ data }) => {
  // ...
  // Rest of the code
  return (
    <div style={{ paddingLeft: "20px" }}>
      {data.map((parent) => {
        return (
          <div key={parent.name}>
            {parent.isFolder && (
              <button onClick={() => toggleNested(parent.name)}>
                {parent.name}
              </button>
            )}
            // ...
            // Rest of the code
            // ...
          </div>
        );
      })}
    </div>
  );
};
The final step is to update the display CSS property that we’ll add to the div wrapping the RecursiveComponent that’s inside the RecursiveComponent. When a user selects the folder, we’ll update the showNested object by adding the folder name as a key to that object. We’ll also set its value to true and add a check to see if the folder name is present in showNested.
Then, we’ll set the display to block. Otherwise, we’ll set it to none to hide the nested files and folders:
const RecursiveComponent = ({ data }) => {
  // ...
  // Rest of the code
  return (
    <div style={{ paddingLeft: "20px" }}>
      {data.map((parent) => {
        return (
          <div key={parent.name}>
            // ...
            // Rest of the code
            // ...

            // Updating the display property using the showNested state
            <div style={{ display: !showNested[parent.name] && "none" }}>
              {parent.children && <RecursiveComponent data={parent.children} />}
            </div>
          </div>
        );
      })}
    </div>
  );
};
Hopefully, you should be able to toggle through all the directories. And with that, this blog is finished!
Conclusion
In this article, you’ve learned about recursive components in React, how to build them, and why we might use them. In addition, I showed how recursion is different from loops with a real-world example. Hopefully, you learned something new that will be useful for your next React project.
I hope you enjoyed this article, and thanks for taking the time to read it. If you have any issues while following the article or have further questions, let me know in the comments section. If you like what I’m doing here and want to help me keep doing it, don’t forget to hit that share button.
Cut through the noise of traditional React error reporting with LogRocket
LogRocket is a React analytics solution that shields you from the hundreds of false-positive errors alerts to just a few truly important items. LogRocket tells you the most impactful bugs and UX issues actually impacting users in your React applications.

LogRocket automatically aggregates client side errors, React error boundaries, Redux state, slow component load times, JS exceptions, frontend performance metrics, and user interactions. Then LogRocket uses machine learning to notify you of the most impactful problems affecting the most users and provides the context you need to fix it.
Focus on the React bugs that matter — try LogRocket today.

Top comments (0)