
Written by Vijit Ail✏️
Simple CRUD-based modules, a common requirement of any business, should be simple to build and maintain. Remult is a comprehensive framework that allows developers to build full-stack, type-safe apps using only TypeScript code.
This article will introduce Remult’s basic concepts and will demonstrate how Remult can be used to simplify and speed up your web app development process!
In this guide, we’ll create a simple booking form and we’ll store the form submissions in a MongoDB collection. We'll build the UI using React and then add styling with Spectre.css.
Jump ahead
- Get to know the Remult framework
- Set up the React project with Remult
- Initialize the
remultExpressmiddleware - Initialize Remult on the frontend
- Add the database connection
- Generate the API endpoints with Remult entities
- Build and style the frontend
- Add backend-only methods
Get to know the Remult framework
Remult is a CRUD framework that uses TypeScript entities for CRUD operations. It also provides a type-safe API client and an ORM for backend database operations.
This framework abstracts away and reduces the boilerplate code in your application. It makes it easy to build full-stack applications using TypeScript and also allows developers to integrate with other frameworks such as Express.js and Angular.
Remult is a middle-ground. It doesn't force you to work in a certain way; instead, it provides many options for your projects.
Set up the React project with Remult
Let's start by creating a React project using Create React App and selecting the TypeScript template:
> npx create-react-app remult-react-booking-app --template typescript
> cd remult-react-booking-app
Next, we’ll install the required dependencies.
> npm i axios express remult dotenv
> npm i -D @types/express ts-node-dev concurrently
In the above code, we’re using the concurrently package. This package is required because we’ll be serving the client and server code simultaneously from the root of React project.
Now, create a tsconfig file for the server, like so:
// tsconfig.server.json
{
  "extends": "./tsconfig.json",
  "compilerOptions": {
    "module": "commonjs",
    "emitDecoratorMetadata": true
  }
}
Then, in the main tsconfig.json file, add the experimentalDecorators option to enable the use of decorators.
// tsconfig.json

{
  "compilerOptions": {
    // ...
    "experimentalDecorators": true
  },
}
Update the package.json file, like so:
// package.json

{
  "proxy": "http://localhost:3002",
  // ...
  "scripts": {
  // ...
    "start:dev": "concurrently -k -n \"SERVER,WEB\" -c \"bgBlue.bold,bgGreen.bold\" \"ts-node-dev -P tsconfig.server.json src/server/\" \"react-scripts start\""
  },
}
Here, we add the proxy option to let the webpack dev server know to proxy API requests on ports 3000 to 3002 while the app is running on the local environment. We also add an npm script to initiate the frontend and API dev server simultaneously.
Initialize the remultExpress middleware
Now, let’s create a server folder inside the src folder created by Create React App and create an api.ts file that will initialize the remultExpress middleware.
// src/server/api.ts

import { remultExpress } from "remult/remult-express";

export const api = remultExpress();
Next, create a .env file for the server and specify the API port number.
// src/server/.env

API_PORT=3002
Next, create an index.ts file that will serve as the root file for the server, initialize express, load the environment variables, and register the remultExpress middleware.
// src/server/index.ts

import { config } from "dotenv";
config({ path: __dirname + "/.env" });

import express from "express";
import { api } from "./api";

const app = express();
app.use(api);

app.listen(process.env.API_PORT || 3002, () => console.log("Server started"));
Initialize Remult on the frontend
We'll use the global Remult object in the React app to communicate with the API server via the axios HTTP client.
// src/common.ts

import axios from "axios";
import { Remult } from "remult";

export const remult = new Remult(axios);
At this point, the primary project setup is complete and ready to run on the local server.
Use the following command:
> npm run start:dev
Add the database connection
In this guide, we’ll use MongoDB to store our form submissions. To set up the MongoDB connection pool for Remult, use the remultExpress middleware’s dataProvider option.
First, you must install mongodb as a dependency in your project, like so:
> npm i mongodb
The dataProvider option can accept an async() function that connects to MongoDB and returns the MongoDataProvider object, which acts as a connector for Remult.
// src/server/api.ts

import { MongoDataProvider } from "remult/remult-mongo";

export const api = remultExpress({
  dataProvider: async () => {
    const client = new MongoClient(process.env.MONGO_URL || "");
    await client.connect();
    console.log("Database connected");
    return new MongoDataProvider(client.db("remult-booking"), client);
  },
});
Generate the API endpoints with Remult entities
Entities are used by Remult for generating API endpoints, API queries, and database commands. entity is used as a model class for both frontend and backend code.
We will require two entities in order to define the booking object and the available daily slots.
Create a shared folder inside src, and it will include code shared between the frontend and backend. Then, create another subfolder for storing entities in the shared folder, and create the entity class files: Booking.entity.ts and Slot.entity.ts.
To create an entity, define a class with the required properties, and use the @Entity decorator. The @Entity decorator accepts an essential argument used to determine the API route, the default database collection or table name, and an options argument used to define entity-related properties and operations.
For this guide, the Slot entity can be defined as follows:
// src/shared/entities/Slot.entity.ts

import { Entity, Fields, IdEntity } from "remult";

@Entity("slots")
export class Slot extends IdEntity {
  @Fields.string()
  startTime: String;

  @Fields.string()
  endTime: String;
}
The @Fields.string decorator defines an entity data field of type String. This decorator is also used to describe field-related properties like validation rules and operations.
// src/shared/entities/Booking.entity.ts

import { Entity, Fields, IdEntity, Validators } from "remult";

@Entity("bookings", {
  allowApiCrud: true
})
export class Booking extends IdEntity {
  @Fields.string({
    validate: Validators.required,
  })
  name: String;

  @Fields.string({
    validate: Validators.required,
  })
  email: String;

  @Fields.string({ validate: Validators.required })
  description: String;

  @Fields.string({
    validate: Validators.required,
  })
  date: String;

  @Fields.string({
    validate: Validators.required,
  })
  slotId: string;
}
Now that both entities are defined, let's add them to theremultExpress middleware’s entities property. We can also seed initial data to the slots collection using the initApi property.
// src/server/api.ts

import { Slot } from "../shared/entities/Slot.entity";
import { Booking } from "../shared/entities/Booking.entity";

export const api = remultExpress({
  entities: [Slot, Booking],
  initApi: async (remult) => {
    const slotRepo = remult.repo(Slot);
    const shouldAddAvailablSlots = (await slotRepo.count()) === 0;

    if (shouldAddAvailablSlots) {
      const availableSlots = [10, 11, 12, 13, 14, 15, 16, 17].map((time) => ({
        startTime: `${time}:00`,
        endTime: `${time}:45`,
      }));

      await slotRepo.insert(availableSlots);
    }
  },
  dataProvider: async () => {
    // ...
  },
});
Build and style the frontend
Let's begin working on the app’s frontend by building the form UI.  To start, replace the default boilerplate code in the
 src/App.tsx file with the following code:
// src/App.tsx

import "./App.css";
import { BookingForm } from "./components/BookingForm";

function App() {
  return (
    <div className="App">
      <header className="hero hero-sm bg-primary ">
        <div className="hero-body text-center">
          <div className="container grid-md">
            <h1>Book an appointment</h1>
          </div>
        </div>
      </header>
      <BookingForm />
    </div>
  );
}

export default App;
Now, let’s add the Spectre.css library to make the user interface look presentable.
> npm i spectre.css
You can refer to the following code for the BookingForm component:
// src/components/BookingForm.tsx

import { useEffect, useState } from "react";
import { useForm } from "react-hook-form";
import { remult } from "../common";
import { Booking } from "../shared/entities/Booking.entity";
import { Slot } from "../shared/entities/Slot.entity";

const bookingRepo = remult.repo(Booking);

export const BookingForm = () => {
  const {
    register,
    handleSubmit,
    setValue,
    watch,
    setError,
    clearErrors,
    reset,
    formState: { errors },
  } = useForm();

  const [availableDates, setAvailableDates] = useState<string[]>([]);
  const [availableSlots, setAvailableSlots] = useState<Slot[]>([]);

  const [isSubmitting, setSubmitting] = useState<boolean>(false);

  const bookingDate = watch("date");

  const onSubmit = async (values: Record<string, any>) => {
    try {
      setSubmitting(true);
      const data = await bookingRepo.save(values);
      console.log({ data });
      reset();
    } catch (error: any) {
      setError("formError", {
        message: error?.message,
      });
    } finally {
      setSubmitting(false);
    }
  };

  // JSX code
  return (
    <form onSubmit={handleSubmit(onSubmit)}>
      <>...</>
    </form>
  );
};
Here, we use the react-hook-form library to manage the form state and input values.
To save the submitted values in the bookings collection, we need to create a repository object for the Booking entity.
const bookingRepo = remult.repo(Booking);
Remult repository objects provide methods to perform CRUD operations on the entity. In this case, we’re using the save() repository method to insert data into the collection.
await bookingRepo.save(values);
Add backend-only methods
At times, you might want to create custom APIs with additional logic, like sending an email, performing multiple database operations, or completing other sequential tasks.
Multiple DB operations must be only performed on the backend because having various entity-level functions on the frontend could impact the app performance.
One way to implement backend-only methods in Remult is to create a controller class and use the @BackendMethod decorator.
For our project’s booking form, let's create two backend methods. The first method, getAvailableDates(), will get the next five available working days. The second method, getAvailableSlots(), will get the available booking slots by date.
// src/shared/controllers/Booking.controller.ts

import { BackendMethod, Remult } from "remult";
import { Booking } from "../entities/Booking.entity";
import { Slot } from "../entities/Slot.entity";
import { addWeekDays, formattedDate } from "../utils/date";

export class BookingsController {
  @BackendMethod({ allowed: true })
  static async getAvailableDates() {
    const addDates = (date: Date, count = 0) =>
      formattedDate(addWeekDays(date, count));

    return Array.from({ length: 5 }).map((v, idx) => addDates(new Date(), idx));
  }

  @BackendMethod({ allowed: true })
  static async getAvailableSlots(date: string, remult?: Remult) {
    if (!remult) return [];
    const unavailableSlotIds = (
      await remult.repo(Booking).find({ where: { date } })
    ).map((booking) => booking.slotId);

    const availableSlots = await remult
      .repo(Slot)
      .find({ where: { id: { $ne: unavailableSlotIds } } });

    return availableSlots;
  }
}
The allowed property in the @BackendMethod decorator defines whether the requesting user has access to the API. In this case, it's true because we want the API to be public.
You can have authorization rules that control the value of the allowed property. Backend methods also have access to the remult object in order to execute DB operations.
To use the backend methods, you don't have to make any API calls manually. Just import the controller in your frontend code and call the methods directly as you would for any other module.
Internally, Remult makes the API call for you using the HTTP client that was defined in the frontend code when you initialized Remult. This way, you’re guaranteed that the APIs are type-safe and easier to maintain.
// src/components/BookingForm.tsx

import { BookingsController } from "../shared/controllers/Booking.controller";

export const BookingForm = () => {
   // ...
  useEffect(() => {
    BookingsController.getAvailableDates().then(setAvailableDates);
  }, []);

  useEffect(() => {
    if (!availableDates.length) return;
    setValue("date", availableDates[0]);
    BookingsController.getAvailableSlots(availableDates[0]).then(
      setAvailableSlots
    );
  }, [availableDates]);

  useEffect(() => {
    BookingsController.getAvailableSlots(bookingDate).then(setAvailableSlots);
  }, [bookingDate]);

  useEffect(() => {
    setValue("slotId", availableSlots[0]?.id);
  }, [availableSlots]);
 // ...
}
As shown below, the Date and Available dropdown form fields are now pre-filled by default. 

If we try to submit the form with incomplete values, the validation rules added in the Booking entity will fail and return an error. 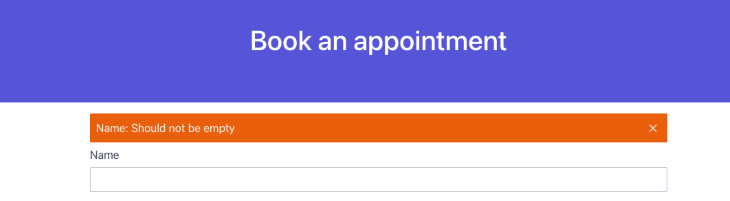
To check out the complete code from this article, see the GitHub repo.
Conclusion
Remult is a great framework that allows you to build type-safe, full-stack apps quickly and easily. Its straightforward syntax makes Remult the perfect tool for any developer looking to start type-safe programming. You can check out the official documentation for more in-depth explanations of the methods covered in this guide.
So what are you waiting for? Give Remult a try today!
Writing a lot of TypeScript? Watch the recording of our recent TypeScript meetup to learn about writing more readable code.

TypeScript brings type safety to JavaScript. There can be a tension between type safety and readable code. Watch the recording for a deep dive on some new features of TypeScript 4.4.

Top comments (0)