
To help you set up a Office 365 account for UiPath robot access, here's a step-by-step guide (current as of July 2020).
Before you can use your Office 365 applications in UiPath Studio, you need to create an app registration in the Azure Portal. This registration can then be used inside a UiPath Microsoft Office 365 application scope to authenticate to Office 365.
In this guide, i'll show you how to
- Create a new App Registration
- Setup API permissions so your App Registration can use Office 365
- Add Office 365 Application Scope to your UiPath project
- Link up your App Registration to an Office 365 Application Scope in UiPath Studio
Creating a new App Registration in Azure Portal
Navigate to Azure Portal, and sign in with your username/password. This doesn't have to be the username/password that the robot will use.
Next, navigate to Azure Active Directory using the left menu
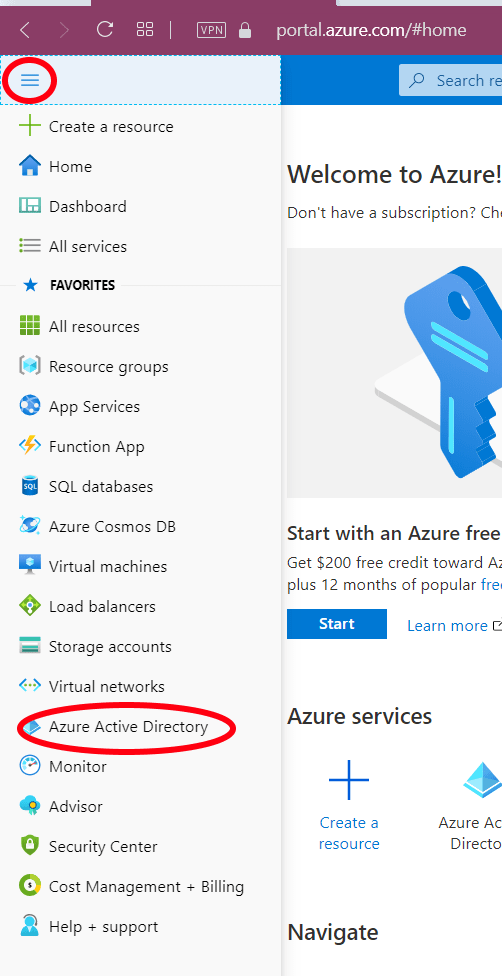
Within Azure Active Directory, click on App Registrations:
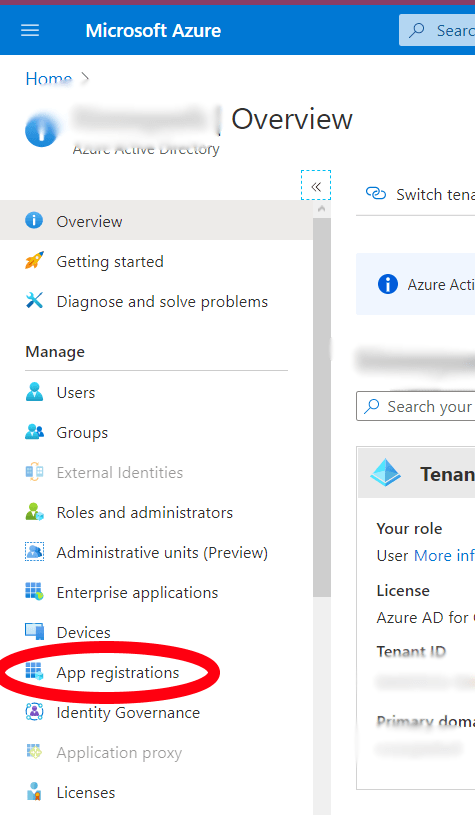
In the App Registrations screen, click on New Registration in the top menu
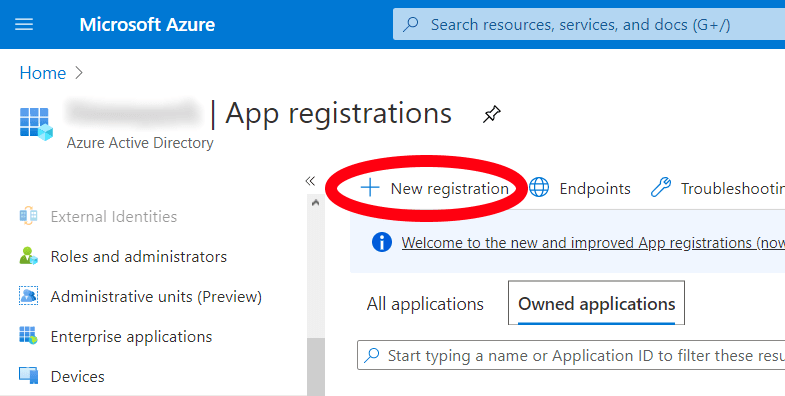
In the Register an application screen, enter a descriptive name for your app registration. I've used UiPathOffice365Medium here.
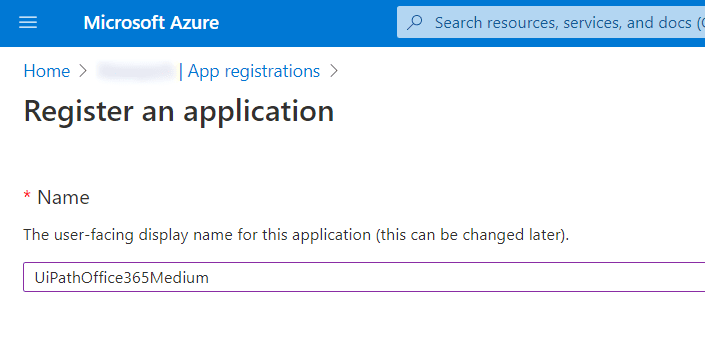
Below that, we need to specify which accounts can be used with this app registration. Change this setting to Accounts in any organizational directory (Any Azure AD directory - Multitenant)
Below that, there is a section for the redirect URI. This is quite important, and is part of the authentication protocol that is used here (OAuth 2.0). I'm not going to dive in the details of that (there are plenty of smarter people who can help you with that), but we can't leave the default value here as UiPath will not be able to work with this registration if we leave it blank.
Set the type to Public client/native (mobile&desktop), and fill in the following value in the URI field; This is a pre-defined response in the OAuth2.0 protocol
urn:ietf:wg:oauth:2.0:oob
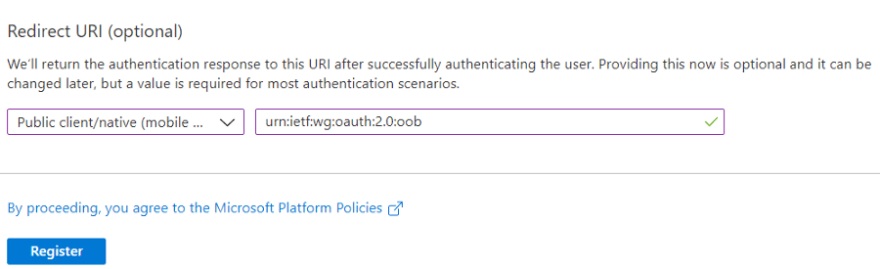
Next, click on the Register button on the bottom part of the screen to create your new app registration. With that out of the way, let's configure the permissions for this new app registration
Setup Azure Active Directory Permissions for our app registration
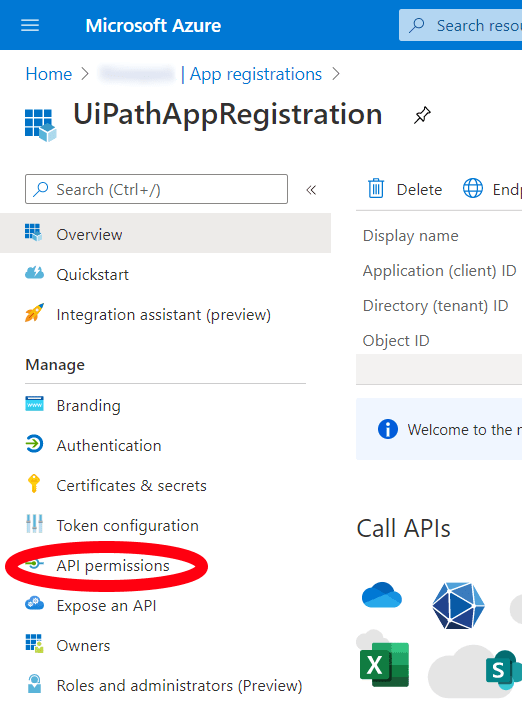
After clicking Register in the last step, we should now be in the App Registration screen. In the menu on the left, click on API Permissions
Within the API Permissions screen, we first click on Add a permission.

A new screen opens, Request API Permissions. Click on Microsoft Graph. Within the Microsoft Graph screen, click on Delegated permissions.
Next, we need to select the permissions. I'll list the section and subsection of the permissions you need to select
Calendar
- Calendars.Read
- Calendars.ReadWrite
- Calendars.Read.Shared
- Calendars.ReadWrite.Shared
Files
- Files.Read
- Files.Read.All
- Files.ReadWrite
- Files.ReadWrite.All
Sites
- Sites.Read.All
- Sites.ReadWrite.All
- Mail.Read
- Mail.ReadWrite
- Mail.Send
- Mail.Read.Shared
- Mail.ReadWrite.Shared
- Mail.Send.Shared
Once you've selected all these permissions, click on Add permissions on the bottom of the Request API permissions screen. After processing for a while, your Office 365 App Registration is now ready for use with UiPath.
Add Office 365 Activities to your UiPath project
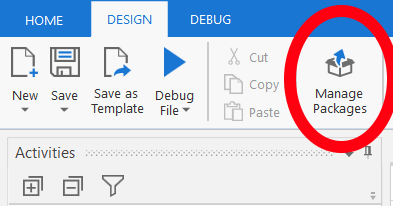
To be able to use Office 365, we need to add the UiPath Office 365 activities to our project. First, start a new project, or open one in UiPath Studio.
Once in your project, click on the Manage packages button in the ribbon.
In the Manage packages window, click on All Packages, then in the search bar enter Office365
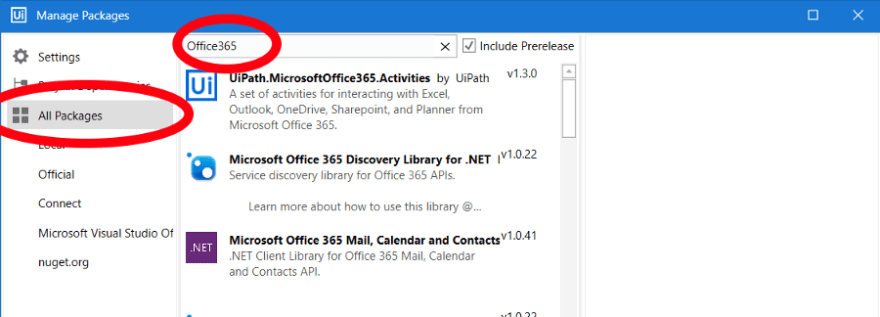
One of the results returned should be
UiPath.MicrosoftOffice365.Activities
Select this activity, then in the right side of the Manage Packages window, click on Install, then click on Save in the right bottom of the window.
UiPath Studio will now resolve the package and install it.
Use the Office 365 Application Scope
To use the Office 365 applications, we first need to insert an Application Scope in the project. To do this, navigate to the Activities tab in the Design window of UiPath, and search for the Office 365 Application Scope.
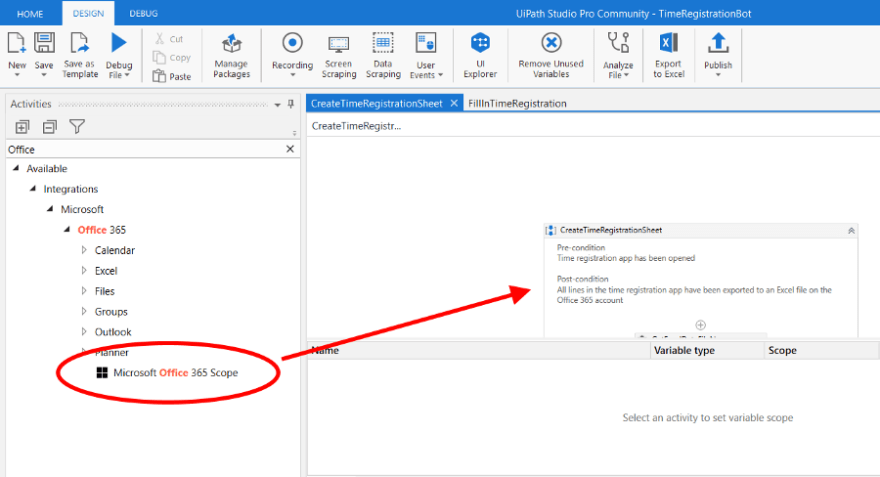
Insert it into a sequence. We will now configure connection to Office 365 from within this scope. To see the properties, select the Office 365 Application Scope in the sequence and let's have a look at the properties.
There's a lot of options here, I won't go into detail on any of them now. But the only one we need to be able to develop with UiPath and Office 365 is the Application Id property. We can copy this ID from the Azure portal, by opening the App Registration we created earlier and going to the Overview screen.
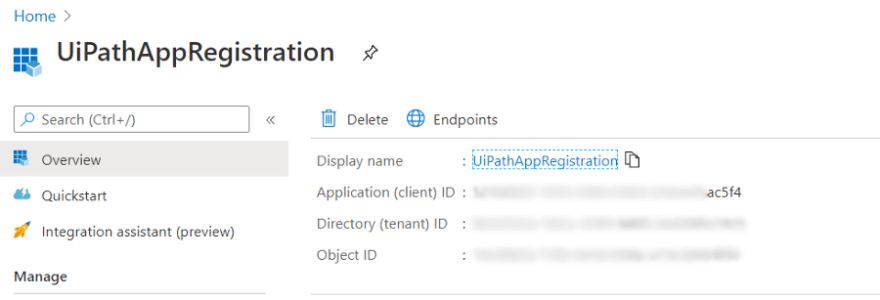
The value we need can be found next to the Application (client) ID label (ending in 5f4 in my example). Copy the GUID displayed in Azure.
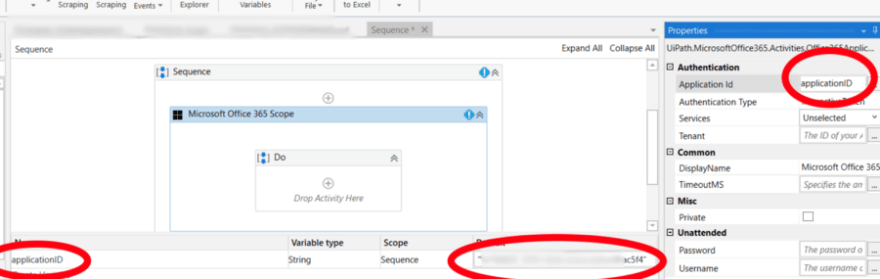
In UiPath, create a new String variable applicationID, and give it a default value with the value we copied from Azure (quotes!)
Next, in the properties window of the UiPath Office 365 Application Scope, set the variable applicationID in the Application ID field of the Office 365 Application Scope in our sequence
Next, in the Services combobox, select the services you want to use. Most of the time, you're good with just using Files in this list (which will allow you to manipulate Office365 documents). Please refer to the UiPath documentation if you want to know more on this.
Now we can run our sequence in debug mode, and UiPath will attempt to authenticate to Office 365. The first time we do this, we get a popup window where we will need to authorize to Azure/Office 365. Once we've authorized by logging in, we'll need to confirm the permissions we want to use
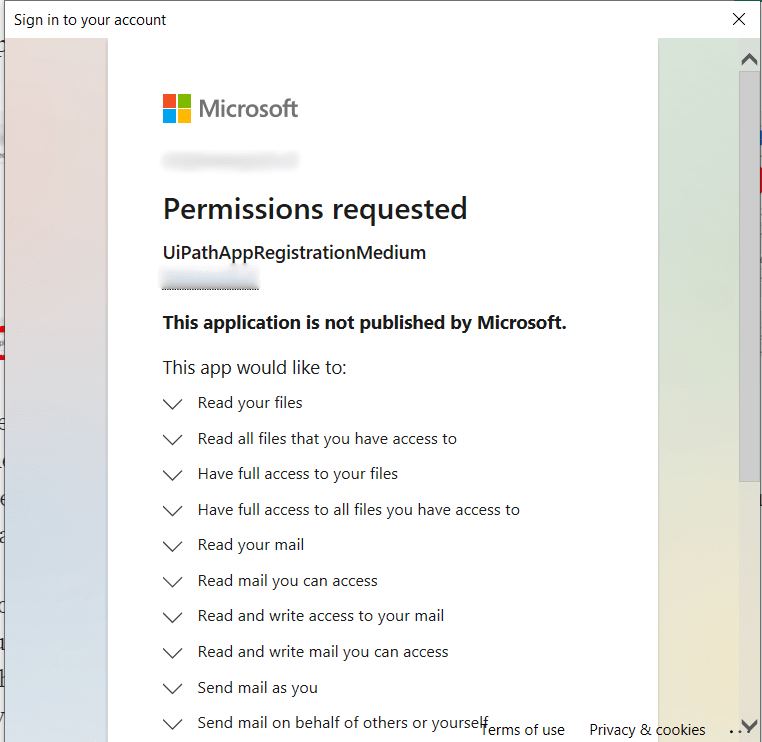
Scroll to the bottom of this list, and click on Accept (if you accept of course :)). Now, next time we use this application context we will be able to use it without authentication.

Top comments (1)
Hey Marco,
How would you make sure your app grants users access to only a few activities in Office 365 and not all the users in the AD? I know you have to consent when you first login, but is there another layer of security you can place where only certain users may have access to the application and for certain sharepoint sites (not all that is available in AD)