For the past few months I've been studying to take the AWS developer associate certification.
I had a great time learning the many services offered by the platform, but as the date of the exam crept ever closer, I realized that my notes (almost 250 pages!) were really aching for some order.
Of course I could just revise them. Trim the least-important bits. Highlight the key parts. Fight against the never-ending tide of permanently bolded text that reigns over the document from page 36 onwards.
But maybe a better course of action would be to share what I have learnt. Perhaps the feeling of being observed will help me to avoid bolding and highlighting every single line of text. I guess time will tell.
So what is Amazon Web-Services?
Chances are if you are reading this post, you are aware of what AWS is. But for completion’s sake, AWS is Amazon’s cloud platform, offering over 200 on-demand services with affordable pay-as-you-go pricing. These services include (but are not limited to): computing, storage, databases, networking and data analytics.
I choose to start this series with a computing service (EC2) because, despite Amazon’s excellent serverless technologies, EC2 is still one of the most comfortable and intuitive ways to run code on the cloud.
Elastic Cloud Computing
Elastic Cloud Computing (EC2) is a service that provides computing on the cloud, which can automatically shrink or grow on demand.
It’s kind of a virtual machine hosted by AWS, that you can set-up in a matter of minutes.
So we’ll do that!
In this post we will launch an EC2 instance, and in part 2 we’ll use it to mount a webserver.
We start by logging into the AWS console. AWS has an impressive free tier that lets us play with lots of its services without paying a single dime.
We’ll go straight to EC2.
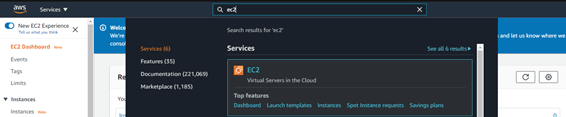
This will lead us into the EC2 dashboard, where we can create and manage our EC2 instances, as well as other features that are outside the scope of today’s post.
From here we can select “Launch instance"

Step 1
Here which we can pick an AMI. An AMI, or Amazon Machine Image is just a template which contains software configuration required to launch an EC2 instance.
Amazon offers a nice default selection, but you can also visit the AMI store, use Community AMIs or even create your own.
We’ll select Amazon Linux 2 AMI, a lightweight, battle-tested AMI which is suitable for most of your demo and educational needs.
Step 2
In this section we have to choose an instance type, and we get our pick from a rather long list with varying levels of performance. Since this is a rather simple demonstration we’ll go with the t2.micro, and press next.
Step 3
For step 3, we can leave all the defaults this time around, but do make sure that “Auto-Assign public IP” is set to “enabled”, since we’ll want to log onto this instance from our local computer.

Step 4
Here we can choose Elastic Block Storages (EBS). EBS are scalable, highly-available volumes that can be attached to EC2 instances. They come in different varieties including:
• The General Purpose SSD family (gp 2-3): Good price/performance balance. Great for development and operations where latency is not paramount.
• The Provisioned IOPS SSD family (io 1-2): Higher durability and Input/Output operations per second than gps, albeit a bit more expensive.
For your root SBS you’ll only be able to pick between the gp & io SSD families. However, on subsequent volumes, you can also pick HDD options:
• Throughput Optimized HDD (st1): An HDD option which is pretty low-cost, and it great for huge amounts of data which is frequently accessed.
• Cold HDD (sc1): A super low-cost option which is great for rarely-accessed data.
The default gp2 will suffice for our example, so we’ll press next.
Step 5
On Step 5 we can add Tags to our instance. Tags are key-value pairs that we can apply to our instances or EBSs, to make it easy to refer to them from other services. However, this time around we’ll add none and continue onto the next step.
Step 6
This step will let us configure a Security Groups, which pretty much acts as a virtual firewall, defining which ports will accept traffic. Since the aim of Part 2 is to use this instance as a web service, we’ll add port 80 to enable HTTP traffic.

After that, we can review and launch our instance. But before the final push, we’ll have to configure a key-pair for this instance. This will allows us to connect to our newly-created instance via SSH.
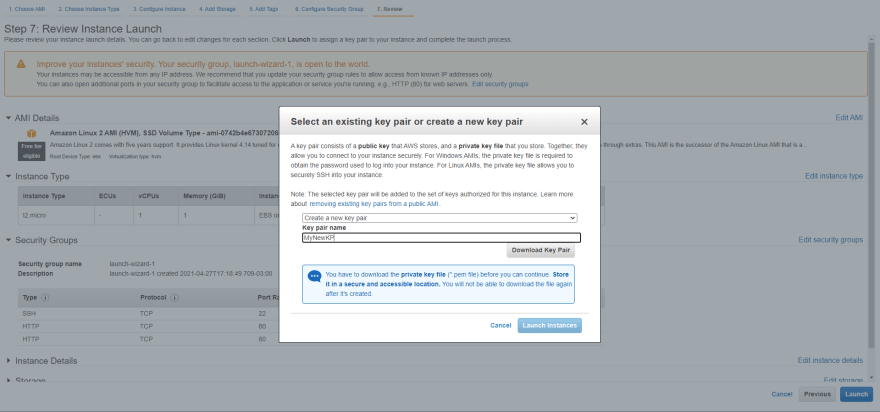
You’ll have to download a .pem file containing the keys. Store it well because you won’t be able to download it again. After doing that, we’ll have our EC2 up and running.

On part 2 we’ll use this instance to mount a very simple web-server.

Top comments (0)