

Image Source: https://cloud.google.com/solutions/continuous-delivery-with-travis-ci
Hello everyone. It came to my attention how important automation is when I started working for a big corporation. I realized that if you do not automate all your scripts, you are most likely not going to do any testing at the end. Tech debt can become a real problem.
Have you ever thought of having all your “post-Github-push” commands ( otherwise knows as deployment process) done for you automatically?
Well today you will learn how to do so in 5 mins. And yes, all you will have to do, is push your new changes to your Github repo. Everything from there on will be taken care of.
Prerequisites : Github account, Travis CI account, Firebase account.
- Find out what your process is after making changes to your repo:
In my case, after I push my changes to Github, I like to make sure it is passing all the linting, e2e tests, and unit tests. afterwards, I would like to build for production, and deploy to Firebase. Quite a few steps. As I said, automation.
- Sign up/ Login to your travis CI account using Github: travis-ci.org

Image Source: https://travis-ci.com/images/logos/TravisCI-Mascot-1.png
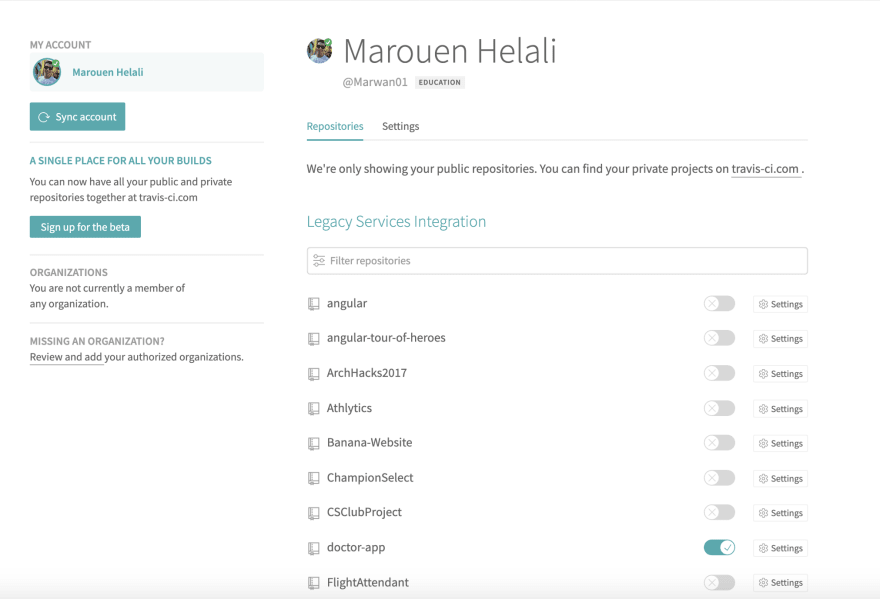
- Click the + button next to Repositories on the left. You should see your Github repos. Use the toggle to enable the repo you are trying to use Travis CI with. You should be able to see something similar to this:
- Add a .travis.yml file to the root folder of your project. Within this file, we are going to specify which server-side language we are using, and its version ; in our case, we are using nodejs 10. Next, we add our scripts from step 1. that we want to execute as soon as Travis CI receives a commit that you pushed to Github. Your .travis.yml fire should look similar to this:
language: node_js
node_js:
- '10'
script:
- ng lint
- ng e2e
- ng test
- ng build --prod
Congratulations, you just ran your first automated CI build pipe.

Additional Step: Automatic deployment to Firebase (Assuming you have already deployed your project to Firebase Hosting)
- If you would like to also deploy to firebase after your tests and build succeed, you will need to execute this command in your project root:
firebase login:ci
This will open up a browser tap and ask you for some permissions to sync up Github/Travis/Firebase together. At the end, you will see a nice token in the terminal. Save it, we are going to need it in the next step.
- Now we are almost there, we just have to do one last cool thing: Encrypting the token for Travis to understand. We need Ruby for that.
install Ruby
gem install travis
travis encrypt "PASTE_YOUR_TOKEN_HERE"
- You should have received an encrypted token that you can now add to the deploy part of your .travis.yml to finally have your project automatically deployed to firebase each time you push changes successfully to Github!
deploy:
 provider: firebase
 token:
  secure: "PASTE_TRAVIS_ENCODED_TOKEN_HERE"
message: "this is an automatic deployment by travis - CI as a result of pushing to master"
Now make some changes, push to Github and watch your dreams come true on the Travis CI website. You should see something like this for a successful build:

Now if you go to your Firebase hosted website, you should be able to see that your new changes took place. Enjoy!

Original Source: https://medium.com/faun/ci-cd-with-travis-ci-and-firebase-20b6c69fa8f7

Oldest comments (0)