When we create an instance in AWS EC2, we need to add a .pem file to the instance. And to log in every time we need to use that .pem file to our local machine. Which is not that cool way :(
So, in this article, we will learn how we can add root user password for ssh login from our local machine to AWS EC2 instance.
Before getting started, I am considering we have a running instance on AWS EC2. I am running the ubuntu operating system on my instance. For the Linux instance, all these work the same as the ubuntu instance.
At first, we need to log in to our instance with the corresponding .pem file by the following command and of course, replace “your-pem-file.pem” by your instance .pem file and x.x.x.x by your instance IP address:
ssh -i "your-pem-file.pem" ubuntu@x.x.x.x
Then, we need to switch to superuser by running this command:
sudo su
After that, we will edit the configuration to modify the ssh login system for password. So, let’s open the configuration file with a nano editor. This will let us edit the default configuration.
nano /etc/ssh/sshd_config
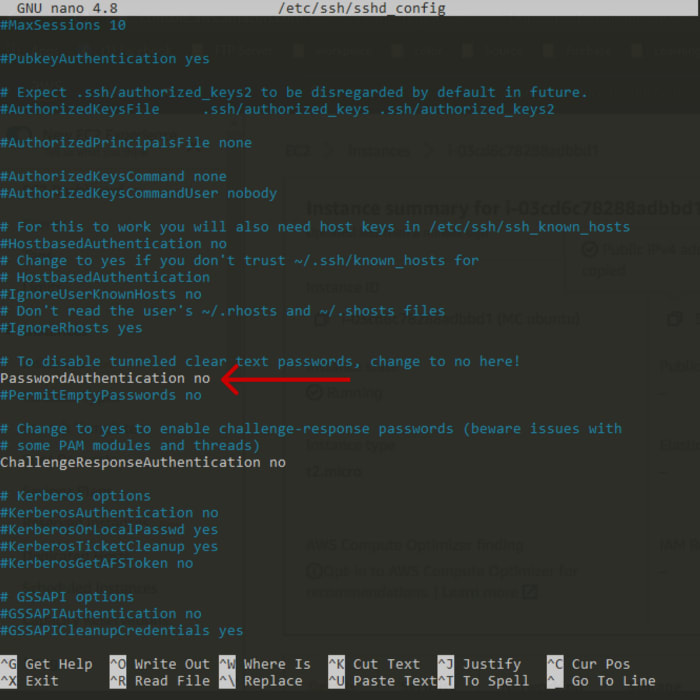
This will open the config file which possibly will look like this:
So, we need to tell ssh we want password authentication. For this, we are going to change PasswordAuthentication noto PasswordAuthentication yes. After that, press crtl+x and save this file.
Next, we need to restart the sshd by running this command:
service sshd restart
Now, we can set a password for our authentication by running this command:
passwd ubuntu
And set your preferred password. And whalah, it’s done!
Now, exit from the server and login again with your password that you’ve set just now. Run this command, and then give the password.
ssh ubuntu@x.x.x.x
So, isn’t this interesting? :D


Top comments (0)