Handling Authentication and Authorization with Firebase is like a piece of cake thanks to their awesome SDK and documentation.
But that doesn't stop there, because Firebase also offers a pre-built UI for us Devs to use so that we can quickly build a sign in/sign up page. This UI that I'm talking about is also the same UI used by Google throughout its Google products, which is backed by years of research on UI/UX (so yeah, we're actually standing in the shoulder of a giant, folks!)
So in this blog, we will be building a Sign In page with Firebase UI and Auth, and I'll be using Next.js here (because it's awesome, but you can also use React if you want, or other framework).
So without further ado, let's go ahead and build a Sign In Page!
Prerequisites
Before we begin, this blog assumes you already have a Firebase account and app set up. If you haven't yet, you can go to their page at Firebase to create an account, and start a new project. They also have a very generous free plan without requiring you a credit card, so this step will be not that of an obstacle. After signing up, proceed to creating a Project, and then add app, and choose web. You can name it whatever you want. You can then proceed to console once everything is set up.
Also, this blog assumes you already know Next.js since we will be building the sign in page with Next.js, but if you don't, you can use React if you prefer (since the code will also be pretty much the same) or use any framework you like. Btw, if you want to learn Next.js and get up to speed with what it is (and why it's better than React), I have a blog about A quick introduction to Next.js which you can check out.
Ok, if you're all set, let's go ahead and build a sign in page, shall we?
Let's Build!
Alright, so the first thing we have to do is to start and initialize our next.js project, install some dependencies, and get our configs from firebase.
Create Next App
To start our Next.js project, open your terminal, then enter npx create-next-app my_login and wait for it to set up a Next.js Environment (you can name it whatever you want, it doesn't need to be my_login).
Once that's finished, we can cd my_login (or whatever name you choose), and install our dependencies.
Install Dependencies
For our dependencies, we need:
firebase - The Firebase SDK we will be using for this project
react-firebase-hooks - A collection of firebase utils for common firebase operations. (This will help lessen the boilerplate we have.)
react-firebaseui - The SignIn UI by Firebase. This module contains a component that we can just import and render, that's why I said building Sign In page with Firebase is a breeze.
So in your terminal, enter:
npm i firebase react-firebase-hooks react-firebaseui
Or you can use yarn if you want.
Let it finish in the background while we proceed on the next step 😉.
Firebase App
Ok, so while we're waiting for our dependencies, we can go ahead to firebase console, set up the auth provider/s, and get our SDK config.
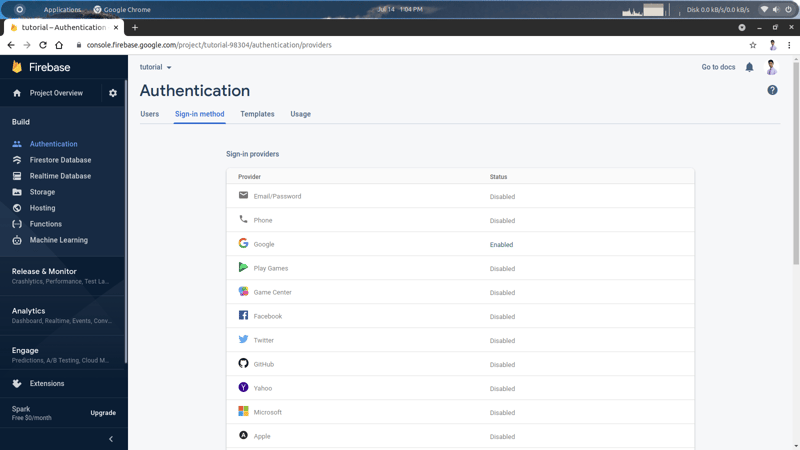
First, go to firebase console, go to Authentication, and choose SignIn method.
From there, choose the sign in method you want. In my case, I chose: Google, Twitter, and GitHub. (Note: You need a dev account in Twitter and GitHub before you can add them as OAuth providers).
(Side Note: If you're using a custom domain, add that under authorized domain which you can find right below these providers).
Alright, our Auth Providers are set up! So now, we can go ahead and grab our firebase SDK config.
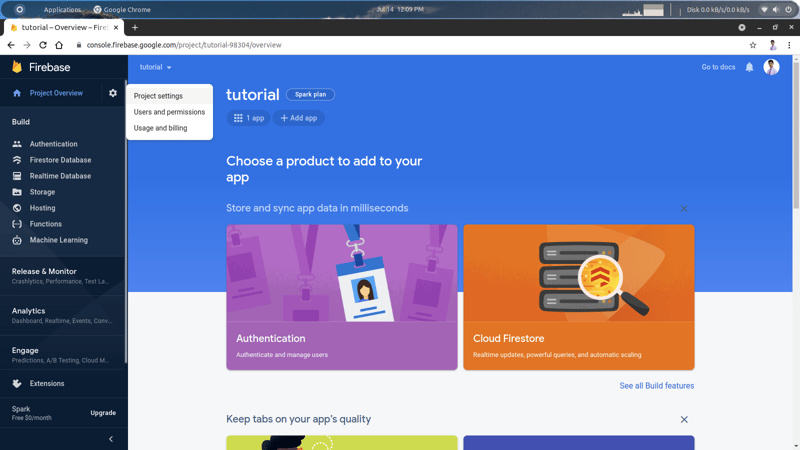
To do that, just click on the gear icon next to Project Overview on the top left and choose Project Settings
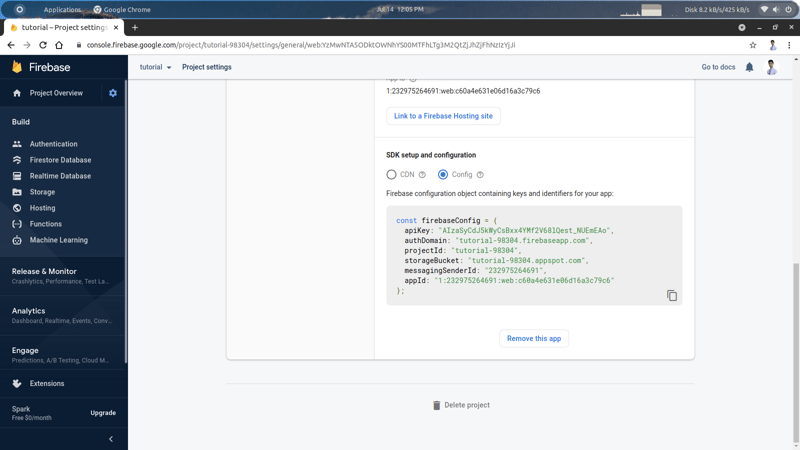
Then scroll down through the bottom and find SDK setup and configuration, then choose Config
Copy your config (not mine, copy your own, because it won't work to you, but I will be deleting this project anyway, so it will not actually work).
Now that we have the config, we can continue on to our Next.js App and start coding (maybe the dependencies are also done installing).
Configuring Our Firebase App locally
So back to our Next.js App, we can configure and initialize our Firebase project.
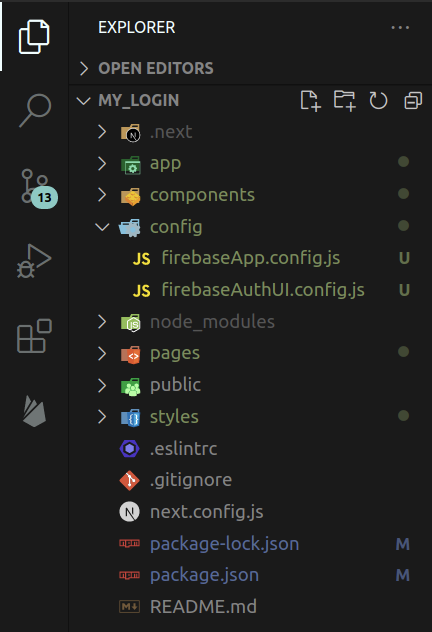
First, let us save the Firebase SDK Config we just copied. Create a new folder named config and add there a new file called firebaseApp.config.js.
(You might see that I have another file there. We will be adding that later).
So inside the firebaseApp.config.js, we can save and export our SDK config:
// config/firebaseApp.config.js
export const firebaseConfig = {
    apiKey: ...
    // paste your config here...
}
After saving the config, we can now initialize our firebase app.
For the next step, you might think that I am thinking too much here about modularization, but I think it's a good practice to separate files based on their concerns. Though it's not actually essential, I prefer "personally" to separate the initialization of my firebase app in a separate App folder because I think it's much cleaner and more modularize. You can also do the same if you like to separate things about firebase with next.js.
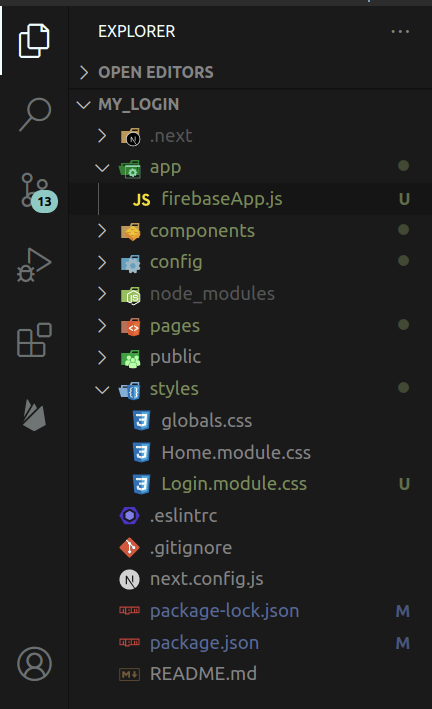
I hope you did the same, because inside the App folder, we will be creating a firebaseApp.js file where we will put the initialization of our app.
It should look something like this:
Inside the firebaseApp.js, we can write the following code:
import firebase from 'firebase/app';
import 'firebase/auth'
import { firebaseConfig } from '../config/firebaseApp.config.js'


if (!firebase.apps.length) {
    firebase.initializeApp(firebaseConfig)
}

export const auth = firebase.auth();
export {firebase}
Alright, our firebase set up is near ready! To complete the setup, let's have the AuthUI config (the extra file you saw above under the config folder).
AuthUI Config
The AuthUI config will be used by the FirebaseUI component to generate the Sign In components for us. In this config, you can specify how you would like the FirebaseUI to behave, as well as what will be included in the sign in page. You can check out all the configurations here..
Alright, so let's now create a new file inside the config folder and name it firebaseAuthUI.config.js. This is where we will write the config for the react firebaseui sign in component.
For this tutorial, we will be using the following config (write this inside the firebaseAuthUI.config.js):
// /config/firebaseAuthUI.config.js
export const uiConfig = firebase => {
    return {
        signInFlow: 'popup',
        signInSuccessUrl: '/',
        tosUrl: '/terms-of-service',
        privacyPolicyUrl: '/privacy-policy',
        signInOptions: [
            firebase.auth.GoogleAuthProvider.PROVIDER_ID
        ]
    }
}
And yeah, this is a function that returns a config, because we don't want to import the firebase app from multiple modules, and we want this to be more Functional Programming'ish.
I think it's a cleaner way of coding but yeah, let's proceed.
Adding The Pages
Since we're using Next.js (are you?), it will handle routing for us via the pages folder. So inside the pages folder, we will be adding three more files:
login.js
privacy-policy.js
terms-of-service.js
NOTE: We don't necessarily need to put any valid TOS or Privacy Policy. We just have that for the config of our LogIn UI (though optional, it makes it look more like a sign in page. You can add whatever you want there for production ready apps you have)
Ok, so inside the privacy-policy.js, we can just add the following:
import React from 'react'

export default function PrivacyPolicy() {
    return <h1>Privacy policy Page</h1>
}
You can also do the same in TOS (terms-of-service) page by replacing the privacy policy.
Alright, so we can actually proceed coding the AuthUI.
Inside the login.js, write the following:
// Next JS related
import Head from 'next/head';
import { useRouter } from 'next/router';

// Firebase related
import { useAuthState } from 'react-firebase-hooks/auth';
import StyledFirebaseAuth from 'react-firebaseui/StyledFirebaseAuth';
import { auth, firebase } from '../app/firebaseApp';
import { uiConfig } from '../config/firebaseAuthConfig';

// Components
import Logo from '../components/elements/Logo';
import Card from '../components/elements/Card';
import Error from '../components/elements/Error';
import Loading from '../components/elements/Loading';

// Styles
import LoginStyle from '../styles/Login.module.css';


export default function Login() {
    const [user, loading, error] = useAuthState(auth);
    const router = useRouter();

    if (loading) return <Loading />
    else if (error) return <Error msg={error} />

    else if (user) {
        // user is already logged in, redirect to home page
        router.push('/');
    }

    const authConfig = uiConfig(firebase);

    return (
        <>
            <Head>
                <title>CodeBlog | LogIn</title>
            </Head>
            <div className={LoginStyle.login}>
                <Card>
                    <div className={LoginStyle.loginTitleContainer}>
                        <h1>Log In to</h1>
                        <Logo />
                    </div>
                    <StyledFirebaseAuth uiConfig={authConfig} firebaseAuth={auth} />
                </Card>
            </div>
        </>
    )
}
In here, I structured my imports by combining and labeling related imports for better organization and readability. Though optional, this is just how I code.
Also, I made custom components here like loading and error. Note that you can also make your own.
I also have a custom CSS imported (I'm not going to show it here, because it's unnecessary for this tutorial)
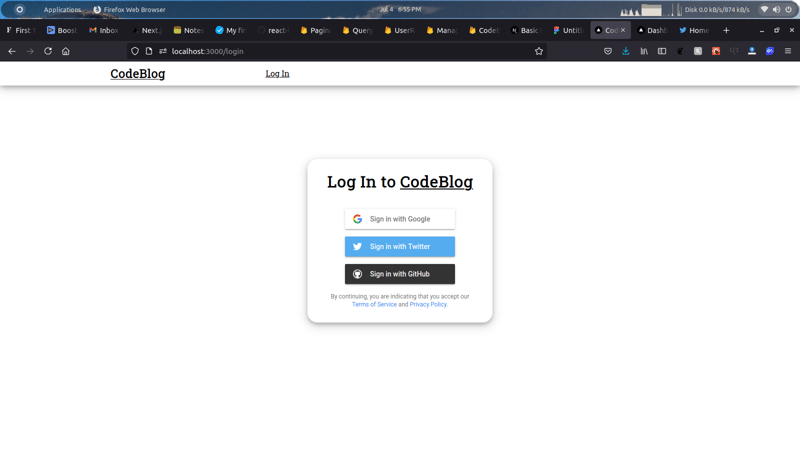
Note that I haven't designed or made the Sign In with {whatever provider} on the component, because the <StyledFirebaseAuth uiConfig={authConfig} firebaseAuth={auth} /> handled that for us. By just providing the auth config and firebase auth, it will handle the rest of the auth logic plus component for us.
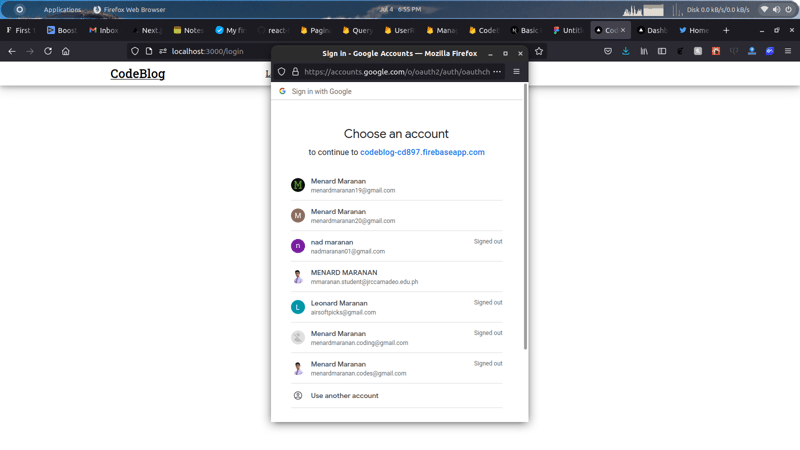
This is how it looks like to me:
And that's it!
We're done!
Whew! What a ride isn't it?
As you can see, building a SignIn page with firebase is very easy, and we don't even need to think all of the auth logic ourselves.
And this is why I love Firebase. The awesome Developer SDK makes things easier for us to implement, increases our productivity, and greatly lessens the development time.
About your author
I am Menard Maranan, a Fullstack Developer. As of now, I'm more focused on Next.js, though I often craft my own tech stack, especially depending on the use case 😉)
Follow me here for more content like this!
Also, Follow Me On Twitter!
'Til next time!




Oldest comments (6)
Would have been great to see a similar example with something like Appwrite authentication API
Thanks for the hint!
Actually, I haven't heard of Appwrite before. I'm gonna add that to my list of 'to learn' technologies. Btw, I'm curious how does it compare to Firebase Auth or Auth0?
Thanks Menard, great job!!
Is this firebase ver 8, by the way??
If so, I would like you to add any changes when we want to do the same at ver 9!!
Because I have been struggling with this changes and errors :(
Hello Hiroshi!
I'm glad you found this interesting. Also, thanks for the heads up!
You're right, this is firebase 8.7, seems I really need to update my content.
Anyway, I'll see if I can make that happen and get back to this article soon
How did you get the css 3rd party working on Next? I can't... It shows me:
Global CSS cannot be imported from within node_modules.
Read more: nextjs.org/docs/messages/css-npm
Location: node_modules/react-firebaseui/FirebaseAuth.js
What could I do? :/
Hey thanks for this great tutorial!
When I run it I get the error on the
const [user, loading, error] = useAuthState(auth);line of "ReferenceError: Cannot access 'auth' before initialization". Do you have any idea what I could be doing wrong?