In the last post we covered an overview of Helm and the MinIO deployment to give us an option for testing later on workloads that require object storage. This post we are going to focus on context and how to make sure you have access from your desktop to your Kubernetes Cluster.
Context

Image taken from Kubernetes.io
Context is important, the ability to access your Kubernetes cluster from your desktop or laptop is required. Lots of different options out there and people use obviously different operating systems as their daily drivers.
In the post we are going to be talking about Windows but as I said there are other options out there for other operating systems. More to the point if you are managing multiple Kubernetes clusters for different projects or learning.
By default, the Kubernetes CLI client uses the C:\Users\username.kube\config to store the Kubernetes cluster details such as endpoint and credentials. If you have deployed a cluster you will be able to see this file in that location. But if you have been using maybe the master node to run all of your kubectl commands so far via SSH or other methods then this post will hopefully help you get to grips with being able to connect with your workstation.
Once again Kubernetes.io have this documented
Install the Kubernetes-CLI
First, we need the Kubernetes CLI installed on our Windows Machine, I used chocolatey with the following command.
choco install kubernetes-cl
We then we need to grab the kubeconfig file from the cluster, grab the contents of this file either via SCP or just open a console session to your master node and copy to the local windows machine. The location of the config is listed below.
$HOME/.kube/config
If you have taken the console approach, then you will need to get the contents of that file and paste into the config location on your Windows machine. You could go ahead and run the following command but this is going to contain redacted information so this will not work if you take a copy of this to your windows machine.
kubectl config view

What we need to do is get those redacted values to copy over to our windows machine, you can achieve this by running the following commands
cd $HOME/.kube/
ls
cat config
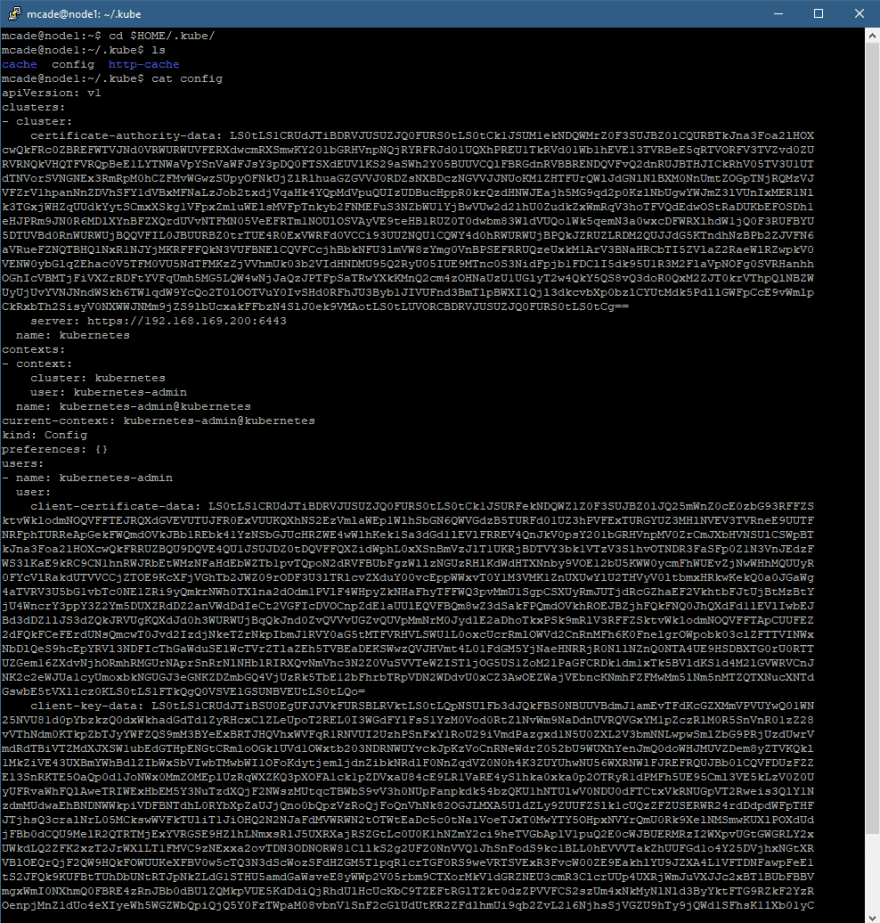
That the above starting at the apiVersion: v1 down to the bottom of the file and copy that to your .kube directory on windows. This same process is similar for other operating systems.
C:\Users\micha.kube\config
If you want to open the file, then you will be able to compare that to what you saw on the shell of your master node.

You will now be able to check in on your K8 cluster from the windows machine
kubectl cluster-info
kubectl get nodes

This not only allows for connectivity and control from your windows machine, but this then also allows us to do some port forwarding to access certain services from our windows machine. We can cover them off in a later post.
Multiple Clusters
Ok a single cluster is simple, and we are there with the above specifically on Windows. But accessing multiple clusters using contexts is really what you likely came here to see.
Again some awesome documentation that you can easily run through.
For this post though I have my home lab cluster that we have been walking through and then I have also just deployed a new EKS cluster in AWS. The first thing to notice is that the config file is now updated with multiple clusters. Also note I do not use notepad as my usual go to for editing YAML files.

Then also notice in the same screen grab that we have multiple contexts displayed.

So now if I run the same commands we ran before.
kubectl cluster-info
kubectl get nodes

We can see that the context has been changed over, and actually this is done automatically with the EKS commands and I am not sure if this is the same process for other cloud providers something we will get to in later posts. But now we are on the AWS cluster and can work with our cluster from our windows machine. So how do we view all of the possible contexts that we may have in our config file.
kubectl config get-contexts

And if we want to flip between the clusters you simply run the following command, you will then see how we switched over to the other context and back into our home lab cluster.
kubectl config use-context Kubernetes-admin@kubernetes

One thing to note is that I also store my .pem file in the same location as my config file, I have been reading about some best practices that if you have multiple config requirements you could start creating a folder structure with all of your test clusters, all of your development clusters and then live and so on.
Hopefully that was useful, and in the next post we will take a look at the load balancer that I am using in the home lab.
The post Building the home lab Kubernetes playground – Part 6 first appeared on vZilla.

Top comments (0)