
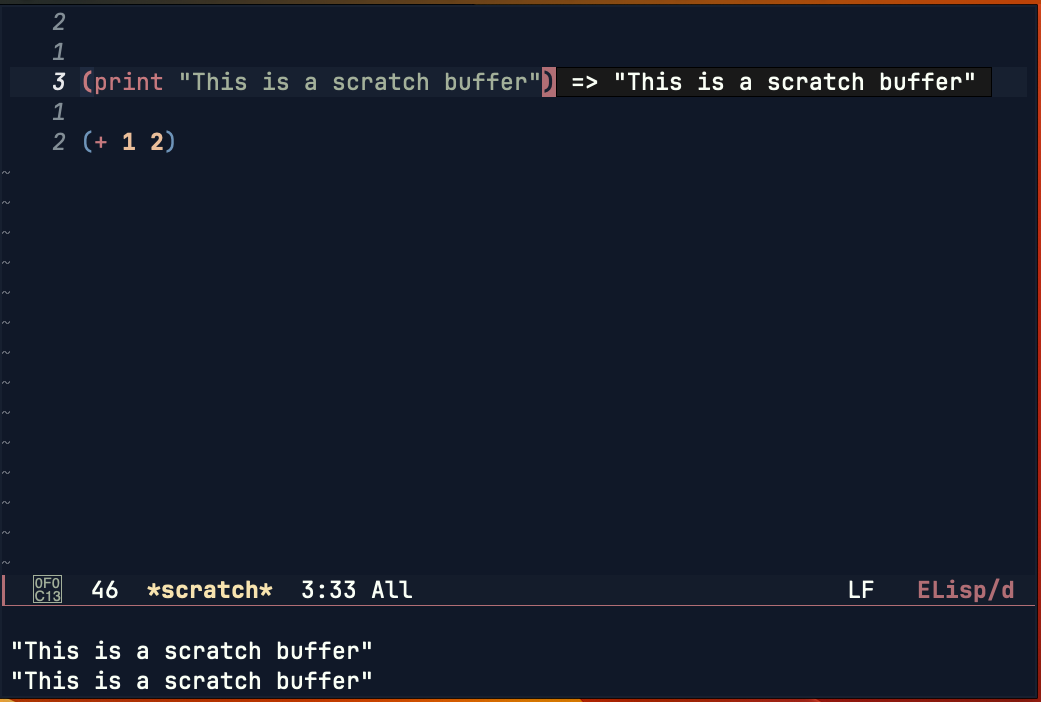
I've been using Neovim as my main editor for more than 3 years now, but I sporadically use Emacs from time to time, specially to write and keep notes. In fact, this blog is written using Emacs and one of its plugins called Org Mode.
But recently, I tried to use Emacs as my main editor and although it didn't quite go as I planned, in the process I came to learn and love many things about Emacs, like elisp and the scratch buffer.
In this post, I will explain how to write a basic plugin that can create a scratch buffer like the one in emacs. While at the same time showing the basic architecture of a neovim plugin and some other things I learned in the process.
What are we building?
We're building a small implementation of the scratch buffer but for neovim. In a scratch buffer, you can quickly try new pieces of code and later decide if you want to save it or just discard it when closing neovim.
The original implementation supports evaluating code directly in the buffer (REPL), but we won’t be implementing this functionality as it’s quite complex; therefore this plugin will be small.
The anatomy of a Neovim plugin
Let's start by seeing how the architecture of a common neovim plugin looks like, usually a neovim plugin is structured in the following way:
.
├── LICENSE
├── plugin
│  └── plugin-file.lua
├── lua
│  └── main-file.lua
└── README.md
The plugin and lua folder are special cases and have the following meanings:
- plugin folder
All files in this folder will get executed as soon as Neovim starts, this is useful if you want to set keymaps or autocommands regardless of the user requiring the plugin or not
- lua folder
The lua folder is in most cases where your plugin's code lives, this code will only be executed when the user explicitly requires your plugin, for our example require('scratch-buffer')
For this plugin, we don't want to execute any code if the user has not required the plugin, and therefore all the code will live inside the lua folder.
Let’s create the main file for our plugin, the naming is important and will usually be the same as the plugin, there are two ways to do it:
- Having a single lua file named after the plugin, e.g: scratch-buffer.lua
- Having a folder named after the plugin with an init.lua inside of it, e.g
lua/scratch-buffer/init.lua\.
Let's go with the first option and create a new file named scratch-buffer.lua\ inside the lua/\ folder and put the following code on it:
.
├── LICENSE
├── lua
│  └── scratch-buffer.lua
└── README.md
print("Hello from our plugin")
Our plan
Let’s stop for a moment to think about what we need to do exactly for this plugin… We need to:
- Create a command that gets executed when neovim starts…
- Create an empty scratch buffer and assign a filetype to it
- Set the buffer in the initial window
How to load our extension
We can have the code of our extension wherever we want in our filesystem, but we need to tell Neovim where our plugin's code is, so it can load the files correctly. Since I use lazy.nvim this is the way to load a plugin from a local folder:
{
  dir = "~/Documents/projects/scratch-buffer", -- Your path
  name = "scratch-buffer",
  config = function ()
    require('scratch-buffer')
  end
}
Now if you restart your neovim you will see the message Hello from our plugin in the command line
Execute code when neovim starts
Autocommands are a way to tell neovim to execute commands after a specific event, these events can be, for example:
- When Neovim starts
- When a file is written/loaded
- When leaving or entering a buffer/window
One of the best ways to explore the Neovim documentation is by using the official documentation, if you have telescope.nvim installed, you can just run :Telescope help_tags and search for autocommands

After reading the documentation, we know that to execute a command when neovim loads, we can use the event VimEnter, this is what the documentation says:
After doing all the startup stuff, including loading vimrc files, executing the "-c cmd" arguments, creating all windows and loading the buffers in them.
When creating an autocommand we also need to define an augroup for our extension, which is just a way to group all our commands. It's a good idea to group them based on the name of the extension, so if the user needs to review an autocommand it is clear which extension is creating it.
local augroup = vim.api.nvim_create_augroup("ScratchBuffer", { clear = true })

local function main()
  print("Hello from our plugin")
end

local function setup()
  vim.api.nvim_create_autocmd("VimEnter",
    { group = augroup, desc = "Set a fennel scratch buffer on load", once = true, callback = main })
end

return { setup = setup }
In the autogroup we set the option clear = true so if our plugin gets called multiple times it just clears the previous autocommands instead of creating multiple autocommands.
We're also exporting a function called setup, there's nothing special about this name, but it's the most common convention used across neovim plugins to initialize a plugin.
Let’s update the require of our plugin to call the setup function:
require('scratch-buffer').setup()
Now, when you exit and enter neovim, you will see the string Hello from our plugin in the command line.
Create a buffer using neovim APIs
Now we need to create a buffer that will function as our scratch-buffer. As we did before, the first thing to do is to search the documentation, in there we find that we need to use the nvim_create_buf({listed}, {scratch}) function.
This function, as the documentation explains, receives two parameters:
- listed
Whether the buffer is shown when you run :buffers
- scratch
Very convinient property
Creates a "throwaway" |scratch-buffer| for temporary work (always 'nomodified'). Also sets 'nomodeline' on the buffer.
Let's create a new function that creates the buffer and returns it. Additionally, let's set the filetype to lua and the name of the buffer to *scratch*
local function create_buffer()
  local buf = vim.api.nvim_create_buf(true, true)
  vim.api.nvim_buf_set_name(buf, "*scratch*")
  vim.api.nvim_set_option_value("filetype", "lua", { buf = buf })
  return buf
end
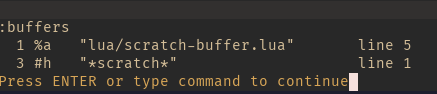
If you restart neovim and list the buffers, you will notice the buffer is created and listed correctly
Set the scratch buffer as the initial buffer
We have by now created a buffer when the user enters Neovim, but we still need to set it up as the initial buffer, to accomplish that, we need to use the nvim_win_set_buf, this is what the documentation says:
Sets the current buffer in a window, without side effects
Attributes: ~ not allowed when |textlock| is active
Parameters: ~ • window Window handle, or 0 for current window • buffer Buffer handle
Since we’re touching this, let's also add some welcome text to the scratch buffer and put the cursor in the last line for more convenience
local buf = create_buffer()

vim.api.nvim_buf_set_lines(buf, 0, -1, true, { "-- Welcome to Neovim!", "" })

vim.api.nvim_win_set_buf(0, buf)

vim.api.nvim_win_set_cursor(0, { vim.api.nvim_buf_line_count(buf), 0 })
How can we publish the extension to the world?
You’re probably aware that the preferred way to distribute neovim is to use git repositories, most of the people use Github for this, and it’s not different with this plugin.
To distribute it, we can simply create a new repository on Github and set the visibility it to public. Now users can install it like any other package:
{
  "miguelcrespo/scratch-buffer.nvim",
  config = function ()
    require('scratch-buffer').setup()
  end
}
Conclusion
In this blog post, I wanted to share what I learned while writing my first small plugin called scratch-buffer. The original implementation of this plugin on GitHub is written in a language called Fennel, which belongs to the lisp family and compiles to lua, but the functionality is basically the same. I have written more about Fennel in a previous blog post.
After reading this blog post, you hopefully understand much better now how neovim plugins work and how to write one. You also know how to search the neovim documentation to find the functions you need. I must admit this step took me a long time since I’m very spoiled as a Javascript developer to easily find blog post about things I need, but you get used to it.
Without more to say, happy coding!
All the code…
Just in case you want to see all the code together
local function create_buffer()
  local buf = vim.api.nvim_create_buf(true, true)
  vim.api.nvim_buf_set_name(buf, "*scratch*")
  vim.api.nvim_set_option_value("filetype", "lua", { buf = buf })
  return buf
end

local function main()
  print("Hello from our plugin")
  local buf = create_buffer()

  vim.api.nvim_buf_set_lines(buf, 0, -1, true, { "-- Welcome to Neovim!", "" })

  vim.api.nvim_win_set_buf(0, buf)

  vim.api.nvim_win_set_cursor(0, { vim.api.nvim_buf_line_count(buf), 0 })
end

local function setup()
  local augroup = vim.api.nvim_create_augroup("ScratchBuffer", { clear = true })

  vim.api.nvim_create_autocmd("VimEnter",
    { group = augroup, desc = "Set a fennel scratch buffer on load", once = true, callback = main })
end

return { setup = setup }

Top comments (0)