What is “Leta OS” ?
“Leta OS” is a simple OPERATING SYSTEM written in ASSEMBLY LANGUAGE. The main task of this OS is to display the hardware information of your personal computer where you run this operating system.
(Leta is a university nickname/card which was reasoned to give this OS a name like Leta OS)
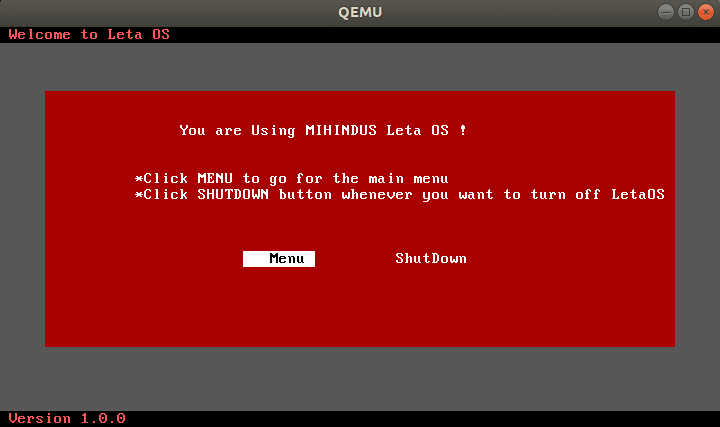
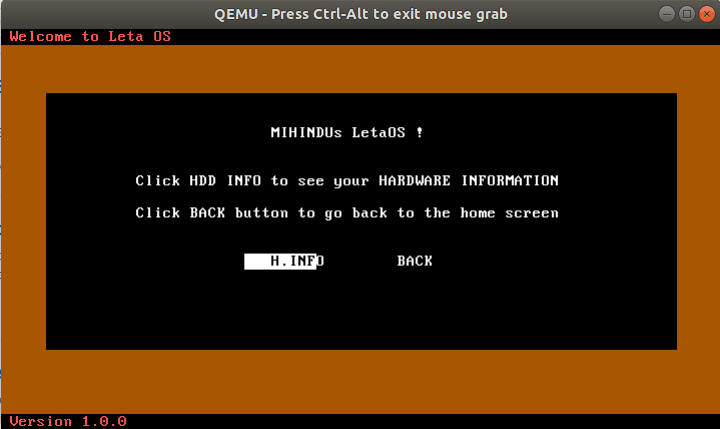
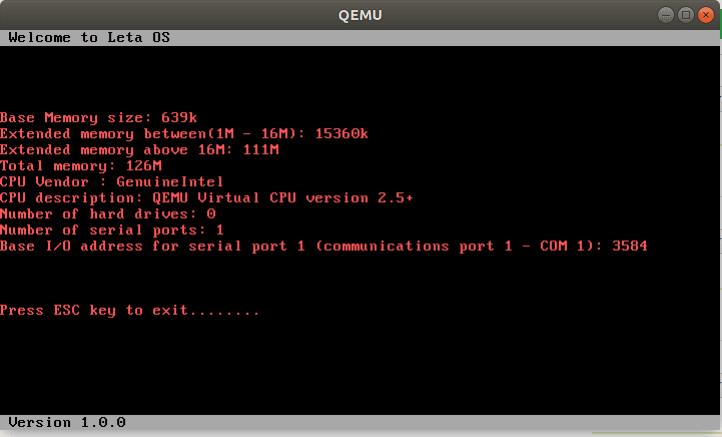
Leta OS contains three separate windows as welcome page, a menu windows to select what you need to perform and hardware information displaying window.
Here i have developed this operating system that enables the capability to boot this OS through CD rom, USB, floppy disk or can be run this OS in a virtual machine box(QEMU) on linux or windows.
👏👏DOWNLOAD
You can download “LetaOS” from my github.
How to boot “Leta OS” ?
After you have downloaded my Leta OS folder, open disk_images/ directory and you will be displayed these files, these images that you can write to a real device(pen/floppy disk, CD)
- LetaOS.iso- CD ISO image built using floppy disk image
- LetaOS.flp -Floppy image of LetaOS
Linux kernel uses ordinary files format to represent various I/O devices and these files are in /dev directory. You just need the device, /dev/sdb, rather than the number (**/dev/sdb1).
(sdb-represents the device ,sdb1-primary partition on that device)
Then enter(in disk image directory),
sudo dd if=LetaOS.flp of=/dev/sdb
NOTE: Format your USB drive. Try not to partition your pen drive and make it as LetaOS only USB drive.
sudo /sbin/mkdosfs -F 32 -I /dev/sdb`
On linux, use the dd utility like this:
sudo dd if=LetaOS.flp of=/dev/fd0
Using Emulator:
If you want to quickly try out “Leta OS” you can use an emulator/virtual thing to experience Leta OS. That doesn’t involve writing disk images to a physical device.
- QEMU- https://www.qemu.org (This is what i recommend to try in both Linux and windows)
- NASM- Nasm is a assmbler that compiles assembly language code into machine language. Download these two tools into your linux machine to work with Leta OS
👏NASM & QEMU installation on linux:(both will be installed at once)
sudo apt-get install build-essential qemu nasm
👏Next: Open Leta OS folder and open that location in the terminal and compile Leta OS like this and it will be built,
sudo bash ./build-linux.sh
👏Running:After building LetaOS type this command in that same location on the terminal , OS will be turned on in qemu emulator:
qemu-system-i386 -soundhw pcspk -drive
format=raw,file=disk_images/LetaOS.flp,index=0,if=floppy
This is how “Leta OS” looks like:
Leta OS:
There are some special parts of my LetaOS code.
1- Created three separate windows with basic Assembly.
(Draw backgrounds, option screens are coded with text contents ,dialog boxes, created buttons to perform something once it clicked, made color variations and designed UI with three separate windows)
- kernal.asm
- screen.asm
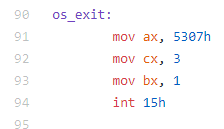
2- Shut down method/Turn off OS once you click shut down button.
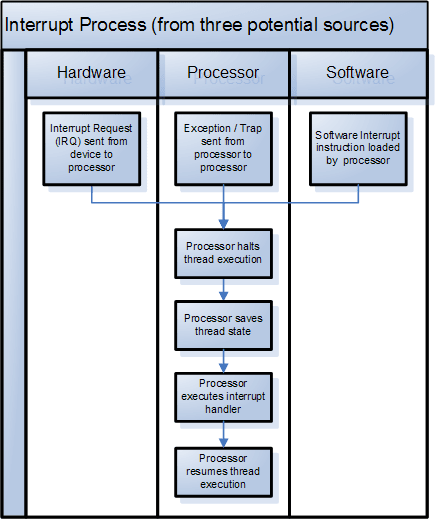
3- Used BIOS service interrupts/processor and hardware interrupts to display hardware information.
- BIOS Interrupts
- CPU Interrupts
- Number Of Hard Drives
- Reading base memory
- Display all the Hardware information in one screen
**Hardware interrupts **are used by devices to communicate that they require attention from the Operating System. They are implemented using electronic alerting signals that are sent to the processor from an external device, which is either a part of the computer itself. They have a direct line to the processor through an interrupt request line.
4- Enabled keyboard inputs such as ENTER, ESC, ARROWKEY inputs to perform click, back and move between buttons.
Thank You
Hope you all enjoyed and learned something on this. Please let me know your comments suggestions and any questions you have about this blog.
👉 Visit me - https://mihinduranasinghe.com/




Latest comments (0)