There has been a drastic rise of using virtual cloud servers to host apps. And a lot of developers implement CI/CD. It makes the deployment in the cloud easy and fast.
A lot of apps no longer use FTPs or traditional shared hosting anymore. But there are still many of us who host their apps in shared hosting, because the app is simple and the cost is low as well. Today we’ll learn how to automatically deploy our code to shared hosting via FTP whenever something is pushed to bitbucket.
Bitbucket has an integrated CI/CD service called Bitbucket Pipelines that allows us to automatically build, test and deploy our code. We’ll setup a pipeline by creating bitbucket-pipelines.yml file in the root directory of our repository. In this file, we’ll add steps to deploy our app to FTP server when code is pushed to the master branch.
Let’s Begin.
I will be using a simple weather app written in Vue CLI https://github.com/oxyyyyy/vue-weather. I have forked this repo to update the weather api keys in https://github.com/maharjanmilan/vue-weather
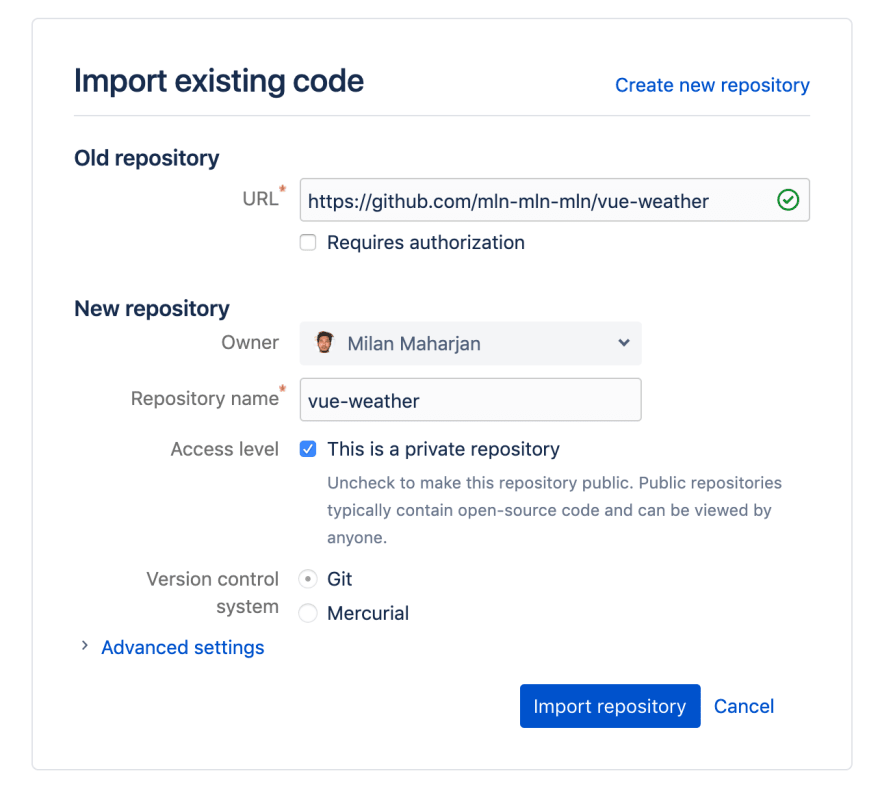
To import this Github repo to your Bitbucket, go to https://bitbucket.org/repo/import
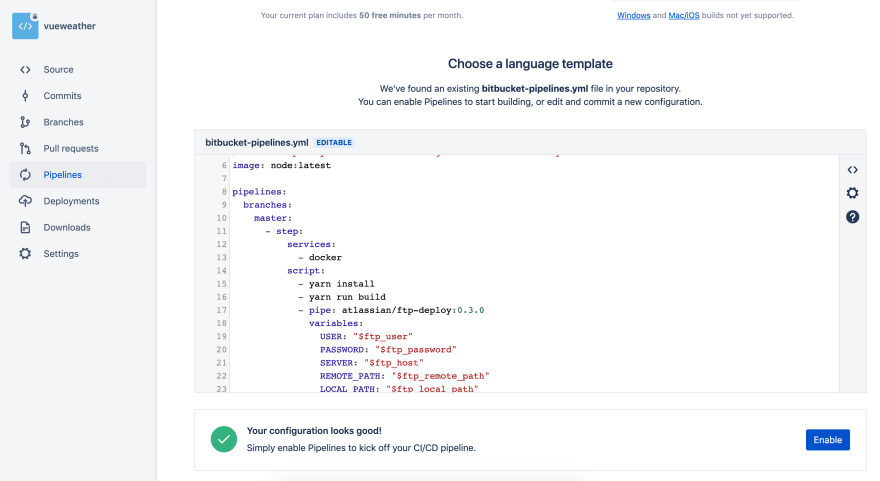
Create bitbucket-pipelines.yml file in the root of the project.
This is a build configuration for Docker. You can use any docker image from Docker Hub as your build environment. Here I have used node:latest image. Under branches I have specified master. So this build will happen only when we push to master branch. Under script I have mentioned few commands to run inside the container. Then I have used a ftp pipe provided by Bitbucket to deploy the code to ftp server. Under variables we define our FTP parameters of Cpanel or any hosting service.
You can see here that I have used pipeline environment variables. This can be defined under repository Setting > Pipelines > Repository variables
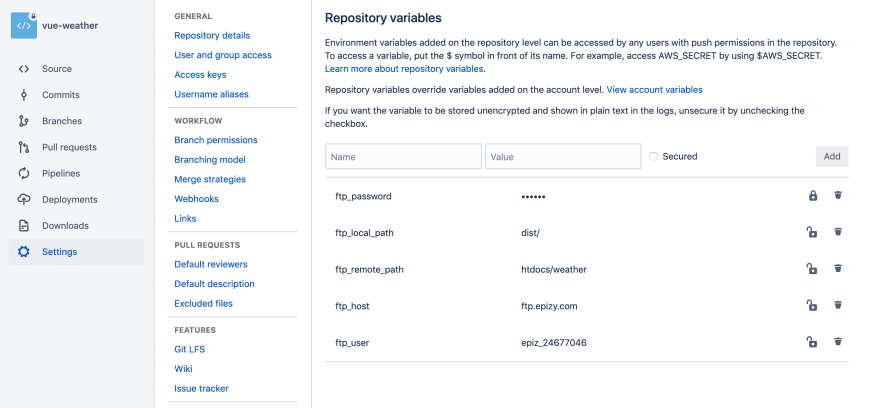 Pipeline Environment Variables
You should always use pipeline environment variables for the sensitive informations.
Once you have created and commited the file, click on Pipelines menu and click Enable button. Now the pipeline is enabled for this repository.
Now whenever you push to master branch, the build process is triggered automatically. Here is what happens:
Bitbucket will create a container with the code of current repository from the image we mentioned in the yml file. In this case from node:latest image.
It then runs yarn install to install all the dependencies js libraries.
Since we are deploying the project in production, we don’t need all the codes from the repository. The yarn run build command will compile the necessary code and store in dist folder. We only need to deploy this folder.
Bitbucket ftp pipe will then copy the dist folder as defined in $ftp_local_path variable to $ftp_remote_path path in our FTP server.
If you go to Pipelines menu you can see the current pipeline being run.
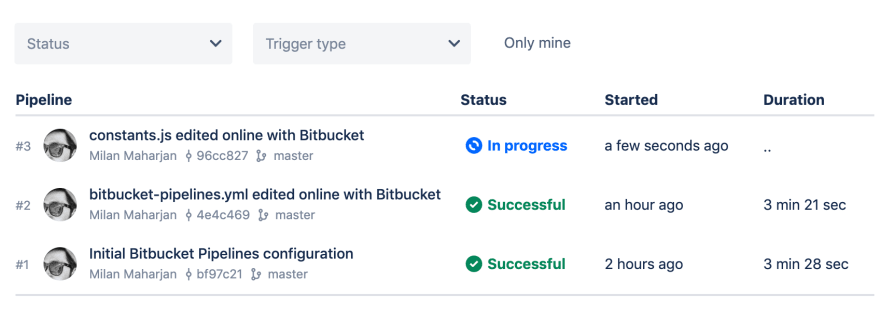 List of pipelines
You can also click on specific pipeline and view the build steps and build logs.
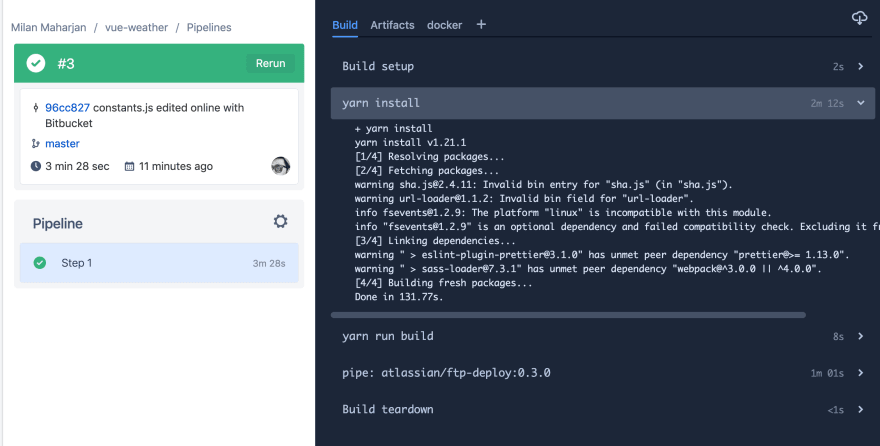 Pipeline detail page
It took 3m 28s for the whole build process. At the time of this writing Bitbucket provides free 50 build minutes, which shall be enough if you don’t push much. Also if you have to revert your changes, you can just click on old pipes and rerun it.
The code should now be deployed to your FTP server. Mine was uploaded here: http://weather.milanmaharjan.com.np/

It is as simple as that.
If your app is not working update the api key for Weatherbit in src/constants.js file. You can create api key for free from Weatherbit
Gitlab also has a similar integrated CI/CD service and they provide 2000 build minutes per month for free. I am also planning to write a tutorial on Gitlab as well.
I hope this tutorial was helpful for you. If you have any issues, let me know in the comments below.

Oldest comments (0)