Sometimes it’s nice to have a lightweight development container that automatically serves the contents of a directory, for rapid prototyping or building static web pages—without having to setup a tool chain on your local environment or install web server software (and its dependencies) on your local machine.
If you’re using VS Code’s extension for developing inside containers, below is a recipe for a comfortable development setup containing these three main attributes:
- Lightweight; small image footprint and minimal container boot up time
- Automatic; once the container starts, the files are being served on a local port without the need to run another command
- Complete; has all the dependencies required by VS Code for the full development lifecycle
To achieve this, we’ll use the Alpine Linux operating system with Nginx as our development web server.
Step 1: define development container in a Dockerfile
We’ll include the dependencies required by VS Code’s remote containers extension as well as the specific tools we need for development.
.devcontainer/Dockerfile:
# We'll base our dev container image on Alpine Linux.
FROM alpine:3.15

# Then we'll add the dependencies we need:
# - musl, libgcc, and libstdc++ are required by VS Code's server
# - git and gnupg are useful for remote development so that we
# can commit and sign commits from within the container
# - and of course nginx itself
RUN apk add \
  musl \
  libgcc \
  libstdc++ \
  git \
  gnupg \
  nginx

# Finally, we'll remove nginx's default content and replace it
# with a symlink to our source code.

RUN rm -rf /usr/share/nginx/html
RUN ln -s /workspaces/my-app /usr/share/nginx/html
Heads up
You'll want to replace /workspaces/my-app with whatever directory VS Code mounts your source code to inside the container.
Step 2: configure VS Code to utilize our image
With our image definition done, we’ll add some configuration to instruct VS Code to run it.
.devcontainer/devcontainer.json:
{
  "name": "my-app",
  // Tell VS Code to build our dev container from our Dockerfile.
  "build": {
    "dockerfile": "./Dockerfile"
  },
  // Automatically expose port 8080 (mapped to container's port 80, nginx's default) for development
  "appPort": "8080:80",
  // Make sure our nginx container's default command runs, which starts up the web server in the background.
  "overrideCommand": false
}
Step 3: profit
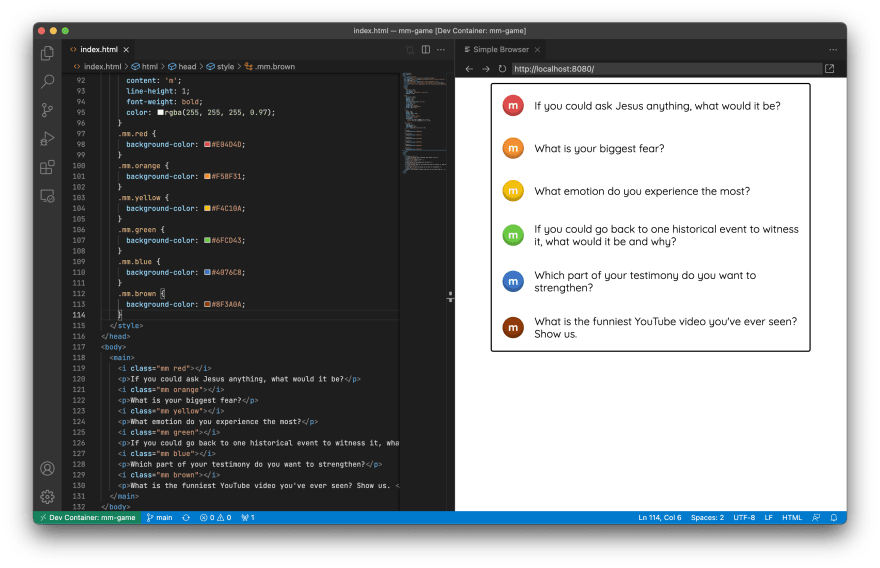
With those files in place, VS Code has everything it needs to spin up the development container with the source code mounted inside. Once it’s running, you can load up your project’s files in the browser (or even try VS Code’s built-in development browser) on port 8080 for easy side-by-side development:
Happy prototyping!

Top comments (1)
do you have the code on github?