If you need your application in a Docker container in azure you can visit this post
step 1
step 2
Creating a dotnet core web application

For this sample I named the web application github
step 3
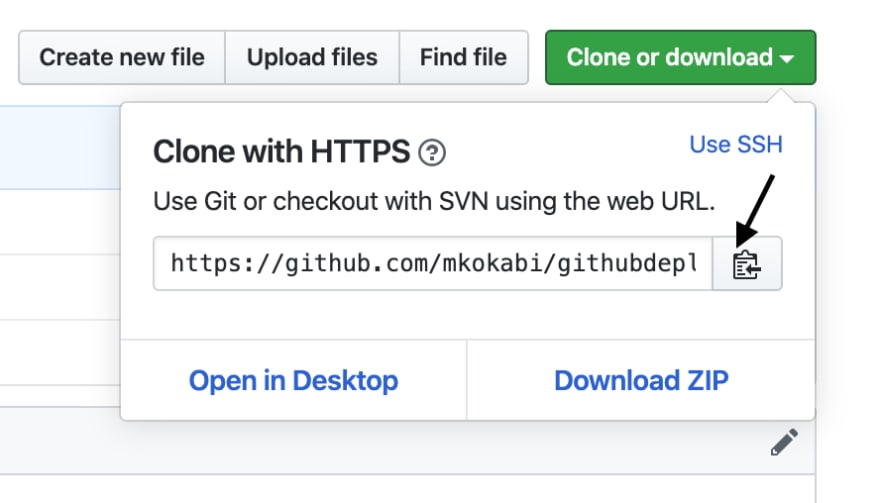
Pushing the web application to github.

cd github
git init
git remote add origin https://github.com/mkokabi/githubdeploy.git
git pull origin master
git add .
git commit -m "First commit"
git push --set-upstream origin master
step 4
Get the publish profile of your Azure web app.

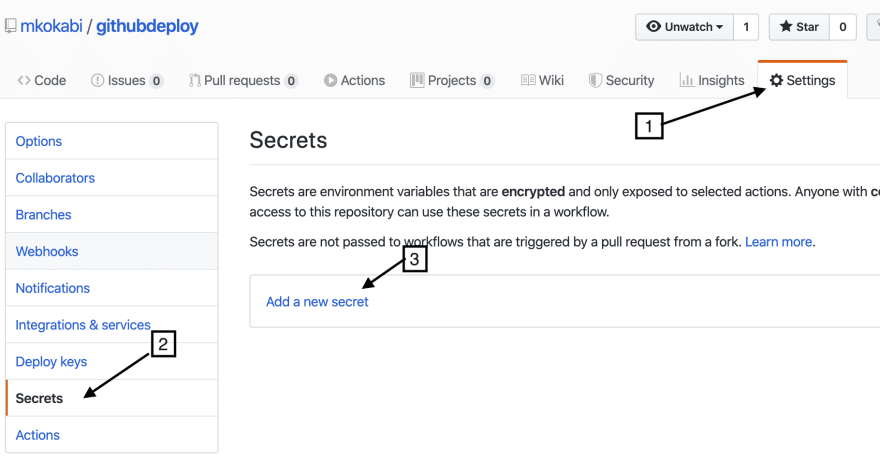
step 5
Store the contents of the publish profile in the repository secret with a name such as azureWebAppPublishProfile.

step 6
step 7
Select Setup a workflow yourself

step 8
Replace the steps with
      - uses: actions/checkout@v2
        name: checkout
      - uses: actions/setup-dotnet@v1
        with:
          dotnet-version: '3.1.100' # SDK Version to use.
      - run: dotnet build --configuration Release

      - name: dotnet publish
        run: |
          dotnet publish -c Release -o ${{env.DOTNET_ROOT}}/github
      - name: 'Run Azure webapp deploy action using publish profile credentials'
        uses: azure/webapps-deploy@v1
        with:
          app-name: GithubDotNetCore  # Replace with your app name
          publish-profile: ${{ secrets.azureWebAppPublishProfile }}
          package: ${{env.DOTNET_ROOT}}/github
- The github in dotnet publish command is the name of my web application. You can replace it with your project name.
- The GithubDotNetCore in the app-name parameter is the name of my Azure Web App.
step 9
Commit your changes in the yaml file (mail.yml). You can either create a new branch or directly commit it in master.
step 10
The workflow is set to trigger on the push. As the yaml file has been pushed the worflow would be triggered. Review the Actions tab and all the steps of the workflow should get completed after a few minutes.

Now your application should be deployed to your Azure web site.


Top comments (0)