
As one of the novice front-end developers, I should mention the importance of being able to work with the server side. Surfing the internet you can find various APIs on which you can practice your skills. But it is much better to create your database, which will be suitable for your projects. This article is dedicated to explaining to beginners how to create their database using the Firebase service and how to interact with it. For practice, I will create a small app, which you can download a little bit later.
What is Firebase?
Firebase is an application development platform. It has a pretty extensive set of tools, but in the context of this article I will use the Realtime database, where I will store the list of heroes.
Register the application and create a database for it
Let’s go to the official Firebase website. Now we should register the app and create a database for it. I described further steps below.
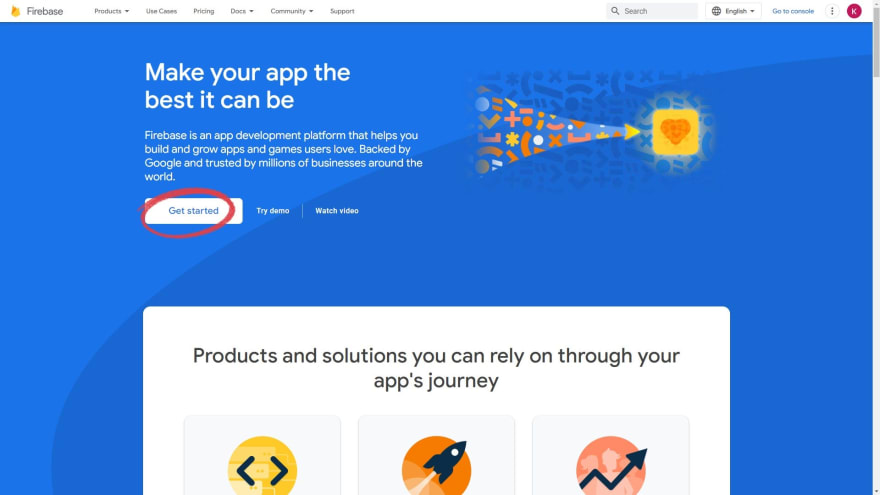
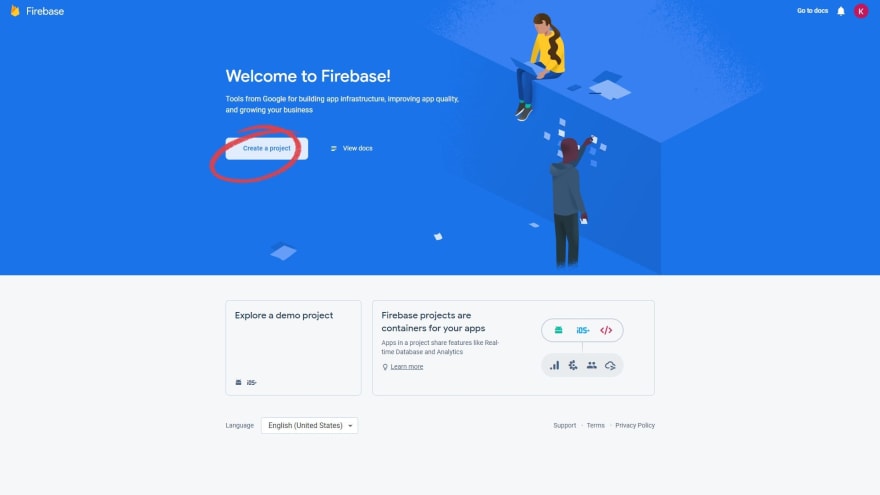
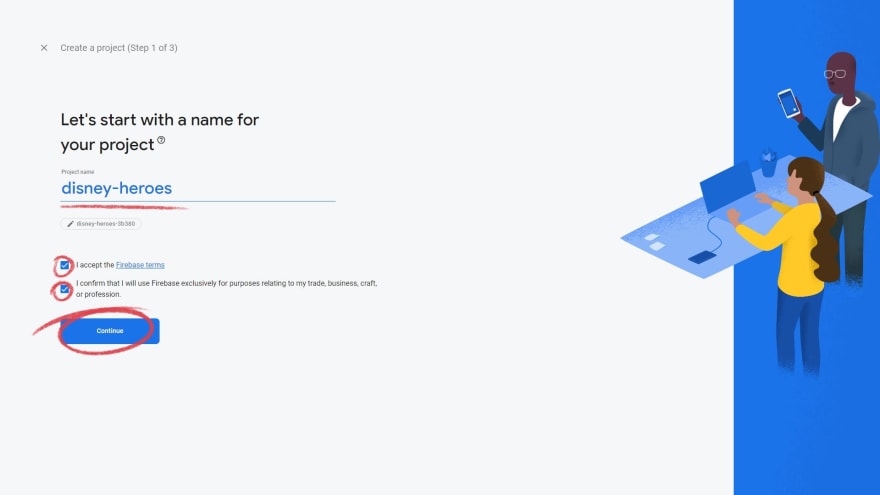
Project registration:
- Get started
- Create project
- Enter the name of your project and also accept terms

- Choose your location and accept terms

- Wait for the creation process

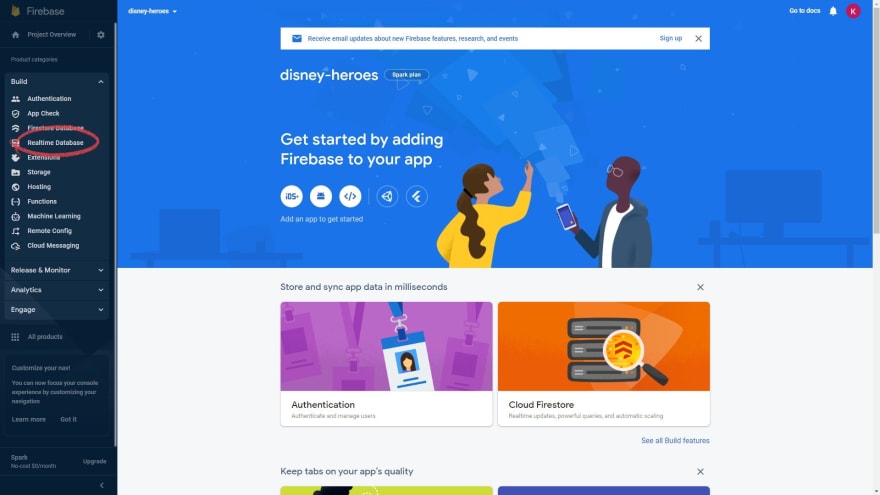
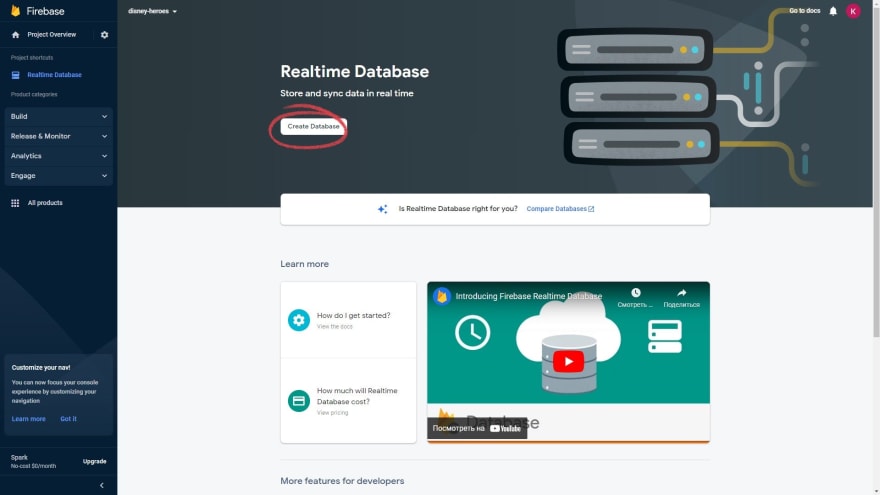
Creation of the database:
- In a menu choose Realtime Database
- Create database
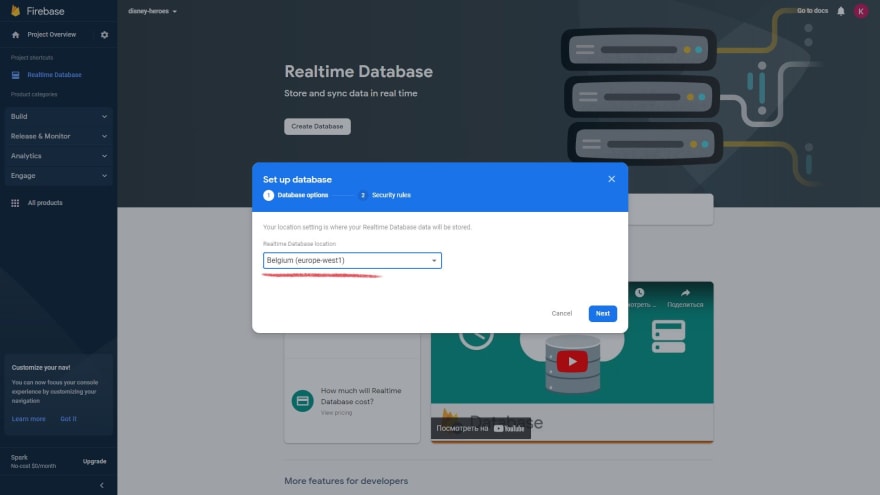
- Choose location
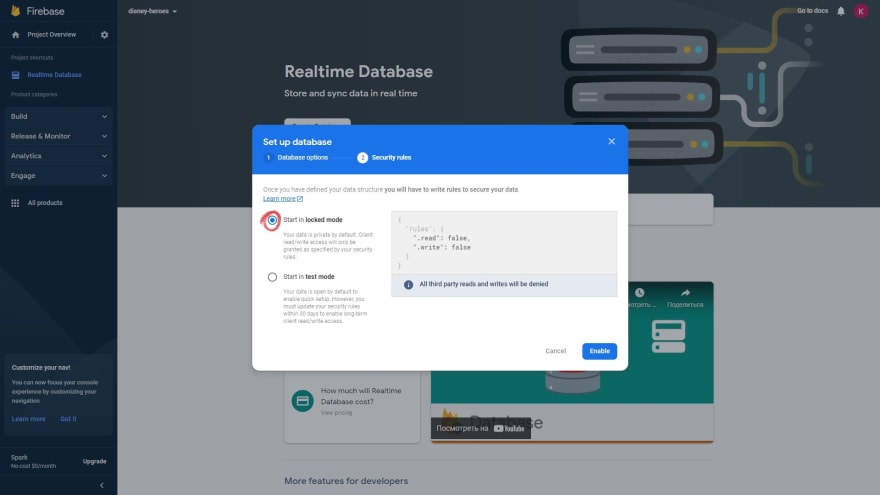
- Leave this configuration for creating rules for DB
- Database is ready
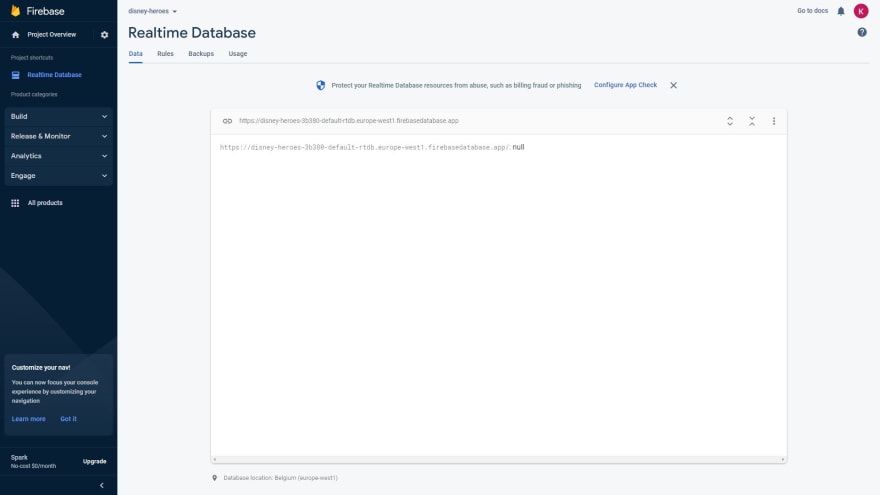
Voilà! The database is ready. Let’s see how to use it within the app
It is time to dig into the storage
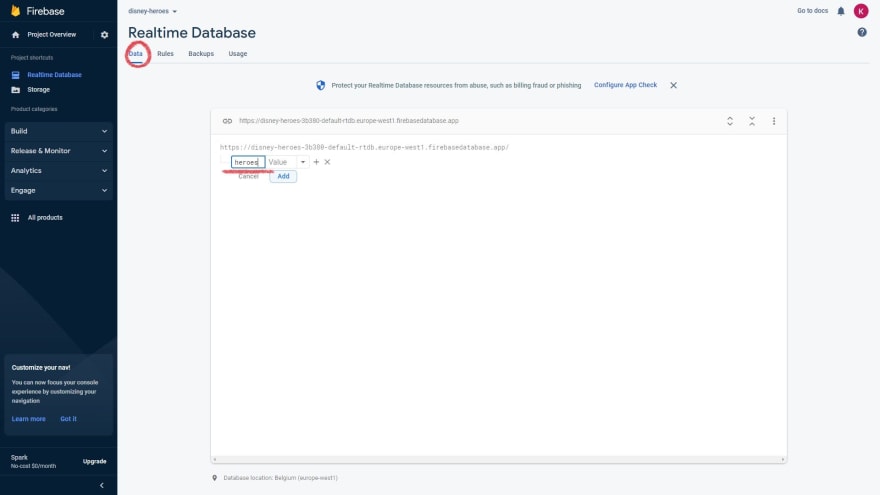
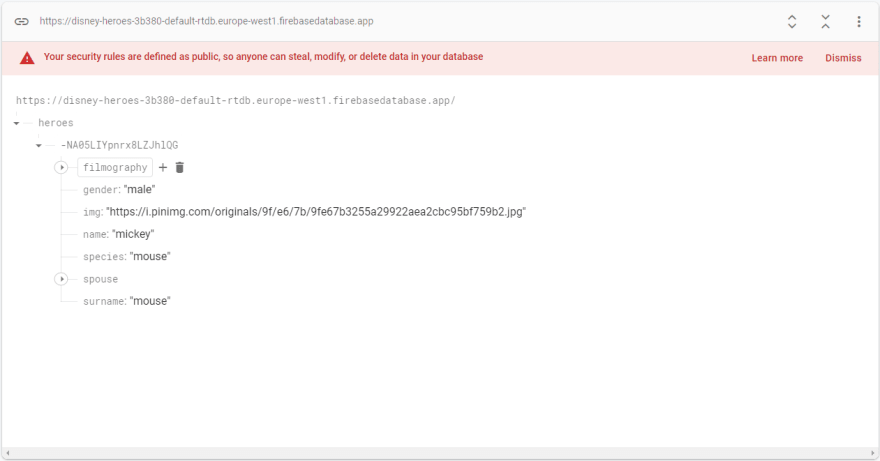
Go to the Realtime database and create a heroes branch. For this step, you just need to click a plus button and enter the name of the branch you need. In my case — heroes.
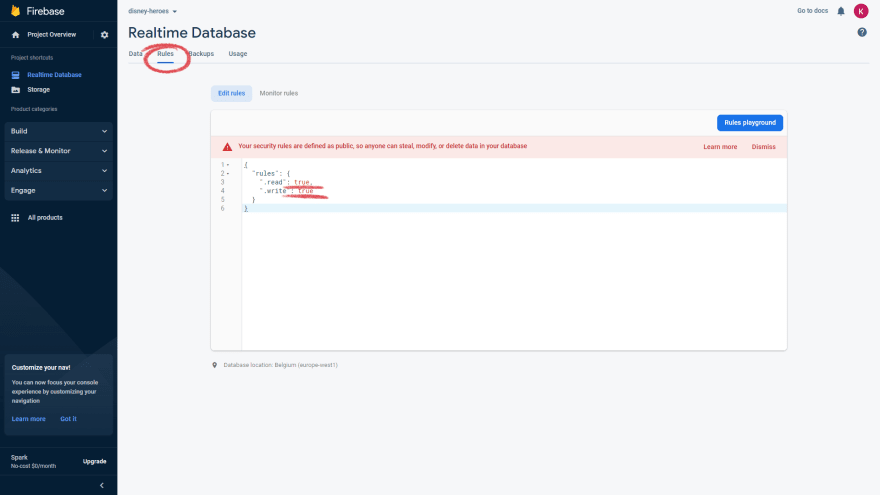
Next, let’s go to the Rules tab and overwrite them with true for now so that we have access to read and edit the data. In the next article I will show you how to work with these rules.
The last thing you should do is just copy the URL that is used to access the database and API key. Save this data in enviroment.ts and enviroment.prod.ts inside the app.
To find the API key follow the next steps:
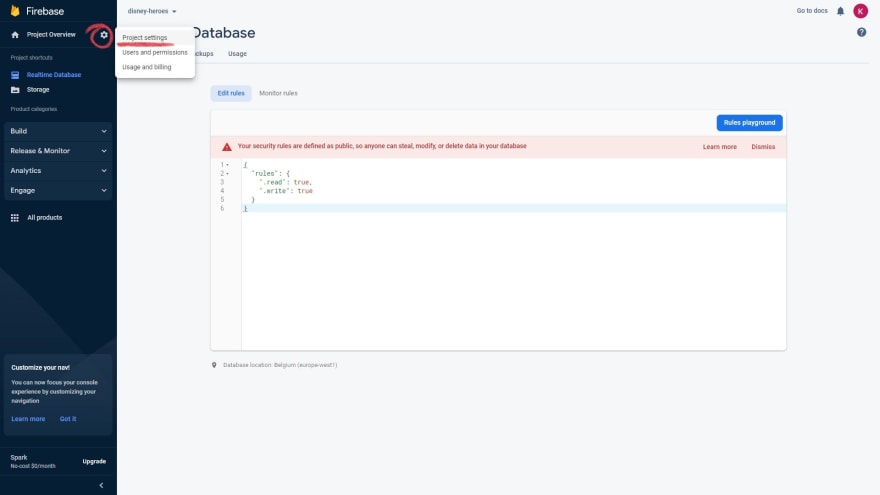
at the bottom of the page press this:

Short app overview
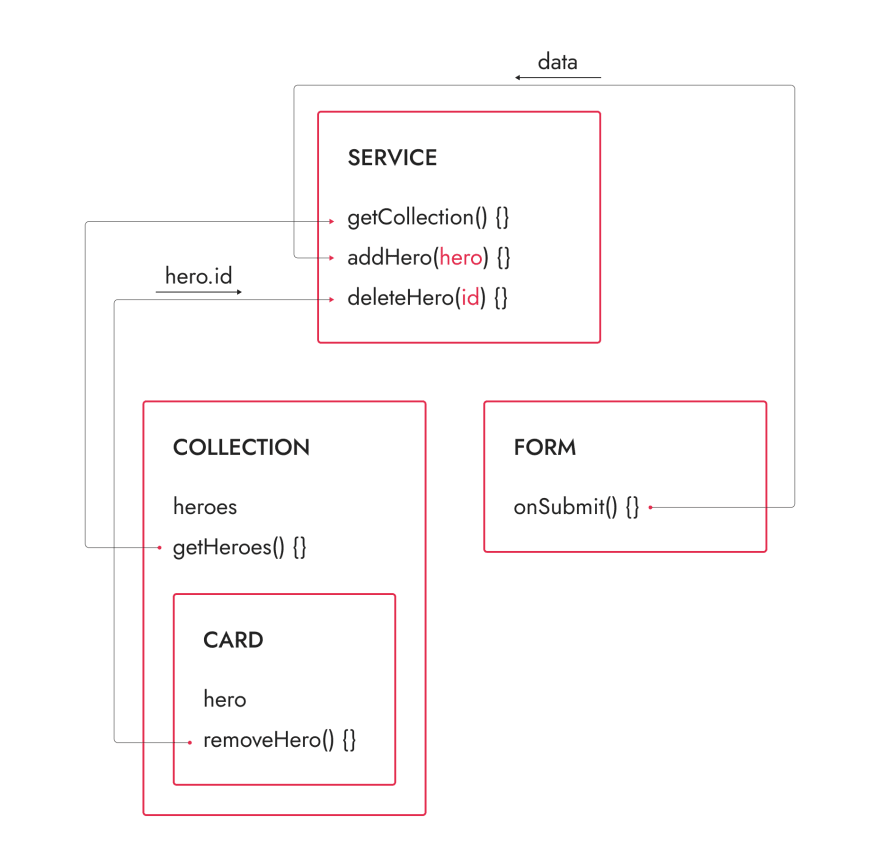
I’ve created a small Angular app on which I will show you how to make HTTP requests to the DB.
It contains two pages: a list of heroes and a form for creating a new hero.
The collection template will display hero cards. Let’s init form for creating heroes in create-form.component.ts and create a template for it.
There is also a service in the application, in which will be the logic for the interaction between the application and the database.
Schematically, the application looks as follows:
Import HttpClientModule in app.module.ts. Then inject HttpClient into HeroService.
Here you can see the start state of the application.
Adding a hero to the base
Let’s add a method that will add heroes to the addHero database. To do this, create a POST request in service with URL from enviroment.ts with adding the branch name in the following format:
${environment.db}heroes.json
@Injectable({
  providedIn: 'root',
})
export class HeroService {
  constructor(private http: HttpClient) {}

  getCollection(): Observable<Hero[]> {}

  addHero(data: Hero): Observable<Hero> {
    return this.http.post<Hero>(`${environment.db}heroes.json`, data);
  }

  deleteHero(id: string) {}
}
In the onSubmit method of the create-form.component.ts subscribe to the observable of the request and output the response in the console.
@Component({
  //...
})
export class CreateFormComponent implements OnInit {
  //...

  constructor(private fb: FormBuilder, private heroService: HeroService) {}

  onSubmit() {
    const hero = this.createHero();

    this.heroService.addHero(hero).subscribe(console.log);
    this.form.reset();
  }

  createHero() {
    //...
  }
}
In the console we get the response in the format of an object with name as a key and hero id as a value. Also, you can see some changes in the database.
Getting a list of heroes
Let’s create a getCollection method for getting heroes from the DB. A URL inserts the same endpoint as in the addHero method.
Go to the collection component and subscribe to the observable in the ngOnInit hook. Get the response values in the heroes variable.
@Component({
  //...
})
export class CollectionComponent implements OnInit {
  heroes!: Hero[];

  constructor(private heroService: HeroService) {}

  ngOnInit(): void {
    this.heroService.getCollection().subscribe(console.log);
  }
}
@Injectable({
  providedIn: 'root',
})
export class HeroService {
  constructor(private http: HttpClient) {}

  getCollection(): Observable<Hero[]> {
    return this.http.get<Hero[]>(`${environment.db}heroes.json`)
  }

  addHero(data: Hero): Observable<Hero> {
    //...
  }

  deleteHero(id: string) {}
}
The response from the backend looks like this:
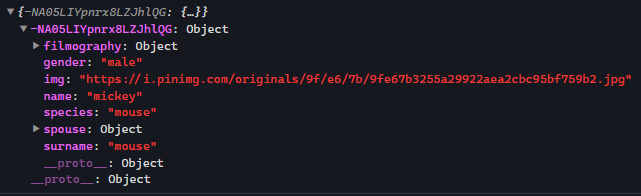
But as you can see the object key is a hero id and the value is a hero object. Let’s format the result and make the id a part of the hero object.
@Component({
  //...
})
export class CollectionComponent implements OnInit {
  heroes!: Hero[];

  constructor(private heroService: HeroService) {}

  ngOnInit(): void {
    this.heroService.getCollection().subscribe((data) => (this.heroes = data));
  }
}
@Injectable({
  providedIn: 'root',
})
export class HeroService {
  constructor(private http: HttpClient) {}

  getCollection(): Observable<Hero[]> {
    return this.http.get<Hero[]>(`${environment.db}heroes.json`).pipe(
      map((data: { [key: string]: any }) => {
        return Object.keys(data)
          .map((key) => ({
            ...data[key],
            id: key,
          }))
          .reverse();
      })
    );
  }

  addHero(data: Hero): Observable<Hero> {
    //...
  }

  deleteHero(id: string) {}
}
That’s it! Now you can see that previously created heroes are displayed.
As a final example, let’s check the removal of a hero from the list in the base
I will delete a hero by its id. To do this transfer id as a property in the deleteHero method. Make a request with this URL:
${environment.db}heroes/${id}.json
Add an event listener on the delete button in card.component.ts. In the listener’s method subscribe to the observable that is returned from the deleteHero method. Write additional logic for deleting a card without refreshing the page.
@Injectable({
  providedIn: 'root',
})
export class HeroService {
  constructor(private http: HttpClient) {}

  getCollection(): Observable<Hero[]> {
     //...
  }

  addHero(data: Hero): Observable<Hero> {
    //..
  }

  deleteHero(id: string) {
    return this.http.delete<void>(`${environment.db}heroes/${id}.json`);
  }
}
@Component({
  //...
})
export class CollectionComponent implements OnInit {
  heroes!: Hero[];

  constructor(private heroService: HeroService) {}

  ngOnInit(): void {
    //...
  }

  //delete from template
  onRemove(hero: Hero) {
    this.heroes = this.heroes.filter((item) => item != hero);
  }
}
<h1>character collection</h1>

<div class="collection">
  <app-card
    *ngFor="let hero of heroes"
    [hero]="hero"
    (remove)="onRemove($event)"
  >
  </app-card>
</div>
@Component({
  //...
})
export class CardComponent {
  @Input() hero!: Hero;
  @Output() remove: EventEmitter<Hero> = new EventEmitter<Hero>();

  constructor(private heroService: HeroService) {}

  removeHero() {
    this.remove.emit(this.hero); //delete from template
    this.heroService.deleteHero(this.hero.id!).subscribe();
  }
}
Next, you can do the hero editing in a similar way.
Here you can see the result.
We have created our database and we have analyzed how to interact with the database by three methods of HTTP requests. But the disadvantage of this database is that its data is not protected. And I will tell you how to protect it in the next article.
Thanks for reading!

Top comments (0)