Hi, I’m Keita, a front-end developer at Morph.
When developing products, there are often moments when you wonder, “Why is this feature specified this way?” or “This customer is saying something, but I feel like we’ve seen a similar ticket before.” It was in those moments that I thought: I want to perform semantic searches on our project management tool data!
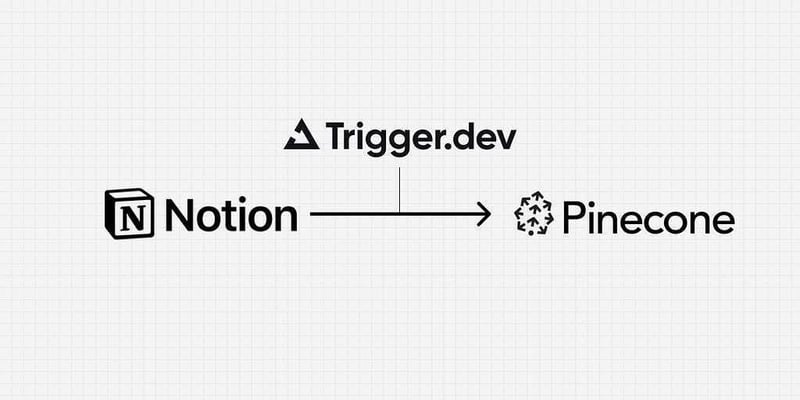
In this article, as the first step, I will explain how to transfer data into Pinecone — a vector database — in order to vectorize its content and prepare it for integration with AI. I use Trigger.dev for the data transfer.
What is Pinecone?
The vector database to build knowledgeable AI | Pinecone
Pinecone is a fully managed vector database that efficiently stores and retrieves high-dimensional embedding vectors generated by machine learning models. The API makes it easy to upsert data or run queries, and it can be used just like a typical NoSQL database. By vectorizing the data, you can perform searches based on similarity in semantic space rather than simple string matching, making it a great fit for AI integration.
Similar tools include Weaviate and Chroma.
What is Trigger.dev?
Trigger.dev is an event-driven workflow automation platform. It allows you to write background tasks in TypeScript and provides a smooth development experience through a combination of CLI and web dashboard tools. It supports triggering tasks via webhooks or scheduled execution with cron expressions.
Initializing the Project
Start by initializing your project with the Trigger.dev CLI. Be sure to sign up and create your project beforehand.
For this example, I selected the Scheduled Task template.
npx trigger.dev@latest init
Once the initialization is complete, you’ll see files like the following:
// src/trigger/example.ts
import { logger, schedules, wait } from "@trigger.dev/sdk/v3";

export const firstScheduledTask = schedules.task({
  id: "first-scheduled-task",
  // Every hour
  cron: "0 * * * *",
  // Set an optional maxDuration to prevent tasks from running indefinitely
  maxDuration: 300, // Stop executing after 300 secs (5 mins) of compute
  run: async (payload, { ctx }) => {
    // The payload contains the last run timestamp that you can use to check if this is the first run
    // And calculate the time since the last run
    const distanceInMs =
      payload.timestamp.getTime() - (payload.lastTimestamp ?? new Date()).getTime();
    logger.log("First scheduled tasks", { payload, distanceInMs });
    // Wait for 5 seconds
    await wait.for({ seconds: 5 });
    // Format the timestamp using the timezone from the payload
    const formatted = payload.timestamp.toLocaleString("en-US", {
      timeZone: payload.timezone,
    });
    logger.log(formatted);
  },
});
Fetching Data from Notion
To integrate with Notion, use the @notionhq/client. With Notion’s Integration, you can implement data integration — please refer to the guide to create your integration and grant access to the target database.
Since the Notion API response is in the rich text AST format, I use the notion-to-md package to convert it into Markdown format.
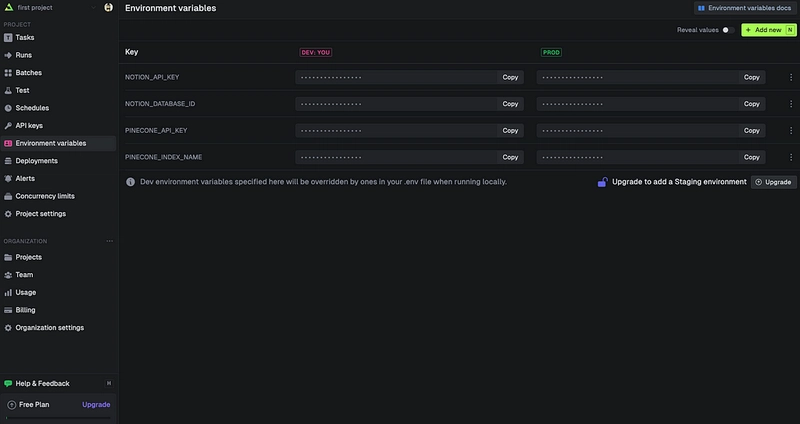
The following code shows how to query the database and obtain each page’s content in Markdown. Make sure to specify your NOTION_API_KEY and NOTION_DATABASE_ID in your .env file.
// src/fetch-notion.ts

import { isFullPage, Client as NotionClient } from "@notionhq/client";
import { NotionConverter } from "notion-to-md";
import { MDXRenderer } from "notion-to-md/plugins/renderer";
import { DefaultExporter } from "notion-to-md/plugins/exporter";
import { PageObjectResponse } from "@notionhq/client/build/src/api-endpoints";
const notion = new NotionClient({
  auth: process.env.NOTION_API_KEY,
});
const buffer: Record<string, string> = {};
const n2m = new NotionConverter(notion)
  .withRenderer(new MDXRenderer())
  .withExporter(
    new DefaultExporter({
      outputType: "buffer",
      buffer: buffer,
    })
  );

export async function fetchNotion() {
  const databaseId = process.env.NOTION_DATABASE_ID!;
  const notionResponse = await notion.databases.query({
    database_id: databaseId,
  });
  const pages = notionResponse.results;
  const results: (Record<string, string> & { text: string })[] = [];
  for (const page of pages) {
    // Check if the page is a full page object
    if (!isFullPage(page)) {
      continue;
    }
    await n2m.convert(page.id);
    const bodyString = buffer[page.id];

    console.log(bodyString);
 }
}
Formatting Notion Data
- In this app, a batch process is executed every hour, and only data that was updated within that hour is transferred to Pinecone. Adjust the query conditions for the database accordingly.
- While Pinecone can store numbers and strings, it cannot store objects or null values. Therefore, the data must be formatted.
Taking these two points into account, the fetchNotion function becomes as follows:
import { isFullPage, Client as NotionClient } from "@notionhq/client";
import { NotionConverter } from "notion-to-md";
import { MDXRenderer } from "notion-to-md/plugins/renderer";
import { DefaultExporter } from "notion-to-md/plugins/exporter";
import { PageObjectResponse } from "@notionhq/client/build/src/api-endpoints";

const notion = new NotionClient({
  auth: process.env.NOTION_API_KEY,
});
const buffer: Record<string, string> = {};
const n2m = new NotionConverter(notion)
  .withRenderer(new MDXRenderer())
  .withExporter(
    new DefaultExporter({
      outputType: "buffer",
      buffer: buffer,
    })
  );

// turn notion propeties into plain text
function extractPlainText(
  property: PageObjectResponse["properties"][string]
): string {
  // Return an empty string if the property or its type is missing
  if (!property || !property.type) return "";
  switch (property.type) {
    // For title and rich_text, concatenate the plain_text from each item
    case "title":
    case "rich_text": {
      const content =
        property.type === "title" ? property.title : property.rich_text;
      if (Array.isArray(content)) {
        return content.map((item) => item.plain_text).join("");
      }
      return "";
    }
    // For select and status, return the name of the selected option
    case "select":
      return property.select ? property.select.name : "";
    case "status":
      return property.status ? property.status.name : "";
    // For date, return the start date
    case "date":
      return property.date ? property.date.start : "";
    // For created_by, return the creator's name if available
    case "created_by":
      if (property.created_by && "name" in property.created_by) {
        return property.created_by.name || "";
      }
      break;
    // For people, return a comma-separated list of user names
    case "people":
      if (Array.isArray(property.people) && property.people.length > 0) {
        return property.people.map((person: any) => person.name).join(", ");
      }
      break;
    // For relation, return a comma-separated list of relation ids (or empty string if missing)
    case "relation":
      if (Array.isArray(property.relation) && property.relation.length > 0) {
        return property.relation.map((rel: any) => rel.id || "").join(", ");
      }
      break;
    default:
      break;
  }
  // Return an empty string if no valid value is found
  return "";
}
export async function fetchNotion() {
  const databaseId = process.env.NOTION_DATABASE_ID!;
  const one_hour_ago = new Date(Date.now() - 60 * 60 * 1000).toISOString();
  const notionResponse = await notion.databases.query({
    database_id: databaseId,
    filter: {
      and: [
        {
          last_edited_time: {
            after: one_hour_ago,
          },
          timestamp: "last_edited_time",
        },
      ],
    },
  });
  const pages = notionResponse.results;
  const results: (Record<string, string> & { text: string })[] = [];
  for (const page of pages) {
    // Check if the page is a full page object
    if (!isFullPage(page)) {
      continue;
    }
    await n2m.convert(page.id);
    const bodyString = buffer[page.id];
    results.push({
      _id: page.id,
      created_time: page.created_time,
      last_edited_time: page.last_edited_time,
      ...Object.keys(page.properties).reduce((acc, key) => {
        acc[key] = extractPlainText(page.properties[key]);
        return acc;
      }, {} as Record<string, string>),
      text: bodyString,
    });
  }
  return results;
}
Transferring Data to Pinecone
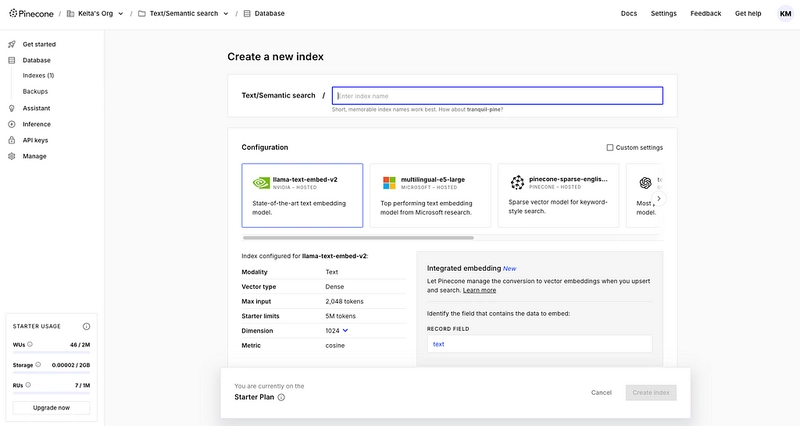
Now for the final step: transferring the data to Pinecone. After signing up for Pinecone and obtaining an API key, add it to your .env file. Also, initialize your index. Choose an embedding model and cloud provider that best suits your needs.
In this example, I use the Integrated embedding. The fields specified here will serve as the targets for semantic search.
Once everything is set up, edit your Trigger.dev code as follows. It’s very simple — make sure to set PINECONE_API_KEY and PINECONE_INDEX_NAME in your .env file.
import { logger, schedules } from "@trigger.dev/sdk/v3";
import { Pinecone } from "@pinecone-database/pinecone";
import { fetchNotion } from "../fetch-notion";

const pc = new Pinecone({
  apiKey: process.env.PINECONE_API_KEY!,
});
const index = pc.index(process.env.PINECONE_INDEX_NAME!);
export const notionToPineconeTask = schedules.task({
  id: "notion-to-pinecone-batch",
  cron: "0 * * * *",
  maxDuration: 300,
  run: async (payload, { ctx }) => {
    logger.log("Trigger task started", { payload });
    const pages = await fetchNotion();
    await index.namespace("ns1").upsertRecords(pages);
    logger.log("Notion to Pinecone transfer completed");
  },
});
Testing and Deployment
Test your script using a combination of the Trigger.dev CLI and the web dashboard. Run the following command and then log in to the Trigger.dev dashboard:
npx trigger.dev@latest dev
Also, be sure to set your environment variables within the Trigger.dev dashboard.
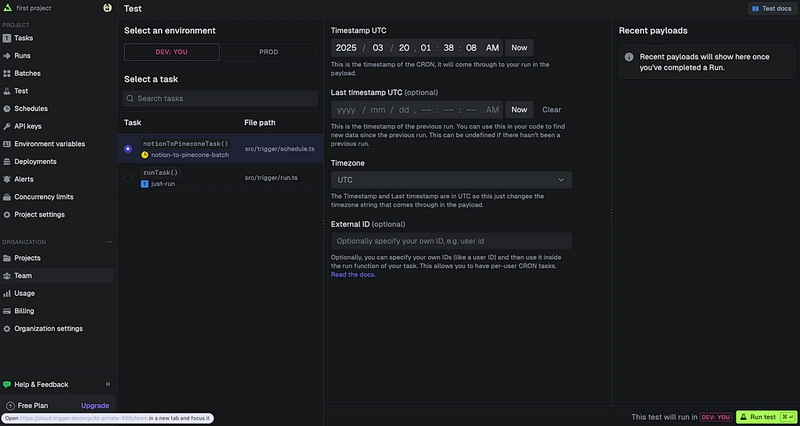
From the Test tab, select the task you created and click Run Test.
This completes the Notion → Pinecone transfer script! 🎉
Final thoughts
I originally wanted to try Trigger.dev while building an in-house application, and it turned out to be far more comfortable than I had expected. I particularly appreciated that even cron tasks can be easily tested from the dashboard. That said, if this were a customer-facing feature, you would likely write dedicated test scripts to ensure quality — so I view the Trigger.dev test functionality as a development aid rather than a full testing solution. Overall, I believe it’s perfect for batch processing in internal applications.

Top comments (0)