
This is part of a series of articles in which I try to break down the evolution of React State concept and try to showcase its importance by explaining the problems React State tackles in simple and intuitive way.
Hello again,
Lets skip the introductions and get right to it!
In the previous article, we developed a page shows a student name which we input in a text field and submit to the localStorage. We also had a button to clear the storage and erase the student name. All that we did in vanilla Javascript! The point was to showcase how much of a hustle there would be if we had to manually interact with the DOM every time we wanted to add or remove data (which is how it was before React came).
In this article, we will develop the same page but in React!
(if you have not read the previous article yet, I would suggest you go read it first then come check this one!)
At the end of this article, you would be able to compare the two different code and see for yourself how much time and effort React State saves and why.
No more blah blahs, lets get going ..
if this is your first time using React and you want to set it up first, go check this page to know how to get started!
first lets create a new folder and initiate a new react project inside it. You can copy paste the following command lines to your terminal:
npx create-react-app my_app
cd my_app
npm start
after running the following command, open your browser and head to http://localhost:3000/
you should be able to see the following default page:

Open the project in your preferred text editor, and you are ready to go!
Removing unnecessary files and adding Bulma
- Adding Bulma:
Lets head to out terminal and install Bulma dependency in the root directory:
npm i Bulma
Now we only need to import the CSS library and dependencies to ur main HTML file. The main file in React can be found in public/index.html. In React, index.html is the main page. Then, the App component renders and returns some HTML that gets inserted in the index.html page.
So if you go to src/index.js you will see this line
ReactDOM.render(<App />, document.getElementById('root'));
This basically tells the <App /> component to insert itself in the HTML element that has an id of 'root'. (You can find a div that has that id inside the index.html page).
ANYWAYS, all we need to do now to get Bulma ready is to paste those two lines inside the <head></head> tag in the index.html page:
<link rel="stylesheet" href="https://cdnjs.cloudflare.com/ajax/libs/bulma/0.7.5/css/bulma.min.css">
<script defer src="https://use.fontawesome.com/releases/v5.3.1/js/all.js"></script>
- Removing files:
In our project directory (folder), lets open the src directory and start deleting some files. Since we will be using Bulma, we will delete the App.css and index.css files. Delete the App.test.js too because we wont do testing for the sake of this article. Finally, delete the logo.svg file as we wont be using it in our page.
your src directory should look like this now:

Sure, since we deleted some files that were being used in the default code, we need to do some cleaning before we go on. Go ahead and delete the imports to both the logo and the App.css in App.js and index.js, and delete everything inside App component to make it render a blank white page.
Your final App.js file should look like this:
import React from 'react';

function App() {
  return (
    <div className="App">

    </div>
  );
}

export default App;
As you can see, our App component is actually a functional component. In react, there are two types of components:
- Functional Components
- Class Components
We will dive deeper into both types later, but an essential difference is that you cannot use state with functional components (That's why hooks were created!. More on that and on functional programming in the next article). For this article we just want to see how state solved the hustle that we mentioned in the previous article, so we will change our App component to a class component.
this is how it will look:
class App extends React.Component {
  render() {
    return (
      <div className="App">

      </div>
     );
  }
}
HTML to JSX
Now we are ready to start building the page in React. React uses HTML syntax but it is called JSX. Basically if you want to design a page in HTML, it is the same in React. All you have to do is put the HTML code inside the return() function. One minor difference though (you may have noticed), is that in react, class is called className, and all event listeners are camelCase (onclick = onClick).
So, we just need to do minor changes to the HTML code we wrote in the previous article and paste it inside the return() function. For now, We will just change class to classNameand delete all the onclick methods.
Our App.js should look like this by now:
import React from 'react';

class App extends React.Component {
  render() {
    return (
        <section className="section">
          <div className="container">
              <h3 className="title">Student:</h3>
              <ul id="li" className="subtitle"></ul>
          </div>
          <section className="section">
              <div className="container">
                  <div className="columns">
                      <div className="columns">
                          <div className="column">
                              <input  className="input is-success" id="submit" type="text" placeholder="Student Name" />
                          </div>
                          <div className="column">
                              <input className="button is-success" type="button" value="Submit Student" />
                          </div>
                      </div>
                  </div>
                  <input className="button is-warning" type="button" value="Clear Storage" />
              </div>
          </section>
      </section>
     );
  }
}

export default App;
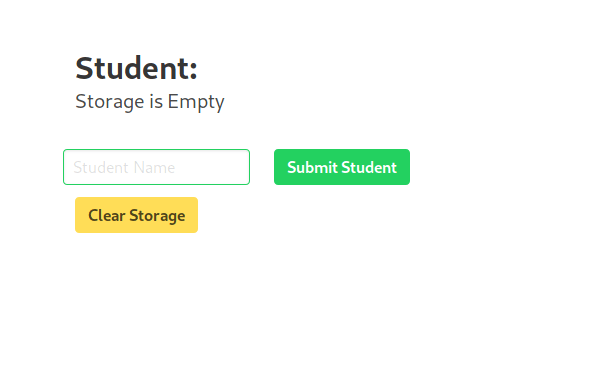
and the page looks like this:

Storing the value in state
So, all we have for this page is the name of the student which we should fetch from the localStorage. If the localStorage is empty however, we want to display Storage is Empty. Lets do this step by step:
- Displaying the state:
So state is just a Javascript object that we can put whatever in it. For this case, we will store a vale that is called 'student_name'. To do so, we need to write the following inside React.Component{ here } but outside of render(return(...)).
Should look like:
class App extends React.Component {
  state = {
    'student_name': 'Storage is Empty'
  }
  render() {
    ...
}
We stored the student name to be Storage is Empty by default for now. (later we will check if there is a student stored in the localStorage before we display Storage is Empty).
In React, everything inside the return() function is what gets rendered as HTML. BUT, what is cool about that is that you can insert dynamic data by inserting Javascript inside your JSX, HTML-like, code! and this is how we will be able to isnert our javascript State object that contains our student_name value into the page.
Inside our App.js file, we will go to where we want to insert the value (inside <ul></ul> in this case) and write the following:
<ul id="li" className="subtitle">
  <li>{this.state.student_name}</li>
</ul>
(the brackets {} is how you can insert Javascript inside JSX).
Now we can see our state data!
- Updating the state:
We want to be able to update the state and see the changes in realtime! first lets create a function for that.
saveStudentInitial = () => {
    this.setState({
      student_name: e.target.value
    })
  }
As you can see, the syntax for updating any value in the state is this.setState({}) (we will talk about the weird this in the coming article).
This function says, take the event passed to you, extract its value, then update the student_name with it. But if you remember from the previous article, these changes usually do not appear on the page unless you manually manipulate the DOM!. Well, that is what is special about setState. It re-renders the component every time you use it, making the new changes appear. AND, if you had nested components, not all the app with re-render, but only the component in which you used setState. This is why using state is way easier and more efficient.
Now we need to call the function from the input field and pass it the event value. For now, lets call the function when the user changes the input so we test the realtime data changing.
Lets edit the input field code and make it call the saveStudentInitial():
<input className="input is-success" onChange={(e) => this.saveStudentInitial(e)} id="submit" type="text" placeholder="Student Name" />
Now if you try typing anything inside the input field, you will see the name of the student changing as you type. Cool!
Now lets get this thing working Properly. We do not really want to update the student name as we type! but we still want to save the value of the name in the state as the user types, then submit it when the submit button is clicked. So, lets create a new value in the state object and call it input_value that is and empty string by default.
state = {
    input_value: '',
    'student_name': 'Storage is Empty'
  }
In the saveStudentInitial function, instead of updating the student_name we want to update the input_value.
saveStudentInitial = (e) => {
    this.setState({
      input_value: e.target.value
    })
  }
Cool! We have the value stored in React in the front end, we just need to save it in the localStorage when the submit button is clicked.
- Save the value to the localStorage after you set the state:
Lets create a function that saves the input_value in the localStorage and sets the student_name to be equal to the input_value!
saveStudent = () => {
    localStorage.setItem('student', this.state.input_value)
    this.setState({
      student_name: this.state.input_value
    })
  }
lets make this run when we click the submit button.
<input className="button is-success" type="button" value="Submit Student" onClick={() => this.saveStudent()}/>
Now if you try submitting any new name, it will show on the screen!. If you refresh the page though, you will see that the subtitle under Students: is back to Storage is Empty. But we just saved the value to the storage!
lets see what we should do now ..
- check if there is any value in the storage when the page loads and change the state accordingly
Now every time the component is rendered / re-rendered, we want to first check if the storage is empty or not. If it is empty, wont do anything as the default value of student_name in our state is already Storage is Empty. BUT, if the storage has the student name, then we want to set the student_name in our state to that value.
componentDidMount = () => {
    let student = localStorage.getItem('student')
    if (student !== null){
      if (this.state.student_name !== student){
        this.setState({
          student_name: student
        })
      }
    }
  }
Ha?? What is componentDidMount?.
componentDidMount is a function that automatically runs ever single time the component gets rendered or re-rendered to the page. But that is why we need to be careful and that is why we have two if statements. We dont wanna be stuck in an infinite loop!
Cool! we are almost done. We just need to implement the Clear Storage properly!
- set the state to default and empty the storage when clear Storage is clicked.
clearStorage = () => {
    localStorage.clear()
    this.setState({
      student_name: 'Storage is Empty'
    })
  }
Notice that every time we add new data, instead of refreshing the page, we just update the state! It does the DOM manipulation for us.
Lets not forget to call this function when the Clear button is clicked:
<input className="button is-warning" type="button" value="Clear Storage" onClick={() => this.clearStorage()}/>
Our final App.js now look like this:
import React from 'react';

class App extends React.Component {
  state = {
    input_value: '',
    'student_name': 'Storage is Empty'
  }

  saveStudentInitial = (e) => {
    this.setState({
      input_value: e.target.value
    })
  }

  saveStudent = () => {
    localStorage.setItem('student', this.state.input_value)
    this.setState({
      student_name: this.state.input_value
    })
  }

  clearStorage = () => {
    localStorage.clear()
    this.setState({
      student_name: 'Storage is Empty'
    })
  }

  componentDidMount = () => {
    let student = localStorage.getItem('student')
    if (student !== null){
      if (this.state.student_name !== student){
        this.setState({
          student_name: student
        })
      }
    }
  }

  render() {
    return (
        <section className="section">
          <div className="container">
              <h3 className="title">Student:</h3>
              <ul id="li" className="subtitle">
                <li>{this.state.student_name}</li>
              </ul>
          </div>
          <section className="section">
              <div className="container">
                  <div className="columns">
                      <div className="columns">
                          <div className="column">
                              <input className="input is-success" onChange={(e) => this.saveStudentInitial(e)} id="submit" type="text" placeholder="Student Name" />
                          </div>
                          <div className="column">
                              <input className="button is-success" type="button" value="Submit Student" onClick={() => this.saveStudent()}/>
                          </div>
                      </div>
                  </div>
                  <input className="button is-warning" type="button" value="Clear Storage" onClick={() => this.clearStorage()}/>
              </div>
          </section>
      </section>
     );
  }
}

export default App;
AND we are done!
We coded an efficient, easy to develop create, read, and delete page!
In the coming article we will talk more about functional programming and hooks!
Thanks for reading and do get it touch if you need any help!

Top comments (0)