

STEP1:
1.முதலில் AWS Account Open செய்ய வேண்டும்.

2.அதன் பின்னர் இது போல page ஆனது ஓபன் ஆகும் . இதில் aws logo அருகில் உள்ள service என்ற button ஐ கிளிக் செய்யவும்.
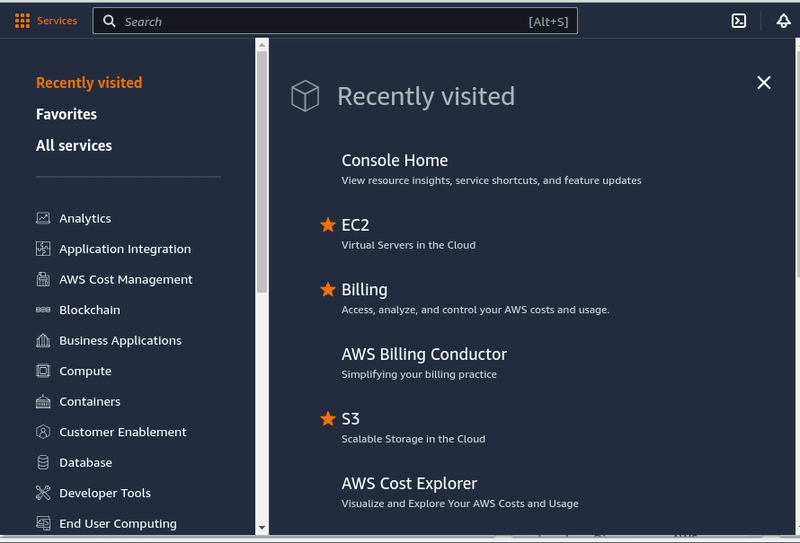
3.அதன் பின்னர் ec2 (Virtual Servers in the Cloud) என்பதை click செய்யவும்.
![]()
- பின்னர் இது போல ec2 dashboard ஆனது open ஆகும் .

STEP 2:
- இதனை open செய்த பிறகு instance ஆனது create செய்ய வேண்டும் .

2.இதில் எந்தவொரு instance ஆனது இப்போது வரை create செய்யப்படவில்லை. அவையாவும் இப்போது running status லும் இல்லை.

3.மேலே கொடுக்கப்பட்டுள்ள image இல் Launch instance ஐ கிளிக் செய்ய வேண்டும்.
Launch an instance:
STEP1:
create name and tag:

1.Launch instance-ஐ கிளிக் செய்தவுடன் இதுபோல ஒரு இன்ஸ்டன்ஸ் create செய்கின்ற பேஜ் ஆனது ஓபன் ஆகும்.
2.இதில் நாம் create செய்கின்ற instance க்கு name and tag ஆனது கொடுக்க வேண்டும்.
3.நான் webserver-ubuntu என கொடுத்து உள்ளேன்.
Application and OS Images:

STEP1:
1.அதன் பின்னர் Application and OS Images (Amazon Machine Image) ஆனது தேர்ந்துஎடுக்கவேண்டும் , நான் உபுண்டு os image ஐ தேர்ந்து எடுத்து உள்ளேன் ..
2.instance type ஆனது தேர்ந்துஎடுக்கவேண்டும் ,. நான் free tier eligible (t2 micro)ஐ நான் select செய்துளேன் .

- key pair ஆனது create செய்ய வேண்டும்.
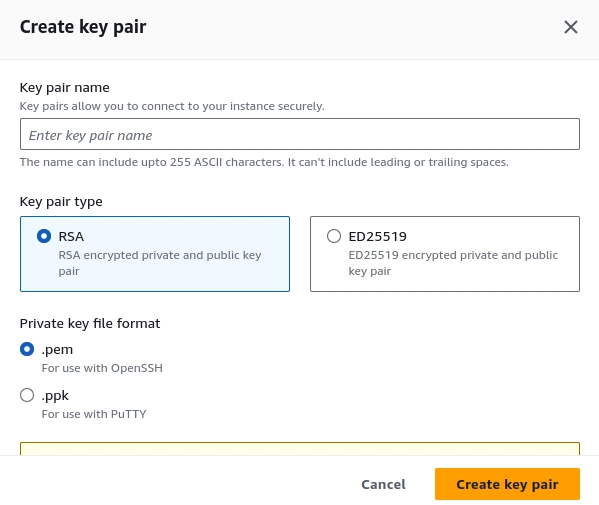
key pair name = ubunutu-webserver-image
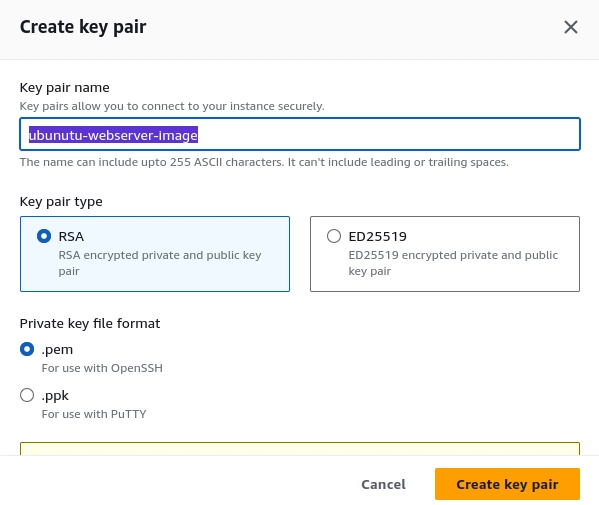
4.create key pair கொடுத்தவுடன் key ஆனது download ஆகும்.

5.network settings இல் எந்தஒரு changes-ம் இல்லை.

6.கடைசியாக instance ஐ launch செய்ய வேண்டியதுதான்..
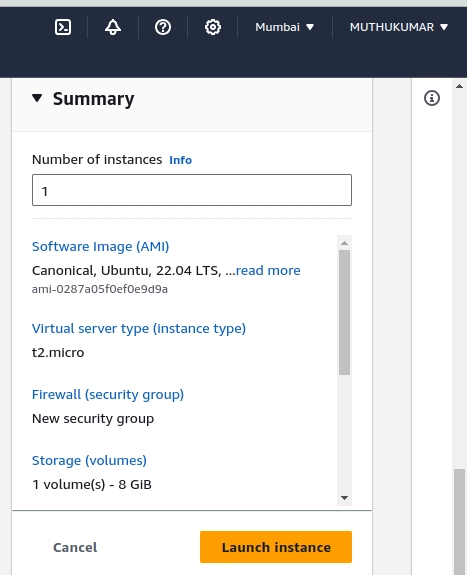
7.instance ஐ launch செய்ய launch instance button-ஐ கிளிக் செய்யவும்.
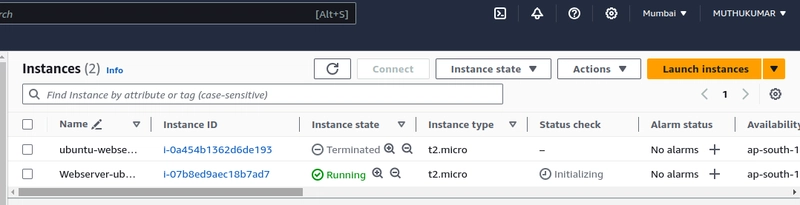
இப்போது instance ஆனது running status இல் உள்ளது.
அதன் பின்னர் இன்ஸ்டன்ஸ் ஐ கிளிக் செய்து விட்டு அதன் மேலே கொடுக்கப்பட்டுள்ள connect button ஐ click செய்யவும்

next connect to instance ஆனது open aagum.

இதில் உள்ள ssh use செய்து local teminal இல் shell ஐ open செய்யலாம்.

ssh -i "ubunutu-webserver-image.pem" ubuntu@ec2-13-233-160-172.ap-south-1.compute.amazonaws.com
muthukumar@localmachine:~$ sudo -i
[sudo] password for muthukumar:
root@localmachine:~# cd /
root@localmachine:/# cd /home/muthukumar/Downloads/
root@localmachine:/home/muthukumar/Downloads#

root@localmachine:/home/muthukumar/Downloads# ssh -i "ubunutu-webserver-image.pem" ubuntu@ec2-13-233-160-172.ap-south-1.compute.amazonaws.com
The authenticity of host 'ec2-13-233-160-172.ap-south-1.compute.amazonaws.com (13.233.160.172)' can't be established.
ED25519 key fingerprint is SHA256:zgAr8NDB4BCRafF9bVkjmHe2Rl/WGu9w/hvHTBKlc9o.
This key is not known by any other names
Are you sure you want to continue connecting (yes/no/[fingerprint])? yes
Warning: Permanently added 'ec2-13-233-160-172.ap-south-1.compute.amazonaws.com' (ED25519) to the list of known hosts.
Welcome to Ubuntu 22.04.3 LTS (GNU/Linux 6.2.0-1012-aws x86_64)

 * Documentation:  https://help.ubuntu.com
 * Management:     https://landscape.canonical.com
 * Support:        https://ubuntu.com/advantage

  System information as of Fri Nov 17 11:02:14 UTC 2023

  System load:  0.0               Processes:             97
  Usage of /:   20.5% of 7.57GB   Users logged in:       0
  Memory usage: 20%               IPv4 address for eth0: 172.31.14.12
  Swap usage:   0%

Expanded Security Maintenance for Applications is not enabled.

0 updates can be applied immediately.

Enable ESM Apps to receive additional future security updates.
See https://ubuntu.com/esm or run: sudo pro status


The list of available updates is more than a week old.
To check for new updates run: sudo apt update


The programs included with the Ubuntu system are free software;
the exact distribution terms for each program are described in the
individual files in /usr/share/doc/*/copyright.

Ubuntu comes with ABSOLUTELY NO WARRANTY, to the extent permitted by
applicable law.

To run a command as administrator (user "root"), use "sudo <command>".
See "man sudo_root" for details.
ubuntu@ip-172-31-14-12:~$ hostname -I
172.31.14.12
ubuntu@ip-172-31-14-12:~$
OS DETAILS:
ubuntu@ip-172-31-14-12:~$ cat /etc/os-release

PRETTY_NAME="Ubuntu 22.04.3 LTS"

NAME="Ubuntu"

VERSION_ID="22.04"

VERSION="22.04.3 LTS (Jammy Jellyfish)"

VERSION_CODENAME=jammy

ID=ubuntu

ID_LIKE=debian

HOME_URL="https://www.ubuntu.com/"

SUPPORT_URL="https://help.ubuntu.com/"

BUG_REPORT_URL="https://bugs.launchpad.net/ubuntu/"

PRIVACY_POLICY_URL="https://www.ubuntu.com/legal/terms-and-policies/privacy-policy"

UBUNTU_CODENAME=jammy

ubuntu@ip-172-31-14-12:~$
Apache installation in Ubuntu:
Step1:
sudo apt install apache2 -y
Step2:
status check, enable apache2
sudo systemctl status apache2
root@ip-172-31-29-19:/# systemctl status apache2
● apache2.service - The Apache HTTP Server
     Loaded: loaded (/lib/systemd/system/apache2.service; enabled; vendor preset: enabled)
     Active: active (running) since Mon 2023-11-20 06:44:41 UTC; 4min 7s ago
       Docs: https://httpd.apache.org/docs/2.4/
   Main PID: 1830 (apache2)
      Tasks: 55 (limit: 1121)
     Memory: 5.0M
        CPU: 46ms
     CGroup: /system.slice/apache2.service
             ├─1830 /usr/sbin/apache2 -k start
             ├─1832 /usr/sbin/apache2 -k start
             └─1833 /usr/sbin/apache2 -k start

Nov 20 06:44:41 ip-172-31-29-19 systemd[1]: Starting The Apache HTTP Server...
Nov 20 06:44:41 ip-172-31-29-19 systemd[1]: Started The Apache HTTP Server.
root@ip-172-31-29-19:/#
sudo systemctl enable apache2
root@ip-172-31-29-19:/# systemctl enable apache2
Synchronizing state of apache2.service with SysV service script with /lib/systemd/systemd-sysv-install.
Executing: /lib/systemd/systemd-sysv-install enable apache2
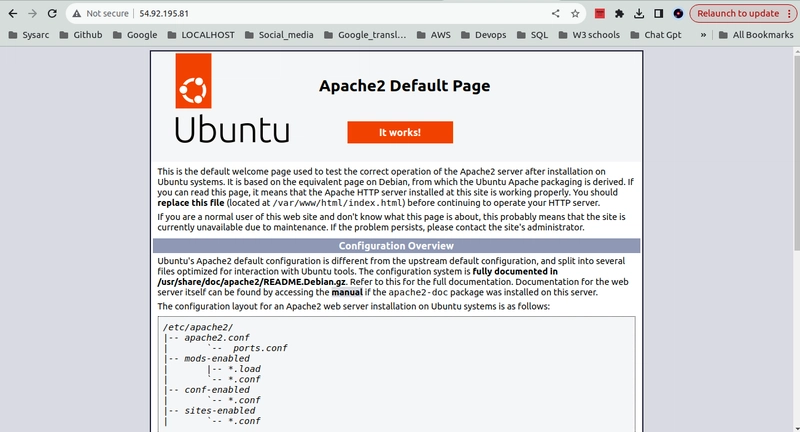
Check Browser:
Ip: http://Server_ip/ --> AWS PUBLIC_IP

make a domain point to your server open /etc/hosts file:
sudo vim /etc/hosts

127.0.0.1 localhost
54.92.195.81 wordpressmk.com

# The following lines are desirable for IPv6 capable hosts
::1 ip6-localhost ip6-loopback
fe00::0 ip6-localnet
ff00::0 ip6-mcastprefix
ff02::1 ip6-allnodes
ff02::2 ip6-allrouters
ff02::3 ip6-allhosts
:wq! save and exit
restart the server:
systemctl reload apache2
systemctl restart apache2
LAMP Stack Installation:
Apache installation:
sudo apt update -y && apt upgrade -y

sudo apt install apache2 apache2-utils -y

sudo systemctl start apache2

sudo systemctl enable apache2

sudo systemctl status apache2

apache2 -v
- check on browser with ip of server we need to set www-data (Apache user) as the owner of document root
sudo chown -R www-data:www-data /var/www/html
Installing MariaDB:
sudo apt install mariadb-server mariadb-client

sudo systemctl start mariadb

sudo systemctl enable mariadb

sudo systemctl status mariadb
creating root password for mariadb:
mysql_secure_installation
root@ip-172-31-29-19:/# mysql_secure_installation

NOTE: RUNNING ALL PARTS OF THIS SCRIPT IS RECOMMENDED FOR ALL MariaDB
      SERVERS IN PRODUCTION USE!  PLEASE READ EACH STEP CAREFULLY!

In order to log into MariaDB to secure it, we'll need the current
password for the root user. If you've just installed MariaDB, and
haven't set the root password yet, you should just press enter here.

Enter current password for root (enter for none):
OK, successfully used password, moving on...

Setting the root password or using the unix_socket ensures that nobody
can log into the MariaDB root user without the proper authorisation.

You already have your root account protected, so you can safely answer 'n'.

Switch to unix_socket authentication [Y/n] Y
Enabled successfully!
Reloading privilege tables..
 ... Success!


You already have your root account protected, so you can safely answer 'n'.

Change the root password? [Y/n] Y
New password:
Re-enter new password:
Password updated successfully!
Reloading privilege tables..
 ... Success!


By default, a MariaDB installation has an anonymous user, allowing anyone
to log into MariaDB without having to have a user account created for
them.  This is intended only for testing, and to make the installation
go a bit smoother.  You should remove them before moving into a
production environment.

Remove anonymous users? [Y/n] Y
 ... Success!

Normally, root should only be allowed to connect from 'localhost'.  This
ensures that someone cannot guess at the root password from the network.

Disallow root login remotely? [Y/n] Y
 ... Success!

By default, MariaDB comes with a database named 'test' that anyone can
access.  This is also intended only for testing, and should be removed
before moving into a production environment.

Remove test database and access to it? [Y/n] Y
 - Dropping test database...
 ... Success!
 - Removing privileges on test database...
 ... Success!

Reloading the privilege tables will ensure that all changes made so far
will take effect immediately.

Reload privilege tables now? [Y/n] Y
 ... Success!

Cleaning up...

All done!  If you've completed all of the above steps, your MariaDB
installation should now be secure.

Thanks for using MariaDB!
login to mariadb:
root@ip-172-31-29-19:/# mariadb -u root -p
Enter password:
Welcome to the MariaDB monitor.  Commands end with ; or \g.
Your MariaDB connection id is 41
Server version: 10.6.12-MariaDB-0ubuntu0.22.04.1 Ubuntu 22.04

Copyright (c) 2000, 2018, Oracle, MariaDB Corporation Ab and others.

Type 'help;' or '\h' for help. Type '\c' to clear the current input statement.

MariaDB [(none)]>
MariaDB [(none)]> exit
root@ip-172-31-29-19:/# mariadb --version
mariadb  Ver 15.1 Distrib 10.6.12-MariaDB, for debian-linux-gnu (x86_64) using  EditLine wrapper
PHP INSTALLATION:
- To install PHP on your Ubuntu machine, you can follow these steps: Step 1: Update Package Lists:
Open a terminal window and run the following command to update the package lists:
sudo apt update
Step 2: Install PHP:
Run the following command to install PHP along with some commonly used extensions:
sudo apt install phpThis will install the latest version of PHP available in the Ubuntu repositories.
Step 3: Verify PHP Installation:
sudo add-apt-repository ppa:ondrej/php
sudo apt update0
After the installation is complete, you can verify if PHP is installed properly by checking the version:
php -vCertainly! When you install PHP extensions on Ubuntu using apt, you would replace extension_name with the actual name of the PHP extension you want to install.
For instance, if you want to install the curl extension, the command would be:
sudo apt install php-curl
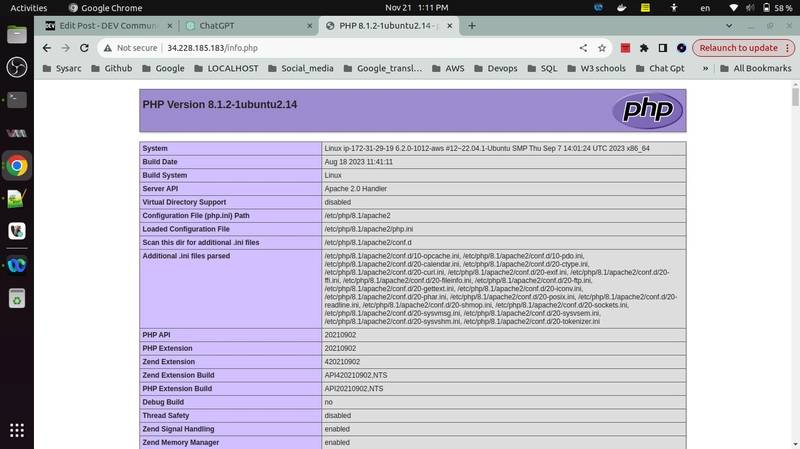
root@ip-172-31-29-19:/# php -v
PHP 8.1.2-1ubuntu2.14 (cli) (built: Aug 18 2023 11:41:11) (NTS)
Copyright (c) The PHP Group
Zend Engine v4.1.2, Copyright (c) Zend Technologies
    with Zend OPcache v8.1.2-1ubuntu2.14, Copyright (c), by Zend Technologies
Step 4: Start the Web Server (If Needed):
sudo systemctl restart apache2
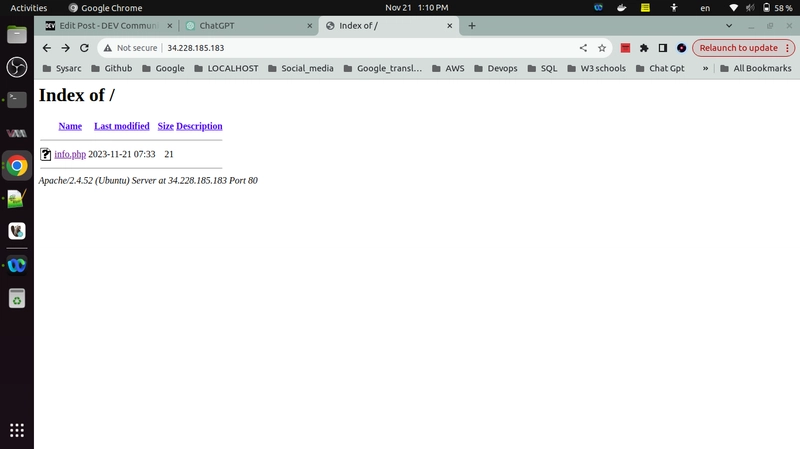
Step 5: Test PHP:
Create a PHP file in your web server's document root directory (e.g., /var/www/html) with the following content:
<?php

phpinfo();

?>
Remove Apache index file:
root@ip-172-31-29-19:/var/www/html# rm index.html
- ReStart Apache webserver:
sudo systemctl restart apache2
LAMP is successfully installed.
WORDPRESS_INSTALLATION:
Login to mariadb and create wordpress user and wordpress database and give privileges.
mysql -u root -p
root@ip-172-31-29-19:/# mysql -u root -p
Enter password:
Welcome to the MariaDB monitor.  Commands end with ; or \g.
Your MariaDB connection id is 42
Server version: 10.6.12-MariaDB-0ubuntu0.22.04.1 Ubuntu 22.04

Copyright (c) 2000, 2018, Oracle, MariaDB Corporation Ab and others.

Type 'help;' or '\h' for help. Type '\c' to clear the current input statement.

MariaDB [(none)]>
CREATE USER 'wordpresuser'@'localhost' IDENTIFIED BY '054866';
MariaDB [(none)]> CREATE USER 'wordpresuser'@'localhost' IDENTIFIED BY '054866';
Query OK, 0 rows affected (0.004 sec)
CREATE DATABASE wordpressdatabase;
MariaDB [(none)]> CREATE DATABASE wordpressdatabase;
Query OK, 1 row affected (0.000 sec)
GRANT ALL PRIVILEGES ON wordpressdatabase.* TO 'wordpresuser'@'localhost';
MariaDB [(none)]> GRANT ALL PRIVILEGES ON wordpressdatabase.* TO 'wordpresuser'@'localhost';
Query OK, 0 rows affected (0.001 sec)
FLUSH PRIVILEGES;
download the latest wordpress zip file:
wget https://wordpress.org/latest.zip
root@ip-172-31-29-19:/# wget https://wordpress.org/latest.zip
--2023-11-21 08:48:59--  https://wordpress.org/latest.zip
Resolving wordpress.org (wordpress.org)... 198.143.164.252
Connecting to wordpress.org (wordpress.org)|198.143.164.252|:443... connected.
HTTP request sent, awaiting response... 200 OK
Length: 25955109 (25M) [application/zip]
Saving to: ‘latest.zip’

latest.zip                          100%[==================================================================>]  24.75M  34.0MB/s    in 0.7s

2023-11-21 08:49:00 (34.0 MB/s) - ‘latest.zip’ saved [25955109/25955109]
root@ip-172-31-29-19:/# unzip latest.zip
Command 'unzip' not found, but can be installed with:
apt install unzip
install unzip:
apt install unzip
root@ip-172-31-29-19:/# apt install unzip
Reading package lists... Done
Building dependency tree... Done
Reading state information... Done
unzip is already the newest version (6.0-26ubuntu3.1).
0 upgraded, 0 newly installed, 0 to remove and 29 not upgraded.
unzip latest.zip
sudo mv wordpress/ /var/www/html/
sudo chown www-data:www-data -R /var/www/html/wordpress/
sudo chmod -R 755 /var/www/html/wordpress/
create wordpress configuration file:
sudo vim /etc/apache2/sites-available/wordpress.conf
<VirtualHost *:80>
    ServerAdmin devopsmk.in
    DocumentRoot /var/www/html/wordpress
    ServerName 34.228.185.183
    ErrorLog ${APACHE_LOG_DIR}/error.log
    CustomLog ${APACHE_LOG_DIR}/access.log combined
</VirtualHost>
:wq! save and exit
enable the virtual host and the rewrite module:
sudo a2ensite wordpress.conf
sudo systemctl reload apache2
sudo a2enmod rewrite
sudo systemctl restart apache2


> http://34.228.185.183/index.php/2023/11/21/welcome-to-aws-world/

Top comments (2)
அருமை நண்பா
thanks nanpa
Some comments may only be visible to logged-in visitors. Sign in to view all comments.