
Header photo by Roman Synkevych 🇺🇦 on Unsplash
What is OpenID?
Always a good start, understanding what the key component to this whole post is! As always though, I will reference Wikipedia
"OpenID is an open standard and decentralized authentication protocol promoted by the non-profit OpenID Foundation. It allows users to be authenticated by co-operating sites (known as relying parties, or RP) using a third-party identity provider (IDP) service..." Wikipedia - OpenID
Simple right! Well the technical details of how OpenID works is probably for a much more in-depth specific technical blog for this technology, but the one thing that we need to understand here is that OpenID allows users to be authenticated using 3rd party identify providers. In the case of AWS, their OpenID Connect set up would allow a service in GitHub to authenticate to AWS, and through the IAM system, assume a specific role.
The question is, why go to the effort to set this all up when a simple Access Key/Secret Key combination would work? Well, as you know from AWS Well-Architected best practices, you should always use temporary credentials over static ones. With the assumption of an AWS role, it uses temporary credentials. With OpenID Connect-compatible identity providers, such as GitHub, you would need to set this up using a Web Identity source. With this post, I will show you how I set this up for this blog (and for the Tokonatsu website!)
GitHub Actions using IAM Access Keys
This is where I started, as you can see below GitHub has my secrets for the AWS_ACCESS_KEY_ID and AWS_SECRET_ACCESS_KEY, statically set quite a while ago!

Within my GitHub actions pipeline, I am using the Configure AWS Credentials action from the GitHub Marketplace to configure the secrets for use in the pipeline.
- name: Configure AWS Credentials
  id: aws-credentials-configure
  uses: aws-actions/configure-aws-credentials@v1
  with:
    aws-access-key-id: ${{ secrets.AWS_ACCESS_KEY_ID }}
    aws-secret-access-key: ${{ secrets.AWS_SECRET_ACCESS_KEY }}
    aws-region: ${{ secrets.AWS_DEFAULT_REGION }}
If you want to see the whole file, then there is a link here to the build-and-deploy.yaml (prior to the changes) file on GitHub.
As you can see, it is pretty simple, and it worked. The IAM user that owned those keys was happy to sit there and allow the pipeline to access the service. However, that IAM user is still static, and the keys will need to be manually be rotated. From a security stance, anyone that found that key out would be able to do as much as the pipeline could do to my website. As I use aws s3 sync to copy the website up, while also using the -delete parameter, it means that I need delete access for this IAM user! Not really the best!
By using Terraform, I was able to set up all the correct access and switch my pipeline over to using role assumption, thus temporary credentials. GitHub do provide a walkthrough to set up the OpenID Connect, which is what I based this configuration on. Along with the Terraform Documentation hopefully, this will help you with your journey!
Creation of the OpenID Connect Provider
Setting up the Identity Provider (IdP) will need to be the first step. This action will create a description in IAM of the external IdP and establishes the trust between your account and the organisation, in this case GitHub. This step requires just a few options, of which can be harder to get.
Using the walkthrough documentation, we can see that the following is required:
- The provider URL - in the case of GitHub this is
https://token.actions.githubusercontent.com - The "Audience" - which scopes what can use this. Confusingly in Terrraform this is also known as the
client_id_list. - The Thumbprint of the endpoint - This one is the tricker one, as you will need to generate this yourself.
Generating the thumbprint
This part wasn't as clear in the GitHub documentation, but I went over to the AWS Documentation which gave me instructions on how to generate the thumbprint. You would need a copy of the openssl CLI o be able to do this, but the quickest way is as follows:
- Use the OpenSSL command to check against the provider URL to get the certificate.
openssl s_client -servername token.actions.githubusercontent.com -showcerts -connect token.actions.githubusercontent.com:443
Grab the certificate shown in the output, you will see this starting with
-----BEGIN CERTIFICATE-----, then place this content into a file. For this demo, I will usegithub_openid.crt.Use the OpenSSL command again to generate the fingerprint from the file created above.
openssl x509 -in github_openid.crt -fingerprint -sha1 -noout
Which should output the fingerprint. Strip away all the extra parts, and the : between each of the pairs of hexadecimal characters, and you should end up with something like this:
6938fd4d98bab03faadb97b34396831e3780aea1
⚠️ Note: You will need to make the letters lowercase, as Terraform is case sensitive for the variable we need to put this in, but AWS is not case sensitive, so it can sent Terraform into a bit of a loop. ⚠️
Adding the resource in Terraform
With all of this, you can now start to put together the Terraform elements. We can use the Terraform resource for setting up the OpenID Connect Provider in IAM. Below is a code example, using the information gathered from the documentation and the thumbprint generation, and all placed into a single resource object.
resource "aws_iam_openid_connect_provider" "github" {
  url = "https://token.actions.githubusercontent.com"
  client_id_list = [
    "sts.amazonaws.com"
  ]
  thumbprint_list = [
    "6938fd4d98bab03faadb97b34396831e3780aea1"
  ]
}
This seems simple enough, but this is just authorising GitHub to be a trusted source, and that identities from GitHub can be used to authenticate against AWS. The IAM role set up is where the main bulk of granting access is completed.
Creating the IAM Role
IAM Policy - Bucket Access
Before access can be granted to the GitHub Actions pipeline, we will need to create a policy that defines the access that the role will have. There isn't much in the way of any difference to this part than creating any other policy however, for this blog and the Tokonatsu website, we need some additional permissions outside of the simple s3:PutObject.
In the example below, as my S3 bucket is also a resource in Terraform, you can see how I have pulled the bucket ARN for the resource from the outputs of the S3 bucket creation. It is normally best practice to reference variables and other outputs rather than using strings.
# tfsec:ignore:aws-iam-no-policy-wildcards
data "aws_iam_policy_document" "website_colins_blog_policy" {
  version = "2012-10-17"

  statement {
    effect = "Allow"
    resources = [
      aws_s3_bucket.website_colins_blog.arn,         # or "unique-bucket-name-for-site"
      "${aws_s3_bucket.website_colins_blog.arn}/*"   # or "unique-bucket-name-for-site/*"
    ]

    actions = [
      "s3:DeleteObject",
      "s3:GetBucketLocation",
      "s3:GetObject",
      "s3:ListBucket",
      "s3:PutObject"
    ]
  }
}
⚠️ Note: As I use tfsec to keep an eye on my Terraform, it attempts to look at the policy and look for anything that might be considered an issue. On the first line you can see the tfsec:ignore:aws-iam-no-policy-wildcards comment, which means tfsec will ignore that rule when it checks my Terraform. As we need to give this role access to do the listed actions on all objects in the bucket, a wildcard is easier. Hence the rule to stop the error from showing up. ⚠️
IAM Policy - Role Assumption
As we will be using rule assumption, there needs to be an additional policy document created that will be added to the Role, that can tell it who can assume the role. You might have seen a similar version when using sts:AssumeRole as an action, for principles that cover other accounts as an example. With the sts:AssumeRoleWithWebIdentity what we are telling AWS tha the role assumption needs to happen if they have a "web identity", one of the external providers.
The primary element to ensuring the right IdP is used when looking for which identity to grant access too, we need to reference the ARN of the OpenID Connect Provider added earlier. As the Terraform resource we used above was identified with aws_iam_openid_connect_provider.github, we can use one of its attributes to programmatically add the ARN to the principles. We will need to specify the type in Terraform as "Federated" as well.
The last two bits are condition blocks and these are unique to the GitHub OpenID Connect set up. There is a little more detail on the GitHub Actions: OpenID Connect in AWS page. Using this page, I am adding two "StringLike" tests to the role, that looks for two specific variables:
-
token.actions.githubusercontent.com:sub- Which is used to specify which repo's GitHub actions are allowed access. -
token.actions.githubusercontent.com:aud- That ensures that AWS's STS service is the one that is requesting the identity type, and no others.
The token.actions.githubusercontent.com:sub in my actual repo it says that any repo in my personal space mystcb called blog using any branch, can access. While this is very open, my personal blog only really can be edited by myself, and I would want the role to also activate on any test branches as well. This is shown on my personal Terraform as repo:mystcb/blog:*. The example I have below is more specific, and only allows access if the GitHub action is working from the main branch. What I wanted to show here is a secure version, but also showing how you can add wildcards to the value to cover more branches if need be.
data "aws_iam_policy_document" "website_colins_blog_role_assumption" {

  version = "2012-10-17"

  statement {
    effect = "Allow"

    actions = ["sts:AssumeRoleWithWebIdentity"]

    condition {
      test     = "StringLike"
      variable = "token.actions.githubusercontent.com:sub"
      values   = ["repo:mystcb/blog:ref:refs/heads/main"]
    }

    condition {
      test     = "StringLike"
      variable = "token.actions.githubusercontent.com:aud"
      values   = ["sts.amazonaws.com"]
    }

    principals {
      type        = "Federated"
      identifiers = [aws_iam_openid_connect_provider.github.arn]
    }
  }

}
Now we have our two policy documents as Terraform data objects, we can then pull them together to create the role
Creation of the IAM Role
For us to create the role, we need to pull together all the bits we have created so far. This will mean doing a few special tricks with the data resources.
Firstly we need to create an IAM Policy resource, that the IAM Role resource can use to attach to the newly created role.
The IAM Policy resource require 3 elements, the name, path , and the policy in JSON format. While the name and path can be as custom as you need, the policy in JSON format is what might trip a few people up. The IAM Policy Document data object has just one Attribute output tha can be referenced here: json. This conversion means we can quickly add the three together to make the IAM Policy object in AWS.
resource "aws_iam_policy" "website_colins_blog" {
  name   = "access_to_website_colins_blog_s3"    # This is my example name!
  path   = "/"                                   # Root path for ease
  policy = data.aws_iam_policy_document.website_colins_blog_policy.json
}
Next, we need to create the role itself which has two key elements, the name and the assume_role_policy. The name is as you want this to be however, the assume_role_policy will be needed to let AWS IAM know what can assume this role. In our case, it is the JSON output from our second IAM Policy Document.
resource "aws_iam_role" "website_colins_blog_github_role" {
  name               = "access_to_website_colins_blog_s3_role"      # This is my example name!
  assume_role_policy = data.aws_iam_policy_document.website_colins_blog_role_assumption.json
}
Great! Now we have role, and we can assume it it - well not exactly, one last step. With IAM, you can attach multiple policies to a single role, which if you created in line with the aws_iam_role resource it can make it a little more complicated, and very long. The AWS provider allows us two methods to manage the role's policies. One is through managed_policy_arns/inline_policy or aws_iam_policy_attachment. The former two work very much the same, but takes exclusive authority over the state of the IAM Role itself. This means if you attach policies using the latter resource object, you will find Terraform getting stuck in a cycle. For this example, I am using the policy attachment resource.
resource "aws_iam_role_policy_attachment" "website_colins_blog" {
  role       = aws_iam_role.website_colins_blog_github_role.name
  policy_arn = aws_iam_policy.website_colins_blog.arn
}
This block is where all the references from before make this easier. This is where the role resource object, and the policy resource object come together to create the role. Now, AWS is aware of GitHub, its OpenID Connect provider, and we have given a specific repo's GitHub actions that run on the main branch access to assume a role in AWS, which give it access to AWS S3. The role assumption will use temporary credentials for each of the runs!
One last bit, this part will enable you to get the ARN for the role, which will be required for the configuration of GitHub.
output "website_colins_blog_role_arn" {
  description = "The role ARN for the Website: Colin's Blog Role"
  value       = aws_iam_role.website_colins_blog_github_role.arn
}
Very simple, it just outputs the ARN for the role which will need to be copied to GitHub. For the rest of the blog, I am going to be using an example role in my examples. This will not work, so make sure you are getting your role that matches your account. The ARN we will be using will be
arn:aws:iam::12326264843:role/access_to_website_colins_blog_s3_role

GitHub Actions/Workflow Updates
To enable this, we need to update the workflow yaml file, and this is probably the easiest bit of the whole post!
Add the Role ARN as a secret
This is where we need to move back to GitHub and grab the ARN from above, and add this as an add the URL to the Repository Secrets. You should be able to find your version at https://github.com/<yourname/org>/<yourrepo>/settings/secrets/actions. This is under Settings -> Secrets and variables -> Actions and click New Secret. Enter in a name for the secret, and its value which I have put in:
-
Name:
AWS_ROLE_ARN -
Secret:
arn:aws:iam::12326264843:role/access_to_website_colins_blog_s3_role

Once you have added that, make sure to remove the two existing Repository Secrets, in my case I called them
AWS_ACCESS_KEY_IDAWS_SECRET_ACCESS_KEY
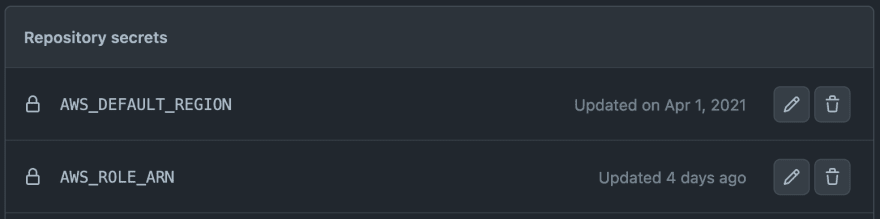
The AWS CLI will always use the keys over role assumption in it's priority so always best to remove them. With the two older secrets removed you should now have just the AWS_ROLE_ARN and AWS_DEFAULT_REGION
Update the Workflow YAML file
For GitHub actions to be able to assume the role, there are two changes that need to be made to the workflow yaml file. The first one, will be the need to enable the workflow to interact with GitHub's OIDC Token endpoint. Part of the assumption process will require us to identify as a web identity from GitHub to have AWS know who we are. As such you will need to add additional permissions to the job. Specifically the following
-
id-tokentowrite -
contentstoread
So it should look something like this:
jobs:
  hugo_build_and_deploy:
    runs-on: ubuntu-latest
    permissions:
      id-token: write
      contents: read
Later on in the pipeline, where we configured the AWS credentials before, you will need to remove the older secret variables, and put the new secrets in:
- name: Configure AWS Credentials
  id: aws-credentials-configure
  uses: aws-actions/configure-aws-credentials@v1
  with:
    role-to-assume: ${{ secrets.AWS_ROLE_ARN }}
    aws-region: ${{ secrets.AWS_DEFAULT_REGION }}
To see this whole file in context, I would recommend having a look at this blog's workflow on GitHub!
All you need to do now, is run the GitHub Actions workflow, and make sure it works! With my blog workflow, it was pretty much a drop in replacement for the IAM credentials. There were a few minor issues with my workflow, but nothing that following this wouldn't have resolved fo me!
Some minor issues
As you can see, it wasn't exactly first time running for me! It did take a while, and also I had placed a --acl public-read as part of the aws s3 sync command, which the new bucket I created had been set to block public ACLs!

There was one other issue, and that was with the GITHUB_TOKEN that is used. In normal operation, without the added permissions, this token worked fine with an additional Marketplace action called GitHub Deployments. However, changing this over to allow the OpenID Connect feature, it meant that the token mysteriously stopped working.
Switching to use a Fine-grained PAT
On the 18th of October 2022, GitHub offered up a new service called Fine-grained personal access tokens. The idea is that rather than creating a very open Personal Access Token (PAT), you could create a token that was very limited in it's reach. It is still in beta as I write this blog (28th Feb 2023).
Using this beta feature, I was able to create a new token, limiting it to specifically the blog repo, and specific permissions. The screenshot below shows the details about the new PAT. (I am aware I could probably reduce the permissions a little more!)

From here, I added a new respository secret called REPO_TOKEN with the value of the newly generated token, and then updated the part in the workflow that needed it:
- name: Set Deploy Status
  id: deploy-status-start
  uses: bobheadxi/deployments@v1
  with:
    step: start
    token: ${{ secrets.REPO_TOKEN }}
    env: Prod
    ref: ${{ github.ref }}
Round up
Hopefully what I have shown you in this post is how to move away from IAM Credentials, and use the OpenID Connect features of both AWS and GitHub to enable role based assumption to gain access to an S3 bucket that stores, in my case, a static website.
If you do have any questions, comments, please let me know!

Top comments (0)