
Hey everyone, Today we'll see how we can deploy our own Appwrite function with Appwrite Cloud within minutes. It's so easy and useful.
So for getting started first create your account here - Appwrite Cloud

After signup create a project, click on Functions as shown below -

After this there are two ways to deploy it.
Method 1 - Appwrite CLI
Appwrite provide a featured packed CLI for managing your Appwrite projects. This is a one time process and helps a lot in deploying your functions easily.
- Install the Appwrite CLI -
npm install -g appwrite-cli
or dependency free installation
For Mac
brew tap appwrite/sdk-for-cli https://github.com/appwrite/sdk-for-cli
brew update
brew install --HEAD appwrite
> For windows
iwr -useb https://appwrite.io/cli/install.ps1 | iex
> For Linux
curl -sL https://appwrite.io/cli/install.sh | bash
- After the installation is complete, verify the install using
appwrite -v
- Now, Login to the appwrite cli. This will ask for your email and password. If you logged in with social auth try password reset and set a password first.
appwrite login

- After this, verify that you can access your project -
appwrite projects get --projectId [PROJECT_ID]
- Now our appwrite cli setup is complete and now let's set up our function.

> Now we have to connect our existing project first. Run
appwrite init project
- Select the existing project and after that you'll see result like this in your console.

- Now run below command to initialize your project.
appwrite init function
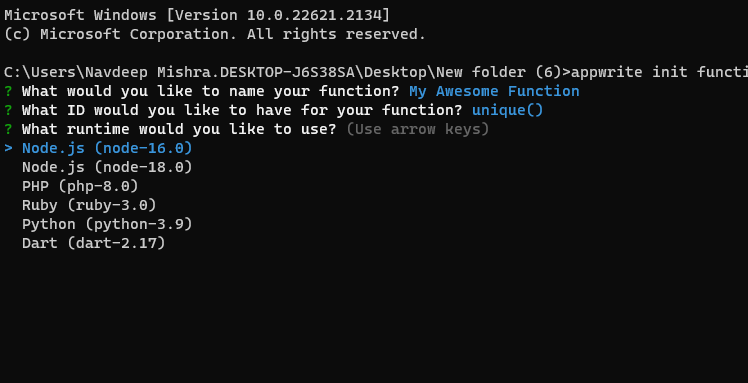
- Now here you have to select your runtime. If you want to deploy a javascript function then select _node runtime_. I have selected _node runtime_ here.
**_After selecting this our function is created_**.
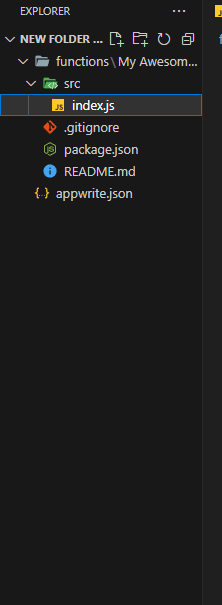
- Update `src/index.js` with your function code. For detailed information about functions visit [here](https://appwrite.io/docs/functions).
- Once you have updated your code then
appwrite deploy function
- Select your function with `arrow keys` and confirm with `space` and hit 'enter'.
**Congratulations** 🎊🎊🎊 _Your Appwrite function is deployed successfully in Appwrite Cloud.
Now visit your functions dashboard, open the function you deployed just now. Go to settings tab and change the execution policies according to your need. Now Execute the function on event or add custom schedules for execute from your code. You can check function execution in the function dashboard by clicking on `Execute` button._
**Method 2 - Appwrite Cloud**
- Login to your Appwrite cloud account and navigate to functions page.
- Click on _create function_ button and enter necessary details.
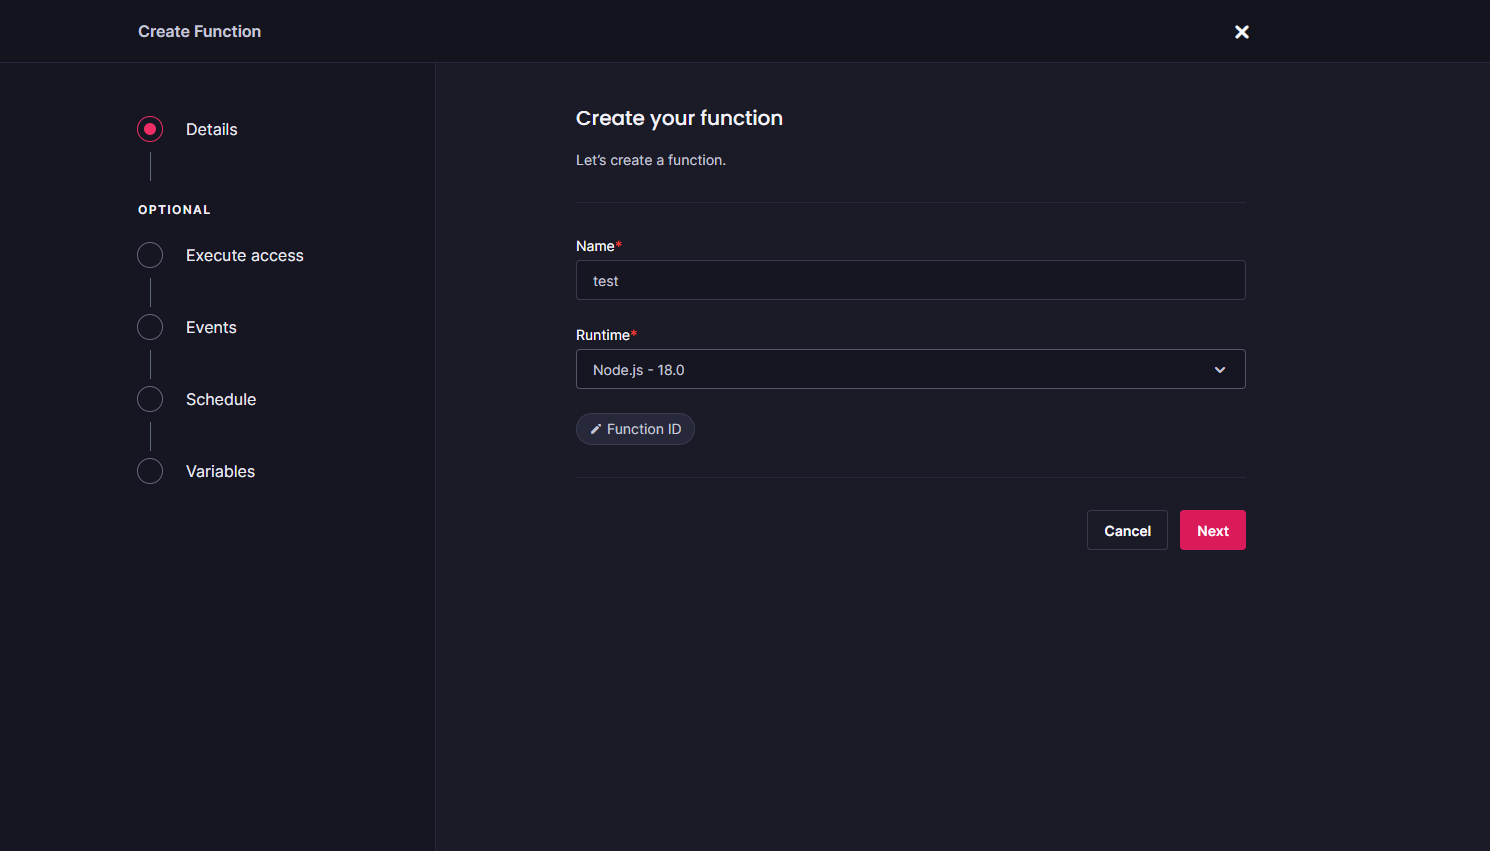
- In the next optional steps you can add _Events_, _Execute Access_, _Schedule_ and _Variables_ for your Appwrite function and then hit _Create_
**_Your Appwrite function is created._** 🔥
Wait .......................... 🤔🤔🤔🤔
We have to add code as well right?....
So let's proceed then..
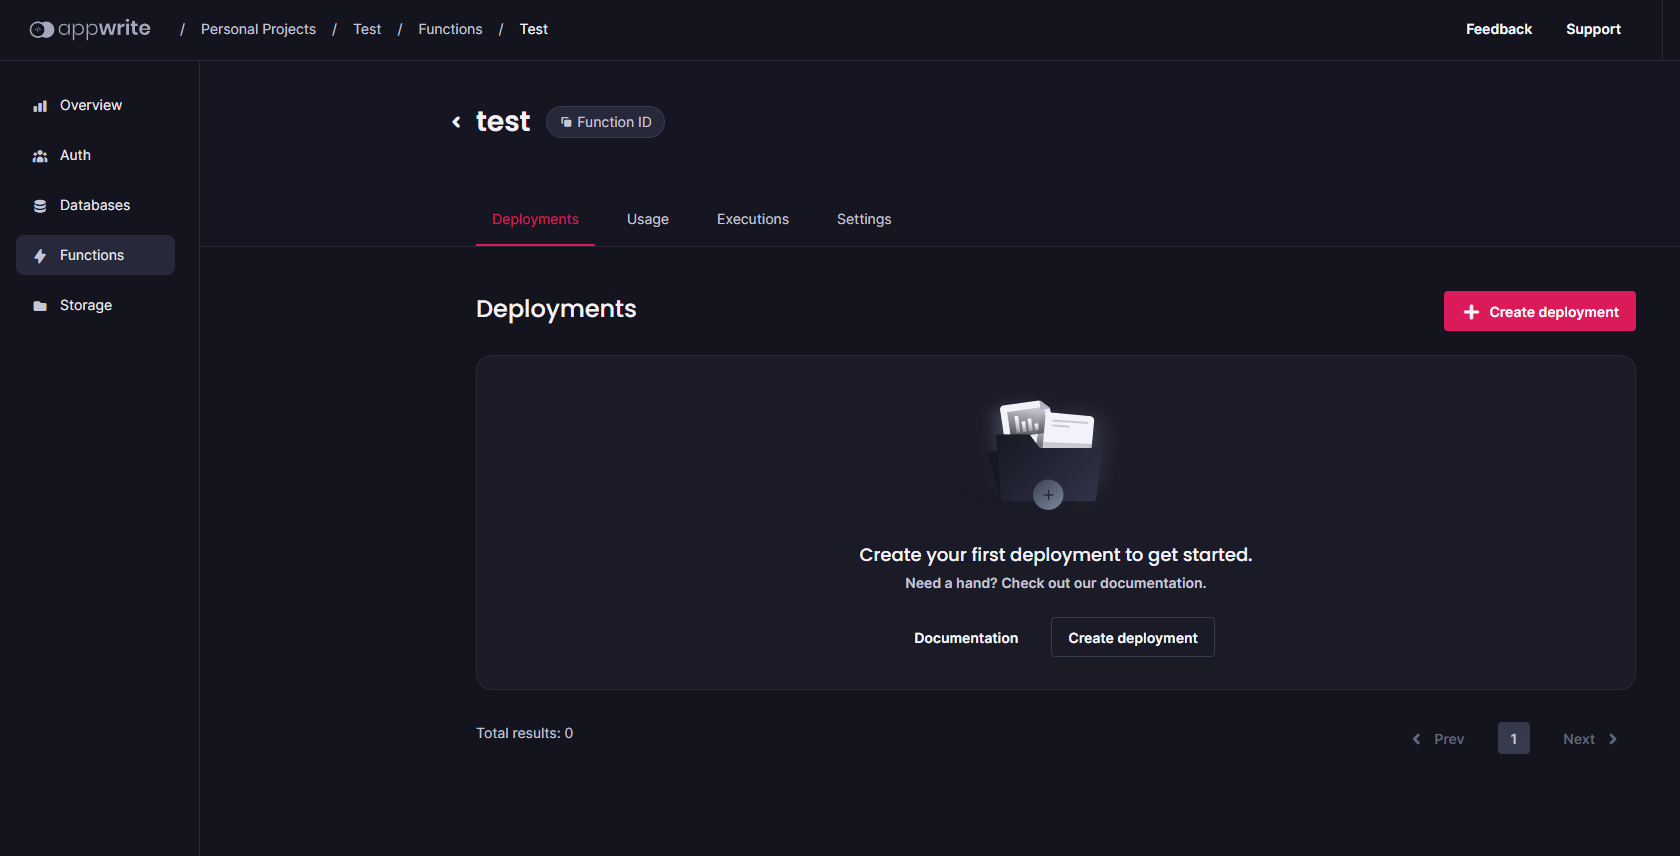
- After creating your function you should see this screen.
- Now just pick your `index.js` file (with all code) and `package.json` and create a `tar.gz` compressed file. You can use **7zip** if you are in windows platform.
- Once you have create `tar.gz` compressed file. Go to function dashboard and click on **Create Deployment** and upload this `tar.gz` file like shown below and mention `index.js` as the entry point.
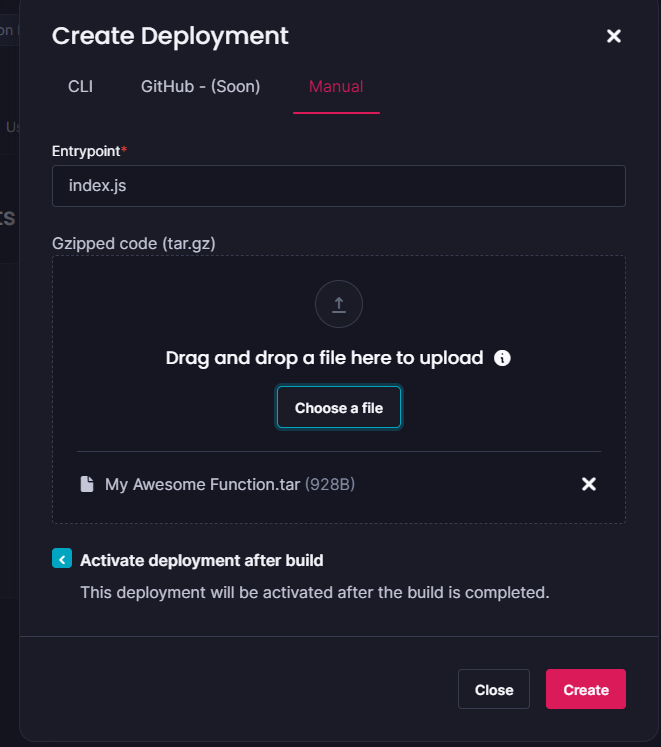
- Also check the **Activate deployment** checkbox to activate function after deployment.
**Congratulations** 🎊🎊🎊 _Your Appwrite function is deployed successfully in Appwrite Cloud.
- Once done click on `Execute Now` button and you'll see this.
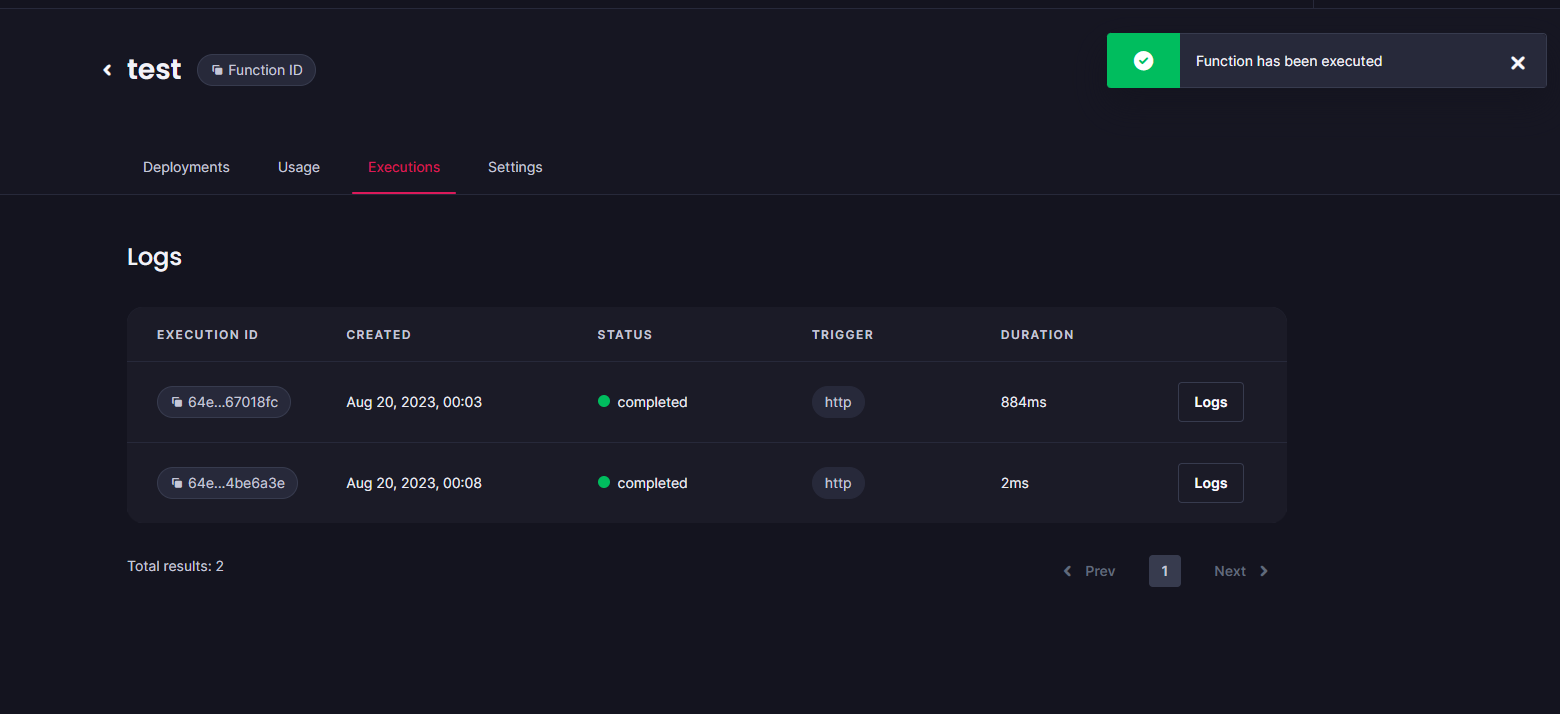
_You can check logs where you can find all error logs, console logs or response returned by your Appwrite function._
_That's all, You have successfully learned how to deploy Appwrite function.
Thankyou for reading this😉
Please like 💓, share 🌐 and follow 🙍♂️ for more useful content._
Navdeep M.

Top comments (0)