We will use the Ruby on Rails backend of Dev.to as Admin panel and create a custom frontend as Vue.js for our website.
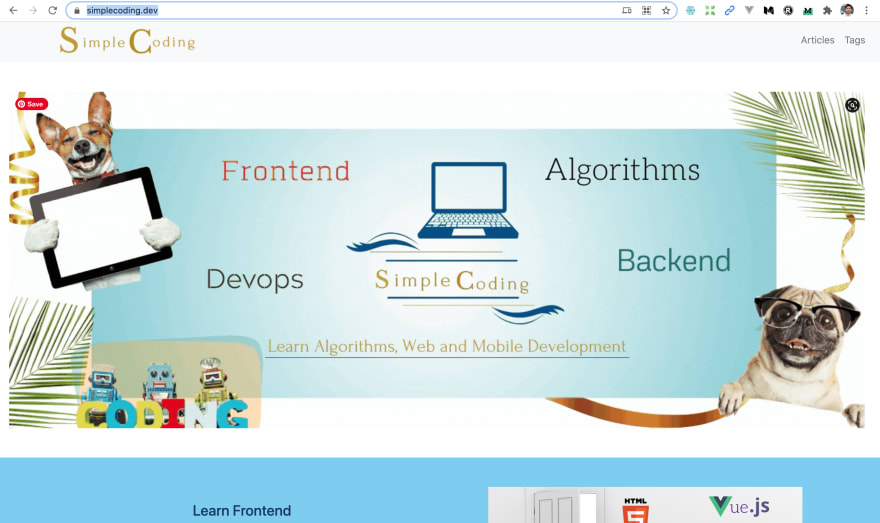
End result
Introduction
I am very passionate about Algorithms and Open-source technologies. I have been writing stories about how to solve Leetcode problems. While I like the interface of Medium and Dev to write, but I feel they lack certain features like
Integrating an online code compiler with the story
Creating custom tags, like BFS, DFS, Stack, Queue
Marking progress of users
Better organization of articles, like coursera or Udemy.
So I decided to create my own open-source website which will have the following features:-
I will use the code base of Dev for my admin panel, to write stories
Create a Vue.js front-end for my website
Host it in Google cloud
Creating a subscription-based feature for the premium articles, 1:1 tutoring.
Architecture
The dev.to website uses Forem. Forem is open source software for building communities. The GitHub code which power Dev can be found here.
Puma as the webserver
Ruby on Rails as backend
PostgreSQL as the primary database
Redis* to store cached data
Sidekiq and Active Job for background workers
Elasticsearch* for in app searching
I thought it will be also a good opportunity to learn the best practice of caching
, authentication
, background jobs
Problem with the Forem codebase
The backend and front-end are tightly coupled. So, if I want to create a mobile app later, it will be a problem.
Monolithic code, which will be hard to maintain, unlike micro-services architecture.
Anyway, I am only concerned about the first problem right now, so the first goal is to create APIs which my front end can use. We will discuss how to create the frontend in the next tutorial in this series.
Watch It
If you want to watch this tutorial instead of reading it, you can watch it here. This video also explains the frontend part which will be discussed in the next tutorial in this series.
Backend (Admin Panel)
My first goal is to install the backend on google cloud, create some posts and make an API to list all the posts so that my Vue,js frontend can display those.
It was a bit challenging to run and deploy it but once I did it, I see it running in google cloud.
Now, the next goal is to make a new controller that can list all the articles and the meta-data associated with those articles in JSON format.
class SimplecodingArticlesController < Devise::RegistrationsController | |
prepend_before_action :require_no_authentication, only: [] | |
skip_before_action :verify_authenticity_token | |
def allarticles | |
@articles = Article.all.as_json(only: [:id, :title, :slug, :description, :processed_html, :tag_list]) | |
msg = { :status => "ok", :message => "Success!", :html => "<b>...</b>" } | |
render :json => @articles | |
end | |
def tags | |
@tags = Tag.all.as_json(only: [:id, :name]) | |
render :json => @tags | |
end | |
end |
First of all, I created a route called /all . I intend to use this route to return the list of articles in a JSON format. Then, I create a SimplecodingArticlesController which was a sub-class of Devise::RegistrationsController, because I wanted to use require_no_authentication method, so that I can show those articles without any authentication as of now. Later I will use an access token to authenticate the APIs. Right now, a quick and dirty way is enough to get started.
// 20210131210952 | |
// http://localhost:3000/all | |
[ | |
{ | |
"id": 1, | |
"title": "Generate Parentheses", | |
"slug": "generate-parentheses-13hd", | |
"description": "Question number 22. Generate Parentheses In this series, I am going to solve Leetcode medium problem...", | |
"processed_html": "<p>Question number 22. Generate Parentheses<br>\n<a href=\"https://res.cloudinary.com/Optional/image/fetch/s--FheVkx9X--/c_limit%2Cf_auto%2Cfl_progressive%2Cq_auto%2Cw_880/https://dev-to-uploads.s3.amazonaws.com/i/i83o2wl8riy6uk9ndtt2.png\" class=\"article-body-image-wrapper\"><img src=\"https://res.cloudinary.com/Optional/image/fetch/s--FheVkx9X--/c_limit%2Cf_auto%2Cfl_progressive%2Cq_auto%2Cw_880/https://dev-to-uploads.s3.amazonaws.com/i/i83o2wl8riy6uk9ndtt2.png\" alt=\"Alt Text\" loading=\"lazy\"></a><br>\nIn this series, I am going to solve Leetcode medium problems live with my friends, which you can see on our youtube channel, Today we will do Problem Problem 22. Generate Parentheses.</p>\n\n<p>A little bit about me, I have offers from Uber India and Amazon India in the past, and I am currently working for Booking.com in Amsterdam.</p>\n<h2>\n <a name=\"motivation-to-learn-algorithms\" href=\"#motivation-to-learn-algorithms\" class=\"anchor\">\n </a>\n Motivation to learn algorithms\n</h2>\n\n\n<div class=\"ltag__link\">\n <a href=\"https://medium.com/leetcode-simplified/solve-leetcode-problems-and-get-offers-from-your-dream-companies-2786415be0b7\" class=\"ltag__link__link\">\n <div class=\"ltag__link__pic\">\n <img src=\"https://res.cloudinary.com/Optional/image/fetch/s--6IxRzTfm--/c_limit%2Cf_auto%2Cfl_progressive%2Cq_auto%2Cw_880/https://miro.medium.com/fit/c/96/96/1%2AhNjwft_dNBxvTr6g6TOVGg.jpeg\" alt=\"Nil Madhab\" loading=\"lazy\">\n </div>\n </a>\n <a href=\"https://medium.com/leetcode-simplified/solve-leetcode-problems-and-get-offers-from-your-dream-companies-2786415be0b7\" class=\"ltag__link__link\">\n <div class=\"ltag__link__content\">\n <h2>Solve Leetcode Problems and Get Offers From Your Dream Companies | by Nil Madhab | LeetCode Simplified | Jan, 2021 | Medium</h2>\n <h3>Nil Madhab ・ <time datetime=\"2021-01-25T13:36:09.910Z\">Jan 25, 2021</time> ・ 3 min read\n <div class=\"ltag__link__servicename\">\n <img src=\"/assets/medium_icon.svg\" alt=\"Medium Logo\" aria-label=\"Medium Logo\" loading=\"lazy\">\n Medium\n </div>\n </h3>\n</div>\n </a>\n</div>\n\n\n<h2>\n <a name=\"problem-statement\" href=\"#problem-statement\" class=\"anchor\">\n </a>\n Problem Statement:\n</h2>\n\n<p>Given n pairs of parentheses, write a function to generate all combinations of well-formed parentheses.</p>\n\n<p><strong>Example 1:</strong></p>\n\n<p><code>Input: n = 3<br>\nOutput: [\"((()))\",\"(()())\",\"(())()\",\"()(())\",\"()()()\"]</code></p>\n\n<p><strong>Example 2:</strong></p>\n\n<p><code>Input: n = 1<br>\nOutput: [\"()\"]</code></p>\n\n<p><strong>Constraints:</strong></p>\n\n<ul>\n<li>1 <= n <= 8</li>\n</ul>\n<h2>\n <a name=\"youtube-discussion\" href=\"#youtube-discussion\" class=\"anchor\">\n </a>\n Youtube Discussion\n</h2>\n\n<p><iframe width=\"710\" height=\"399\" src=\"https://www.youtube.com/embed/zbUaPatPpvU\" allowfullscreen loading=\"lazy\">\n</iframe>\n</p>\n\n<h2>\n <a name=\"solution\" href=\"#solution\" class=\"anchor\">\n </a>\n Solution\n</h2>\n\n<p>This is a backtracking problem. We have to generate all valid combinations of parentheses. First, we must identify what are the characteristics of a valid string. Their length should be 2*n, where n is the given number. Also, the order of the parenthesis is also important. We can only put opening parenthesis first and the no of opening and closing parenthesis should be same. Therefore we need to keep track of opening and closing parenthesis too.</p>\n\n<p>Therefore at first, we called the solve method with left and right value as 0 and empty string. We add an opening string to the string and call this method again with modified parameters. If it is not possible to add an opening parenthesis, we add one closing parenthesis and backtrack again. When we find the length of the string as 2*n we add that string to our global list. This can be understood with the dry run given in the code.</p>\n\n<p>The following is the Java code for this problem.</p>\n\n\n<div class=\"ltag_gist-liquid-tag\">\n <script id=\"gist-ltag\" src=\"https://gist.github.com/sksaikia/b1e230841ba5bca299aab2803339354f.js\"></script>\n</div>\n\n\n<p>The C++ code is given below.</p>\n\n\n<div class=\"ltag_gist-liquid-tag\">\n <script id=\"gist-ltag\" src=\"https://gist.github.com/sksaikia/21a731a0dbebb14abc834a840c4af7a4.js\"></script>\n</div>\n<br>\nThe code can be found in this repository.\n\n\n<div class=\"ltag-github-readme-tag\">\n <div class=\"readme-overview\">\n <h2>\n <img src=\"/assets/github-logo.svg\" alt=\"GitHub logo\" loading=\"lazy\">\n <a href=\"https://github.com/webtutsplus\">\n webtutsplus\n </a> / <a style=\"font-weight: 600;\" href=\"https://github.com/webtutsplus/LeetCode\">\n LeetCode\n </a>\n </h2>\n <h3>\n \n </h3>\n </div>\n</div>\n\n\n<p><strong>Sign up for Leetcode Simplified</strong><br>\nBy LeetCode Simplified</p>\n\n<p>Get latest leetcode solution with youtube breakdown <a href=\"https://medium.com/leetcode-simplified/newsletters/leetcode-simplified?source=newsletter_v3_promo--------------------------newsletter_v3_promo-----------\">Take a look</a><br>\nYou're an editor of Leetcode Simplified</p>\n\n", | |
"tag_list": [ | |
"algorithms", | |
"coding" | |
] | |
}, | |
{ | |
"id": 2, | |
"title": "Solve Leetcode Problems | Remove All Adjacent Duplicates in String II", | |
"slug": "solve-leetcode-problems-remove-all-adjacent-duplicates-in-string-ii-3j96", | |
"description": "Problem 1209. Remove All Adjacent Duplicates in String II. In this series, I am going to solve Leetc...", | |
"processed_html": "<p>Problem 1209. <strong>Remove All Adjacent Duplicates in String II.</strong></p>\n\n<p>In this series, I am going to solve Leetcode medium problems live with my friend, which you can see on our youtube channel, Today we will do Problem 1209. <strong>Remove All Adjacent Duplicates in String II.</strong></p>\n\n<p>A little bit about me, I have offers from <strong>Uber India</strong> and <strong>Amazon India</strong> in the past, and I am currently working for <strong>Booking.com</strong> in Amsterdam.</p>\n\n<p><a href=\"https://res.cloudinary.com/Optional/image/fetch/s--DIMl_j8U--/c_limit%2Cf_auto%2Cfl_progressive%2Cq_auto%2Cw_880/https://dev-to-uploads.s3.amazonaws.com/i/s5bkah60kdlzj704s68t.jpg\" class=\"article-body-image-wrapper\"><img src=\"https://res.cloudinary.com/Optional/image/fetch/s--DIMl_j8U--/c_limit%2Cf_auto%2Cfl_progressive%2Cq_auto%2Cw_880/https://dev-to-uploads.s3.amazonaws.com/i/s5bkah60kdlzj704s68t.jpg\" alt=\"Alt Text\" loading=\"lazy\"></a></p>\n\n<h2>\n <a name=\"youtube-discussion\" href=\"#youtube-discussion\" class=\"anchor\">\n </a>\n Youtube Discussion\n</h2>\n\n<p>Please comment here or on youtube, if you have any doubts<br>\n<iframe width=\"710\" height=\"399\" src=\"https://www.youtube.com/embed/XZZL_nJ21VU\" allowfullscreen loading=\"lazy\">\n</iframe>\n</p>\n\n<h2>\n <a name=\"motivation-to-learn-algorithms\" href=\"#motivation-to-learn-algorithms\" class=\"anchor\">\n </a>\n Motivation to Learn Algorithms\n</h2>\n\n<p>I have worked in India as a software developer for 4 years. I started learning algorithms and data structure from my 3rd year in college as I was from an Electronics background. Here is my salary progression over the years, (all in INR, Lakh per year)</p>\n\n<p>2016: placement in <strong>Flipkart</strong> from college, IIT KGP(18 lakh base + 2 lakh bonus = <strong>20</strong> lakh). But the offer was delayed by 6 months, as Flipkart was going through some trouble, so I joined Samsung.</p>\n\n<p>2016: <strong>Samsung Noida</strong>(off campus ) (14 lakh base + 5 lakh joining bonus = <strong>19</strong> lakh). They pay to IITians 19 lakh but other colleges 9-14 lakh for the same work, which is bogus.</p>\n\n<p>2017: <strong>Oyorooms</strong> (<strong>17</strong> lakh fixed, no bonus, no stocks). I took a pay cut as I was not learning anything in Samsung, so joined Oyo.</p>\n\n<p>2019: <strong>Sharechat</strong> (26 lakh fixed + 2.6lakh bonus + stock options) I joined Sharechat in Bangalore, as SDE1 , I also got offers from <strong>Grab</strong> (21 lakh fixed + 3 lakh bonus =<strong>24 lakh</strong>) and <strong>Rivigo</strong> (27 lakh fixed+3 lakh bonus = <strong>30 lakh</strong>).</p>\n\n<p>2020: Offer from Amazon ( 26.5 lakh base + 18.5 lakh joining bonus= <strong>43 lakh</strong>) in SDE2 role. They offer stocks but it is vested only 5 percent in the first year, so I ignored it.</p>\n\n<p>Offer from <strong>Uber</strong> (33 lakh base + 15 lakh stock options per year (96000 USD over 4 years)+ 5 lakh joining bonus = <strong>55</strong> lakh per year) in SDE2 role. <strong>I think that is the top salary, you can get 3.5–4 years experience in India, but I might be wrong.</strong><br>\n</p>\n<div class=\"ltag_gist-liquid-tag\">\n <script id=\"gist-ltag\" src=\"https://gist.github.com/sksaikia/b3e44a32bab220f3773ca25ba9b9adf2.js\"></script>\n</div>\n<br>\nI rejected both offers and ended up joining <strong>Booking.com</strong> as I wanted to explore Europe. I can’t disclose my current salary.\n\n<p><code>A lot of startups and established companies in India pay over 35 lakh per year for the top talent in programming, for just over 4 years of experience, like Dunzo, Dream11, Rubric, etc, check</code></p>\n\n<p><a href=\"https://leetcode.com/discuss/compensation\">Compensation</a></p>\n\n<p>Even if you are not from a good college, you can still land awesome jobs, for let’s take this example</p>\n\n<p><code><br>\nEducation: B.Tech in CS from Tier 3 college<br>\nYears of Experience: 2<br>\nPrior Experience: Java Developer at Startup<br>\ncurrent CTC: INR 3.2 LPA+1 LPA(Bonus)<br>\nDate of the Offer:Dec 2020<br>\nCompany: Swiggy<br>\nTitle/Level:SDE -1<br>\nLocation: Bangalore<br>\nSalary: INR 17.6 LPA<br>\nRelocation/Signing Bonus: -<br>\nStock bonus: 7 LPA vested over 4 years<br>\nBonus: -<br>\nTotal comp (Salary + Bonus + Stock): 17.6 + 0 + 1.75 =INR 19.35 LPA<br>\nBenefits: -<br>\nOther details: Not even a single word from me after this digits are spoken by the recruiter.<br>\n</code><br>\n<strong>Has a 6 months career gap even at the time of offer</strong></p>\n\n<p>I got so many offers because I practiced a lot of data structure and algorithms. I solved over 410 questions in Leetcode.</p>\n\n<p><a href=\"https://leetcode.com/nilmadhab/\">Nil Madhab-Leetcode Profile</a></p>\n<h2>\n <a name=\"problem-statement\" href=\"#problem-statement\" class=\"anchor\">\n </a>\n Problem statement:\n</h2>\n\n<p>Given a string s, a k duplicate removal consists of choosing k adjacent and equal letters from s and removing them causing the left and the right side of the deleted substring to concatenate together.</p>\n\n<p>We repeatedly make k duplicate removals on s until we no longer can.</p>\n\n<p>Return the final string after all such duplicate removals have been made.</p>\n\n<p>It is guaranteed that the answer is unique.</p>\n\n<p><strong>Example 1:</strong></p>\n\n<p><code>Input: s = \"abcd\", k = 2<br>\nOutput: \"abcd\"<br>\nExplanation: There's nothing to delete.</code></p>\n\n<p><strong>Example 2:</strong></p>\n\n<p><code>Input: s = \"deeedbbcccbdaa\", k = 3<br>\nOutput: \"aa\"<br>\nExplanation:<br>\nFirst delete \"eee\" and \"ccc\", get \"ddbbbdaa\"<br>\nThen delete \"bbb\", get \"dddaa\"<br>\nFinally delete \"ddd\", get \"aa\"</code></p>\n\n<p><strong>Example 3:</strong></p>\n\n<p><code>Input: s = \"pbbcggttciiippooaais\", k = 2<br>\nOutput: \"ps\"</code></p>\n<h2>\n <a name=\"solution\" href=\"#solution\" class=\"anchor\">\n </a>\n Solution\n</h2>\n\n<p>This problem can be solved by using a stack. If we count the occurrence of each character and store it in a stack and as soon as the occurrence of that character becomes equal to k, we remove it from the stack. As we have stored the characters and their occurrence in a stack, we can pop it from the stack and reverse the generated string from the stack. (Reversal is necessary, just to a dry run of example 4).</p>\n\n<p>The java code along with a dry run of example 3 for this problem is given below.<br>\n</p>\n<div class=\"ltag_gist-liquid-tag\">\n <script id=\"gist-ltag\" src=\"https://gist.github.com/sksaikia/9b5a74ae09769ce5cd42b4473cc4e6bd.js\"></script>\n</div>\n\n\n<p>The python code is given below.</p>\n\n\n<div class=\"ltag_gist-liquid-tag\">\n <script id=\"gist-ltag\" src=\"https://gist.github.com/sksaikia/cb80d916ccea8415855da834772ca016.js\"></script>\n</div>\n\n\n<p>Time Complexity: O(n), n is the length of the string</p>\n\n<p>Space Complexity: O(n), n is the length of the string</p>\n\n<p>The solution code can be found in this repository.</p>\n\n\n<div class=\"ltag-github-readme-tag\">\n <div class=\"readme-overview\">\n <h2>\n <img src=\"/assets/github-logo.svg\" alt=\"GitHub logo\" loading=\"lazy\">\n <a href=\"https://github.com/webtutsplus\">\n webtutsplus\n </a> / <a style=\"font-weight: 600;\" href=\"https://github.com/webtutsplus/LeetCode\">\n LeetCode\n </a>\n </h2>\n <h3>\n \n </h3>\n </div>\n</div>\n\n\n", | |
"tag_list": [ | |
"algorithms", | |
"programming", | |
"career", | |
"computerscience" | |
] | |
} | |
] |
Enabling CORS
As we mentioned earlier, we would use Forem as our backend and create a frontend in vuejs which would be hosted separately from the backend.
When this frontend will make requests to the Forem backend, these requests would be cross-origin requests as the frontend and the backend are separately hosted. Hence, to make the web browsers allow these cross-origin requests from our frontend, we will have to enable CORS from our backend.
To do this, we just need to add the following code in /config/initializers/cors.rb where the directory config is located in the root folder of Forem’s Github repo.
debug_cors = ENV["DEBUG_CORS"].present? ? true : false | |
Rails.application.config.middleware.insert_before 0, Rack::Cors, debug: debug_cors, logger: (-> { Rails.logger }) do | |
allow do | |
# allow all origins | |
origins "*" | |
# allowed public APIs | |
resource "/all", headers: :any, methods: [:get] | |
%w[articles comments listings podcast_episodes tags users videos].each do |resource_name| | |
# allow read operations, disallow custom headers (eg. api-key) and enable preflight caching | |
# NOTE: Chrome caps preflight caching at 2 hours, Firefox at 24 hours | |
# see https://developer.mozilla.org/en-US/docs/Web/HTTP/Headers/Access-Control-Max-Age#Directives | |
resource "/api/#{resource_name}/*", methods: %i[head get options], headers: [], max_age: 2.hours.to_i | |
end | |
end |
API for fetching all the articles of a tag
Now, I wanted to create an API for fetching all the articles that are associated with a single tag. This is very simple. I just had to create a route and a new method inside the simplecodingarticlescontroller class.
Modify the route.rb file as shown below
... | |
get "/tags", to: "simplecoding_articles#tags" | |
# Add this route | |
get "/tags/:tag", to: "simplecoding_articles#get_by_tag" | |
get "/confirm-email", to: "devise/confirmations#new" | |
... |
Create a new method in simplecoding_articles_controller.rb
def get_by_tag | |
@tag_articles = Article.where("cached_tag_list LIKE :tag", | |
{:tag => "%#{params[:tag]}%"}).as_json(only: [:id, :title, :slug, :description, :processed_html, :tag_list]) | |
msg = { :status => "ok", :message => "Success!", :html => "<b>...</b>" } | |
render :json => @tag_articles | |
end |
Make sure to allow CORS on this route by modifying the /config/initializers/cors.rb file as shown in the Enabling CORS section
The JSON response of this api is same as shown for /all API
API for fetching a particular article
The API which we created earlier, sends the list of all the articles. Suppose, we need only a particular article. In that case, we will have to get all the articles from the API and then search for that particular article. This is inefficient. Let’s create an API that would return only a specific article.
Let’s create a new route /articles/:id in routes.rb as shown below.
get "/articles/:id", to: "simplecoding_articles#get_article_by_id" |
Let us also create a new method inside the simplecoding_articles_controller.rb
def get_article_by_id | |
@articles = Article.find(params[:id]).as_json(only: [:id, :title, :slug, :description, :processed_html, :tag_list]) | |
msg = { :status => "ok", :message => "Success!", :html => "<b>...</b>" } | |
render :json => @articles | |
end |
The JSON response of this API looks like the following
{ | |
"id": 61, | |
"description": "Introduction We have created a simple authentication system in Java and Springboot, whic...", | |
"main_image": "/i/89ztmarxt39jwl2mmk1l.jpg", | |
"processed_html": "<p><a href=\"/i/zak9sbkb7h3hnwjixe5o.jpg\" class=\"article-body-image-wrapper\"><img src=\"/i/zak9sbkb7h3hnwjixe5o.jpg\" alt=\"Alt Text\" loading=\"lazy\"></a></p>\n\n<h2>\n <a name=\"introduction\" href=\"#introduction\" class=\"anchor\">\n </a>\n Introduction\n</h2>\n\n<p>We have created a simple authentication system in Java and Springboot, which you can see here.<br>\n</p>\n<div class=\"ltag__link\">\n <a href=\"https://medium.com/webtutsplus/a-simple-user-authentication-api-made-with-spring-boot-4a7135ff1eca\" class=\"ltag__link__link\">\n <div class=\"ltag__link__pic\">\n <img src=\"https://res.cloudinary.com/dgjb1x9mh/image/fetch/s--tLzMBohE--/c_limit%2Cf_auto%2Cfl_progressive%2Cq_auto%2Cw_880/https://miro.medium.com/fit/c/96/96/1%2AhNjwft_dNBxvTr6g6TOVGg.jpeg\" alt=\"Nil Madhab\" loading=\"lazy\">\n </div>\n </a>\n <a href=\"https://medium.com/webtutsplus/a-simple-user-authentication-api-made-with-spring-boot-4a7135ff1eca\" class=\"ltag__link__link\">\n <div class=\"ltag__link__content\">\n <h2>Login and Signup with Java and Spring Boot | Javarevisited</h2>\n <h3>Nil Madhab ・ <time datetime=\"2021-01-08T11:11:23.526Z\">Jan 8, 2021</time> ・ 14 min read\n <div class=\"ltag__link__servicename\">\n <img src=\"/assets/medium_icon.svg\" alt=\"Medium Logo\" aria-label=\"Medium Logo\" loading=\"lazy\">\n Medium\n </div>\n </h3>\n</div>\n </a>\n</div>\n\n\n<p>This time we are going to take that simple Spring Boot API that we created in the previous tutorial and run it on the cloud. To be able to do this we will need to go to get ourselves a VPS, or a Virtual Private Server. A VPS is a virtual operating system that is run on a company’s data center. So we aren’t renting someone’s entire computer, we are renting a part of their computer, in our case we are only renting one of their CPU cores (most modern laptops have 4 cores, some have even more), 1 GB of their RAM, and 25 GB of their storage. So let's get this started shall we?</p>\n\n<p><iframe width=\"710\" height=\"399\" src=\"https://www.youtube.com/embed/1b0RKk2Ag30\" allowfullscreen loading=\"lazy\">\n</iframe>\n</p>\n\n<p><iframe width=\"710\" height=\"399\" src=\"https://www.youtube.com/embed/gT9pRMBcdm0\" allowfullscreen loading=\"lazy\">\n</iframe>\n</p>\n\n<h2>\n <a name=\"requirements\" href=\"#requirements\" class=\"anchor\">\n </a>\n Requirements\n</h2>\n\n<ul>\n<li>A terminal. This isn’t necessarily a requirement as you can access a terminal from the Digital Ocean website, but from my testing I found their terminal to be a bit slow, so I prefer just going with the terminal that came with my operating system.</li>\n<li>An account with Digital Ocean (or with any other VPS provider).</li>\n</ul>\n\n<h2>\n <a name=\"setting-up-the-vps\" href=\"#setting-up-the-vps\" class=\"anchor\">\n </a>\n Setting up the VPS\n</h2>\n\n<p>To start off with, head on over to <a href=\"http://digitalocean.com/\">Digital Ocean</a> and click on either “Sign In” or “Sign Up” (or the VPS provider of your choice).<br>\n<a href=\"/i/qevh3mfuvr2nx1cmc54f.png\" class=\"article-body-image-wrapper\"><img src=\"/i/qevh3mfuvr2nx1cmc54f.png\" alt=\"Alt Text\" loading=\"lazy\"></a><br>\nOnce you have an account you can go to your dashboard. Click on “Create” and then “Droplets”.</p>\n\n<p><a href=\"/i/eydua82aw2fhta3wry6h.png\" class=\"article-body-image-wrapper\"><img src=\"/i/eydua82aw2fhta3wry6h.png\" alt=\"Alt Text\" loading=\"lazy\"></a></p>\n\n<p>For our droplet, we are going to choose Ubuntu 20.04 (LTS) as our image of choice. For the uninitiated, this is a very easy-to-use distribution of Linux based on Debian, it’s also the one I use on a personal basis.</p>\n\n<p>We are just going to choose the basic plan of $5/mo since there is no reason to get anything more expensive. We are not going to add any block storage. Feel free to choose any region you want, personally, I am just going to choose Frankfurt. We are not going to get any additional options.</p>\n\n<p>Our authentication option will be via password, so enter a root password of your choice. When you reach the “Choose a hostname” point you should give it a name of your choice since this will be how you recognize your droplet, and I don’t know about you but if I had a list of droplets all with a name similar to “ubuntu-s-1vcpu-1gb-fra1–01” I would never be able to tell them apart, so I am just gonna change the hostname of mine to something more recognizable, “Spring-Boot-Cloud”. I am also not going to enable backups since I am doubtful that this droplet will last very long. Click on “Create Droplet”.</p>\n\n<p><a href=\"/i/u64rjbodlmirtozda9da.png\" class=\"article-body-image-wrapper\"><img src=\"/i/u64rjbodlmirtozda9da.png\" alt=\"Alt Text\" loading=\"lazy\"></a></p>\n\n<p>Your droplet will get booted up as a normal computer would. Once it has finished you will be able to interface with it through the website or through your terminal.</p>\n\n<p><a href=\"/i/cg7okvf04ge3o0wkjk1p.png\" class=\"article-body-image-wrapper\"><img src=\"/i/cg7okvf04ge3o0wkjk1p.png\" alt=\"Alt Text\" loading=\"lazy\"></a></p>\n\n<p>When you open the console for the first time it will ask for your “Login”, you just type “root”. Next, it will ask for your password, this is the password you had to enter when you initially created your droplet. After that you will see something like this:</p>\n\n<p><a href=\"/i/ua28g6elaxqua53y6yjt.png\" class=\"article-body-image-wrapper\"><img src=\"/i/ua28g6elaxqua53y6yjt.png\" alt=\"Alt Text\" loading=\"lazy\"></a></p>\n\n<h2>\n <a name=\"using-your-terminal\" href=\"#using-your-terminal\" class=\"anchor\">\n </a>\n Using your terminal\n</h2>\n\n<p>If you are like me and prefer to use your computer’s terminal then you can follow this part, otherwise, feel free to skip over this part. Start off by opening your terminal and type this command (replace YOUR_IP with the IP address of your droplet):</p>\n\n<p><code>ssh root@YOUR_IP</code></p>\n\n<p>It should give you a message like: “The authenticity of host ‘YOUR_IP (YOUR_IP)’ can’t be established. ECDSA key fingerprint is SHA256:STRING_OF_CHARACTERS. Are you sure you want to continue connecting (yes/no/[fingerprint])?”? Just type “yes”. It will add it to the list of known hosts and then close the connection, just retype</p>\n\n<p><code>ssh root@YOUR_IP</code></p>\n\n<p>or just press the up arrow. It will ask you for the password, this is the password you created when you set up your droplet. You should see something like this:</p>\n\n<p><a href=\"/i/qzlupv5h4gekmavq0ng3.png\" class=\"article-body-image-wrapper\"><img src=\"/i/qzlupv5h4gekmavq0ng3.png\" alt=\"Alt Text\" loading=\"lazy\"></a></p>\n\n<h2>\n <a name=\"updating-upgrading-and-installing\" href=\"#updating-upgrading-and-installing\" class=\"anchor\">\n </a>\n Updating, upgrading, and installing\n</h2>\n\n<p>Now that we have our server up and running we have to do some housekeeping to make sure that it is ready to run our application for us. Run this command to update our files, upgraded our files, and remove any unwanted files:</p>\n\n<p><code>apt-get update && apt-get upgrade && apt-get autoremove</code></p>\n\n<p>If at any time a message like “Do you want to continue? [Y/n]” pops up, you can just press “y” and then “Enter”.</p>\n\n<h2>\n <a name=\"installing-required-packages\" href=\"#installing-required-packages\" class=\"anchor\">\n </a>\n Installing required packages\n</h2>\n\n<p>Now that our operating system has been updated we need to install the necessary packages, you can do that using this command:</p>\n\n<p><code>apt-get install openjdk-8-jdk openjdk-8-jre mysql-server maven</code></p>\n\n<p>This will install Java 8 JDK and runtime environment, <a href=\"https://medium.com/javarevisited/top-10-free-courses-to-learn-php-and-mysql-for-web-development-e96e69982675?source=---------34------------------\">MySQL</a>, and <a href=\"https://medium.com/javarevisited/6-best-maven-courses-for-beginners-in-2020-23ea3cba89\">Maven</a>. Maven will be used to build our project’s JAR file.</p>\n\n<h2>\n <a name=\"setting-up-mysql\" href=\"#setting-up-mysql\" class=\"anchor\">\n </a>\n Setting up MySQL\n</h2>\n\n<p>Next, we need to set up our <a href=\"https://medium.com/javarevisited/top-5-courses-to-learn-mysql-in-2020-4ffada70656f\">MySQL database</a>, start off by entering this command:</p>\n\n<p><code>mysql_secure_installation</code></p>\n\n<p>This will take you through setting everything up. If you hesitate about something just say no, which in this case just means press enter. When it asks for your password, enter a password that you will remember since you will need it later. When it asks if you want to reload the privilege tables now, say yes. Next, let us create the users' database. Start off by typing this into the terminal:</p>\n\n<p><code>mysql</code></p>\n\n<p>This will take you to the MySQL monitor where we can now create our new database with this command:</p>\n\n<p><code>CREATE DATABASE users;</code></p>\n\n<p>When testing this out I had an issue where my Spring Boot application had issues with being able to access the database. I found this command which seemed to work:</p>\n\n<p><code>ALTER USER 'root'@'localhost' IDENTIFIED WITH mysql_native_password BY 'YOUR_PASSWORD';<br>\nFLUSH PRIVILEGES;</code></p>\n\n<p>Ones that’s done, you can exit MySQL monitor with the command:</p>\n\n<p><code>exit</code></p>\n\n<h2>\n <a name=\"setting-up-javahome\" href=\"#setting-up-javahome\" class=\"anchor\">\n </a>\n Setting up JAVA_HOME\n</h2>\n\n<p>Finally, we need to set the JAVA_HOME variable so that Maven will know where the JDK is. We can use nano to edit our environment:</p>\n\n<p><code>nano /etc/environment</code></p>\n\n<p>Underneath the PATH variable add this line:</p>\n\n<p><code>JAVA_HOME=\"/usr/lib/jvm/java-1.8.0-openjdk-amd64\"</code></p>\n\n<p>When you are done you can press Ctrl+X, it will ask you if you want to save, type “y”, and then press Enter.</p>\n\n<p><a href=\"/i/y7p6gut39spviq3tr1zc.png\" class=\"article-body-image-wrapper\"><img src=\"/i/y7p6gut39spviq3tr1zc.png\" alt=\"Alt Text\" loading=\"lazy\"></a></p>\n\n<p>To force the OS to recognize the new variable we have to run this command:</p>\n\n<p><code>source /etc/environment</code></p>\n\n<p>To make sure it worked you can run:</p>\n\n<p><code>echo $JAVA_HOME</code></p>\n\n<p>This should return the path to where the JDK is installed.</p>\n\n<h2>\n <a name=\"compiling-our-program\" href=\"#compiling-our-program\" class=\"anchor\">\n </a>\n Compiling our program\n</h2>\n\n<p>All that is left for us to do is to compile our Spring Boot application into a JAR file. Let's start by downloading the source files from bitbucket:</p>\n\n<p><code>git clone https://PsionicAlch@bitbucket.org/java-spring-1994/api-tutorial.git</code></p>\n\n<p>This will clone the project into our home file. Now we need to change some application variables so that our application will know how to access our database. Enter this command:</p>\n\n<p><code>nano api-tutorial/src/main/resources/application.properties</code></p>\n\n<p>This will open our application.properties file in nano. Change “USERNAME” to root, and “PASSWORD” to the password you used to set up MySQL. Remember to save your file as you did before. Now for the part that makes me a bit nervous since it caused me so much grief when I did the preparation for this tutorial. To compile the application run this command:</p>\n\n<p><code>cd api-tutorial/ && mvn clean install</code></p>\n\n<p>If you receive a “BUILD SUCCESS” message it means that your project successfully compiled and that you now have a JAR file that you can run. For this part, I am going to switch back to the terminal on the Digital Ocean website because it will allow me to run the program in the background even after I closed my terminal.</p>\n\n<h2>\n <a name=\"running-your-application\" href=\"#running-your-application\" class=\"anchor\">\n </a>\n Running your application\n</h2>\n\n<p>To run your newly created JAR file you will have to change directories with this command:</p>\n\n<p><code>cd api-tutorial/target</code></p>\n\n<p>Now to run the JAR file you can use this command:</p>\n\n<p><code>java -jar tutorial-0.0.1-SNAPSHOT.jar</code></p>\n\n<p>You should now have a running <a href=\"https://medium.com/javarevisited/10-advanced-spring-boot-courses-for-experienced-java-developers-5e57606816bd?source=collection_home---4------0-----------------------\">Spring Boot application</a> that can be accessed from the internet. Let’s test it out!</p>\n\n<h2>\n <a name=\"testing-our-application\" href=\"#testing-our-application\" class=\"anchor\">\n </a>\n Testing our application\n</h2>\n\n<p>To create a new user you can run this command (replace YOUR_IP with your server’s IP address):</p>\n\n<p><code>curl -H \"Content-Type: application/json\" -X POST -d '{<br>\n \"username\": \"test\",<br>\n \"password\": \"test\"<br>\n}' http://46.101.208.101:8080/users/register</code></p>\n\n<p><a href=\"/i/l99ssmln8zj75i0i8q51.png\" class=\"article-body-image-wrapper\"><img src=\"/i/l99ssmln8zj75i0i8q51.png\" alt=\"Alt Text\" loading=\"lazy\"></a></p>\n\n<p>You should be able to run all the commands we went through in the <a href=\"https://medium.com/webtutsplus/a-simple-user-authentication-api-made-with-spring-boot-4a7135ff1eca\">previous tutorial.</a></p>\n\n<p><strong>Thank you for reading this.</strong></p>\n\n<p><strong>Have a lovely day!</strong><br>\n`</p>\n\n", | |
"slug": "let-s-deploy-spring-boot-app-to-the-cloud-56j2", | |
"title": "Let’s Deploy Spring Boot App to the Cloud", | |
"tag_list": [ | |
"cloudservices", | |
"springboot", | |
"devops", | |
"deployment" | |
] | |
} |
Remember to enable CORS for this route as well
API for fetching Articles via Slugs
Currently, we have an API to fetch a single article using the id of the article. Let’s add another API that would enable us to fetch a single article using its slug.
Create a new route in routes.rb
get "/articles/slugs/:slug", to: "simplecoding_articles#get_article_by_slug" |
Create a new method in simplecoding_articles_controller.rb
def get_article_by_slug | |
@articles = Article.find_by_slug(params[:slug]).as_json(only: [:id, :title, :slug, :description, :processed_html, :main_image, :tag_list]) | |
msg = { :status => "ok", :message => "Success!", :html => "<b>...</b>" } | |
render :json => @articles | |
end |
The response of this API is similar to that of the previous API.
Also, remember to enable CORS for this API as well.
GoodBye!
In the next tutorials, we will use these APIs for the front-end and also make API to fetch articles that belong to one tag.
Complete backend code can be found here
webtutsplus
/
simple-coding-rails
copy of forem
Forem 🌱
For Empowering Community
Welcome to the Forem codebase, the platform that powers dev.to. We are so excited to have you. With your help, we can build out Forem’s usability, scalability, and stability to better serve our communities.
What is Forem?
Forem is open source software for building communities. Communities for your peers, customers, fanbases, families, friends, and any other time and space where people need to come together to be part of a collective See our announcement post for a high-level overview of what Forem is.
dev.to (or just DEV) is hosted by Forem. It is a community of software developers who write articles, take part in discussions, and build their professional profiles. We value supportive and constructive dialogue in the pursuit of great code and career growth for all members. The ecosystem spans from beginner to advanced developers, and all are welcome to find their place…
Top comments (0)