
What is Google Apps Script? (In reference to Google Sheets)
Apps Script includes special APIs to let you programmatically create, read, and edit Google Sheets. Apps Script can interact with Google Sheets in two broad ways: any script can create or modify a spreadsheet if the script's user has appropriate permissions for the spreadsheet, and a script can also be bound to a spreadsheet, which gives the script special abilities to alter the user interface or respond when the spreadsheet is opened.
Let's use this idea in creating a RSVP form that sends an email to you when someone RSVPs to your event.
To start, youll have to create your Google Sheet:
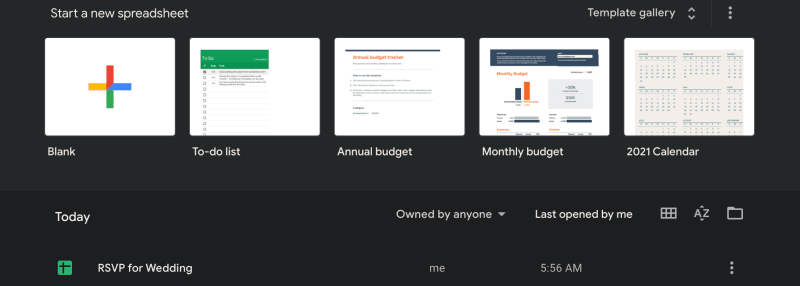
Name your spreadsheet something relevant to your project.
Youll create your column names that will be used in your form.
For example, for my RSVP form I will have a email, name, extras, and a invite code.
For your own sanity, I'd suggest adding a timestamp

Okay now that your spreadsheet is set up to your liking and you saved it, we will work in the script editor :)
To get to the script editor you'll navigate to Tools -> script editor. This is what you should see :)

Next is the fun part! ^_^ Getting it to work haha
Here is some example code to use within the script editor:
let To_Email = "PUTYOUREMAILHERE@yahoo.com"; // email to send the form data to

/**
 * This fn is the entry point.
 */
function postData(e) {

  try {
    Logger.log(e); // the Google Script version of console.log see: Class Logger

    let emailData = e.parameters; // just create a slightly nicer variable name for the data

    if (emailData.invite_code != "123456") { // validate invite code before saving data
      Logger.log("Incorrect Invite Code");
      return ContentService
          .createTextOutput(JSON.stringify({"result":"error", "message": "Sorry, your invite code (" + emailData.invite_code + ") is incorrect."}))
          .setMimeType(ContentService.MimeType.JSON);
    }

    record_data(e);

    MailApp.sendEmail({
      to: To_Email,
      subject: "A new guest RSVP'd for your wedding",
      replyTo: String(emailData.email), // This is optional and reliant on your form actually collecting a field named `email`
      htmlBody: formatMailBody(emailData)
    });

    return ContentService    // return json success results
          .createTextOutput(JSON.stringify({"result":"success","data": JSON.stringify(e.parameters) }))
          .setMimeType(ContentService.MimeType.JSON);
  } catch(error) { // if error return this
    Logger.log(error);
    return ContentService
          .createTextOutput(JSON.stringify({"result":"error", "message": "Sorry, there is an issue with the server."}))
          .setMimeType(ContentService.MimeType.JSON);
  }
}


/**
 * This fn inserts the data received from the html form submission
 * into the sheet. e is the data received from the POST
 */
function recordData(e) {
  Logger.log(JSON.stringify(e)); // log the POST data in case we need to debug it
  try {
    let doc     = SpreadsheetApp.getActiveSpreadsheet();
    let sheet   = doc.getSheetByName('responses'); // select the responses sheet
    let headers = sheet.getRange(1, 1, 1, sheet.getLastColumn()).getValues()[0];
    let nextRow = sheet.getLastRow()+1; // get next row
    let row     = [ new Date().toUTCString() ]; // first element in the row should always be a timestamp
    // loop through the header columns
    for (let i = 1; i < headers.length; i++) { // start at 1 to avoid Timestamp column
      if(headers[i].length > 0) {
        row.push(e.parameter[headers[i]]); // add data to row
      }
    }
    // more efficient to set values as [][] array than individually
    sheet.getRange(nextRow, 1, 1, row.length).setValues([row]);
  }
  catch(error) {
    Logger.log(error);
    Logger.log(e);
    throw error;
  }
  finally {
    return;
  }
}


/**
 * This method is just to prettify the email.
 */
function formatEmailBody(obj) { // function to spit out all the keys/values from the form in HTML
  let result = "";
  for (let key in obj) { // loop over the object passed to the function
    result += "<h4 style='text-transform: capitalize; margin-bottom: 0'>" + key + "</h4><div>" + obj[key] + "</div>";
    // for every key, concatenate an `<h4 />`/`<div />` pairing of the key name and its value,
    // and append it to the `result` string created at the start.
  }
  return result; // once the looping is done, `result` will be one long string to put in the email body
}
Obviously this can be modified to whatever your projects needs are.
GETTING YOUR SCRIPT UP AND RUNNING
Once youre satisfied with your script code, publish the changes by:
File -> manage version -> enter in what changed -> click save new version -> click ok to close
Click publish -> deploy as web app
Change your project version to the newest
-execute the app as [Me (youremailhere@yahoo.com)]
-make sure the who has access to your app is set to anyone, even anonymous
-COPY THE CURRENT WEB APP URL AS YOULL USE THAT IN YOUR FORM (will set it equal to action within your form)
Click update
BOOM you're up and running, ready to take on all the forms!
SETTING UP YOUR FORM
In this example, I'm following the column names I set up in my spreadsheet to dictate what fields I will need to collect via my form. I'm developing my form within an angular component. You will need to change up the form to follow your spreadsheet!
FORM CODE:
<form class="gform pure-form pure-form-stacked"
method="POST"
data-email="example@email.net"
action="https://script.google.com/macros/s/AKfycbx1AQpIsZzuNX3VWwLCucruNuLytoTbFpWMZ4ndpfxfRztHMn8/exec">
<!-- change the form action to your script editor published url -->
<h2 class="content-head is-center">The Kirk Wedding</h2>
<aside>
<p>
We would <em>love</em> to have you at our wedding! </p>
<p>Please use the <b><em>RSVP form</em></b>
to let us know you'll be there.
</p>
</aside>
<div class="input-container">
<div class="col-md-6 col-sm-6">
<div class="form-input-group">
<i class="fa fa-envelope"></i>
<label>Email: </label>
<input type="email" name="email" class="" placeholder="Your email" required>
</div>
<div class="col-md-6 col-sm-6">
<div class="form-input-group">
<i class="fa fa-user"></i>
<label>Full Name: </label>
<input name="name" class="" placeholder="Your name" required>
</div>
</div>
</div>
<div class="row">
<div class="col-md-6 col-sm-6">
<div class="form-input-group">
<i class="fa fa-users"></i>
<label>Husband/Wife or kids: </label>
<input type="number" name="extras" class="" min="0" max="4" placeholder="" required>
</div>
</div>
<div class="col-md-6 col-sm-6">
<div class="form-input-group">
<i class="fa fa-key"></i>
<label>Invite Code: </label>
<input type="number" name="invite_code" id="invite_code" class="" min="0" placeholder="Invite code" required>
</div>
</div>
<div class="form-input-group">
<button class="button-success pure-button button-xlarge">
<i class="fa fa-paper-plane"></i> Send</button>
</div>
</div>
</div>
</form>
NOW ideally you should be able to spin up your app once you have replaced everything with your spreadsheet specific needs. Remember you set up an invite_code in your script so make sure to use that invite_code within your form. Once all required fields are filled in, you should be able to successfully submit the form data. You will see the following:
{
"result": "success",
"data": "{\"extras\":[\"4\"], \"invite_code\":[\"271117\"],
\"email\":[\"nisa@nisa.com\"], \"name\":[\"Nisa\"]}"
}
You'll probably want to hide this with a Thank You page :)
Here is what you should get in your email once someone would RSVP to your event:

AND there you have it! :) I hope this will be informative. I had a lot of fun learning about Google Script while creating my wedding RSVP.

Latest comments (0)