
RedwoodJS is a full-stack serverless web application framework to help developers build their front-end and back-end with one single codebase. This framework provides the mechanism to build JAMstack applications very fast.
The front end is a React application, while the back end is a GraphQL server. RedwoodJS features an end-to-end development workflow that weaves together the best parts of React, GraphQL, Prisma, TypeScript, Jest, and Storybook.
In this tutorial, you'll learn how to build a Todo App with RedwoodJS.
Prerequisites
Before you start this tutorial, ensure you have;
Setting Up RedwoodJS
To setup a new Redwood.js project on your computer, you can follow any of these steps below
Creating a new Project using RedwoodJS CLI
You will run the command below to install a new project from your terminal.
yarn create redwood-app my-redwood-project
my-redwood-project will represent your project name on the above command, which you can also change to a preferred name.
Then change into that directory and start the development server:
cd my-redwood-project
yarn redwood dev
Creating a new RedwoodJS starter project
Another easy method to create a new RedwoodJS project is by cloning RedwoodJS Starter Project.
You can achieve that by visiting RedwoodJS Starter Repository.
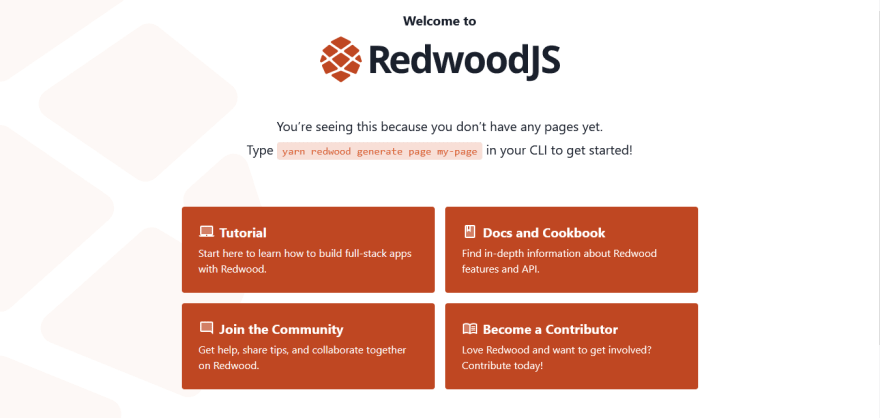
If you completed any of the above process successfully, your browser should automatically open to http://localhost:8910 where you'll see the Welcome Page, which links out to a ton of great resources:
Working with RedwoodJS
In this tutorial, you will learn how to build a Todo App with RedwoodJS, which you will cover some of the basic features of this framework.
Redwood File Structure
RedwoodJS file structure is classified into Backend and Frontend, which entirely makes up a full-stack development tool.
This is what the RedwoodJS file structure looks below;
├── api
│ ├── db
│ │ └── schema.prisma
│ ├── dist
│ ├── src
│ │ ├── directives
│ │ │ ├── requireAuth
│ │ │ └── skipAuth
│ │ ├── functions
│ │ │ └── graphql.js
│ │ ├── graphql
│ │ ├── lib
│ │ │ ├── auth.js
│ │ │ ├── db.js
│ │ │ └── logger.js
│ │ └── services
│ └── types
│
├── scripts
│ └── seed.js
│
└── web
 ├── public
 │ ├── favicon.png
 │ ├── README.md
 │ └── robots.txt
 └── src
 ├── components
 ├── layouts
 ├── pages
 │ ├── FatalErrorPage
 │ │ └── FatalErrorPage.js
 │ └── NotFoundPage
 │ └── NotFoundPage.js
 ├── App.js
 ├── index.css
 ├── index.html
 └── Routes.js
In the above file structure, RedwoodJS has three directories, API, scripts and web. Redwood separates the backend (API) and frontend (web) concerns into their own paths in it code-base.
Thescripts folder holds any Node.js scripts you may need to run from your command line that aren't directly related to the API or web sides.
The seed.jsis your database seeder file, it is used to populate your database with data that needs to exist for your app to run effectively.
Creating Pages
In this tutorial, you will create a page which will serve as your home page for this Todo App.
RedwoodJS has a command line tool which is used to generate web pages, which makes it unique from some other frameworks.
Use this command to generate your home page.
yarn redwood generate page home /
This command will create a new page folder named 'HomePage'. This is the path to your newly generated home page web/src/pages/HomePage/HomePage.js
If your page generated successfully, then you should have same screen as shown below on your browser.
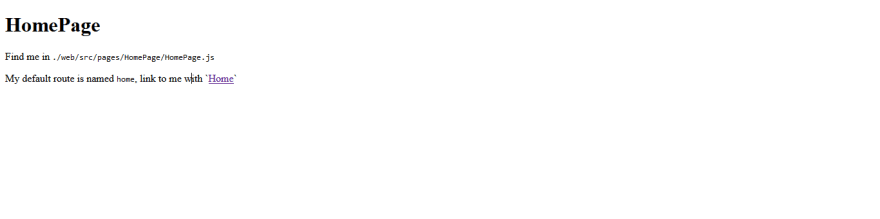
Now, you successfully created a home page for this project, you will revisit the HomePage.js later to write some script as you build along.
Creating the Database Schema
Before you continue with creating a database schema for this project, you will first decide the data you need for this project (i.e the fields).
You will create a table called todo which will take the following fields.
-
ida unique identifier for this todo app (it will be auto-incremented) -
bodya string data type, which will contain the actual content for each todo -
statusa string data type with a default value off, it will be used to know when a todo is marked or not. RedwoodJS uses Prisma to talk to the database. Prisma has another library called Migrate that lets you update the database's schema in a predictable way and snapshot each of those changes. Each change is called a migration and Migrate will create one when we make changes to our schema. Now, you can define the data structure for this project.Open api/db/schema.prisma, remove themodel UserExampleand add the Todo model below.
model Todo {
 id Int @id @default(autoincrement())
 body String
 status String @default("off")
}
Now you will need to snapshot the schema changes as a migration, run this command for that:
yarn rw prisma migrate dev
You'll be prompted to give this migration a name.
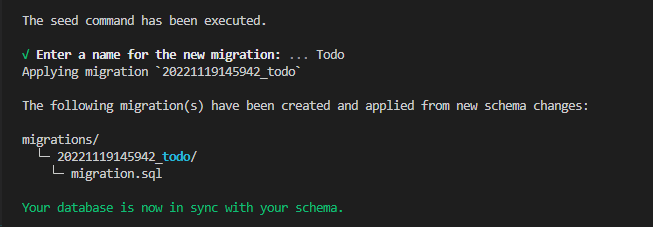
In the case of this project, use Todo.
Note, for other projects,use something that best describes what your database model does.
You can learn more about Redwood Database Schema.
Creating an SDL & Service
Now you'll create the GraphQL interface to access the Todo table. You can do that with this command:
yarn rw g sdl Todo
This will create a few new files under the api directory:
api/src/graphql/todos.sdl.js: defines the GraphQL schema in GraphQL's schema definition language
api/src/services/todos/todos.js: contains your app's business logic (also creates associated test files)
Now you will need to define a Mutation types for this Todo model.
Open up api/src/graphql/todos.sdl.js and define the Mutation as shown below.
type Mutation {
 createTodo(body: String!): Todo @skipAuth
 updateTodoStatus(id: Int!, status: String!): Todo @skipAuth
 renameTodo(id: Int!, body: String!): Todo @skipAuth
 }
You can a see a complete code for this file below:
export const schema = gql`
 type Todo {
 id: Int!
 body: String!
 status: String!
 }
type Query {
 todos: [Todo!]! @requireAuth
 }
input CreateTodoInput {
 body: String!
 status: String!
 }
input UpdateTodoInput {
 body: String
 status: String
 }
type Mutation {
 createTodo(body: String!): Todo @skipAuth
 updateTodoStatus(id: Int!, status: String!): Todo @skipAuth
 renameTodo(id: Int!, body: String!): Todo @skipAuth
 }
`
To complete the SDL and Service, you'll open api/src/services/todos/todos.js and write this block of code:
import { db } from 'src/lib/db'
export const todos = () => db.todo.findMany()
export const createTodo = ({ body }) => db.todo.create({ data: { body } })
export const updateTodoStatus = ({ id, status }) =>
 db.todo.update({
 data: { status },
 where: { id },
 })
export const renameTodo = ({ id, body }) =>
 db.todo.update({
 data: { body },
 where: { id },
 })
Creating Components
Components are independent and reusable bits of code that serve the same purpose as JavaScript functions, but work in isolation and return HTML.
In this project, you will create a few component, these components will ensure a proper flow of data within this app.
Creating a AddTodoForm Component
RedwoodJS has command line tool that generates a component.
Now, you will run this command below to create a component called AddTodoForm.
yarn rw g component AddTodoForm
After running the above command, you can locate your component in web/src/components/AddTodoForm.
Now, open your AddTodoForm.js and write this block of code inside.
This is the file path web/src/components/AddTodoForm/AddTodoForm.js.
import styled from 'styled-components'
import { useState } from 'react'
import Check from 'src/components/Check'
const AddTodoForm = ({ submitTodo }) => {
 const [todoText, setTodoText] = useState('')
const handleSubmit = (event) => {
 submitTodo(todoText)
 setTodoText('')
 event.preventDefault()
 }
const handleChange = (event) => {
 setTodoText(event.target.value)
 }
return (
 <SC.Form onSubmit={handleSubmit}>
 <Check type="plus" />
 <SC.Body>
 <SC.Input
 type="text"
 value={todoText}
 placeholder="What to do"
 onChange={handleChange}
 />
 <SC.Button type="submit" value="Add Todo" />
 </SC.Body>
 </SC.Form>
 )
}
const SC = {}
SC.Form = styled.form`
 display: flex;
 align-items: center;
`
SC.Body = styled.div`
 border-top: 1px solid #efefef;
 border-bottom: 1px solid #efefef;
 width: 100%;
`
SC.Input = styled.input`
 border: none;
 font-size: 18px;
 font-family: 'Inconsolata', monospace;
 padding: 10px 0;
 width: 75%;
::placeholder {
 color: #e1e1e1;
 }
`
SC.Button = styled.input`
 float: right;
 margin-top: 5px;
 border-radius: 6px;
 background-color: #8000ff;
 padding: 5px 15px;
 color: white;
 border: 0;
 font-size: 18px;
 font-family: 'Inconsolata', monospace;
:hover {
 background-color: black;
 cursor: pointer;
 }
`
export default AddTodoForm
styled was imported from RedwoodJS styled-components which you used for styling of Form, Body, Input and Button.
useState was imported from react library for state management within this project.
Check was imported from Check Component, which will created before this component.
const AddTodoForm function, is used to handle the submit event of this project, in which this component will be called on the next component for processing.
Creating a SaveTodo Component
This component handle data saving communication between your Form and Database.
Run this command to create the component:
yarn rw g component SaveTodo
If you have created this component successfully, locate the path web/src/components/SaveTodo/SaveTodo.js and write the below code.
import { useMutation } from '@redwoodjs/web'
import AddTodoForm from 'src/components/AddTodoForm'
import { QUERY as TODOS } from 'src/components/TodoListCell'
const CREATE_TODO = gql`
 mutation SaveTodo_CreateTodo($body: String!) {
 createTodo(body: $body) {
 id
 __typename
 body
 status
 }
 }
`
const SaveTodo = () => {
 const [createTodo] = useMutation(CREATE_TODO, {
 update: (cache, { data: { createTodo } }) => {
 const { todos } = cache.readQuery({ query: TODOS })
 cache.writeQuery({
 query: TODOS,
 data: { todos: todos.concat([createTodo]) },
 })
 },
 })
const submitTodo = (body) => {
 createTodo({
 variables: { body },
 optimisticResponse: {
 __typename: 'Mutation',
 createTodo: { __typename: 'Todo', id: 0, body, status: 'loading' },
 },
 })
 }
return <AddTodoForm submitTodo={submitTodo} />
}
export default SaveTodo
useMutation is a RedwoodJS hook, which allow you to execute the mutation when we're ready.
__typename is required here in order for optimistic responses to function properly.
const SaveTodo adds the data into the Todo database model and trigger a re-render of any affected components, so we don't need to do anything but update the cache.
The above code block summerizes saving data in RedwoodJS, you can learn more about Saving Data.
Modify HomePage
You hae successfully completed your SaveTodo component, which add every TODO into the database.
It's time for you to modify the HomePage and add the SaveTodo component inside.
Open web/src/pages/HomePage/HomePage.js path and write this code:
import styled from 'styled-components'
import { MetaTags } from '@redwoodjs/web'
import SaveTodo from 'src/components/SaveTodo'
const HomePage = () => {
 return (
 <>
 <MetaTags title="Todos" description="Your list of todo items" />
<SC.Wrapper>
 <SC.Title>Todo List</SC.Title>
 <SaveTodo />
 </SC.Wrapper>
 </>
 )
}
const SC = {}
SC.Wrapper = styled.div`
 width: 600px;
 margin: 0 auto;
`
SC.Title = styled.h1`
 font-size: 24px;
 font-weight: bold;
 margin-top: 100px;
`
export default HomePage
In the above block, you have imported SaveTodo for adding new Todos.
Now check your browser to see if you will get same result as the screenshot below.

Creating Check Component
This component will be used for improving users experience in this project.
You will create a new component called Check with the commands below.
yarn rw g component Check
If you complete the above command, locate the path web/src/components/Check/Check.js and write the below code.
import styled from 'styled-components'
import IconOn from './on.svg'
import IconOff from './off.svg'
import IconPlus from './plus.svg'
import IconLoading from './loading.svg'
const map = {
 on: <IconOn />,
 off: <IconOff />,
 plus: <IconPlus />,
 loading: <IconLoading />,
}
const Check = ({ type }) => {
 return <SC.Icon>{map[type]}</SC.Icon>
}
const SC = {}
SC.Icon = styled.div`
 margin-right: 15px;
`
export default Check
In the above code block, you imported some svg files which has not been created yet.
In your web/src/components/Check folder, create the following svg files and write the svg codes inside.
loading.svg this is svg code for this file:
<svg width="20" height="20" viewBox="0 0 20 20" fill="none" xmlns="<http://www.w3.org/2000/svg>">
<circle cx="10" cy="10" r="9" fill="white" stroke="#8000FF" stroke-width="2"/>
<circle cx="10" cy="10" r="4" fill="#8000FF"/>
</svg>
off.svg this is the svg code for this file:
<svg width="20" height="20" viewBox="0 0 20 20" fill="none" xmlns="<http://www.w3.org/2000/svg>">
<circle cx="10" cy="10" r="9" fill="white" stroke="#8000FF" stroke-width="2"/>
</svg>
on.svg this is the svg code for this file:
<svg width="20" height="20" viewBox="0 0 20 20" fill="none" xmlns="<http://www.w3.org/2000/svg>">
<circle cx="10" cy="10" r="9" fill="#8000FF" stroke="#8000FF" stroke-width="2"/>
</svg>
plus.svg this is svg code for this file:
<svg width="20" height="20" viewBox="0 0 20 20" fill="none" xmlns="<http://www.w3.org/2000/svg>">
<path d="M10 0.3125C4.64844 0.3125 0.3125 4.64844 0.3125 10C0.3125 15.3516 4.64844 19.6875 10 19.6875C15.3516 19.6875 19.6875 15.3516 19.6875 10C19.6875 4.64844 15.3516 0.3125 10 0.3125ZM15.625 11.0938C15.625 11.3516 15.4141 11.5625 15.1563 11.5625H11.5625V15.1563C11.5625 15.4141 11.3516 15.625 11.0938 15.625H8.90625C8.64844 15.625 8.4375 15.4141 8.4375 15.1563V11.5625H4.84375C4.58594 11.5625 4.375 11.3516 4.375 11.0938V8.90625C4.375 8.64844 4.58594 8.4375 4.84375 8.4375H8.4375V4.84375C8.4375 4.58594 8.64844 4.375 8.90625 4.375H11.0938C11.3516 4.375 11.5625 4.58594 11.5625 4.84375V8.4375H15.1563C15.4141 8.4375 15.625 8.64844 15.625 8.90625V11.0938Z" fill="#8000FF"/>
</svg>
Now, if you've created the above svg files inside the web/src/components/Check path, your Check folder should look the image snapshot below.

Creating TodoItem Component
You will create a TodoItem Component using this command:
yarn rw g component TodoItem
Locate the path web/src/components/TodoItem/TodoItem.js and write the below code.
import styled from 'styled-components'
import Check from 'src/components/Check'
const TodoItem = ({ id, body, status, onClickCheck }) => {
 const handleCheck = () => {
 const newStatus = status === 'off' ? 'on' : 'off'
 onClickCheck(id, newStatus)
 }
return (
 <SC.Item>
 <SC.Target onClick={handleCheck}>
 <Check type={status} />
 </SC.Target>
 <SC.Body>{status === 'on' ? <s>{body}</s> : body}</SC.Body>
 </SC.Item>
 )
}
const SC = {}
SC.Item = styled.li`
 display: flex;
 align-items: center;
 list-style: none;
`
SC.Target = styled.div`
 cursor: pointer;
`
SC.Body = styled.div`
 list-style: none;
 font-size: 18px;
 border-top: 1px solid #efefef;
 padding: 10px 0;
 width: 100%;
`
export default TodoItem
The above block of the code is returning an item list of TODOS, considering the status of every todos.
Working with RedwoodJS Cell
Cells are a declarative approach to data fetching and one of Redwood's signature modes of abstraction. By providing conventions around data fetching, Redwood can get in between the request and the response to do things like query optimization and more, all without you ever having to change your code.
RedwoodJS Cell are used to execute a GraphQL query and manage its lifecycle. The idea is that, by exporting named constants that declare what you want your UI to look like throughout a query's lifecycle, RedwoodJS can assemble these into a component template at build-time using a Babel plugin. All without you having to write a single line of imperative code.
You can generate a Cell with RedwoodJS Cell generator. Run this command to generate a TodoListCell:
yarn rw generate cell TodoList
If you've completed the above command, open up web/src/components/TodoListCell/TodoListCell.js and write the below code:
import styled from 'styled-components'
import TodoItem from 'src/components/TodoItem'
import { useMutation } from '@redwoodjs/web'
export const QUERY = gql`
 query TODOS {
 todos {
 id
 body
 status
 }
 }
`
const UPDATE_TODO_STATUS = gql`
 mutation TodoListCell_CheckTodo($id: Int!, $status: String!) {
 updateTodoStatus(id: $id, status: $status) {
 id
 __typename
 status
 }
 }
`
export const Loading = () => <div>Loading…</div>
export const Empty = () => <div></div>
export const Failure = () => <div>Oh no</div>
export const Success = ({ todos }) => {
 const [updateTodoStatus] = useMutation(UPDATE_TODO_STATUS)
const handleCheckClick = (id, status) => {
 updateTodoStatus({
 variables: { id, status },
 optimisticResponse: {
 __typename: 'Mutation',
 updateTodoStatus: { __typename: 'Todo', id, status: 'loading' },
 },
 })
 }
const list = todos.map((todo) => (
 <TodoItem key={todo.id} {…todo} onClickCheck={handleCheckClick} />
 ))
return <SC.List>{list}</SC.List>
}
export const beforeQuery = (props) => ({
 variables: props,
})
const SC = {}
SC.List = styled.ul`
 padding: 0;
`
In the above code block, you all TODOS using RedwoodJS GraphQL query and mapped these todos into the TodoItem created above, which will be imported on the HomePage.js.
Getting Ready for Testing
Before you test this project, there are few things you need to do.
Modifying HomePage
First, is modifying your Homepage by importing some of the components you created.
Open web/src/pages/HomePage/HomePage.js path and write this code:
import styled from 'styled-components'
import { MetaTags } from '@redwoodjs/web'
import SaveTodo from 'src/components/SaveTodo'
import TodoListCell from 'src/components/TodoListCell'
const HomePage = () => {
 return (
 <>
 <MetaTags title="Todos" description="Your list of todo items" />
<SC.Wrapper>
 <SC.Title>Todo List</SC.Title>
 <TodoListCell />
 <SaveTodo />
 </SC.Wrapper>
 </>
 )
}
const SC = {}
SC.Wrapper = styled.div`
 width: 600px;
 margin: 0 auto;
`
SC.Title = styled.h1`
 font-size: 24px;
 font-weight: bold;
 margin-top: 100px;
`
export default HomePage
In the above block, you have imported TodoListCell for displaying Todos from database and SaveTodo for adding new Todos.
Fixing styled-components in RedwoodJS
For you to avoid styled-components error in all the components where you imported it, add styled-components package to your web/package.json.
Open up web/package.json and add this code among the dependencies.
"styled-components": "⁵.3.3"
The above code will fix styled-components error.
Test your Todo App
Now you have completed this project, restart your RedwoodJS server with any of the commands below:
yarn redwood dev
or
yarn rw dev
Here the output of this project:

Conclusion
In this tutorial, you've known what RedwoodJS is about and why you need RedwoodJS for your startups. You've learnt how about RedwoodJS page generate tool, RedwoodJS Database Schema, RedwoodJS SDL and Service, RedwoodJS Components and, also how to work with RedwoodJS Cell.
You can learn more about RedwoodJS from its tutorial documentation.
You can clone this project from this GitHub repository https://github.com/noblefresh/todo-app-with-redwoodjs
A TIP FROM THE EDITOR: Some time ago, we introduced RedwoodJS; check it out at RedwoodJS, a new framework.
Originally published at https://blog.openreplay.com.

Top comments (0)