
I write content for AWS, Kubernetes, Python, JavaScript and more. To view all the latest content, be sure to visit my blog and subscribe to my newsletter. Follow me on Twitter.
This is Day 9 of the #100DaysOfPython challenge.
This is an overview of how to display your public GitHub repositories containing notebook files in an online interactive notebook using Binder and Jupyter.
Prerequisites
- Familiarity with Pipenv. See here for my post on Pipenv.
- Familiarity with JupyterLab.
- A basic JupyterLab setup. See my "Hello Jupyter Notebook" post here for my post on JupyterLab.
- A GitHub account.
- A public GitHub repository containing notebook files.
Getting started
We are simply going to publish any Jupyter notebook with a .ipynb extension in our public GitHub repository to Binder.
If you need an example repo, you can use my hello-jupyterlab repo.
Binder itself is simply a website that enables you to display your public GitHub repositories in an interactive notebook.
You can add your own public repo or add the link for my example https://github.com/okeeffed/hello-jupyter-lab.
Add the URL into the Build and launch a repository input and click Launch.
Exploring the notebook
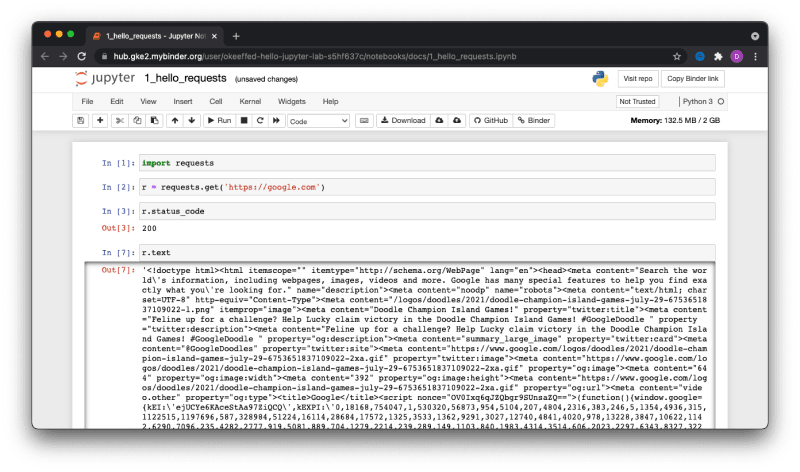
Once the notebook has loaded (and assuming you are using my repo as an example), you can navigate to an example doc in docs/1_hello_requests.ipynb,
Once there, you can click on the Run button to execute the code and see the output.
We can go one step further by also adding more cells to print the responses:
Adding dependencies
Binder itself does a lot of the heavy lifting for you and supports a wide range of configuration files that you would use as part of dependency management.
In the case of the example, the Pipfile.lock is automatically identified and the dependencies were installed.
Resources and further reading
Photo credit: juvnsky
Originally posted on my blog. To see new posts without delay, read the posts there and subscribe to my newsletter.

Top comments (0)