Introduction
Welcome back to Part 3 of our 5-part series on 'How we moved from Artifactory and saved $200k p.a'.
If you are just joining we recommend jumping back to the beginning and starting from there.
Approach
Having identified that we wanted to create a structured service we had to determine the best way to approach it.
Our earlier analysis helped us identify the artefact types that we needed to support. Yet a remaining challenge was to identify how to support these and empower our development teams across the technologies and tools we use on a daily basis.
Architecture
The following architecture gives a high-level overview of the service components.

Repository convention
Something that became apparent was that our Artifactory configuration was a disordered muddle which has since provided us with a harsh lesson about paying particular attention to the rollout of such platform tooling. It had never been implemented in a controlled or consistent way.
Determined to avoid this at all costs we decided to build naming conventions for each of our artefact types into our service. This would be implicit, removing disambiguation and preference from any decisions.
Our products commonly have both development and production environments so it was decided that the service should mirror this and have just two conforming types of repository.
Development repositories would be where teams push build artefacts continually via Continuous Integration (CI). Then, when the appropriate levels of testing had been passed, the artefacts could be promoted into the corresponding release repository.
A benefit of this approach was ensuring a clear separation between development and release dependencies so that we could start to look at implementing automated housekeeping rules in the future. We do not need hundreds of development packages so why bother keeping them?
This helps with our goals of enforcing convention and consistency, which in turn makes it easier to automate and roll out changes in the future.
Infrastructure
We needed to start building out our infrastructure to support the service.
As we were utilising several AWS services, using AWS CDK was the obvious choice. It allowed us to build the service quickly and was also easy to change when required.
Going back to enforcing convention and consistency we leveraged AWS Service Catalog with several custom templates to help us create new repositories.
Delivery
Providing a service that worked successfully meant that we had to look at how we delivered our software and consider what an exemplary software lifecycle looks like, as well as the platforms we needed to support.
The following key areas were identified:
- Local Development
- Application Configuration
- Authorisation
- Continuous Integration (CI)
- GitHub Actions
- Jenkins
- Continuous Delivery (CD)
- Harness
We also were aware of some products using other technologies such as Azure DevOps and TeamCity that we would not directly support, but still had to take into consideration how they could access and use the service.
Tooling
As developers, we are used to using tools to help make our day-to-day easier. If you look at any good service you will see that they typically have a range of tools to make interacting with them easy.
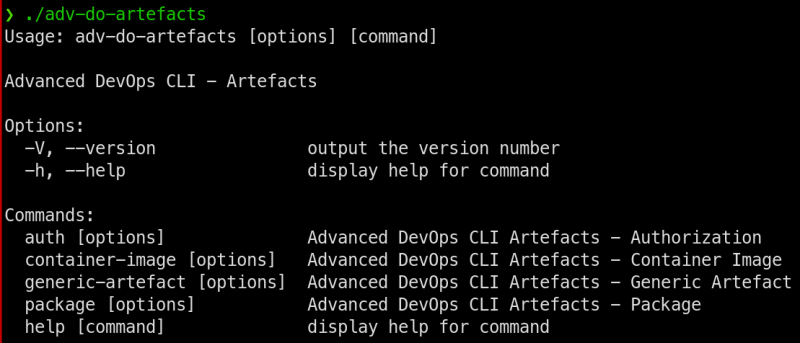
Command Line Interface (CLI)
We determined that creating a CLI would provide us with a centralised entry point for all of our delivery mechanisms and be flexible enough to allow it to work for any that we didn’t support.
The CLI had to support multiple operating systems (Windows, Linux & macOS) and be easy to update and use as required.
We started analysing what functionality the CLI would require and quickly identified potential overlaps between native package manager and docker commands. There is little point in us trying to write, maintain and support any tooling that mirrored these. Everyone knows how they work, they are industry standard tools.
It was decided that our CLI would work complementary to these. It would bridge the gaps and provide the functionality we needed for our service to work.
We determined our key functional requirements were:
- Authorisation
- Packages - get and promote
- Generic Artefacts - get, list, publish and promote
- Container Images - promote
The most important feature of the CLI was authorisation into the service. Every developer and delivery mechanism must authorise into the service before they can use it.
The CLI had to make authorisation easy and limit the impact on our engineering teams on a day-to-day basis.
We looked at other open-source CLIs for inspiration and took the time to understand how this could be done effectively for multiple operating systems, shells and from a user or service perspective.
In the end, we went with a multi-pronged approach and created mechanisms that allowed authorisation in several ways i.e. user, role and service level.
Our security is of the utmost importance and having authorisation tokens written to files was an absolute no-go. Everything by default was going to be applied to the running shell process in order for it to be used and thrown away when finished. That was implemented across several different shells such as bash, Powershell and Windows command prompt.
With our authorisation mechanism now in place, working and flexible enough to handle different operating systems and shells, the other features were much more straightforward.
Generic Artefacts proved the most labour intensive, only due to having to implement an entire set of commands to allow complete artefact management.
Other
With the CLI now in place we used it to power any other tooling that would help accelerate our development teams.
Our core Continuous Integration (CI) platform is GitHub Actions. We decided it was worth the effort to create a custom action that automatically downloaded the latest CLI, installed it and performed the required authorisation. This meant that teams could drop that action straight into their workflows and it would just work. Minimal change, maximum satisfaction.
Next, we looked at Jenkins. Although we are moving away from it, we still have some products still using it, therefore we spent a bit of time putting together some example pipelines on how the CLI could be used and included that in our documentation for teams to follow.
Now we have covered our Continuous Integration (CI) tools, we needed to look at our Continuous Delivery (CD) ones.
Harness is our Continuous Delivery (CD) tool of choice. It provides a flexible template engine, that we were able to utilise to create templates that could be reused across our teams.
Next up
With our new Advanced Artefacts service in place, we were ready to get on with the actual migration from Artifactory.
Next up, we’ll walk through how we built our migration tooling, defined our process and performed the migration.

Top comments (0)