The DataDigger is an open source database browser for developers in OpenEdge. It enables them to view, update, delete, im- and export the data inside the database. The DataDigger is written fully in OpenEdge 4GL and has over 40,000 lines of code. Inside are some real treasures, so I will dissect the DataDigger, to reveal them. Today: controlling timers with a scheduler.
In my previous post I explained how I used a timer ocx to improve the user experience on an OpenEdge window. In short: I used it to delay the VALUE-CHANGED event on a browser to avoid lengthy screen updates.
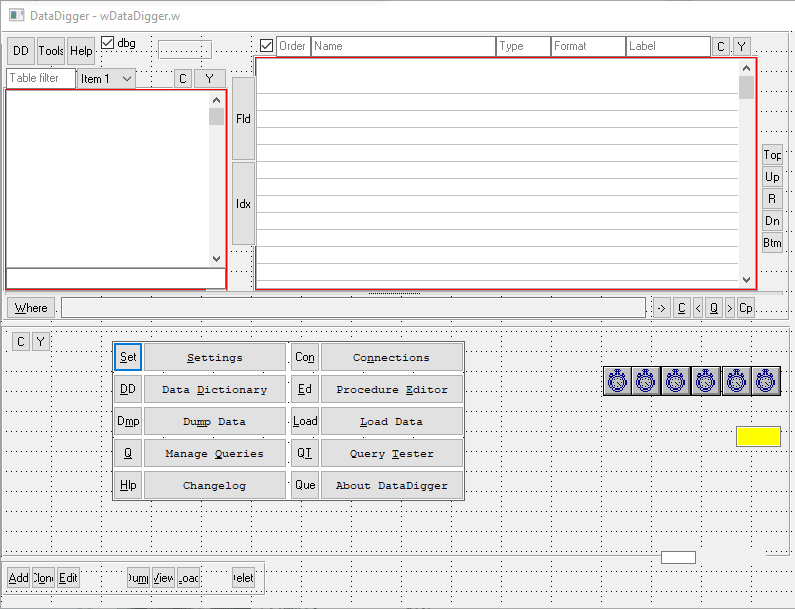
Since this worked as a charm, I really got the taste of timers and just like when your only tool is a hammer and every problem looks like a nail, a lot of my problems begged for a solution in the form of a timer and so I ended up with lots of timers:
- to delay the value changed event on the table browse
- to close the popup menu after 2 seconds
- to keep track of scrolling the browser horizontally (there is no event for that)
- to pre-load the cached definitions of the database
- to keep the connections alive to the various databases
- to resize the resizable data dictionary
Although it all worked well, it didn’t feel good:
Noticed it? It’s especially this what nags me:
Six timers in a row and although the end user couldn’t really care less how many of those reside on my design canvas, it bothered me. We – developers – can surely do better than that.
By the time I found a use for a seventh timer I decided that enough is enough; I stripped all timers except for one. I wanted one timer to rule them all. But in order to rule them, it needed to have them all in one place. In a temp-table. Of course. The plan is to save all timer events in this temp-table and let our single timer keep track of what procedure to start and when.
The table consists of a field for the procedure (cProc), a field for the interval (iTime) and a field to store when the procedure should run (tNext).
/* TT for the generic timer OCX */
DEFINE TEMP-TABLE ttTimer NO-UNDO
  FIELD cProc AS CHARACTER
  FIELD iTime AS INTEGER
  FIELD tNext AS DATETIME
  INDEX idxNext IS PRIMARY tNext
  INDEX idxProc cProc.
Notice that tNext is a datetime field. This has a granularity of a thousandth of a second and that should be more than precise enough for our purposes. Also notice that our primary index is exactly on that field. I’ll come back to that later on.
Ok, now lets get a timer running:
/* KeepAlive timer every minute */
RUN setTimer("KeepAlive", 60000).
That was easy, wasn’t it? Ok, that’s a bit lame, let’s see what happens inside setTimer:
PROCEDURE setTimer:
  /* Enable or disable a named timer. */
  DEFINE INPUT PARAMETER pcTimerProc AS CHARACTER NO-UNDO.
  DEFINE INPUT PARAMETER piInterval AS INTEGER NO-UNDO.

  FIND ttTimer WHERE ttTimer.cProc = pcTimerProc NO-ERROR.
  IF NOT AVAILABLE ttTimer THEN CREATE ttTimer.

  ASSIGN
    ttTimer.cProc = pcTimerProc
    ttTimer.iTime = piInterval
    ttTimer.tNext = ADD-INTERVAL(NOW, piInterval,"milliseconds").
  RUN SetTimerInterval.
END PROCEDURE.
Basically, what we do is find the timer in the temp-table and create it if it does not exist. We fill the fields and finally we run the procedure SetTimerInterval. This procedure doe a neat trick:
PROCEDURE setTimerInterval:
  /* Set the interval of the timer so that it will
   * tick exactly when the next timed event is due.
   */
  FOR FIRST ttTimer BY ttTimer.tNext:
    chCtrlFrame:pstimer:INTERVAL = MAXIMUM(1,MTIME(ttTimer.tNext) - MTIME(NOW)).
    chCtrlFrame:pstimer:ENABLED = TRUE.
  END.
END PROCEDURE.
It simply finds the first record by time of execution (that’s why we had the index on it), we subtract ‘NOW’ from that time and then we have the number of milliseconds until the next event. We set that as the timer interval, enable it and then we simply wait until the timer ticks. And then …
PROCEDURE pstimer.ocx.tick:
  chCtrlFrame:pstimer:ENABLED = FALSE.
  FIND FIRST ttTimer NO-ERROR.
  IF AVAILABLE ttTimer THEN DO:
    RUN VALUE(ttTimer.cProc).
    IF AVAILABLE ttTimer THEN ttTimer.tNext = ADD-INTERVAL(NOW, ttTimer.iTime,"milliseconds").
  END.
  RUN setTimerInterval.
END PROCEDURE.
We find the first event (primary index on time). We run the code and after that we reschedule the timer. That is, if the ttTimer record is still available. One could decide that once the task is run, there is no need for another run. If I close the menu, I only need to close it again when the user opens it, so inside the procedure to close the menu I run setTimer again, but this time with parameter ‘0’, which is a sign to delete it.
Caveats
There are a few limitations of course. You need to define a procedure with the name of the timer and it cannot handle parameters. I thought of introducing that but it would make things overcomplicated so I left it out. The timing is not always 100% accurate and if you have two procedures that should run at the same time, then they will run sequentially. But if exact timing is not a problem and you can do without parameters, then this is a perfect way to improve the UI on your application.
Disclaimer
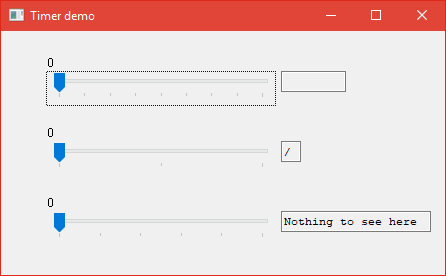
The code that is used in the DataDigger is a bit more complicated than shown above. For starters, it uses buffers instead of operating on ttTimer directly, has some more comments and some code for edge cases and debugging. Leaving all that code in would make it less readable so I simply left it out. I put together a small demo that has no unnessecary code and can be used as a proof of concept. You can find the code on GitHub.
Move the sliders to start the timer, move them back to zero to disable them. The first one shows a clock, the second a spinning rotor and the third one will hide the text after a few seconds.
That’s it. Let me know if you have used a technique like this in your own project or if it can be improved. For now: have fun!


Top comments (0)