Here I show how I would host a static web site on AWS using S3, Route53 and CloudFront.
S3: Create an S3 bucket for your website
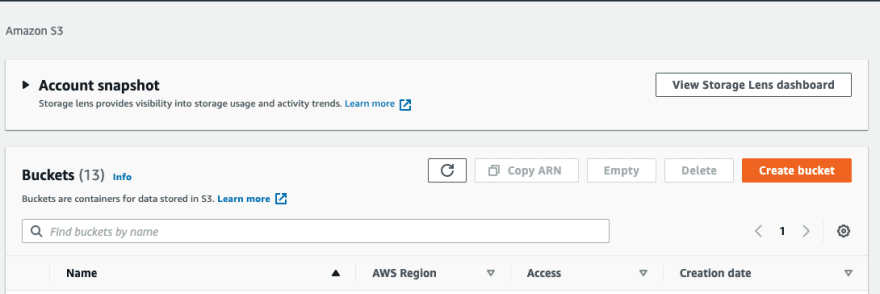
Open the AWS console navigate to S3 and create a bucket
Note uncheck the "Block all public access"
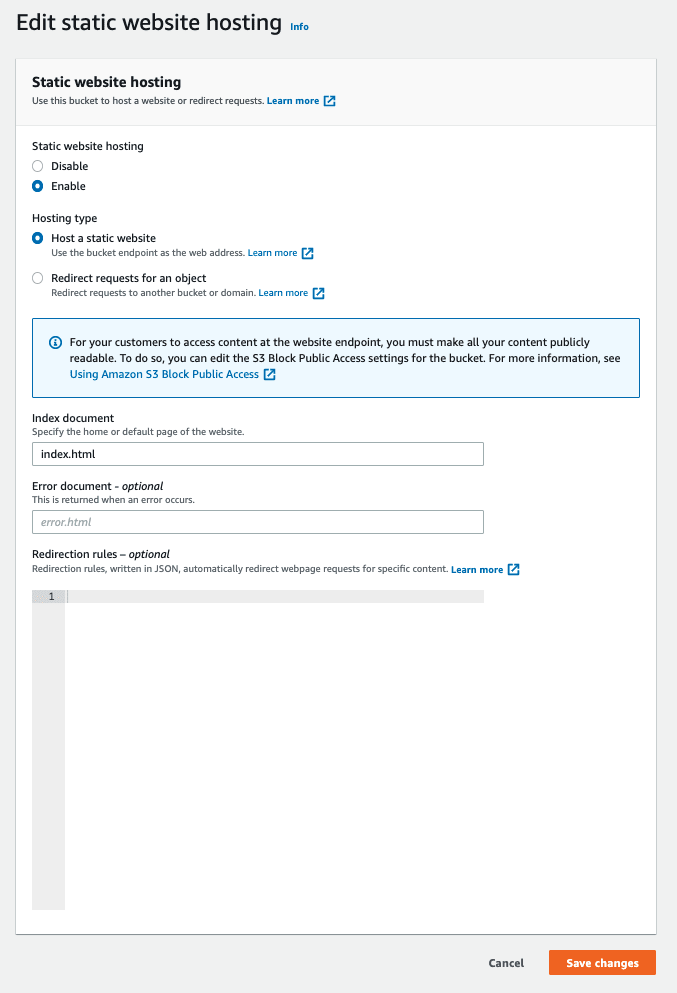
S3: Configure Bucket for Static Website Hosting
Under Properties of the bucket, edit the "Static website hosting" section
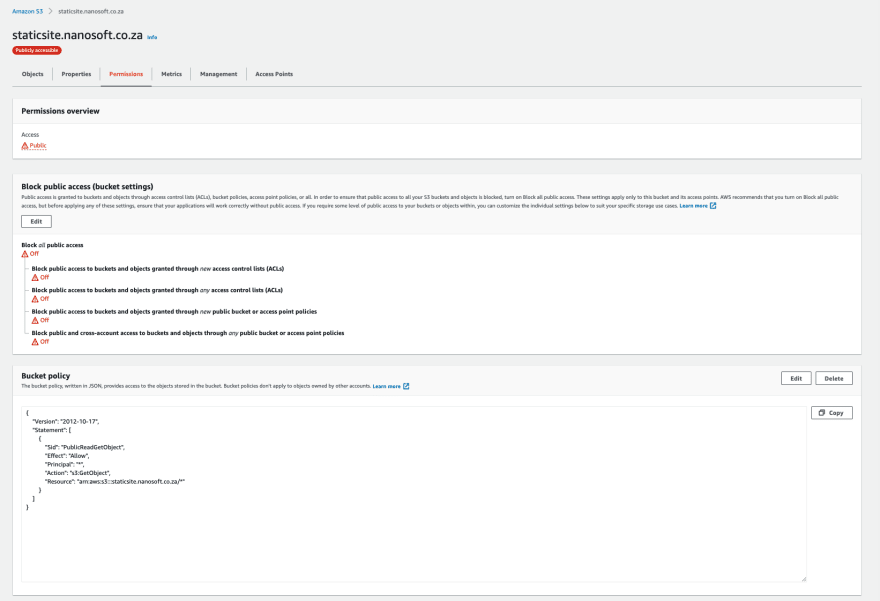
S3: Configure Bucket Policy for Public Access
Add the bucket policy:
{
    "Version": "2012-10-17",
    "Statement": [
        {
            "Sid": "PublicReadGetObject",
            "Effect": "Allow",
            "Principal": "*",
            "Action": "s3:GetObject",
            "Resource": "arn:aws:s3:::<bucket-name>/*"
        }
    ]
}
Create Static Web App
$> npx create-react-app staticsite
Build a static site from react app
$> npm run build
The static site now needs to be uploaded to S3 bucket
S3: Upload application to the bucket
Certificate Manager: Request a certificate in the us-east-1 region
Domain Name Validation Config: Add a CNAME on your domain registrar for validation
Name: _e0bexxxxxxxxxxxxx.staticsite.nanosoft.co.za
Type: CNAME,
Value: _775axxxxxxxxxxxxxxxx.xxxxxxxxxx.acm-validations.aws.
Note: do not include the dot at the end of the Name.
This validation might take up to 30 minutes for the changes to propagate.
Once you subdomain has been validated the status will change to "Issued" and you are now ready to use the certificate.
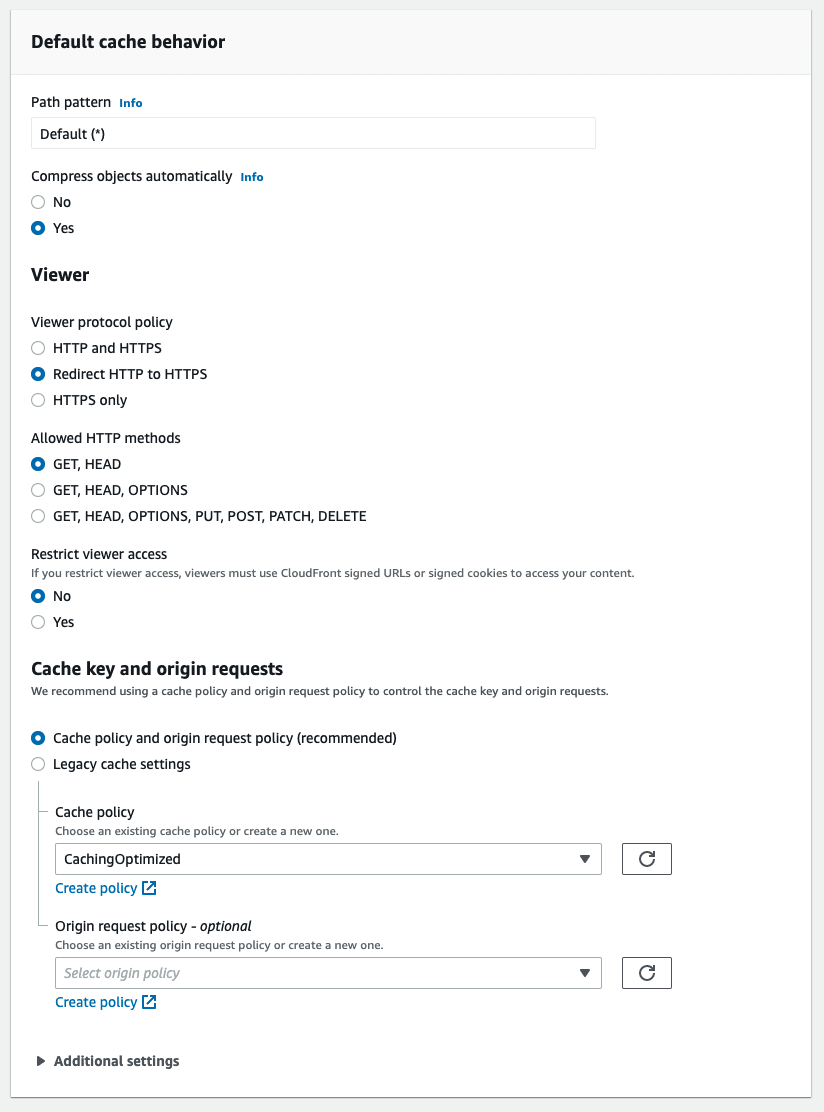
CloudFront: Create a Distribution
Route53: Create a Hosted Zone
Create a hosted zone. I've created a nanosoft.co.za hosted zone here
Route53: Create a Record for a Sub Domain
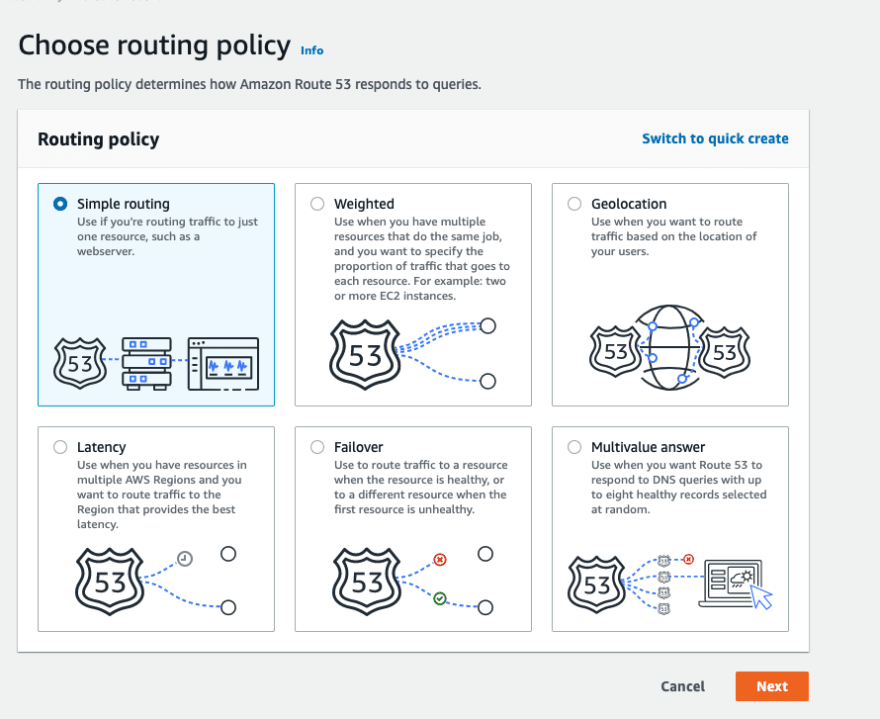
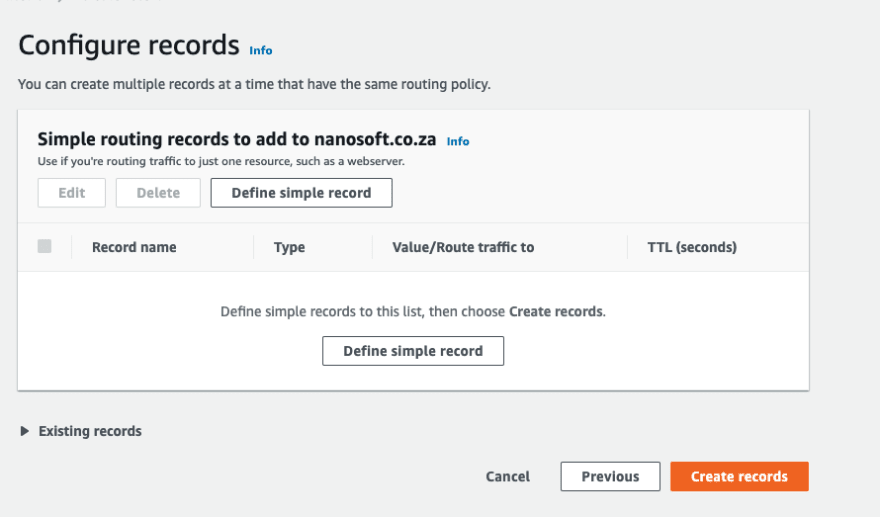
Client "Create Record" and select "Simple routing"
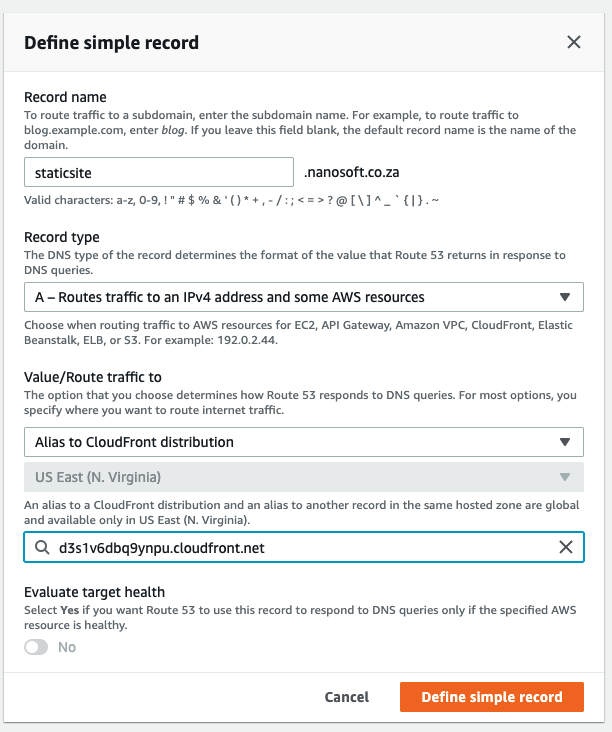
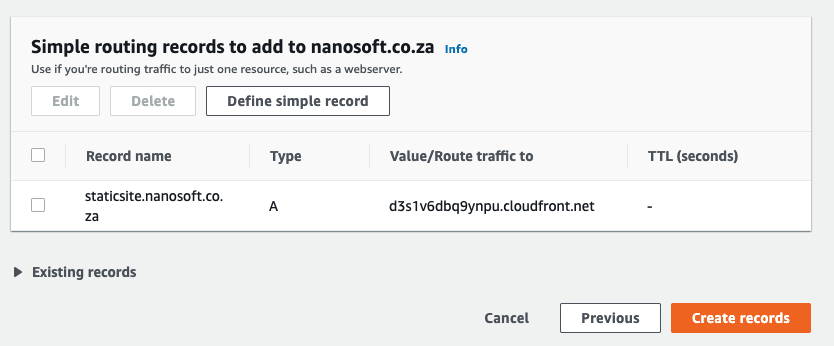
Define simple record
DNS Config: Add a CNAME on your domain registrar for AWS Web hosting
Name: staticsite.nanosoft.co.za
Type: CNAME,
Value: s3-website.af-south-1.amazonaws.com.
To check the progress of the DNS propagation use the tool:
https://dnschecker.org/#CNAME/staticsite.nanosoft.co.za
After a few minutes you'll be able to browse your secure custom domain url for your static site.
Done!







Top comments (0)